Table of Contents
Advertisement
Available languages
Available languages
Quick Links
Advertisement
Table of Contents

Related Manuals for Häfele CYCLONE MINI 539.20.601


Summary of Contents for Häfele CYCLONE MINI 539.20.601
- Page 1 DISHWASHER MESIN PENCUCI PIRING 539.20.601 Instalasi dan Panduan Pengguna...
- Page 2 INSTALASI DAN PANDUAN PENGGUNA UNTUK MESIN PENCUCI PIRING 539.20.601 CYCLONE MINI www.hafele.co.id...
- Page 3 CYCLONE MINI 539.20.601 HANYA UNTUK PENGGUNAAN DALAM RUANGAN www.hafele.co.id...
-
Page 4: Informasi Keselamatan
INFORMASI KESELAMATAN PERINGATAN • Pemasangan dan perbaikan hanya boleh dilakukan oleh teknisi resmi. • Peranti ini ditujukan untuk penggunaan rumag tangga atau sejenisnya seperti: staff dapur pada toko, kantor, atau tempat kerja lain. rumah pertanian pelanggan pada hotel, motel, atau bentuk penginapan lain. lingkungan kamar atau sarapan •... - Page 5 • Jangan letakkan benda berat di atas atau berdiri di atas pintu saat terbuka. Alat dapat miring ke depan • Saat memasukkan barang yang akan dicuci: 1) Pastikan benda tajam agar tidak merusak segel pintu; 2) Peringatan: Pisau dan peralatan lain dengan ujung tajam harus dimasukkan ke dalam keranjang dengan ujungnya menghadap ke bawah atau diletakkan dalam posisi horizontal.
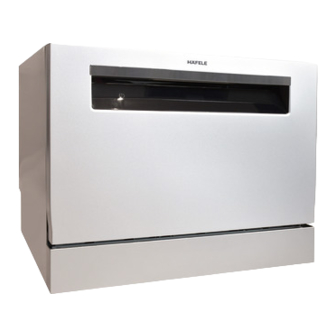
- Page 6 PENGENALAN ALAT IHKTISAR PRODUK Lengan Semprot Wadah Garam Rangkaian Filter Dispenser Rak Gelas Keranjang Rak Alat Makan INSTALASI PENYAMBUNGAN DAYA • Kebutuhan Listrik Silakan lihat label spesifikasi untuk mengetahui voltase pengenal dan sambungkan mesin pencuci piring ke catu daya yang sesuai. Gunakan sekering 10A/13A/16A yang diperlukan, disarankan sekering penundaan waktu atau pemutus sirkuit dan sediakan sirkuit terpisah yang hanya melayani peralatan ini.
- Page 7 Selang Suplai Biasa Selang Suplai dengan Pengaman • Tentang Selang Suplai dengan Pengaman Selang suplai dnegan pengaman terdiri dari dinding ganda. Sistem selang menjamin intervensinya dengan menghalangi aliran air jika selang suplai putus dan ketika ruang udara antara selang suplai itu sendiri dan selang bergelombang luar penuh dengan air.
- Page 8 • Cara Menguras Sisa Air dari Selang Sambungan siphon jika bak cuci 1000 mm lebih tinggi dari lantai, kelebihan air di selang tidak dapat dialirkan langsung ke bak cuci. Kelebihan air dari selang harus dibuang ke dalam mangkuk atau wadah yang sesuai yang diletakkan di luar dan lebih rendah dari bak cuci.
- Page 9 • Langkah 1b Jika seluruh panel dekoratif masuk ke kabinet juga, ukuran A harus sama dengan D+9,5; ukuran B harus sama dengan C+6; Sementara itu, kabinet di sekitar penguat bagian dalam: kedua sisi (C-555) / 2 +3; C, D dan E sebagai langkah kedua dalam ukuran panel dekoratif yang relevan.
- Page 10 • Langkah 3: Merakit Panel Dekoratif • Langkah 4: Rakit pintu dekoratif di mesin pencuci piring, seperti gambar. Pertama pasang sekrup antara papan dasar kabinet dan panel dekoratif, semuanya 16; kemudian tarik luncuran dari alur pintu keluar, selubung 8-sekrup antara panel dekoratif dan luncuran.
- Page 11 Skrup, total 16 Panel Dekoratif Papan Dasar Kabinet Skrup, total 8 • Langkah 5: Pasang skrup penyetel pada dasar • Langkah 6: Pasang mesin pencuci piring di bukaan, tetapi tidak penuh, seperti gambar, sesuaikan sekrup, biarkan alasnya sejajar dengan alas bukaan, lalu dorong pencuci piring hingga penuh.
- Page 12 PANDUAN PENGGUNAAN MENGGUNAKAN PENCUCI PIRING Sebelum menggunakan alat pencuci piring Dalam Luar Setel pelembut air Masukkan garam ke pelembut air Memuat keranjang Mengisi dispenser • Memasukkan Garam ke Pelembut Air CATATAN: Jika model Anda tidak memiliki pelembut air, Anda dapat melewati bagian ini.
-
Page 13: Control Panel
tidak, sistem filter, pompa, atau bagian penting lainnya dari mesin dapat rusak karena air asin. Ini di luar garansi. CATATAN: Wadah garam hanya boleh diisi ulang saat lampu peringatan garam ( ) di panel kontrol menyala. Tergantung seberapa baik garam larut, lampu peringatan garam mungkin masih menyala meskipun wadah garam sudah terisi. - Page 14 Self-Cleaning Program ini menyediakan pembersihan efektif untuk mesin itu sendiri. Untuk hasil pengeringan yang lebih baik. (Hanya dapat Extra Drying digunakan dengan Intensif, Normal, ECO, Glass, 90 mnt) Tekan tombol untuk menambah atau mengurangi waktu tunda, Delay penundaan maksimum 24 jam dapat ditentukan. Child lock Opsi ini memungkinkan Anda untuk mengunci tombol pada panel kontrol, sehingga anak-anak tidak dapat menyalakan mesin...
- Page 15 >H3->H4->H5->H6; Jika tidak ada input dalam 5 detik, peranti akan keluar dari mode setelan dan berubah ke mode siaga. KESADAHAN AIR Setelan Pada Tampilan Layar Pelembut Air Mmol/l 0 - 0.9 0 - 5 1.0 - 2.0 6 - 11 2.1 - 3.0 12 - 17 3.1 - 4.0...
- Page 16 pencuci piring terbaik, ikuti pedoman pemuatan ini. Tempatkan benda di mesin pencuci piring dengan cara berikut: Barang-barang seperti cangkir, gelas, panci/wajan, dll menghadap ke bawah. Barang yang melengkung, atau yang berceruk, harus dimuat miring agar air dapat mengalir. Semua peralatan ditumpuk dengan aman dan tidak dapat terbalik. Semua peralatan ditempatkan sedemikian rupa sehingga lengan penyemprot dapat berputar bebas selama pencucian.
- Page 17 • Memuat Keranjang Alat Makan Untuk keamanan pribadi dan pembersihan berkualitas tinggi, tempatkan alat makan keranjang untuk memastikan bahwa: Mereka tidak bertumpukan. Alat makan ditempatkan dengan pegangan di bawah. Sebaliknya, letakkan pisau dan peralatan berbahaya lainnya dengan pegangan di atas. PERINGATAN Jangan biarkan benda apa pun melewati bagian bawah.
- Page 18 MENGISI WADAH RINSE AID Secara hati-hati tuang rinse air ke Lepaskan tutup wadah rinse aid dengan memutarnya berlawanana dalam dispenser. Hindari pengisian arah jarum jam. berlebih dan tumpah. CATATAN: Bersihkan bilasan yang tumpah dengan kain penyerap untuk menghindari busa berlebih pada pencucian berikutnya.
- Page 19 Untuk siklus pembersihan utama.Untuk beban pembersihan lebih besar, tambahkan detergen pada wadah kecil juga(B) untuk siklus pra-pembersihan. CATATAN: Ketahuilah bahwa tergantung pada kekotoran air, pengaturannya mungkin berbeda. Perhatikan rekomendasi produsen pada Tutup penutup dan tekan sampai kemasan detergen terkunci pada tempatnya. MEMPROGRAM MESIN PENCUCI PIRING •...
- Page 20 • Mulai Siklus Pencucian Keluarkan keranjang bawah dan atas, masukkan piring dan dorong kembali. Dianjurkan untuk memuat keranjang bawah terlebih dahulu, lalu keranjang atas. Tuang deterjen. Masukkan steker ke stopkontak. Catu daya merujuk ke halaman terakhir "Spesifikasi". Pastikan suplai air dihidupkan dengan tekanan penuh. Tutup pintunya, tekan tombol Daya, untuk menyalakan peranti/ Pilih program, lampu respons akan menyala.
- Page 21 PERAWATAN PERAWATAN BAGIAN LUAR • Pintu dan Karet Pintu Bersihkan karet pintu secara teratur dengan kain lembap yang lembut untuk menghilangkan endapan makanan. Saat mesin pencuci piring sedang diisi, sisa makanan dan minuman dapat menetes ke sisi pintu mesin pencuci piring. Permukaan ini berada di luar lemari cuci dan tidak dapat diakses oleh air dari lengan penyemprot.
- Page 22 Sisa makanan yang lebih besar Pasang kembali filter dengan dapat dibersihkan dengan urutan kebalikan dari membilas saringan di bawah air pembongkaran, ganti sisipan filter, mengalir. Untuk pembersihan yang dan putar searah jarum jam ke lebih menyeluruh, gunakan sikat tanda panah dekat. pembersih yang lembut.
- Page 23 PERAWATAN MESIN PENCUCI PIRING • Setelah Pencucian Setiap selesai mencuci, matikan suplai air ke alat dan biarkan pintu sedikit terbuka agar kelembapan dan bau tidak terperangkap di dalamnya. • Melepaskan Steker Sebelum membersihkan atau melakukan perawatan, selalu cabut steker dari stopkontak.
-
Page 24: Penyelesaian Masalah
PENYELESAIAN MASALAH MASALAH UMUM DAN SOLUSINYA Perhatikan tabel berikut jika terjadi sesuatu pada alat. Masalah Penyebab Solusi Sekering putus, atau Ganti sekring atau setel ulang pemutus sirkuit. Mesin Pencuci Piring pemutus arus bekerja. Pindahkan peralatan lain yang berbagi sirkuit tidak bekerja yang sama dengan mesin pencuci piring. - Page 25 keranjang. Barang pecah belah Suara gemerincing Hentikan program, dan atur ulang barang longgar di dalam lemari di lemari cuci pecah belah. cuci. Suara ketukan di Ada persilangan selang Ini tidak mempengaruhi fungsi mesin pencuci atau selang menempel ke selang air piring.
- Page 26 SPESIFIKASI Model CYCLONE MINI Article No. 539.20.601 Pengaturan Tempat Standar Kelas Efisiensi Energy Konsumsi Energi Tahunan 174 kWh Konsumsi Energi Siklus Pembersihan Standard 0.61 kWh Konsumsi Daya saat Mati 0.45 W Konsumsi Daya saat Mode Siaga 0.49W Konsumsi Air Tahunan 1820 liter Kelas Efisiensi Pengeringan Siklus Pembersihan Standard...
- Page 27 LAMPIRAN STANDARD PEMUATAN KERANJANG MENURUT EN50242 • Keranjang Gelas dan Piring Nomor Barang Nomor Barang Cangkir Piring Ceper Mangkuk Sedang Piring Sup Gelas Piring Hidangan Penutup Piring Cawan Keranjang Alat Makan Piring Sendok Saji Piring Oval Halaman 24...
- Page 28 • Keranjang Alat Makan Item Nomor Garpu Sendok Sup Sendok Pencuci Mulut Sendok Teh Informasi tentang test perbandingan menurut EN 50242 Pisau • Kapasitas: 6 pengaturan tempat Sendok Saji • Program: ECO • Pengaturan Rinse aid: 6 Sendok Saus • Pengaturan Pelembut Air: H4 Garpu Saji Halaman 25...
- Page 29 INSTALLATION AND USER MANUAL FOR DISHWASHER 539.20.601 www.hafele.co.id...
- Page 30 CYCLONE MINI 539.20.601 FOR INDOOR USE ON;Y www.hafele.co.id...
-
Page 31: Safety Information
SAFETY INFORMATION WARNING • Installation and repair can only be carried out by a qualified technician • This appliance is intended to be used in household and similar applications such staff kitchen areas in shops, offices and other working environments farm houses by clients in hotels, motels and other residential type environments bed and breakfast type environments... - Page 32 • When loading items to be washed: 1) Locate sharp items so that they are not likely to damage the door seal; 2) Warning: Knives and other utensils with sharp points must be loaded in the basket with their points facing down or placed in a horizontal position. •...
-
Page 33: Product Introduction
PRODUCT INTRODUCTION PRODUCT OVERVIEW Spray Arm Salt Container Filter Assembly Dispenser Cup Rack Basket Cutlery Rack INTALLATION WARNING Electrical Shock Hazard Disconnect electrical power before installing dishwasher. Failure to do so could result in death or electrical shock. POWER CONNECTION •... - Page 34 Connect the cold water supply hose to a threaded 3/4(inch) connector and make sure that it is fastened tightly in place. If the water pipes are new or have not been used for an extended period of time, let the water run to make sure that the water is clear. This precaution is needed to avoid the risk of the water inlet to be blocked and damage the appliance.
-
Page 35: Position Of The Appliance
• How to drain excess water from hoses Syphon connection If the sink is 1000 higher from the floor, the excess water in hoses cannot be drained directly into the sink. It will be necessary to drain excess water from hoses into a bowl or suitable container that is held outside and lower than the sink. - Page 36 • Step 1b If the entire decorative panel into the cabinet also, the size of A should be equal to D +9.5; size B should be equal to C+6; Meanwhile, the cabinet around the inward booster: both sides of the (C-555) / 2 +3; C, D and E as the second step within the relevant size decorative panels.
- Page 37 • Step 3: Assemble the decorative panel • Step 4: Assemble the decorative door on the dishwasher, as figure. First install screw between the cabinet base board and decorative panel, in all 16; then pull glide from out door groove, case 8-screw between decorative panels and glide. Page 7 www.hafele.co.id...
- Page 38 Screw, all in 16 Decorative Panel Cabinet Base Board Screw, all in 8 • Step 5: Install the adjust screw into the base • Step 6: Install the dishwasher in aperture, but not full, as figure, adjust screw, let its bottom align aperture’s base, then push dishwasher full.
-
Page 39: Using Instruction
USING INSTRUCTION USING YOUR DISHWASHER Before using your dishwasher : Inside Outside Set the water softener Loading the Salt Into the Softener Loading the basket Fill the dispenser • Loading The Salt Into The Softener NOTE: If your model does not have any water softener, you may skip this section. Always use salt intended for dishwasher use. - Page 40 with salt. Immediately after filling the salt into the salt container, a washing program should be started (We suggest to use a short program). Otherwise the filter system, pump or other important parts of the machine may be damaged by salty water.
-
Page 41: Water Softener
Self-Cleaning This program provides an effective cleaning of the dishwasher itself. For better drying result. (It can only be used with Intensive, Extra Drying Normal, ECO, Glass, 90 mins) Delay Press the button to add or decrease the delay time, maximum 24 hours delay can be defined. -
Page 42: Water Hardness
Without any operation in five seconds, the machine will exit from set mode, the machine is into standby status WATER HARDNESS Setting on the Digital display stalls water softener Mmol/l 0 - 0.9 0 - 5 1.0 - 2.0 6 - 11 2.1 - 3.0 12 - 17 3.1 - 4.0... - Page 43 Place objects in the dishwasher in following way: Items such as cups, glasses, pots/pans, etc. are faced downwards. Curved items, or ones with recesses, should be loaded aslant so that water can run off. All utensils are stacked securely and can not tip over. All utensils are placed in the way that the spray arms can rotate freely during washing.
- Page 44 WARNING Do not let any item extend through the bottom. Always load sharp utensils with the sharp point down! FUNCTION OF RINSE AID AND DETERGENT The rinse aid is released during the final rinse to prevent water from forming droplets on your dishes, which can leave spots and streaks.
-
Page 45: Filling The Detergent Dispenser
FILLING THE RINSE AIR RESERVOIR Remove the rinse aid reservoir cap by Carefully pour in the rinse-aid into its dispenser, whilst avoiding it to rotating it counterclockwise. overflow. NOTE: Clean up any spilled rinse aid with an absorbent cloth to avoid excessive foaming during the next wash. -
Page 46: Programming The Dishwasher
for the main wash cycle . For more heavily soiled wash loads, also add some detergent into the smaller cavity (B) for the pre-wash cycle . NOTE: Be aware that depending on the soiling of water, setting may be different. Please observe the manufacturer's recommendations on the detergent Close the cover and press on it until it... - Page 47 • Starting A Cycle Wash Draw out the lower and upper basket, load the dishes and push them back. It is commended to load the lower basket first, then the upper one. Pour in the detergent. Insert the plug into the socket. The power supply refer to last page ”Product fiche”.
-
Page 48: Maintenance
MAINTENANCE EXTERNAL CARE • The door and the door seal Clean the door seals regularly with a soft damp cloth to remove food deposits. When the dishwasher is being loaded, food and drink residues may drip onto the sides of the dishwasher door. - Page 49 Larger food remnants can be Reassemble the filters in the cleaned by rinsing the filter under reverse order of the disassembly, running water.For a more thorough replace the filter insert, and rotate clean, use a soft cleaning brush. clockwise to the close arrow. WARNING •...
-
Page 50: Caring For The Dishwasher
CARING FOR THE DISHWASHER • After every wash After every wash, turn off the water supply to the appliance and leave the door slightly open so that moisture and odors are not trapped inside. • Remove the plug Before cleaning or performing maintenance, always remove the plug from the socket. -
Page 51: Troubleshooting
TROUBLESHOOTING GENERAL PROBLEM AND SOLUTION Reviewing the charts on the following pages may save you from calling for service. Problem Possible Causes Solution Fuse blown, or the circuit Replace fuse or reset circuit breaker. Remove Dishwasher doesn't start breaker tripped. any other appliances sharing the same circuit with the dishwasher. -
Page 52: Error Code
This may be caused by on- This has no influence on the dishwasher function. Knocking noise in the site installation or the cross- water pipes If in doubt, contact a qualified plumber. section of the piping. See PART Ⅱ “Preparing And Loading Dishes”. The dishes were not loaded The dishes are not clean correctly. -
Page 53: Specification
SPECIFICATION Model CYCLONE MINI Article No. 539.20.601 Standard place settings Energy efficiency class Annual energy consumption 174 kWh Energy consumption of the standard cleaning cycle 0.61 kWh Power consumption of off-mode 0.45 W Power consumption of left-on mode 0.49W Annual water consumption 1820 liter Drying efficiency class Standard cleaning cycle... - Page 54 APPENDIX LOADING THE BASKETS ACCORDING TO EN50242 • Basket Item Item Number Number Cups Dinner plates Medium serving bowl Soup plates Glasses Dessert dishes Saucers Cutlery basket Dish Serving spoons Oval platter Page 24 www.hafele.co.id...
- Page 55 • Cutlery Basket Item Number Forks Soup spoons Dessert spoons Teaspoons Knives Information for comparability testi n g Serving spoons accordance with EN 50242 • Capacity: 6 place settings Gravy ladles • Program: ECO Serving forks • Rinse aid setting: 6 •...
- Page 56 Head Office Taman Tekno Blok A No. 3 Serpong, Tangerang 15314 Phone +62 21 7587 8888 Email info@hafele.co.id www.hafele.co.id CUSTOMER CARE CENTER 082 333 666 082...
Need help?
Do you have a question about the CYCLONE MINI 539.20.601 and is the answer not in the manual?
Questions and answers