
Related Manuals for Häfele HDW-FI60D


Summary of Contents for Häfele HDW-FI60D
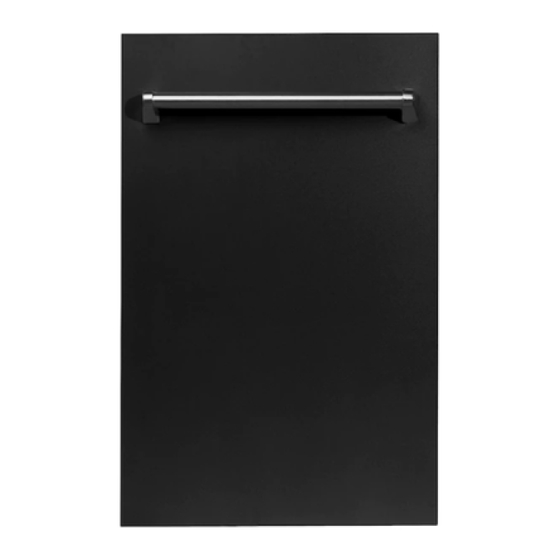
- Page 1 User manual Product applied: 533.23.320 Product name: DISHWASHER FULLY BUILT-IN HDW-FI60D...
- Page 2 Thank you for choosing this product. This User Manual contains important information on safety and instructions in- tended to assist you in the operation and maintenance of your appliance. Please take the time to read this User Manual before using your appliance and keep this book for future reference.
-
Page 3: Table Of Contents
CONTENTS SAFETY INSTRUCTIONS 1.1. General Safety Warnings ................1 1.2. Installation Warnings ..................2 1.3. During Use ......................3 INSTALLATION 2.1. Machine Positioning ..................6 2.2. Water Connection ..................6 2.3. Water Inlet Hose ....................6 2.4. Drain Hose ......................6 2.5. -
Page 4: Safety Instructions
1. SAFET INSTRUCTIONS General Safety Warnings Read these instructions carefully before using your appliance and keep this manual for future reference. Please check the packaging of your ma- chine before installation and the outer surface of the machine once the pack- aging has been removed. -
Page 5: Installation Warnings
Installation Warnings Choose a suitable and safe place to install your machine. Only original spare parts should be used with the machine. Unplug the machine before installation. Your machine must only be installed by an authorised service agent. Installation by anyone other than an authorised agent may cause your warranty to be void. -
Page 6: During Use
During Usage This machine is for domestic use only; do not use It for other purposes. Commercial use will void the guarantee Do not stand, sit or place loads on the open door of the dishwasher. Only use detergents and rinse aids produced specifically for dishwashers. Our company is not responsible for any damage that may occur due to misuse. - Page 7 REC CLING Some machine components and packaging consist of recyclable materials. Plastics are marked with the international abbreviations:( PE , PP , etc. ) The cardboard parts consist of recycled paper. They can be put into waste paper containers for recycling. Material unsuitable for domestic waste must be disposed of at recycling centres.
- Page 8 CE Declaration of Conformity We declare that our products meet the applicable European Directives, Decisions and Regulations and the requirements listed in the standards referenced. Disposal of your old machine The symbol on the product or on its packaging indicates that this product may not be treated as household waste.
-
Page 9: Installation Machine Positioning
INSTALLATION WARNING: Use the new water inlet hose 2.1. Machine positioning supplied with your machine, do not use an old When positioning the machine, place it in an machine’s hose. area where dishes can be easily loaded and WARNING: Run water through the unloaded. -
Page 10: Electrical Connection
2.5. Electrical connection WARNING: Your machine is set to operate at 220-240 V. If the mains voltage supply to your machine is 110 V, connect a transformer of 110/220 V and 3000 W between the electrical connec- tion. Connect the product to a grounded outlet protected by a fuse complying with the values in the “Technical Specifications”... -
Page 11: General Appearance
ECHNICAL 3.2. Technical specifications SPECIFICATIONS Capacity 15 place settings Dimensions 820-870(mm) (mm) Height 598(mm) Width Depth 570(mm) Net weight 38kg Operating voltage / 220-240V 50 frequency Total current (A) 10(A) Total power (W) 1750(W) Water supply Maximum: pressure 1 (Mpa) Minimum: 3.1. -
Page 12: Before Using The Appliance
BEFORE USING THE 4.3. Fill the salt (IF AVAILABLE) To add softener salt, open the salt APPLIANCE compartment cap by turning it count- er clockwise. (1) (2) At first use, fill 4.1. Preparing your dishwasher for the compartment with 1 kg salt and first use water (3) until it is almost overflowing. -
Page 13: Test Strip
Test Strip Run water Keep the strip Shake the Wait (1min.) Set the hardness through the tap in the water strip. level of your (1min.) (1sec) machine. second munite munite NOTE: The factory hardness level setting is “3”. If the water is well water or has a hardness level above 90 dF, we recommend that you use filter and refinement devices. -
Page 14: Filling The Detergent
4.11. Rinse-aid usage Do not fill detergent into the detergent compartment more than required; The rinse aid helps to dry the dishes otherwise you can see whitish streaks without streaks and stains. Rinse-aid is or bluish layers on glass and dishes and required for stain-free utensils and clear may cause glass corrosion. - Page 15 Level Brightener Indicator Dose Rinse-aid not r1 is shown on dispensed the display 1 dose is r2 is shown on dispensed the display 2 doses are r3 is shown on dispensed the display 3 doses are r4 is shown on dispensed the display 4 doses are...
-
Page 16: Loading Your Dishwasher
LOADING OUR WARNING: To avoid any possible DISHWASHER injuries, place long-handle and sharp- pointed knives with their sharp For best results, follow these loading points facing down or horizontally on the guidelines. baskets. Loading the household dishwasher up to the capacity indicated by the manufac- turer will contribute to energy and water savings. - Page 17 Height Ad ustable Rack (peg type) Upper Basket Height adjustment The height adjustable racks enable Turn the Rail Stop Clips, at the ends of glasses and cups to be placed on or the rails, to the sides to open them (as under the racks.
- Page 18 Upper Cutlery Basket The upper cutlery basket is designed for the placement of large and small cutlery and utensils. WARNING: Knives and other sharp ob- jects must be placed horizontally in the cutlery basket. EN 15...
-
Page 19: Alternative Basket Loads
5.2. Alternative Basket Loads Incorrect Loads Lower Basket Incorrect loading can cause poor washing and drying performance. Please follow the manufacturer’s recommendations for a good performans result. Top basket Incorrect loads EN 16... -
Page 20: Programme Table
PROGRAMME TABLE Programme Duration Description (min) Standard program for normally soiled daily using dishes with reduced energy and water consumptions. Smart 109 - 179 Auto program for heavily soiled dishes. 60 C - 70 C Smart 107 - 122 Auto program for normally soiled dishes. 50 C - 60 C Smart 72 - 91... -
Page 21: The Control Panel
THE CONTROL PANEL NOTE: Press and hold the Delay touch (10) button to change the delayed start time faster. The rate of change in time is proportional to the how long the button is pressed and held for. When the Delay Start touch button is pressed for a long period of time, the counter will stop at “h:00”. -
Page 22: 7.1 Changing A Programme
Extra Dry Touch Button 7.2. Cancelling a Programme Press the Extra Dry touch button to add extra Follow the steps below to cancel a pro- drying steps to a programme in order to obtain gramme while in operation or in standby drier dishes. - Page 23 Buzzer Sound Control If no intervention by user, 24 hours after To change the buzzer sound level, follow the activation of Ionizer function, it is automati- below steps: cally cancelled. Note: If machine is turned off, Ionizer func- Open the door and press Extra Dry / Energy Save (5,9) and Half Load (6) touch tion is cancelled.
-
Page 24: Cleaning And Maintenance
CLEANING AND To remove and clean the filter combi- nation, turn it counter clockwise and MAINTENANCE remove it by lifting it upwards (1).Pull the Cleaning your dishwasher is important to coarse filter out of the micro filter (2). maintain the machine’s service life Then pull and remove the metal filter (3). -
Page 25: 8.3 Drain Pump
8.3 Drain Pump Large food residues or foreign objects which were not captured by the filters may block the waste water pump. The rinsing water will then be above the filter. Warning Risk of cuts When cleaning the waste water pump, ensure that you do not injure yourself on pieces of broken glass or pointed implements. -
Page 26: Troubleshooting
TROUBLESHOOTING FAULT POSSIBLE CAUSE TROUBLESHOOTING Your Dishwasher is not Plug your Dishwasher in. plugged in Your Dishwasher is not Switch your Dishwasher on by pressing the switched on. On/Off button. Fuse blown. Check your indoor fuses. The programme does not start. Water inlet tap is closed. - Page 27 FAULT POSSIBLE CAUSE TROUBLESHOOTING Not enough detergent Use the correct amount of detergent, as used instructed in the programme table. Rinse aid dosage and/or Increase rinse aid and/or water softener water softener setting set level. too low. Whitish stains remains on dishes. Increase water softerner level and add High water hardness level salt.
- Page 28 AUTOMATIC FAULT WARNINGS AND WHAT TO DO TROUBLE POSSIBLE FAULT WHAT TO DO CODE Make sure the water inlet tap is open and water is flowing. Separate the inlet hose from the tap and clean the Water inlet system failure filter of the hose Contact for service if the error continues.
-
Page 29: Practical Information
The installation and repairing procedures should always carried out by the Autho- rised Service Agent in order to avoid possible risks. The manufacturer shall not be held liable for damages that may arise from procedures carried out by unauthorised persons. Repairs may be carried out by technicians only. If a component has to be replaced, ensure that only original spare parts are used. -
Page 30: The Product Fiche
THE PRODUCT FICHE Supplier’s trade mark HÄFELE Supplier’s model HDW-FI60D Capacity of dishwasher 15 bộ chén đĩa châu Âu The energy efficiency class A+++ Annual energy consumption in kWh per year (AEc) ( 280 Cycle )* Energy consumption (Et) 0.846... - Page 31 52253525 R35...
- Page 33 Mã sản phẩm áp dụng: 533.23.320 Tên sản phẩm: MÁY RỬA CHÉN ÂM TOÀN PHẦN HDW-FI60D...
- Page 34 Cảm ơn quý khách đã chọn mua sản phẩm này. Hướng dẫn Sử dụng này bao gồm các thông tin quan trọng về an toàn và hướng dẫn hỗ trợ quá trình vận hành và bảo trì thiết bị. Vui lòng đọc kỹ Hướng dẫn Sử dụng trước khi dùng thiết bị và giữ sách hướng dẫn này để...
- Page 35 MỤC LỤC HƯỚNG DẪN AN TOÀN 1.1. Hướng dẫn an toàn chung ................1 1.2. Các cảnh báo lắp đặt .................. 2 1.3. Trong quá trình sử dụng ................. 3 LẮP ĐẶT 2.1. Vị trí Đặt máy ....................6 2.2. Nối đường nước .....................
-
Page 36: Hướng Dẫn An Toàn
1. HƯỚNG DẪN AN TOÀN Cảnh báo an toàn chung Đọc kỹ hướng dẫn này trước khi sử dụng máy rửa bát và giữ lại sổ tay hướng dẫn sử dụng này để tham khảo về sau. Vui lòng kiểm tra bao bì của máy trước khi lắp đặt và... -
Page 37: Các Cảnh Báo Lắp Đặt
Các cảnh báo lắp đặt Chọn vị trí phù hợp và an toàn để lắp đặt máy. Chỉ sử dụng phụ tùng chính hãng cho máy. Ngắt điện trước khi lắp đặt. Thiết bị phải được lắp đặt bởi một đại lý dịch vụ ủy quyền. Việc lắp đặt không thông qua đại lý... -
Page 38: Trong Quá Trình Sử Dụng
Trong quá trình sử dụng Thiết bị chỉ sử dụng cho mục đích gia dụng Không sử dụng cho các mục đích khác. Sử dụng thương mại sẽ khiến thiết bị mất quyền bảo hành. Không đứng, ngồi hay đặt bát đĩa lên cửa của máy rửa bát. Chỉ... - Page 39 TÁI CHẾ Một số bộ phận và bao bì máy là các nguyên vật liệu có thể tái chế. Nhựa được đánh dấu với các ký hiệu quốc tế:(PE, PP, v.v.) Hộp các-tông bằng giấy tái chế. Các hộp này có thể đưa vào thùng đựng giấy phế...
- Page 40 Tuyên bố về Sự phù hợp của CE Chúng tôi tuyên bố rằng các sản phẩm của chúng tôi đáp ứng các Chỉ thị, Quyết định và Quy định hiện hành của Châu Âu cũng như các yêu cầu được liệt kê...
-
Page 41: Lắp Đặt
LẮP ĐẶT CẢNH BÁO: Sử dụng ống cấp nước 2.1. Vị trí đặt máy mới đi kèm với máy, không sử dụng lại Đặt máy ở vị trí dễ dàng cho việc xếp và ống cũ. dỡ bát đĩa. Không đặt máy ở nơi nhiệt CẢNH BÁO: Dẫn nước qua ống mới độ... -
Page 42: Nối Đường Điện
2.5. Kết nối điện CẢNH BÁO: Máy được thiết kế để vận hành ở mức điện áp 220-240 V. Nếu nguồn cấp điện là 110 V, hãy đấu thêm một máy biến áp 110/220 V và 3000 W vào giữa hệ thống kết nối điện. Kết nối máy với ổ... -
Page 43: Thông Số Kỹ Thuật
THÔNG SỐ KỸ THUẬT 3.2. Thông số kỹ thuật Dung tích 15 bộ bát đĩa Kích thước (mm) 820-870(mm) Chiều cao Chiều rộng Chiều sâu 598(mm) 570(mm) Khối lượng tịnh 38kg Điện áp/tần số vận 220-240V 50 hành định mức Tổng dòng điện (A) 10(A) Tổng công suất (W) -
Page 44: Trước Khi Sử Dụng Thiết Bị
TRƯỚC KHI SỬ DỤNG 4.3. Đổ muối rửa bát (NẾU CÓ) Để đổ muối làm mềm, mở nắp ngăn THIẾT BỊ đựng bằng cách xoay ngược chiều kim đồng hồ. (1) (2) Lần sử dụng 4.1. Chuẩn bị cho lần sử dụng đầu tiên, đổ... -
Page 45: Que Thử Nước
Que Thử Nước Dẫn nước qua Để que thử Lắc quy thử. Đợi (1 phút) Cài đặt độ cứng vòi (1 phút) dưới nước (1 của nước. giây) giây phút phút LƯU Ý: Cài đặt độ cứng mặc định là mức “3”. Nếu nước là nước giếng hoặc có độ cứng trên 90 dF, chúng tôi khiến nghị... -
Page 46: Cho Nước Rửa Bát Vào Ngăn Đựng
4.11. Nước trợ xả Không đổ chất tẩy rửa vào ngăn chứa nhiều hơn lượng cần thiết; nếu không, sẽ Nước trợ xả giúp làm khô bát đĩa và sinh ra các vệt trắng hoặc lớp cặn màu không để lại vệt và vết bẩn. Nước trợ xả xanh trên thủy tinh và... - Page 47 Mức Lượng Chỉ số cài chất tẩy đặt trắng Không có r1 hiển thị trên nước trợ màn hình xả 1 phân r2 hiển thị trên lượng đã màn hình xả 2 phân r3 hiển thị trên lượng đã màn hình. xả...
-
Page 48: Các Khuyến Nghị
XẾP BÁT ĐĨA VÀO CẢNH BÁO: Để tránh thương tích, MÁY hãy đặt dao cán dài và có lưỡi nhọn hướng xuống hoặc nằm ngang giá. Để đạt hiệu quả tốt nhất, hãy làm theo các hướng dẫn sắp xếp bát đĩa sau đây. - Page 49 Giá đỡ có thể Điều chỉnh độ cao (loại Điều chỉnh chiều cao giá đỡ trên dùng chốt) Xoay chốt ray trượt ở hai đầu thanh ray Giá đỡ có thể điều chỉnh độ cao giúp sang hai bên để mở (hình minh họa bên đặt ly và...
- Page 50 Giá đựng dụng cụ phía trên Giá để dụng cụ phía trên được thiết kế để đặt các loại dao kéo và vật dụng nhỏ. CẢNH BÁO: Dao và các vật sắc nhọn khác phải được đặt nằm ngang trên giá đựng.
-
Page 51: Giá Xếp Bát Thay Thế
Giá đựng Thay thế ở Vị trí thấp Xếp không đúng cách Xếp không đúng cách làm giảm hiệu suất rửa và làm khô bát đĩa. Vui lòng tuân theo khuyến nghị của nhà sản xuất để có hiệu suất sử dụng tốt. Giá... -
Page 52: Bảng Chương Trình
BẢNG CHƯƠNG TRÌNH RỬA Chương trình Thời gian Mô tả (phút) Chế độ tiêu chuẩn dành cho bát đĩa sử dụng hàng ngày tiêu thụ năng lượng và nước tiết kiệm. Thông minh 109 - 179 Chế độ tự động cho bát đĩa bị bẩn nhiều. 60 C - 70 C Thông minh 107 - 122... -
Page 53: Bảng Điều Khiển
BẢNG ĐIỀU KHIỂN LƯU Ý: Ấn và giữ nút Hẹn giờ để thay đổi thời gian hẹn giờ nhanh hơn. Tốc độ (10) thay đổi phụ thuộc vào khoảng thời gian ấn giữ nút. Khi nút Hẹn giờ được giữ lâu, màn hình sẽ... -
Page 54: Thay Đổi Chương Trình
Nút làm khô 7.2. Hủy chương trình rửa Ấn nút làm khô hơn để thêm bước làm Làm theo các bước sau đây để thay khô vào chương trình giúp làm khô bát Hủy chương trình rửa trong khi vận hành đĩa tốt hơn. - Page 55 Tùy biến Âm báo Nếu không có tác động từ người dùng, Để thay đổi âm lượng âm báo, hãy làm sau 24 giờ kích hoạt, tính năng khử Ion theo các bước sau: sẽ bị hủy. Lưu ý: Nếu máy tắt, tính năng khử Ion sẽ Mở...
-
Page 56: Vệ Sinh Và Bảo Dưỡng
VỆ SINH VÀ BẢO Xoay ngược chiều kim đồng hồ và nhấc lên để tháo và vệ sinh bộ lọc (1).Kéo DƯỠNG màng lọc thô ra khỏi màng lọc tinh (2). Vệ sinh máy rửa bát là điều quan trọng Sau đó... -
Page 57: 8.3 Bơm Xả
8.3 Bơm xả Cặn thức ăn hoặc các dị vật kích thước lớn không được bộ lọc giữ lại có thể làm tắc đường bơm nước thải. Nước xả sau đó sẽ ở bên trên bộ lọc. Cảnh báo nguy cơ Đứt tay Khi vệ... -
Page 58: Xử Lý Sự Cố
XỬ LÝ SỰ CỐ TRỤC TRẶC NGUYÊN NHÂN XỬ LÝ SỰ CỐ Thiết bị chưa được cắm Cắm điện thiết bị. điện. Thiết bị chưa được bật. Ấn nút Bật/Tắt để bật máy rửa bát. Đứt cầu chì. Kiểm tra cầu chì. Chương trình không chạy. - Page 59 TRỤC TRẶC NGUYÊN NHÂN XỬ LÝ SỰ CỐ Dùng đúng lượng chất tẩy rửa như Sử dụng thiếu chất tẩy rửa. hướng dẫn trong bảng chương trình rửa Cài đặt lượng nước trợ xả Tăng lượng nước trợ xả và/hoặc mức và/hoặc mức làm mềm làm mềm nước.
- Page 60 CÁC CẢNH BÁO LỖI TỰ ĐỘNG VÀ CÁCH XỬ LÝ MÃ LỖI NGUYÊN NHÂN CÁCH XỬ LÝ Đảm bảo vòi cấp nước đang mở và có nước chảy. Tháo ống cấp nước ra khỏi vòi và vệ sinh màng Sự cố đường cấp nước lọc của đường ống.
-
Page 61: Thông Tin Hữu Ích
Quá trình lắp đặt và sửa chữa phải được thực hiện bởi Đơn vị Dịch vụ được Ủy quyền để phòng tránh rủi ro. Nhà sản xuất sẽ không chịu trách nhiệm về những thiệt hại gây ra trong quá trình thực hiện bởi những người không có thẩm quyền. Việc sửa chữa chỉ... -
Page 62: Tờ Thông Tin Sản Phẩm
TỜ THÔNG TIN SẢN PHẨM Thương hiệu của nhà cung cấp HÄFELE Mẫu máy HDW-FI60D Dung tích máy rửa bát 15 bộ chén đĩa châu Âu Xếp loại tiết kiệm năng lượng A+++ Mức tiêu thụ năng lượng hàng năm đơn vị... - Page 63 52253525 R35...
- Page 64 www.hafele-vn.com...
Need help?
Do you have a question about the HDW-FI60D and is the answer not in the manual?
Questions and answers