Table of Contents
Advertisement
Quick Links
Advertisement
Table of Contents

Related Manuals for Candy Grand GOY 1054 L


Summary of Contents for Candy Grand GOY 1054 L
- Page 1 И ция э а ации 2-37 GOY 1054 L User instructions 38-71 Kg Detector...
- Page 2 " " “ ”, . " ", 610035, , 24 Candy GOY 1054 L–07S № 31003622 ____________ 5156-002-46092527-2005 " __ " ____________ 20 ___ . ________________________________________________________________ _______________________________________________________________ ( . . .) ( "____"_____________20____ . ________________________________________________________________________ ________________________________________________________________________...
- Page 3 Candy, Candy , Candy Candy. Candy...
- Page 4 " ".
- Page 5 ...
- Page 6 220-240 1850 90° ) 6…15 min. 0,05 max. 0,8 , 73/23/ 89/336/ 2006/95/ 2004/108/...
- Page 7 220-240 10 . Candy Quality Trademark Institute b. He Candy...
- Page 8 f. He 90° . j. He . .);...
- Page 9 "1" - "2" - " " " " ("End"); " ." (Off). 50 % 15 % 60 ° . 60 °...
- Page 10 ( ).
- Page 12 3/4" 40°...
- Page 13 " ." (Off) " " " " " " " " " " " " " " " " " " " " " "...
- Page 14 "Kg DETECTOR" ( "Kg DETECTOR" "Kg DETECTOR": , "Kg DETECTOR" "Kg DETECTOR"...
- Page 15 . (Off) " ". " ." (Off). " " " ." (Off). " ." (Off) " "...
- Page 16 " " " " " " " ") "Rapid" : 14 , 30 " " " " h00), h01) – " ".
- Page 17 " " ( " " " " " ." (Off), " ". " " " ", " " " ". " " " " 20%)
- Page 18 " " Sensor. " " " ", " "). " " " ". " "...
- Page 19 " " " ". " " " " " " "Kg DETECTOR" ( "Kg DETECTOR" " ". " ", " " " ".
- Page 20 " ." (Off). " ." (Off). " ".
- Page 21 "Kg DETECTOR" "Kg DETECTOR" " ",...
- Page 22 " ", – – DETECTOR...
- Page 23 "1", " " . .; "2", " "...
- Page 24 (60 °...
- Page 25 "2" "1", 3/4 "2" "2".
- Page 26 "RINSE" " " " " " " " "...
- Page 27 "Rapid" " ", : 14 , 30 "Rapid", " " " ". 30°C. " " WOOLMARK, 40 ° . TITAN WOOL. "MIX & WASH SYSTEM" Candy • . .); • "Mix & Wash" 40 ° • •...
- Page 28 "Pure New Wool" "non-matting" "machine washable". 40° .
- Page 29 . .) " "...
- Page 30 "2" " ". " ". " " ("End"); " ." (Off);...
- Page 32 , ° 60° 90° • • (•) 40° 60° • • (•) 40° 60° • • (•) 40° 40° • • • 30° 30° • • – 14 30° 40° • • – 30 30° 40° • • – 44 "...
- Page 33 CENELEC EN 60456 60 °C. (•) " ". " " " ", : 14 , 30...
- Page 34 . .)
- Page 35 “ ”.
- Page 36 " ". " ". 0,1,5,7,8 " .". " ".
- Page 37 " " " ".
- Page 38 Consumers. You have chosen the quality, durability and high performance that this washing machine offers. Candy is also able to offer a vast range of other household appliances: washing machines, dishwashers, washer-dryers, cookers, microwave ovens. Traditional ovens and hobs, refrigerators and freezers.
-
Page 39: Table Of Contents
Contents Page Preface General delivery notes Technical data Safety notes Quick start Useful advice for the users Installation Description of controls Detergents, washing aids and amounts to use Program selector Main wash Table of programs Cleaning and routine maintenance Trouble shooting Customer service Before switching on the appliance make sure it is correctly installed and that the transit brackets are removed as shown in chapter "Installation". -
Page 40: Preface
Preface Read these instructions for use and all other information enclosed with the washing ma- chine and act accordingly. Keep all documentation for future reference or for any future owners. Note: this machine is solely for domestic use. Notes on disposal All packaging material used is environmentally-friendly and recyclable. -
Page 41: Technical Data
Technical data Maximum wash load dry Supply voltage 220-240 Power input 1850 Energy consumption (prog. 90°C) Power current fuse amp Normal water level 6…15 Water pressure min. 0,05 max. 0,8 SPIN r.p.m. See rating plate NB: For specifications regarding electrical data, see the data panel on the front of the washing machine (porthole area). -
Page 42: Safety Notes
The socket in your home and the plug on the appliance must be of the same type. It is generally not advisable to use multiple adapters and/or extension leads. All Candy washing machines comply with the safety requirements laid down by the Quality Trademark Institute. - Page 43 l. Do not touch the appliance when hands or feet are wet or damp. Do not use the appliance with bare feet; m. Check there is no water left in the drum before opening the door; WARNING! During the washing cycle, the water can reach a temperature of 90°...
-
Page 44: Quick Start
Quick Start Washing – Press the button inside the door handle to open the door. – Select laundry and put it in the machine. – Close the door. – Put detergent in the dispenser compartments, compartment 1 for pre wash and com- partment 2 for all other programs. -
Page 45: Installation
Installation After removing the machine from the packaging, proceed as follows: On the back of the machine 1) Fix the sheet of corrugated material on the bottom as it is shown on picture. You can find the fastener means in the instruction booklet pack. - Page 46 4) Carefully cut the securing strap that holds the main cord and the drain hose. 5) Use the 4 feet to level the machine with the floor: a) Turn the nut clockwise to release the screw adjuster of the foot. b) Rotate foot to raise or lower it until it stands firmly on the ground.
- Page 47 Water supply Connect the fill hose to the tap. The appliance must be connected to the water mains using new hose-sets. The old hose-sets should not be reused. The appliance must only be connected to the cold water supply. Connection to a warm water supply, that is over 40°, may damage certain delicate fabrics.
-
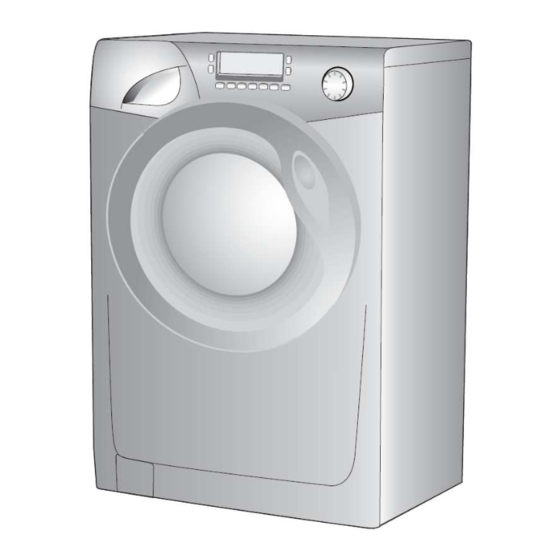
Page 48: Description Of Controls
Description of controls Door handle Program selector with "OFF" position “Wash Temperature” button "Spin speed" button Degree of soiling button "Start delay" button “Lock” button “Pre-wash” button “Intensive” button “Rinse Hold” button “Aquaplus” button “Crease Guard” button “Start/Pause” button Digital display Detergent Drawer... - Page 49 Description of controls Kg DETECTOR (Function active only on Cotton and Synthetics programs) Through every wash phase “Kg DETECTOR” allows to monitor information on the wash load in the drum. So, as soon as the “Kg DETECTOR” is set in motion, in the first 4 minutes of the wash, it: - adjusts the amount of water required;...
- Page 50 Program selector with "OFF" position When the program selector is turned the display lights up to show the settings for the program selected. For energy saving, at the end of the cycle or with an inactivity period, the display level contrast will decrease. Today, most detergents have been improved to wash efficiently at lower temperatures, therefore we have set the default temperature settings of each program to a...
- Page 51 To reactivate the spin cycle is enough to press the button until you reach the spin speed you would like to set. For not damage the fabrics, it is not possible to increase the speed over that auto- matically suitable during the selection of the program. It is possible to modify the spin speed in any moment, also without pause the machine.
- Page 52 The option buttons should be selected before pressing the “START/PAUSE” button. If an option is selected but it is not compatible with the selected programme then the symbol first flashes and then goes off. “Lock” button This is a useful feature to prevent children playing with the option buttons and tampering with the programme you have set.
- Page 53 “Rinse Hold” button Pressing this button means the cycle stops at the final rinse stage, leaving the drum filled with water. The garments thus stay immersed in the water, preventing them from bunching up and forming creases that are difficult to remove. During the phase in which the water is held in the tub, the indicator blinks to show that the machine is at a standstill.
- Page 54 “Start/Pause” button Press to start the selected cycle. NOTE: Few seconds after the start, the Kg DETECTOR function (active only on cotton and synthetics programmes) will weigh the clothes and update the maxi- mum wash time remaining within the first 4 minutes of the wash cycle. While this function is operating the kg detector indicator is on.
- Page 55 SPIN SPEED Once the programme has been selected, the maximum spin speed allowed for that programme appears on the display. Pressing the spin button will reduce the speed by 100 rpm each time the button is pressed. The minimum speed allowed is 400 rpm, or it is possible to omit the spin by pressing the spin button repeatedly.
- Page 56 6) CYCLE DURATION When a programme is selected the display automatically shows the cycle duration, which can vary, depending on the options selected. Once the programme has started you will be kept informed constantly of the time remaining to the end of the wash. The appliance calculates the time to the end of the selected programme based upon a standard loading, during the cycle, the appliance corrects the time to that applicable to the size...
- Page 57 Maximum load Every levels shown on the display is the 20% of the maximum loading capacity. When a programme is selected the maximum capacity suggested is shown on the display. For the programmes where the KG DETECTOR function is active, the appliance in the first minutes it calculates the real laundry loaded, updating the levels on the display in real time.
-
Page 58: Detergents, Washing Aids And Amounts To Use
Detergents, washing aids and amounts to use Choice of detergent General purpose detergents – Powder detergents, for a thorough wash, with bleaching agent, particularly suitable for use in hot wash programs (60°C and over), for heavily soiled and stained laundry. –... - Page 59 Dosages Only use detergents which are suitable for use in a washing machine. You will obtain the best results from your wash with the minimum use of chemical products and the best care for your laundry if you take into consideration the degree of soiling as well as the type of detergent to choose.
-
Page 60: Program Selector
Program selector For the various types of fabrics and various degrees of dirt the washing machine has 4 different program bands ac- cording to: wash cycle, temperature and length of cycle (see table of washing cycle programs). 1. Resistant fabrics The programs have been designed for a maximum wash and the rinses, with spin intervals, ensure perfect rinsing. - Page 61 The programme reaches a maximum temperature of 40°C and ends with 3 rinses and a delicate spin. “MIX & WASH SYSTEM” PROGRAM This is an exclusive Candy system and involves 2 great advantages for the consumer: - to be able to wash together different type of fabrics (e.g. cotton + syn- thetic etc…) NON-FAST COLOUREDS;...
-
Page 62: Main Wash
Main wash Auto half load The washing machine is fitted with a self adjusting water level system. This system enables the machine to use the amount of water needed to wash and rinse the laundry in relation to the particular load. This results in a reduction of the water and electricity used, without in any way compromis- ing the washing and rinsing performance. - Page 63 Note: when sorting laundry - check there are no metal objects in the laundry (such as paper clips, safety pins, pins, coins etc...); - in the event of a machine failure during the warranty pe- riod and foreign objects are found to be the cause of the failure a labour charge may be made for the call out an en- gineer;...
- Page 64 Putting detergent in machine D) Open the drawer, choose the detergent and put in the correct amount, according to the manufacturer’s instructions and the advice on page "Detergents, washing aids and amounts to use". E) Add any other laundry aids. F) Close the drawer again.
-
Page 66: Table Of Programs
Table of programs WEIGHT PROGRAM FOR: PROGRAM CHARGE MAX, SELECTOR TEMP., ° DETERGENT RECOM- MENDED Resistant fabrics Up to: 60° (•) Cotton, linen 90° Cotton, mixed resistant, Up to: 40° (•) Coloureds 60° Mixed fabrics and synthetics Up to: 40°... - Page 67 Please read these notes! When washing heavily soiled laundry it is recommended the load is reduced to 3 kg maxi- mum. ** Programme tested in accordance with CENELEC EN 60456 with the maximum Degree of Soiling selected and a temperature of 60°C. Program also recommended for low-temperature washes (lower than the max.
-
Page 68: Cleaning And Routine Maintenance
Cleaning and routine maintenance Do not use alcohol-based scourers and /or thinners on the outside of your washing ma- chine, just a wipe with a damp cloth will suffice. The washing machine needs very little maintenance: – Cleaning the drawer compartments; –... - Page 69 Transporting storing the appliance for long periods when appli- ance is not in use If the appliance is being transported or is out of use for long periods in unheated places, all remaining water must be completely removed from all hoses. Ensure mains power is off, then unclip the hose and point it downwards into a basin until all the water has emptied out.
-
Page 70: Trouble Shooting
Trouble shooting What might be the cause of… Defects you can remedy yourself Before calling GIAS Service for technical advice please run through the following checklist. A charge will be made if the machine is found to be working or has been installed incorrectly or used incorrectly. If the problem persists after completing the recommended checks, please call the GIAS Service, they may be able to assist you over the telephone. -
Page 71: Customer Service
Customer Service The appliance is covered by a certificate of guarantee which allows you free use of the Candy Technical Support Service. Remember to send off the guarantee certificate for vali- dation within 10 days of the date of purchase. - Page 72 2002/96/ (WEEE). This appliance is marked according to the European directive 2002/96/EC on Waste Electrical and Electronic Equipment (WEEE) By ensuring this product is disposed of correctly, you will help prevent potential nega- tive consequences for the environment and human health, which could otherwise be caused by inappropriate waste handling of this product.
Need help?
Do you have a question about the Grand GOY 1054 L and is the answer not in the manual?
Questions and answers