
Related Manuals for Sungrow SBH100


Summary of Contents for Sungrow SBH100
- Page 1 User Manual High Voltage LFP Battery SBH100/150/200/250/300/350/400 SBH100/150/ 200/250/300/350/400High Voltage LFP BatteryUser ManualSBH100- 400-UEN-Ver11-202306 SBH100-400-UEN-Ver11-202306...
-
Page 3: All Rights Reserved
Software Licenses • It is prohibited to use data contained in firmware or software developed by SUNGROW, in part or in full, for commercial purposes by any means. • It is prohibited to perform reverse engineering, cracking, or any other operations that... -
Page 4: About This Manual
The reader can get additional information about other devices www.sungrowpower.com or on the webpage of the respective component manufacturer. Validity This manual is valid for the following battery models: • SBH100 • SBH150 • SBH200 •... - Page 5 Indicates a hazard with a high level of risk that, if not avoided, will result in death or serious injury. Indicates a hazard with a medium level of risk that, if not avoided, could result in death or serious injury. Indicates a hazard with a low level of risk that, if not avoided, could result in minor or moderate injury.
-
Page 7: Table Of Contents
Contents All Rights Reserved .....................I About This Manual......................II 1 Safety Instructions ....................1 1.1 Notices for Safe Use ..................2 1.2 Battery Handling Information ................3 1.3 Emergency Situations ..................4 1.3.1 Leaking Batteries ..................4 1.3.2 Fire ......................4 1.3.3 Wet Batteries ..................5 1.3.4 Damaged Batteries ................5 2 Product Description ..................7 2.1 Product Introduction..................7... - Page 8 5.5.2 DC Cable Connection and Disconnection..........30 5.6 Communication Cable Connection ..............34 5.6.1 Assemble Communication Connectors and Termination Resistor....34 5.6.2 Communication Cable Connection and Disconnection ......36 5.7 Top Cover Assembling ..................38 5.8 Battery Cascading ..................39 6 Commissioning/Startup Procedure ..............40 6.1 Inspection before Commissioning ..............40 6.2 Commissioning Procedure ................40 7 Battery Decommissioning/Shutdown Procedure ........42...
-
Page 9: Safety Instructions
Level 6 or stronger winds. SUNGROW shall not be held liable for any damage to the device due to force majeure, such as... -
Page 10: Notices For Safe Use
Perform operations considering ac- tual onsite conditions. • SUNGROW shall not be held liable for any damage caused by violation of gen- eral safety operation requirements, general safety standards, or any safety in- struction in this manual. -
Page 11: Battery Handling Information
User Manual 1 Safety Instructions Risk of fire • Do not place the battery near a heat source, such as direct sunlight, a fireplace, a thermally uninsulated wall exposed to sunlight, hot water, or a heater. • Keep sources of ignition such as sparks, flames, and smoking materials away from the battery. -
Page 12: Emergency Situations
1 Safety Instructions User Manual • Do not damage the sheath of cables, wire harness and connectors. • While the battery is charged, used and stored, keep it away from materials that are prone to electric discharge, including static discharge. •... -
Page 13: Wet Batteries
1.3.3 Wet Batteries If the battery is submerged in water, do not let people access it, and then contact Sungrow or an authorized service partner for technical support. If a battery is submerged in water or flooded, first, switch off all circuit breakers in the system to cut off the power supply to the battery. - Page 14 1 Safety Instructions User Manual A damaged battery may release dangerous material and a flammable gas mixture. Never try to repair the battery even if you are a qualified electrician.
-
Page 15: Product Description
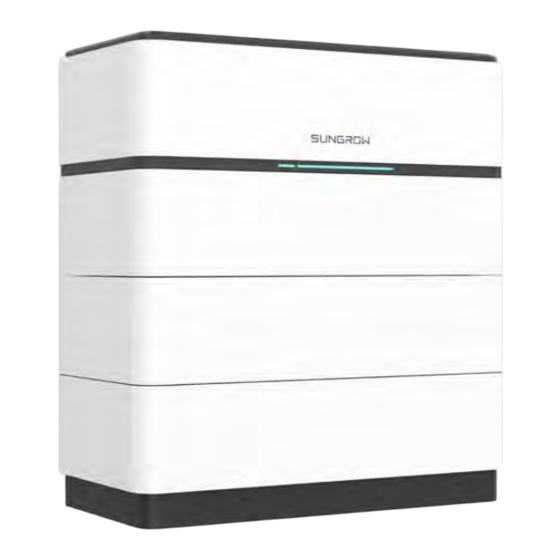
Product Description Product Introduction Overview As an important part of the PV power generation system, SBH100-400 high-voltage battery system works in conjunction with the hybrid inverter to store energy and supply it later for household use. figure 2-1 System Diagram... - Page 16 2 Product Description User Manual *The images shown are for illustration purposes only. The actual product may vary. table 2-1 System Composition Battery Switch gear Top cover Base PACK system SBH100 SBH150 SBH200 SBH250 SBH300 SBH350 SBH400...
-
Page 17: Component Introduction
User Manual 2 Product Description Component Introduction Switch Gear The switch gear is equipped with a DC circuit breaker and a BMU, etc., and is used for bat- tery monitoring, energy transmission, and signal interaction. table 2-2 Parameters of the Switch Gear Parameter Value 675 ±... -
Page 18: Symbols On The Product
2 Product Description User Manual Rated capacity 72Ah Rated energy 5.0kWh Voltage range 55 to 80.3V Base The base is used for holding the switch gear and the PACKs. table 2-4 Base Parameters Parameter Value 650 ± 5 mm * 55 ± 5 mm * 325 ± 5 mm (handles, foot- Dimensions (W*H*D) pads, and the connector not counted) Weight... -
Page 19: Led Indicators
User Manual 2 Product Description Symbol Explanation Please recycle this lithium ion battery. Do not discard. Read the user manual before maintenance! This is a protective grounding terminal, which should be grounded se- curely to protect the safety of operators. LED Indicators The battery system is equipped with two LED indicators, SOC indicator and status indicator. - Page 20 2 Product Description User Manual Status Description Color Status indicator Steady on The battery system works normally The battery system is booting or in Blink slow (at an standby mode interval of 1s) Blue The battery system is being upgraded, Blink fast (at an tested, or calibrated interval of 0.5s)
-
Page 21: Unpacking And Storage
• Unpack and inspect the items inside for any damages. Contact the transport company or SUNGROW in case of any damages or missing items, and provide relevant photos or the name/quantity of the missing items for better services. Do not throw away the original packaging box. It is recommended to store the device in its... -
Page 22: Scope Of Delivery
3 Unpacking and Storage User Manual Inspect the product for any external damages or damages to the structural parts, and check if the packing list matches the order placed. In case of any problem with the above-mentioned inspection items, do not install the device and contact SUN- GROW in time. -
Page 23: Storage
User Manual 3 Unpacking and Storage Quantity Item Name Battery fixing bracket 1 set Switch gear fixing bracket Communication cable Footpads Communication connector Termination resistor Power connector M5 screw assembly Expansion bolt M4 countersunk screw Cold-pressed terminal OT terminal Quick installation guide Storage Proper storage is required if the battery is not installed immediately. -
Page 24: Mounting
Mounting Safety during Mounting This product or system must be operated by professionals! Failure to follow the safety instructions in this manual or operation of this product or system by non-professionals may cause severe personal injury or major prop- erty damage. Strictly follow local relevant standards and requirements in the whole process of installation. - Page 25 User Manual 4 Mounting • Avoid direct exposure to sun, rain and snow. The battery system may derate if the ambient temperature goes higher than 40℃. Installation Angle Requirements It is recommended to adopt the wall-mounting installation for the battery system. Do not in- stall it askew.
-
Page 26: Installation Tools
4 Mounting User Manual Installation Tools Installation tools include, but are not limited to, the following recommended ones. If neces- sary, use other auxiliary tools on site. table 4-1 Tool specification Goggles Dust mask Safety gloves Safety shoes Utility knife Marker Rubber mallet Measuring tape... -
Page 27: Battery System Installation
User Manual 4 Mounting Hydraulic pliers Heat gun M4 Allen wrench Terminal crimping tool (10mm , cold- pressed terminal) Wire stripper Crimping tool (4- Electric drill (ST6.3, M4, M5, M6) Battery System Installation Installation should be conducted on a flat surface in an open space. The installation process is illustrated with SBH150 as an example. - Page 28 4 Mounting User Manual Reference lines for hole drilling: Used for determining the spacing between the two holes at the ends of the battery fixing bracket. Directional sign on the base: Used for identifying the front and the back of the base. The ar- row points from FRONT to BACK.
- Page 29 User Manual 4 Mounting Please wear goggles and masks while drilling holes, so as to protect your eyes and respiratory system from dust and dirt. Clean the dust around in time after fin- ishing drilling. step 4 Position the base 42-62mm away from the wall, so that the battery fixing bracket can be installed.
- Page 30 4 Mounting User Manual The battery fixing bracket should be installed on the top PACK. The installation position can be adjusted slightly through the slotted holes on the back. step 7 Assemble the switch gear. step 8 It is needed to install the switch gear fixing bracket, so as to prevent arc faults caused by moving the switch gear by mistake.
- Page 31 User Manual 4 Mounting - - End...
-
Page 32: Electrical Connection
Electrical Connection Safety Instructions • Operators must wear proper personal protective equipment during electrical connections. • Must ensure that cables are voltage-free with a measuring instrument before touching DC cables. • Ensure that the battery system is undamaged and all cables are voltage free before performing electrical work. -
Page 33: Electrical Connection Overview
User Manual 5 Electrical Connection *The images shown are for illustration purposes only and may not be an exact representa- tion of the actual product. Name Mark Note P+: Connected to the positive terminal of the hybrid inverter Battery DC input P+ P- terminal P-: Connected to the negative terminal of the... -
Page 34: Pe Cable Connection And Disconnection
5 Electrical Connection User Manual figure 5-1 Diagram of Electrical Connection Between the Battery System and the Inverter table 5-1 Cable Requirements Specification Cross-sectional Type Outer diameter Name area of conduc- (mm) tor (mm Multi-core PV cable, able to 10 - 16 DC cable withstand voltages of 6 - 9... - Page 35 User Manual 5 Electrical Connection (1) Heat shrink tubing (2) OT/DT terminal 2. Remove the screw from the PE terminal. Position the cable, fit the screw back, and fasten the cable using a screwdriver. 3. Apply silicone or painting to the PE terminal for corrosion protection. Disconnect the PE cable Remove the screw from the PE terminal, and move the cable away.
-
Page 36: Dc Cable Connection
5 Electrical Connection User Manual DC Cable Connection 5.5.1 Assemble DC Connectors The DC cables are connected to the battery system on one side and to the inverter on the other side, as shown in the figure below. Assemble the cold-pressed terminal for connection on battery side The dimensions of the cold-pressed terminal are shown in the figure below. - Page 37 User Manual 5 Electrical Connection Assemble the connectors for battery connection on inverter side 1. Remove the insulation of the DC cables, both by approximately 15mm. 2. Remove the swivel nuts from the connectors. 3. Crimp the corresponding wiring terminals on the cable wires using a crimping tool. 1: Positive cold-pressed terminal 2: Negative cold-pressed terminal 4.
-
Page 38: Dc Cable Connection And Disconnection
5 Electrical Connection User Manual 5. Fit the swivel nuts onto the connectors and tighten them. Pull gently the cables backward to make sure the connection is secure. 5.5.2 DC Cable Connection and Disconnection Connect the DC cables 1. Remove the dust cover from the port for DC cable connection. 2. - Page 39 User Manual 5 Electrical Connection 4. Fix the power connector with screws. 5. On the inverter side, connect the connectors of the DC cables to the corresponding BAT terminals of the inverter, and make sure they "click" into place.
- Page 40 5 Electrical Connection User Manual 6. Pull gently the DC cables backward to check whether the connection is secure. Disconnect the DC cables Check whether the system is powered, or let it stand for a while before disconnect- ing the cables. 1.
- Page 41 User Manual 5 Electrical Connection 3. On the battery side, pull the DC cables out directly. 4. On the inverter side, loosen the locking element of the connector with a dismantling wrench, and fit the waterproof plug.
-
Page 42: Communication Cable Connection
5 Electrical Connection User Manual Communication Cable Connection 5.6.1 Assemble Communication Connectors and Termination Resistor The communication cable is connected to the battery system on one side and to the inverter on another side, as shown in the figure below. Assemble the communication connector for connection on battery side 1. - Page 43 User Manual 5 Electrical Connection Assemble the wiring terminal for connection on inverter side 1. Remove the insulation of the communication cable from the other side. Keep signal wires CAN1_H (orange-white wire) and CAN1_L (orange wire), and cut off the unused signal wires.
-
Page 44: Communication Cable Connection And Disconnection
5 Electrical Connection User Manual Fit the termination resistor into the communication connector. 5.6.2 Communication Cable Connection and Disconnection Connect the communication cable 1. Remove the waterproof plug from the COM port of the battery. 2. Insert the communication cable and the termination resistor respectively into the OUT and IN ports of the communication terminal, and make sure they "click"... - Page 45 User Manual 5 Electrical Connection Be sure to install a termination resistor, otherwise, the battery communication can- not be enabled. 3. Connect the other side of the communication cable to the H and L of the COM port of the inverter.
-
Page 46: Top Cover Assembling
5 Electrical Connection User Manual 2. Fit the waterproof plug. Top Cover Assembling Assemble the top cover after the electrical connection is completed and the cables are con- firmed to be correctly and firmly connected. -
Page 47: Battery Cascading
User Manual 5 Electrical Connection Battery Cascading RACKs (battery systems) can be connected in parallel, allowing for at most 4 RACKs to be cascaded. Please make sure the usable energy of each RACK is the same when cascading the RACKs. figure 5-2 Battery Cascading Diagram... -
Page 48: Commissioning/Startup Procedure
Commissioning/Startup Procedure Inspection before Commissioning Check the following items before starting the battery: • Check that the battery system has been installed completely. • Check that the appearance of the battery system is intact. • Check that the battery system output wiring harness is correctly connected to the positive and negative terminals of the battery and hybrid inverter to avoid misconnection and re- verse connection. - Page 49 User Manual 6 Commissioning/Startup Procedure Please refer to "2.4 LED Indicators" for the description of LED indicator status. It is required to press the black start button at the first start-up of the system. - - End...
-
Page 50: Battery Decommissioning/Shutdown Procedure
1 Shut off the DC circuit breaker of the battery system. step 2 One minute after the DC circuit breaker is shut off, disconnect and remove the power cables and communication cable. - - End Contact SUNGROW for battery disposal. -
Page 51: Viewing Battery Information
Viewing Battery information If you want to check battery information, please complete the plant creation in iSolarCloud first. For details on how to create a plant in iSolarCloud, please refer to iSolarCloud App User Manual, which can be obtained by scanning the following QR code. - Page 52 8 Viewing Battery information User Manual Viewing Battery information on iSolarcloud Web 1. Log in to the iSolarCloud Web, tap Overview, the battery charging energy from PV then be displayed. 2. Tap Device information, Tap Battery,Battery parameters then be consulted。 Device information:Basic information about the battery device。...
-
Page 53: Battery Augmentation
Battery Augmentation Battery charging and discharging may take a long time. Therefore, before adding a new PACK, please refer to the document Brief Introduction of Battery Augmentation on https:// support. sungrowpower. com/ and charge/discharge the on-site battery system via remote control, so as to prevent the installer from waiting on site. -
Page 54: Troubleshooting And Maintenance
10 Troubleshooting and Maintenance 10.1 Troubleshooting Fault Fault Code Corrective Measure Name 1. Generally, the fault will disappear by itself within 20 min. 2. In the event of continual and frequent occurrence of this fault, please switch off the battery system, and con- tact the installer or manufacturer to check whether the in- 703, 711, 712, verter is damaged. - Page 55 User Manual 10 Troubleshooting and Maintenance Fault Fault Code Corrective Measure Name 1. The operating temperature range of the battery sys- tem is 0 to 55℃ for charging, and -20 to 55℃ for dis- charging. Please check whether the ambient temperature or the battery temperature falls below this range.
- Page 56 WiNet, and battery software to the latest version. 2. If the problem is not resolved, please check whether the system configuration is correct (SUNGROW single- phase hybrid inverter used with battery system consisting of 2~6 PACKs; SUNGROW three-phase hybrid inverter used with battery system consisting of 3~8 PACKs).
- Page 57 User Manual 10 Troubleshooting and Maintenance Fault Fault Code Corrective Measure Name 1. Generally, the battery will return to normal automatically; 2. If the problem is not resolved, please upgrade the battery software. 743, 744, 745 3. Please contact the installer or the manufacturer if the issue persists for a long time.
- Page 58 WiNet, and battery software to the latest version. 2. If the problem is not resolved, please check whether the system configuration is correct (SUNGROW single- phase hybrid inverter used with battery system consisting of 2~6 PACKs; SUNGROW three-phase hybrid inverter used with battery system consisting of 3~8 PACKs).
- Page 59 User Manual 10 Troubleshooting and Maintenance Fault Fault Code Corrective Measure Name 1. Check whether there is a heat source near the battery system, and measure the ambient temperature. The op- erating temperature range of the battery system is 0 to 55℃...
-
Page 60: Maintenance
User Manual 10.2 Maintenance Please contact SUNGROW when adding any new PACK for capacity expansion, and perform the operation following the instructions provided by SUNGROW. Oth- erwise, the system performance may be affected, and the system may not be able to work normally. - Page 61 Grounding Check if the system is correctly grounded. Check if the current, voltage, and temperature of the Functions PACKs are in the normal range. Battery capacity auto-calibration is available, however only when SUNGROW hy- brid inverters are used.
-
Page 62: Appendix
11 Appendix 11.1 Technical Data table 11-1 Technical parameters of high voltage LFP battery(SBH100 / SBH150 / SBH200 / SBH250). Parameters SBH100 SBH150 SBH200 SBH250 Technical 2 modules 3 modules 4 modules 5 modules properties System Data Battery Type LiFePO4 Prismatic Cell Battery Module 5.0kWh, 46kg... - Page 63 User Manual 11 Appendix Parameters SBH100 SBH150 SBH200 SBH250 Mounting method Floor stand Operating Charge: 0 to 55℃ temperature Discharge: -20 to 55℃ Degree of IP55 protection Allowable relative 0% to 95% no condensing humidity range Max. operating Max. 2000 m...
-
Page 64: Faqs
11 Appendix User Manual Parameters SBH300 SBH350 SBH400 Dimensions 675*1220*350mm 675*1380*350mm 675*1540*350mm (W*H*D) Weight 292kg 338kg 384kg Installation location Indoor / Outdoor Mounting method Floor stand Operating Charge: 0 to 55℃ temperature Discharge: -20 to 55℃ Degree of protection IP55 Allowable relative 0% to 95% no condensing humidity range... -
Page 65: Soc Jump
3. Please contact the installer or manufacturer immediately in case of anything abnormal during or after the upgrade. 11.3 Quality Assurance When product faults occur during the warranty period, SUNGROW will provide free service or replace the product with a new one. Evidence During the warranty period, the customer shall provide the product purchase invoice and date. -
Page 66: Contact Information
11 Appendix User Manual Exclusion of Liability In the following circumstances, SUNGROW has the right to refuse to honor the quality guarantee: • The free warranty period for the whole machine/components has expired. • The device is damaged during transport.
Need help?
Do you have a question about the SBH100 and is the answer not in the manual?
Questions and answers
DID WE CAN CONTROL THE TIME of discharging the battery to main grid