Table of Contents
Advertisement
Quick Links
Advertisement
Table of Contents
Troubleshooting

Related Manuals for Goulds Pumps ICMB


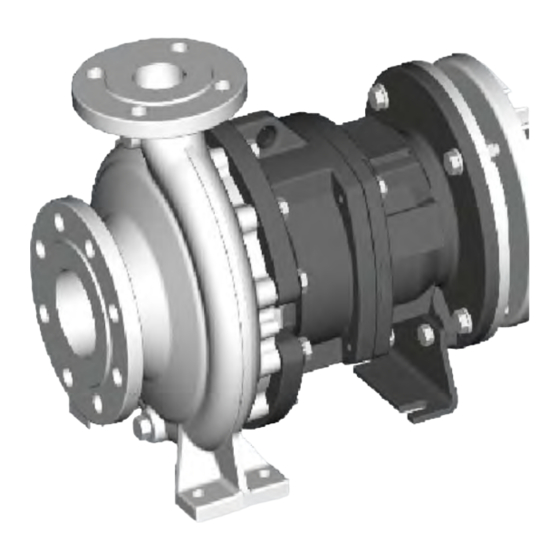
Summary of Contents for Goulds Pumps ICMB
- Page 1 Installation, Operation, and Maintenance Manual Model ICMB...
-
Page 3: Table Of Contents
4.4.2 Permitted nozzle loads and torques at the pump nozzles............. 33 4.4.3 Suction-piping checklist......................... 34 4.4.4 Discharge piping checklist......................37 4.4.5 Bypass-piping considerations ....................... 38 4.4.6 Auxiliary-piping checklist ....................... 38 4.4.7 Final piping checklist ........................39 Model ICMB Installation, Operation, and Maintenance Manual... - Page 4 9 Decommissioning ............................68 9.1 Putting pump out of operation ......................... 68 9.2 Disposal..............................68 10 Certificates ..............................69 10.1 Declaration of no objection........................69 10.2 Declarations of conformity and incorporation ..................70 Model ICMB Installation, Operation, and Maintenance Manual...
- Page 5 Table of Contents 11 Other Relevant Documentation or Manuals ....................74 11.1 For additional documentation ........................ 74 12 Local ITT Contacts ............................75 12.1 Regional offices............................. 75 Model ICMB Installation, Operation, and Maintenance Manual...
-
Page 6: Introduction And Safety
This manual clearly identifies accepted methods for disassembling units. These methods must be adhered to. Never apply heat to aid in their removal unless explicitly stated in this manual. Model ICMB Installation, Operation, and Maintenance Manual... -
Page 7: Safety Terminology And Symbols
Hazard level Indication DANGER: A hazardous situation which, if not avoided, will result in death or seri- ous injury WARNING: A hazardous situation which, if not avoided, could result in death or serious injury Model ICMB Installation, Operation, and Maintenance Manual... -
Page 8: Environmental Safety
Handle and dispose of the processed liquid in compliance with applicable environmental regula- tions. • Clean up all spills in accordance with safety and environmental procedures. • Report all environmental emissions to the appropriate authorities. Model ICMB Installation, Operation, and Maintenance Manual... -
Page 9: User Safety
Noise WARNING: Sound pressure levels may exceed 80 dbA in operating process plants. Clear visual warnings or other indicators should be available to those entering an area with unsafe noise levels. Model ICMB Installation, Operation, and Maintenance Manual... - Page 10 Beware of the risk of a sudden start if the product is used with an automatic level control. • Beware of the starting jerk, which can be powerful. • Rinse the components in water after you disassemble the pump. • Do not exceed the maximum working pressure of the pump. Model ICMB Installation, Operation, and Maintenance Manual...
-
Page 11: Hazardous Liquids
Rinse the eyes with eyewash or running water for at least 15 minutes. Seek medical attention. Chemicals or hazardous fluids Remove contaminated clothing. on skin Wash the skin with soap and water for at least 1 minute. Seek medical attention, if necessary. Model ICMB Installation, Operation, and Maintenance Manual... -
Page 12: Product Warranty
These are the personnel requirements for Ex-approved products in potentially explosive atmospheres: • All work on the product must be carried out by certified electricians and ITT-authorized mechanics. Special rules apply to installations in explosive atmospheres. Model ICMB Installation, Operation, and Maintenance Manual... - Page 13 Keep housing surfaces dust-free. Clean surfaces carefully so that no potentially explosive atmos- phere can occur. • If using a casing heating, ensure that the maximum temperature of the heating medium is at least 15 K lower than the permitted temperature class of the pump. Model ICMB Installation, Operation, and Maintenance Manual...
- Page 14 Maintenance manual (IOM) can cause serious personal injury or damage to the equipment. This in- cludes any modification to the equipment or use of parts not provided by ITT Goulds Pumps. If there is any question regarding the intended use of the equipment, please contact an ITT Goulds representative before proceeding.
- Page 15 For process monitoring, condition-monitoring devices may be utilized. Condition-monitoring devices in- clude but are not limited to these devices: • Pressure gauges • Flow meters • Level indicators • Motor load readings • Temperature detectors • Bearing monitors Model ICMB Installation, Operation, and Maintenance Manual...
- Page 16 • Rotate shaft by hand to ensure it rotates smoothly and there is no rubbing which could lead to excess heat generation, sparks and premature failure. Model ICMB Installation, Operation, and Maintenance Manual...
- Page 17 ITT should be consulted in this context. • Move equipment to a safe/non Ex environment for repairs/adjustments or use spark re- sistant tools and work methods. Model ICMB Installation, Operation, and Maintenance Manual...
-
Page 18: Transportation And Storage
(such as chains, straps, forklifts, cranes, etc.) are rated to sufficient capacity. Keep the pump unit in the same position in which it was shipped from the factory. Close the suction and discharge ends of the pump with plugs for transport and storage. Model ICMB Installation, Operation, and Maintenance Manual... - Page 19 Make sure that the lifting equipment supports the entire assembly and is only used by au- thorized personnel. • Do not attach sling ropes to shaft ends. Lifting the pump Figure 3: Pump lifting Model ICMB Installation, Operation, and Maintenance Manual...
-
Page 20: Storage Guidelines
Treat bearing and machined surfaces so that they are well preserved. Refer to the drive unit and cou- pling manufacturers for their long-term storage procedures. For questions about possible long-term storage treatment services, please contact your local ITT sales representative. Model ICMB Installation, Operation, and Maintenance Manual... -
Page 21: Product Description
The housing dimensions of the pump model ICMB comply with ISO 2858 / DIN EN 22858. The technical requirements and nominal ratings of the pump models ICMB comply with ISO 2858 / DIN EN 22858 / ISO 15783 / DIN ISO 5199. -
Page 22: Installation
Protect the unit from weather and water damage This is applicable if nothing else is specified. due to rain, flooding, and freezing temperatures. Model ICMB Installation, Operation, and Maintenance Manual... -
Page 23: Foundation Requirements
• The concrete foundation must have sufficient firmness according to DIN 1045 or equal standard. Sleeve-type bolts Item Description Baseplate Shims Foundation Sleeve Bolt Figure 4: Sleeve type bolts Model ICMB Installation, Operation, and Maintenance Manual... -
Page 24: Baseplate-Mounting Procedures
Coat the exposed portion of the anchor bolts with a non-bonding compound such as paste wax in order to prevent the grout from adhering to the anchor bolts. Do not use oils or liquid wax. If recommended by the grout manufacturer, coat the foundation surface with a compatible primer. Model ICMB Installation, Operation, and Maintenance Manual... -
Page 25: Install The Baseplate Using Shims Or Wedges
You can use the 4.2.7 Baseplate-leveling worksheet on page 29 when you take the readings. Hand-tighten the nuts for the foundation. 4.2.4 Install the baseplate using jackscrews Tools required: • Anti-seize compound • Jackscrews Model ICMB Installation, Operation, and Maintenance Manual... - Page 26 Level the pads by adjusting the four jackscrews in the corners. Make sure that the machinist's level readings are as close to zero as possible, both lengthwise and across. Use the baseplate-leveling worksheet when you take the readings. Model ICMB Installation, Operation, and Maintenance Manual...
- Page 27 Make sure that the machinist's level readings are as close to zero as possible, both lengthwise and across. Item Description Driver's mounting pads Machinist's levels Foundation bolts Jackscrews Grout hole Pump's mounting pads Figure 10: Level pump mounting pads Hand-tighten the nuts for the foundation bolts. Model ICMB Installation, Operation, and Maintenance Manual...
-
Page 28: Install The Baseplate Using Spring Mounting
Adjust the height and level the baseplate by moving the lower adjusting nuts. When the baseplate is level, tighten the top adjusting nuts so that the top springs are not loose in their followers. Fasten the lower and upper jam nuts on each spring assembly. Model ICMB Installation, Operation, and Maintenance Manual... -
Page 29: Install The Baseplate Using Stilt Mounting
Put a washer onto the stilt. Fasten the stilt assembly with the upper adjusting nut by hand. Screw the upper jam nut onto the stilt by hand. Repeat steps 2 through 4 for all the stilt assemblies. Model ICMB Installation, Operation, and Maintenance Manual... - Page 30 Fasten the lower and upper jam nuts on each stilt. Mounting plate Mounting nut Stilt bolt Foundation cups Washer Upper adjustment nut Mounting washer Mounting bolt Figure 12: Example of an installed stilt assembly Model ICMB Installation, Operation, and Maintenance Manual...
-
Page 31: Baseplate-Leveling Worksheet
4.2 Baseplate-mounting procedures 4.2.7 Baseplate-leveling worksheet Level measurements 1)____________________ 2)____________________ 3)____________________ 4)____________________ 5)____________________ 6)____________________ 7)____________________ 8)____________________ 9)____________________ 10)___________________ 11)___________________ 12)___________________ 13)___________________ 14)___________________ 15)___________________ 16)___________________ 17)___________________ 18)___________________ Model ICMB Installation, Operation, and Maintenance Manual... -
Page 32: Grout The Baseplate
Baseplate Shims or wedges Grout Foundation Sleeve Bolt Figure 13: Pour grout into baseplate Fill the remainder of the baseplate with grout, and allow the grout to set for at least 48 hours. Model ICMB Installation, Operation, and Maintenance Manual... -
Page 33: Piping Checklists
Flange loads from the piping system, including those from the thermal expansion of the piping, must not exceed the limits of the pump. Casing deformation can result in contact with rotating parts, which can result in excess heat generation, sparks, and premature failure. Model ICMB Installation, Operation, and Maintenance Manual... - Page 34 The check valve prevents pump or seal damage due to reverse flow through the pump when the driver is turned off. Model ICMB Installation, Operation, and Maintenance Manual...
-
Page 35: Permitted Nozzle Loads And Torques At The Pump Nozzles
The suction and discharge piping must be designed so that a minimum of forces affect the pump. Do not exceed the force and torque values as shown in the following table. The values are valid for when the pump is operating or when it is idle. Model ICMB Installation, Operation, and Maintenance Manual... -
Page 36: Suction-Piping Checklist
CAUTION: Vary the capacity with the regulating valve in the discharge line. Never throttle the flow from the suction side. This action can result in decreased performance, unexpected heat generation, and equipment damage. Model ICMB Installation, Operation, and Maintenance Manual... - Page 37 If the pump is not self-priming, check that a Use a foot valve with a diameter that is at least equiva- device for priming the pump is installed. lent to the diameter of the suction piping. Model ICMB Installation, Operation, and Maintenance Manual...
- Page 38 The correct distance between the inlet flange of the pump and the closest elbow must be at least five pipe di- ameters. Enough distance to prevent cavitation Eccentric reducer with a level top Model ICMB Installation, Operation, and Maintenance Manual...
-
Page 39: Discharge Piping Checklist
For specific gravity less than 0.60, minimize distance from pump discharge. Check that a check valve is installed in the discharge line, between the isolation valve and the pump discharge outlet. Model ICMB Installation, Operation, and Maintenance Manual... -
Page 40: Bypass-Piping Considerations
23, require manual venting prior to oper- ation. • Running a mechanical seal dry, even for a few seconds, can cause seal failure and physi- cal injury. Never operate the pump without liquid supplied to the mechanical seal. Model ICMB Installation, Operation, and Maintenance Manual... -
Page 41: Final Piping Checklist
Rotate the shaft by hand. Make sure there is no rubbing that can lead to excess heat generation or sparks. Re-check the alignment to make sure that If pipe strain exists, then correct the piping. pipe strain has not caused any misalign- ment. Model ICMB Installation, Operation, and Maintenance Manual... -
Page 42: Commissioning, Startup, Operation, And Shutdown
IOMs and operating procedures. • Excessive warm-up rates can cause equipment damage. Ensure the warm-up rate does not exceed 1.4°C | 2.5°F per minute. NOTICE: You must follow these precautions before you start the pump: Model ICMB Installation, Operation, and Maintenance Manual... -
Page 43: Check The Rotation - Close Coupled
5.3.1 Prime the pump with the suction supply above the pump Slowly open the suction isolation valve. Open the air vents on the suction and discharge piping until the pumped fluid flows out. Close the air vents. Model ICMB Installation, Operation, and Maintenance Manual... -
Page 44: Prime The Pump With The Suction Supply Below The Pump
Open the air vent valves in the casing. Open the valve in the outside supply line until only liquid escapes from the vent valves. Close the vent valves. Close the outside supply line. Model ICMB Installation, Operation, and Maintenance Manual... -
Page 45: Other Methods Of Priming The Pump
Make sure that the ignition temperature of the cooling liquid is at least 50 K higher than the surface temperature of the bearing frame, if the pump is used in potentially explosive environment. Model ICMB Installation, Operation, and Maintenance Manual... - Page 46 When the motor is running but the pump is not conveying, this means that the magnetic drive has stopped. Then proceed as follows: Close disharge valve down to the position minimum flow rate. Start motor again. Model ICMB Installation, Operation, and Maintenance Manual...
-
Page 47: Pump Operation Precautions
) as shown on the published performance curve of the pump. • Do not run pump below minimum pressure at the suction side. Provide monitoring device with automatic switch-off function in case of low pressure. Model ICMB Installation, Operation, and Maintenance Manual... -
Page 48: Inadmissible Modes Of Operations And Their Consequences (Examples)
• Axial thrust too great. Discharge valve opened too much: • Pump can cavitate. Particularly severe with an empty discharge line. • Risk of pressure surge. • Possible damage to the plain bearings. Model ICMB Installation, Operation, and Maintenance Manual... -
Page 49: Shut Down The Pump
Proper personal protective equipment should be worn. Pumpage must be handled and disposed of in conformance with applicable environmental regulations. Slowly close the discharge valve. Shut down and lock out the driver to prevent accidental rotation. Model ICMB Installation, Operation, and Maintenance Manual... -
Page 50: Maintenance
Check the pump capacity. • Check the pump pressure. • Check the pump power. If the pump performance does not satisfy your process requirements, and the process requirements have not changed, then perform these steps: Model ICMB Installation, Operation, and Maintenance Manual... -
Page 51: Disassembly
Keep magnetic drive components and magnetic tools apart by a minimum of 1 m | 3 ft. NOTICE: Use a bench with a non-magnetic work surface such as wood or brass when you work on the pump. Model ICMB Installation, Operation, and Maintenance Manual... -
Page 52: Magnetic Fields
Hex wrenches, sizes 2.5 mm, 3 mm, 5 mm, and 6 mm with a 12.07 cm | 4.75 in. minimum reach • Hex wrench, size 8 mm with 15 cm | 6 in. minimum reach • Torque wrench • Strap wrench • 3/8 in. eyebolt Model ICMB Installation, Operation, and Maintenance Manual... -
Page 53: Prepare The Pump For Disassembly
6.2.6 Remove the frame assembly and shaft Secure the complete pump on a workbench in either a horizontal or a vertical position. Remove the hex screws (901/4) that hold the motor adapter (346) to the lantern (344). Model ICMB Installation, Operation, and Maintenance Manual... - Page 54 Remove the hex screws (901) that hold the motor adapter (346) to the lantern (344). Pull the motor adapter (346) off the motor flange. Loosen the setscrew (904/2) that holds the stub shaft onto the motor shaft. Remove the stub shaft (216) from the motor. Model ICMB Installation, Operation, and Maintenance Manual...
-
Page 55: Dismantle The Lantern, Can And Plain Bearing Pedestal
Impeller nut O-ring (412) (optional) Impeller (230) Distance washer (551) Intermediate ring (509) Impeller key (940) Pull the plain bearing cartridge (310) with plain bearing pedestal (339) out of the inner magnet as- sembly 859. Model ICMB Installation, Operation, and Maintenance Manual... -
Page 56: Dismantling The Plain Bearing
Casing check and replacement WARNING: Risk of death or serious injury. Leaking fluid can cause fire and/or burns. Inspect and ensure gasket sealing surfaces are not damaged and repair or replace as necessary. Model ICMB Installation, Operation, and Maintenance Manual... -
Page 57: Magnet Inspections
2 m | 6 ft. Serious injury to fingers and hands will result if you do not follow this precaution. Driven magnet assembly inspections Perform these checks on the driven magnet assembly (859): Model ICMB Installation, Operation, and Maintenance Manual... -
Page 58: Reassembly
Prior to assembly, remove any metallic particles adhering to parts fitted with magnets. 6.4.1 Reassemble the frame assembly and shaft Slide the stub shaft (216) onto the motor shaft and secure it with the setscrew (904). Model ICMB Installation, Operation, and Maintenance Manual... -
Page 59: Assemble The Drive Magnet
A hex. socket screw key with a minimum length of 120 mm is required for tightening. Stub shaft–to-motor setscrew (904/2) Shaft (216) Motor-to-adapter hex screw (901/6) Frame-to-adapter hex screw (901/4) Close-coupled adapter (346) Frame-to-adapter gasket (400) Drive carrier assembly (858) Drive-to-adapter capscrew (914/1), internal tooth lockwasher (936/1) Model ICMB Installation, Operation, and Maintenance Manual... -
Page 60: Assemble The Plain Bearing Pedestal With Impeller, Inner Magnet Assembly And Plain Bearings
17. The axial play of the plain bearing is automatically set during assembly. 6.4.4 Assemble the can and lantern Place the can gasket (406) in the centering on the plain bearing pedestal (339). Mount can (159) and lantern (344). Model ICMB Installation, Operation, and Maintenance Manual... -
Page 61: Final Assembly
3600 2900 1750 1450 40−25−160 59.2 50.3 40−25−200 64.9 61.1 52.2 48.9 40−25−250 65.2 56.3 50−32−160 64.2 60.4 51.5 48.2 50−32−200 66.4 62.6 53.7 50.4 50−32−250 67.2 58.3 50−32−315 74.5 70.7 61.8 58.5 Model ICMB Installation, Operation, and Maintenance Manual... -
Page 62: Bolt Torque Values
305 | 225 40 | 30 50 | 37 All other screws 60 | 44 90 | 66 150 | 111 220 | 162 Nut torque values This table provides the recommended nut torque values. Model ICMB Installation, Operation, and Maintenance Manual... -
Page 63: Spare Parts
Provide this information when you order spare parts. You can find the required information in the data sheet and the relevant sectional drawing: • Pump model and size • Serial number (order number) • Part name • Sectional drawing, item number Model ICMB Installation, Operation, and Maintenance Manual... -
Page 64: Troubleshooting
The suction or discharge piping Anchor the piping per the Hydraulic Institute is not anchored or properly sup- Standards recommendations (Edition 14, centrifu- ported. gal pump section). The pump is cavitating. Increase the NPSH available. Model ICMB Installation, Operation, and Maintenance Manual... -
Page 65: Alignment Troubleshooting
The baseplate is not Determine which corners of the baseplate are leveled properly and is high or low. probably twisted. Remove or add shims at the appropriate cor- ners. Realign the pump and driver. Model ICMB Installation, Operation, and Maintenance Manual... -
Page 66: Parts Lists And Cross-Sectionals
8 Parts Lists and Cross-Sectionals 8 Parts Lists and Cross-Sectionals 8.1 ICMB close-coupled design Figure 20: ICMB close-coupled design - cross section (valid for type 50-32-160, 65-40-160, 80-50-160) Table 2: Parts list Item No. Description Housing Case drain plug Support bracket... - Page 67 551/1 Distance washer 554/x Washer 557/2 Contact disc 800/1 Motor Drive magnet assembly Inner magnet assembly 901/x Hex screw 904/x Setscrew 914/1 Hex socket screw 920/7 Hex nut 936/1 Tooth lock washer 940/x Model ICMB Installation, Operation, and Maintenance Manual...
- Page 68 8.1 ICMB close-coupled design Figure 21: ICMB close-coupled design - cross section (valid for type 50-32-200, 65-40-200, 80-50-200) Table 3: Parts list Item No. Description Housing Case drain plug Support bracket Hollow drive shaft Inner magnet assembly shell Impeller Impeller nut...
- Page 69 Intermediate ring 551/1 Distance washer 554/x Washer 557/2 Contact disc 800/1 Motor Drive magnet assembly Inner magnet assembly 901/x Hex screw 914/1 Hex socket screw 920/1 Hex nut 936/1 Tooth lock washer 940/x Model ICMB Installation, Operation, and Maintenance Manual...
-
Page 70: Decommissioning
10.1 Declaration of no objection on page 69 with each disassembled component. Recycle disassembled components in accordance with local regulations. A typical procedure is: • Scrap metals • Give plastic elements to recycling • Dispose of remaining components Model ICMB Installation, Operation, and Maintenance Manual... -
Page 71: Certificates
10 Certificates 10 Certificates 10.1 Declaration of no objection Please copy, fill it out and send it with the pump. Model ICMB Installation, Operation, and Maintenance Manual... -
Page 72: Declarations Of Conformity And Incorporation
ATEX - Directive (2014/34/EU) ☐ PED- Directive (2014/68/EU) Harmonized standards used: • EN 349:1993+A1:2008 • EN 12162:2001+A1:2009 • EN 14120:2015 • EN ISO 12100:2010 • EN 13732-1:2008 • EN 809:1998+A1:2009+AC:2010 Obernkirchen, date: Managing Director Technical Manager Model ICMB Installation, Operation, and Maintenance Manual... - Page 73 PESR- Directive (2016 No 1105) Designated standards used: • EN 349:1993+A1:2008 • EN 12162:2001+A1:2009 • EN 14120:2015 • EN ISO 12100:2010 • EN 13732-1:2008 • EN 809:1998+A1:2009+AC:2010 Obernkirchen, date: Managing Director Technical Manager Model ICMB Installation, Operation, and Maintenance Manual...
- Page 74 We also declare that the relevant technical documentation for this incomplete machine was prepared according to appendix VII, Part B and commit ourselves to provide them in copy on demand to the market surveillance authorities. Obernkirchen, date: Managing Director Technical Manager Model ICMB Installation, Operation, and Maintenance Manual...
- Page 75 We also declare that the relevant technical documentation for this incomplete machine was prepared according to appendix VII, Part B and commit ourselves to provide them in copy on demand to the market surveillance authorities. Obernkirchen, date: Managing Director Technical Manager Model ICMB Installation, Operation, and Maintenance Manual...
- Page 76 11 Other Relevant Documentation or Manuals 11 Other Relevant Documentation or Manuals 11.1 For additional documentation For any other relevant documentation or manuals, contact your ITT representative. Model ICMB Installation, Operation, and Maintenance Manual...
- Page 77 Camino La Colina # 1448 Condominio Industrial El Rosal Huechuraba Santiago 8580000 Chile Middle East and Africa ITT - Goulds Pumps +30 210-677-0770 +30 210-677-5642 Achileos Kyrou 4 Neo Psychiko 115 25 Athens Greece Model ICMB Installation, Operation, and Maintenance Manual...
- Page 78 Visit our website for the latest version of this document and more information: http://www.gouldspumps.com ITT Goulds Pumps Inc. 240 Fall Street Senenca Falls 13148 Form IOM.ICMB.en-US.2024-03 ©2024 ITT Goulds Pumps, Inc. The original instruction is in English. All non-English instructions are translations of the original instruction.
Need help?
Do you have a question about the ICMB and is the answer not in the manual?
Questions and answers