Shimadzu GC-2014 Service Manual
Hide thumbs
Also See for GC-2014:
- Instruction manual (318 pages) ,
- Service manual (122 pages) ,
- Operation manual (148 pages)

Related Manuals for Shimadzu GC-2014


Summary of Contents for Shimadzu GC-2014
- Page 1 221-79077 GC-2014 (Preparation Model for RoHS) Service Manual Read the service manual thoroughly before you use the product. Keep this service manual for future reference.
-
Page 2: Product Warranty
Product Warranty Thank you for purchasing this product. Shimadzu provides the following warranty for this product. 1. Period Please contact your Shimadzu representative for information about the period of this warranty. 2. Description If a product/part failure occurs for reasons attributable to Shimadzu during the warranty period, Shimadzu will repair or replace the product/part free of charge. -
Page 3: Introduction
Maintenance parts for this product will be available for a period of seven (7) years after the product is discontinued. Thereafter, such parts may cease to be available. If Shimadzu receives notice of the discontinuation of units or parts, the necessary quantity for the above period is immediately calculated and secured. However, such units or parts may cease to be available within seven years after the discontinuation of the product, depending on individual manufacturer conditions and on changes in the quantity required. -
Page 4: Conventions Used For Precautionary Information
Indicates a potentially hazardous situation which, if not avoided, could result in damage to the product or other property damage. NOTE Indicates information provided to facilitate efficient operation of the equipment or clarify the subject matter. GC-2014 Service Manual... -
Page 5: Table Of Contents
1.4.1 Purity ......................... 8 1.4.2 Supply Pressure ....................8 1.5 Work Related Precautions ..............8 Chapter 2 Configuration of GC-2014........9 2.1 Configuration Diagrams for GC-2014 Series ........9 2.1.1 GC-2014A......................9 2.1.2 GC-2014AF ..................... 10 2.1.3 GC-2014AFsc....................11 2.1.4 GC-2014AFSPL....................11 2.1.5 GC-2014AT...................... - Page 6 4.4 Packed Dual Injector................. 49 Chapter 5 Detector Unit............51 5.1 TCD ....................51 5.1.1 DET HEATER ASSY, FT.................. 52 5.2 FID ....................53 5.2.1 DET HEATER ASSY, F ..................54 5.3 ECD ....................55 5.4 FPD....................57 5.5 FTD-2014C ..................59 GC-2014 Service Manual...
- Page 7 Table of Contents 5.6 FTD-2014..................62 Chapter 6 Maintenance Parts List ........65 6.1 Consumables..................65 GC-2014 Main Unit····························································································· 65 FID-2014 Single·································································································· 65 FPD-2014 ··········································································································· 65 FTD-2014 Capillary ···························································································· 65 FTD-2014 Packed ······························································································ 66 6.2 Maintenance Parts ................67 GC-2014 Main Unit····························································································· 67 FID-2014 Single··································································································...
- Page 8 8.9 Init. for Shipment................87 Chapter 9 Appendix.............89 9.1 GC-2014 Update Software Instruction Manual........89 1. Overview ........................ 89 2. Using Flush ROM Update..................89 3. Updating the GC-2014................... 89 9.2 Changes from the Previous GC-2014 Model ........91 GC-2014 Service Manual...
-
Page 9: Chapter 1 Installation
Recommended temperature range: 18 C to 28 C Recommended humidity range: 50 % to 60 % Operating temperature range: 5 C to 40 C Operating humidity range: 5 % to 90 % (without condensation) GC-2014 Service Manual... -
Page 10: Installation Surface
(1) Changes in the ambient temperature during operation must be kept to a minimum. (2) The instrument must not be directly exposed to the airstream emanating from heating or cooling equipment. (3) The instrument must not be exposed to direct sunlight. (4) Vibrations must be kept to a minimum. GC-2014 Service Manual... -
Page 11: Power Supply
Additional temperature-control block (e.g., INJ) 150 VA or 200 VA (dual FID and TCD only) NOTE The instrument will not attain its performance specifications if the power-supply voltage is unstable or if the power-supply capacity is insufficient. GC-2014 Service Manual... -
Page 12: Gas
1 psi = 6.89 kPa NOTE For precautions on handling high-pressure gas cylinders and using hydrogen gas, refer to the instruction manual for the GC-2014 main unit. 1.5 Work Related Precautions CAUTION Do not make direct contact with the injection unit or detector when they are hot. -
Page 13: Chapter 2 Configuration Of Gc-2014
Chapter 2 Configuration of GC-2014 Chapter 2 Configuration of GC-2014 2.1 Configuration Diagrams for GC-2014 Series 2.1.1 GC-2014A S221-75019-41 GC-2014 ASSY, 100 V GC-2014AD, NONE, DUAL, 100 PACKED DUAL INJ, 100 V S221-75075-41 DUAL AFC ASSY S221-75063-41 ACCESSORY, GC-2014 115 V: S221-75063-41... -
Page 14: Gc-2014Af
Chapter 2 Configuration of GC-2014 2.1.2 GC-2014AF S221-75063-41 (13) GC-2014 ASSY, 100 V GC-2014AF, 100 V 115 V: S221-75052-42 230 V: S221-75052-44 PACKED DUAL INJ, 100 V S221-75075-41 DUAL AFC ASSY S221-75090-41 FID-2014 CELL ASSY, P S221-75040-41 FID-2014 CONTROLLER, DUAL... -
Page 15: Gc-2014Afsc
Chapter 2 Configuration of GC-2014 2.1.3 GC-2014AFsc S221-75020-41 (1) GC-2014 ASSY, 100 V GC-2014AFSC,100 115 V: S221-75020-42 230 V: S221-75020-44 (9) SPL-2014 ASSY, 100 (10) FID-2014,100-120 V S221-75049-41 FLOW CONTROLLER, H2-AIR, FID S221-75049-44 (11) FLOW CONTROLLER, AUX S221-75064-41 (12) ACCESSORY, SPL-2014, SINGLE 2.1.4 GC-2014AFSPL... -
Page 16: Gc-2014At
Chapter 2 Configuration of GC-2014 2.1.5 GC-2014AT S221-75027-41 GC-2014 ASSY, 100 V GC-2014AT, 100 V 115 V: S221-75027-42 230 V: S221-75027-44 PACKED DUAL INJ, 100 V S221-75075-41 DUAL AFC ASSY S221-75086-41 (14) DET HEATER ASSY, FT, 100 V 115 V: S221-75086-42... -
Page 17: Gc-2014Atf
Chapter 2 Configuration of GC-2014 2.1.6 GC-2014ATF S221-75026-41 GC-2014 ASSY, 100 V (19) GC-2014ATF, 100 V 115 V: S221-75026-42 230 V: S221-75026-44 PACKED DUAL INJ, 100 V S221-75075-41 DULA AFC ASSY S221-70090-91 FID-2014 CELL ASSY, P S221-70040-41 FID-2014 CONTROLLER, DUAL... -
Page 18: Gc-2014Atfspl
Chapter 2 Configuration of GC-2014 2.1.7 GC-2014ATFSPL S221-75029-41 S221-75026-41 (19) GC-2014ATFSPL, 100 GC-2014ATF, 100 V 115 V: S221-75029-42 115 V: S221-75026-42 230 V: S221-75029-44 230 V: S221-75026-44 SPL-2014ASSY, 100 S221-70952-91 (20) DETECTOR ADAPTER ASSY GC-2014 Service Manual... - Page 19 Chapter 2 Configuration of GC-2014 GC-2014 ASSY, 100 V COMMON ASSY Shown on next page (A) OVEN HEATER ASSY, 100 V COLUMN OVEN HEATER COLUMN OVEN HEATER ASSY, 100 V S221-43695-41 PT SENSOR ASSY, + S221-43696-91 THERMOCOUPLE, S221-73248-41 WITH CONTACTS, 17A+...
- Page 20 Chapter 2 Configuration of GC-2014 (A) COMMON ASSY OVEN ASSY OVEN UNIT ASSY S221-74501 S221-49480 AIR-INTAKE/EXHAUST GEAR, MOTOR, MODIFIED PIPE ASSY S221-47652 FLAP MOTOR RIGHT PLATE, S221-75120-41 GC-2014 PCB DET I/F, GC-2014 S221-73227-43 S221-73821-42 CPU UNIT, GC-2014 KEY3 ASSY S221-70065-91...
- Page 21 Chapter 2 Configuration of GC-2014 S221-70189-91 PACKED DUAL INJ, 100 V INJECTION UNIT ASSY, 122 S221-744565-41 S221-70484-91 HEATER, PT ASSY, P-INJ100 HEATER, 100 V/150 W ASSY 115 V: 221-74565-42 115 V:S221-70484-92 230 V: 221-74565-44 230 V:S221-70484-34 S221-44584 S221-70596-41 NEEDLE GUIDE, AOC...
- Page 22 Chapter 2 Configuration of GC-2014 S221-71752-92 (9) SPL-2014 ASSY,100 SPL-2014 UNIT, 100-120 INJECTION PORT P ASSY S221-70166-91 BASE, VAPORIZING CHAMBER A ASSY S221-74583-41 S221-70599-91 HEATER, PT ASSY, SPL100 HEATER, 120/150 W ASSY 115 V: S221-74583-41 115 V: S221-70599-91 230 V: S221-74583-44...
- Page 23 Chapter 2 Configuration of GC-2014 S221-75086-41 S221-74567-41 (14) DET HEATER ASSY, FT, 100 V HEATER, PT ASSY, D-FID+ 100 115 V: S221-75086-42 115 V: S221-74567-42 230 V: S221-75086-44 230 V: S221-74567-44 S221-74582-41 S221-70742-91 TCD-2014 CELL ASSY, 100 V HOT PLATE ASSY, 2014+, 100 V...
-
Page 24: Structure Of Gc-2014
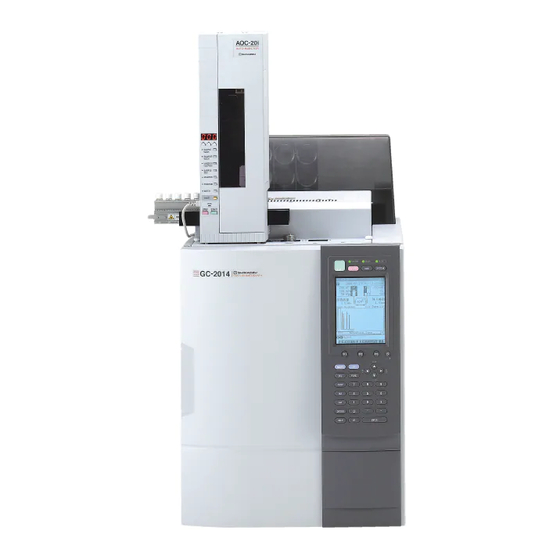
Chapter 2 Configuration of GC-2014 2.2 Structure of GC-2014 2.2.1 External Appearance FLOW CONTROLLER UPPER COVER S221-70515 UPPER COVER S221-70378 KEY COVER S221-70368 DOOR ASSY S221-70065-91 GC-2014 Service Manual... -
Page 25: Structure Diagram 1
Chapter 2 Configuration of GC-2014 2.2.2 Structure Diagram 1 KEY RUBBER 1 S221-46470-01 LCD ASSY 2025 S221-73918-41 KEY RUBBER 2 S221-46471-01 TAPE WIRE ASSY S221-71945-91 GC-2014 Service Manual... -
Page 26: Structure Diagram 2
Chapter 2 Configuration of GC-2014 2.2.3 Structure Diagram 2 POWER UNIT, 2014+, 100 V (100-V system) S221-48460-42 POWER UNIT, 2014+, 230 V (200-V system) S221-48460-49 FILTER, SUPF-EX30-ER-6 PCB DET I/F, GC2014+ S075-00179-03 (100-V system) S221-75120-41 FILTER, SUPF-EX20-ER-6 S075-00179-02 (200-V system) -
Page 27: Structure Diagram 3
Chapter 2 Configuration of GC-2014 2.2.4 Structure Diagram 3 MOTOR ASSY S221-73248-41 MOTOR ASSY, 115 S221-73248-42 MOTOR ASSY, 230 S221-73248-48 2.2.5 PT Sensor and Thermocouple Silicon glass tube Top of the element PT SENSOR ASSY+ (S221-43695-41) The top of the element must face front. -
Page 28: Heater And Pt Sensor/Thermocouple
Chapter 2 Configuration of GC-2014 2.2.6 Heater and PT Sensor/Thermocouple HEATER ASSY Heater Part Name Resistance Value 100 V S221-75052-41 COLUMN OVEN HEATER ASSY, 100 V, 1.3 kW 7.1 to 7.9 115 V S221-75052-42 COLUMN OVEN HEATER ASSY, 115 V, 1.3 kW 9.5 to 10.3... -
Page 29: Fan
Chapter 2 Configuration of GC-2014 2.2.8 Fan Fit the fan (P/N S221-73600) to the motor shaft, attaching it at a position 5 mm 1 mm from the back. In this configuration, fasten the fan with the set screw included with the fan. -
Page 30: Structure Of Oven Cooling Unit
Chapter 2 Configuration of GC-2014 2.2.9 Structure of Oven Cooling Unit GEAR, MOTOR, MODIFIED S221-49480 WASHER, SUS, SPRING 2, M3 S023-77030 BRG, R-ARF0508 S031-40232 SPACER, SQ-25 RETAINING RING, E-SHAPED, SUS 4.0 S037-38858-65 S026-66204 SPRING, FLAP GEAR S221-49694-03 GEAR, SHAFT, MODIFIED... - Page 31 Chapter 2 Configuration of GC-2014 P3 M3 4 PIECES CROSS PAN WASHER SCREW M3 4 PIECES W M3 2 PIECES EACH (4 PIECES IN TOTAL) SPACER SPC 3 4 PIECES W M3 4 PIECES PLAIN P2 M3...
-
Page 32: Electric Circuits
Chapter 2 Configuration of GC-2014 2.3 Electric Circuits 2.3.1 Block Diagram Controller for detectors Power unit CPU unit, GC-2014+ Flat cable 34P Note: One AFC can be mounted to one odd-numbered slot and one even-numbered slot. The AFCs are recognized as CAR1 and CAR2 in order of increasing slot number. -
Page 33: Function Of Each Board
Chapter 2 Configuration of GC-2014 2.3.2 Function of Each Board CPU Unit, GC-2014 Central processor Power Unit This unit detects the temperature of the oven, detector, and injection port, and regulates the temperature of each part by controlling the heater current. It also controls the CRG, high speed cooling unit, and AOC power switching. -
Page 34: Power Unit: Functional Block Diagram
Chapter 2 Configuration of GC-2014 2.3.3 Power Unit: Functional Block Diagram CRG, AOC, and high Oven, DET, INJ speed cooling unit Temperature Heater control Power ON/OFF detection for each part A/D conversion SSR control SSR control Power unit Output to CPU... -
Page 35: Pcb Key Assembly: Functional Block Diagram
Chapter 2 Configuration of GC-2014 2.3.5 PCB Key Assembly: Functional Block Diagram The key is pressed. Voltage Key signal conversion PCB key ASSY The CPU performs detection Window signal Contrast adjustment at regular intervals. CPU unit Fig. 2.3.4 PCB Key Assembly: Functional Block Diagram... -
Page 36: List Of Controllers
Chapter 2 Configuration of GC-2014 2.3.6 List of Controllers Name of Detector Name of Controller S221-70041-41 TCD-2014+ Controller FID, Single S221-46520-42 FID-2014 Controller AF, FTD, Auxiliary FID: FID, Dual S221-70040-41 FID-2014 Controller DUAL+ AF, ATF, AF/SPL, ATF/SPL: S221-75032-41 ECD-2014, Controller, 100... -
Page 37: Chapter 3 Gas-Flow Controller
VALVE ASSY DIFFERENTIAL PRESSURE SENSOR ASSY AFC_WBI (Direct) (Assembly Configuration Chart) S221-73335-44 FLOW BOARD ASSY, AFC2 AFC-2014+, WBI PCB ASSY, AFC-2010+ PCB, AFC3 GC-2010+ S221-48625-91 PIPING ASSY WBI S221-48813-91 "-81" for maintenance VALVE ASSY DIFFERENTIAL PRESSURE SENSOR ASSY GC-2014 Service Manual... - Page 38 Chapter 3 Gas-Flow Controller AUX-AMC_Single Packed INJ S221-74627-41 FLOW BOARD ASSY, DUAL AUX-AMC ASSY PCB ASSY, AMC S221-48585-91 PIPING ASSY S221-48813-91 VALVE ASSY DIFFERENTIAL PRESSURE SENSOR ASSY DIFFERENTIAL PRESSURE SENSOR ASSY, LONG GC-2014 Service Manual...
-
Page 39: Manual Flow Controller
3PC RUBBER PLUG, INJECTION PORT, SILICONE MAINTENANCE S221-09864-18 2PC PIPE, MF-MM17, 2 180 PIPE, PG-MF-MF ASSY S221-19503-08 RESISTANCE TUBE, AIR, GC-8AF MAINTENANCE S221-41410-91 1PC PIPE, M5-MF ASSY PIPE, PG-MF-MF-MMASS S201-48557-25 2PC PIPE, MN2W-MM2W MARK BAND H MARK BAND A GC-2014 Service Manual... - Page 40 Chapter 3 Gas-Flow Controller resistance tube: (26) Insert with rubber plug for port (27). Air resistance tube: (32) Insert with rubber plug for port (27). Air resistance tube: (32) Insert with rubber plug for port (27). GC-2014 Service Manual...
-
Page 41: Ftd
S201-30219 4PC SOCKET RUBBER PLUG, INJECTION PORT, S221-47435 SILICONE MAINTENANCE S221-09864-18 2PC PIPE, MF-MM17, 2 180 PIPE, PG-MF-MF ASSY S221-19503-08 RESISTANCE TUBE, AIR, GC-8AF MAINTENANCE S201-48557-25 2PC PIPE, MN2W-MM2W MARK BAND H MARK BAND A GC-2014 Service Manual... - Page 42 Chapter 3 Gas-Flow Controller resistance tube Inlet: Side with red mark Air resistance tube Air resistance tube: (32) Insert with rubber plug for port (27). GC-2014 Service Manual...
-
Page 43: Fpd
2PC PIPE, MF-MM17, 2 180 PIPE, PG-MF-MF ASSY S221-19503-08 RESISTANCE TUBE, AIR, GC-8AF MAINTENANCE S221-41410-91 2PC PIPE, M5-MF ASSY PIPE, PG-MF-MF-MMASS S221-70720-02 1PC FPD, RESISTANCE TUBE S201-48557-25 2PC PIPE, MN2W-MM2W MARK BAND H MARK BAND A GC-2014 Service Manual... - Page 44 Chapter 3 Gas-Flow Controller resistance tube: (26) Insert with rubber plug for port (27). Air resistance tube: (32) Insert with rubber plug for port (27). GC-2014 Service Manual...
-
Page 45: Aux
S221-23391-91 RESISTANCE TUBE, HYDROGEN, GC-8A REPLACEMENT RUBBER PLUG, INJECTION PORT, S201-35584 SILICONE REPLACEMENT S221-09864-18 1PC PIPE, MF-MM17, 2 180 PIPE, PG-MF-MF ASSY S201-48557-25 1PC PIPE, MN2W-MM2W resistance tube: (26) Insert with rubber plug for port (27). GC-2014 Service Manual... -
Page 46: Apc (Optional)
APC_FTD (Assembly Configuration Chart) S221-73340-45 FLOW BOARD ASSY, APC2 APC-2014+, FID PCB ASSY, APC PCB APC ASSY, 3CH PIPING ASSY, APC S221-48813-91 VALVE ASSY PIPING ASSY, APC, INLET S221-18713-95 FTD-9 RESISTANCE TUBE ASSY, H2 S221-18713-96 FTD-9 RESISTANCE TUBE ASSY, AIR GC-2014 Service Manual... -
Page 47: 2Ch Apc
VALVE ASSY PIPING ASSY, FPD, OUT 3.1.3.3 1ch APC APC_ECD (Assembly Configuration Chart) S221-73342-42 FLOW BOARD ASSY, APC2 APC-2014+, ECD PCB ASSY, MAKEUP PCB APC ASSY, 1CH PIPING ASSY, ECD, OUT S221-48813-91 VALVE ASSY PIPING ASSY, ECD, INLET GC-2014 Service Manual... - Page 48 Chapter 3 Gas-Flow Controller This page is intentionally left blank. GC-2014 Service Manual...
-
Page 49: Chapter 4 Sample Injection Unit
HEATER, 120 V/150 V ASSY HEATER, PT, ASSY, SPL, 230 HEATER, 240 V/124 V ASSY HEAT SENSITIVE MATERIAL, INJ+ S221-73335-43 AFC-2014+, WBI PIPING ASSY, S221-42559-92 AFC-WBI, ADDITION FILTER ASSY, WITH BLIND S221-34121-94 MS FILTER, CONDITIONING S221-48609-91 3-PORT PIPE ACCESSORY ASSY, WBI-2014 GC-2014 Service Manual... -
Page 50: Piping For Sample Injection Unit
3-port pipe Molecular sieve filter (Total flow control valve) Flow sensor (Back of instrument) Pressure sensor Pressure Filter ASSY Control mode = pressure, sensor flow, or linear velocity (Septum purge control valve SPL unit Detector Column oven Column GC-2014 Service Manual... -
Page 51: Configuration Of Injection Unit
HEATER, PT ASSY, SPL100 CARRIER/PURGE LINE (HEATER, PT ASSY, SPL230) INSULATOR, UPPER SPLIT LINE BASE, INJECTION UNIT A ASSY (Shaded area) PARALLEL PIN, SUS1.64 INSULATOR, SPL HEATER BLOCK, SPL NUT, M10 NIPPLE, FOR GASKET WASHER, MM NUT, MF GC-2014 Service Manual... -
Page 52: Assy, Spl, 230
18 mm). Insert the heater in the heater block, with the orientation shown below, until it hits the bottom. To prevent short-circuiting of the lead wires, bend them at points 1 to 2 mm from the bottom while pressing them so as not to apply stress to the heater insulator. GC-2014 Service Manual... -
Page 53: Packed Dual Injector
COVER, PACKED DUAL INJ HOLDING PLATE, HEATER LOCK RING HEAT SENSITIVE MATERIAL, PACKED 1 HEAT SENSITIVE MATERIAL, PACKED 2 HEAT SENSITIVE MATERIAL, PACKED 3 S221-44584 NEEDLE GUIDE, AOC S221-70466 FIN, 2014 RUBBER PLUG, INJ PORT, SILICONE S221-22206 SPACER, INJ GC-2014 Service Manual... - Page 54 Chapter 4 Sample Injection Unit This page is intentionally left blank. GC-2014 Service Manual...
-
Page 55: Chapter 5 Detector Unit
HOT PLATE ASSY, 2014, 100 V HOT PLATE ASSY, 2014, 115 V 2 (Left) S221-32577-91 PIPE ASSY, COL-TCD 1 (145 mm) 2 (Right) S221-32577-92 PIPE ASSY, COL-TCD 2 (210 mm) S221-74600-41 TCD, 100 OHMS, 2014+ S221-14018 BLOCK, DETECTOR COVER GC-2014 Service Manual... -
Page 56: Det Heater Assy, Ft
HEATER, PT ASSY, D-FID, 100 HEATER, PT ASSY, D-FID, 115 221-70125 DET, DUAL, UPPER COVER, TCD 221-70127 DET, DUAL, BLOCK PLATE A 221-70139 LOCK RING, DET, DUAL 221-70141 TCD BLOCK 221-70136 DET, DUAL, BLOCK, UPPER 221-70137 DET, DUAL, BLOCK, LOWER GC-2014 Service Manual... -
Page 57: Fid
Parts List for FID-2014 CELL ASSY, S221-70090-91 Part Name Quantity S221-70630-91 FID-2014 CELL BASE ASSY 11-1 S221-70298-91 BASE UNIT, ASSY, FID 11-2 S221-70162-92 NOZZLE ASSY, PACKED 11-3 S221-47146-92 HIGH VOLTAGE ELECTRODE, FID-2014 S221-47659-92 COLLECTOR ASSY, FID, 600MM S221-41847-93 FILAMENT ASSY, 180MM GC-2014 Service Manual... -
Page 58: Det Heater Assy, F
HEATER, PT ASSY, D-FID 230 HEATER, PT ASSY, D-FID 100 HEATER, PT ASSY, D-FID 115 DET, DUAL, UPPER COVER, FID DET, DUAL, BLOCK PLATE A LOCK RING, DET, DUAL DET, DUAL, BLOCK, UPPER DET, DUAL, BLOCK, LOWER GC-2014 Service Manual... -
Page 59: Ecd
Chapter 5 Detector Unit 5.3 ECD Radiation warning sign Mechanism check sign Electrode Hermetic sticker Heater ASSY To vent Make-up gas inlet (Purge gas) Radiation source ECD cell body Capillary adapter (ECD) Nut M10 cell fixing GC-2014 Service Manual... - Page 60 1PC GRAPHITE JIG, ECD-2014 S202-58258-02 1PC JOINT, GL-GN, 20.5MT S201-48560-05 1PC PIPE, MF-GF 50 S201-32069 1PC WASHER S201-48464 1PC NUT M8 S221-34121-94 1PC MS FILTER, CONDITIONING ADHESIVE NAMEPLATE, MAKEUP CABLE TIE, T30R S070-41154 1PC CONNECTOR, UG-306/V (40) GC-2014 Service Manual...
-
Page 61: Fpd
Chapter 5 Detector Unit 5.4 FPD GC-2014 Service Manual... - Page 62 S221-33193-91 1PC CAPILLARY ADAPTER, DET SIDE S221-41532-90 1PC GRAPHITE JIG, FPD2014 S221-32705 1PC CAP NUT, M5´0.5, SLOTTED S221-70180 1PC DUCT, FPD S201-48557-30 2PC PIPE ASSY, MN-MM S201-48386 1PC BRANCHED PIPE, MM-MF-MF S221-73473-91 1PC BRANCHED PIPE, L MM-MF-MF GC-2014 Service Manual...
-
Page 63: Ftd-2014C
Chapter 5 Detector Unit 5.5 FTD-2014C GC-2014 Service Manual... - Page 64 Chapter 5 Detector Unit S020-05143 M335 SCREW S023-77030 SPRING WASHER, M3 S023-66130-01 WASHER, M3 S037-38871-97 SPACER, BSU-318 GC-2014 Service Manual...
- Page 65 1PC CONTROLLER, FTD-2014+ S221-48324-01 FTD+ COLLECTOR, SPECIAL, PACKING 1PC KNOB, S S221-46520-42 S221-48324-02 FID/FTD2014+C, 100 V/230 V 1PC FID-2014 CONTROLLER 1PC KNOB, L S221-75049-42 FID/FTD2014+C, 100 V/230 V 1PC FLOW CONTROLLER, H2-AIR, FTD S221-75049-44 1PC FLOW CONTROLLER, AUX GC-2014 Service Manual...
-
Page 66: Ftd-2014
Chapter 5 Detector Unit 5.6 FTD-2014 GC-2014 Service Manual... - Page 67 Chapter 5 Detector Unit GC-2014 Service Manual...
- Page 68 DET, SINGLE, UPPER COVER RETAINER PLATE, DET, SINGLE LOCK RING, DET, SINGLE DET, SINGLE, BLOCK, UPPER DET, SINGLE, BLOCK, LOWER S020-46534 SCREW, SUS, SEMS, P3, M36 SCREW, SUS, SEMS, P4, M325 S020-46542 SCREW, SUS, SEMS, P3, M330 GC-2014 Service Manual...
-
Page 69: Maintenance Parts List
Chapter 6 Maintenance Parts List The main maintenance parts for the GC-2014 (Preparation Model for RoHS) are as follows. Note: Compatibility (: Parts for the Preparation Model for RoHS can be used with conventional models; : An adapter is provided; : Incompatible) 6.1 Consumables... -
Page 70: Ftd-2014 Packed
FTD-2014 Packed Description Previous P/N Compatibility Remarks S221-34121-94 MS FILTER Conditioning complete NOZZLE ASSY, PACKED, 0.5 S221-70162-92 S221-18704-91 FTD COLLECTOR (STANDARD) For general use S221-42512-91 FTD COLLECTOR (SPECIAL) For pesticide analysis etc. GC-2014 Service Manual... -
Page 71: Maintenance Parts
S221-47652 FLAP MOTOR S221-73918-41 LCD ASSY, GC-2025 S221-48721-91 With gasket S221-73821-42 PCB KEY ASSY, GC-2014 S221-70250-91 Change to new LCD scheduled S221-46470-01 KEY RUBBER 1, KEY PANEL S221-46471-01 KEY RUBBER 2, KEY PANEL S221-75120-41... -
Page 72: Fid-2014 Single
S221-75049-83 FLOW CONTROLLER, H2-AIR, FPD S221-70049-93 specifications S221-19502-08 RESISTANCE TUBE, H2 Resistance tube only (for H2) S221-31745 HOUSING, RESISTANCE TUBE S201-48386 BRANCHED PIPE, MM-MF-MF BRANCHED PIPE, L, MM-MF-MF S221-73473-91 (LEFT-HAND THREAD) GC-2014 Service Manual... -
Page 73: Ftd-2014 Capillary
TCD CELL ASSY, 230 V S221-70098-38 S221-74600-41 TCD 100 OHM, 2014+ S221-70744-91 S221-75086-41 DET HEATER ASSY, FT, 100 S221-70086-91 S221-75086-42 DET HEATER ASSY, FT, 115 S221-70086-92 S221-75086-44 DET HEATER ASSY, FT, 230 S221-70086-34 GC-2014 Service Manual... -
Page 74: Dfid
N BELLOW VALVE, 2K S221-18150-91 N BELLOW VALVE 2K, WITH S221-41511-41 S221-41511-91 RESISTANCE S221-70483-91 SOLENOID VALVE ASSY For FID, FPD flow controller For conversion from S221-73356-91 HYDROGEN TUBE ADAPTER right-hand thread to left-hand thread GC-2014 Service Manual... -
Page 75: Troubleshooting
3,000 to 6,000. If the offset value is well outside this range, perform offset calibration. (The method is described in the GC-2014 instruction manual.) If the gain value is well outside this range, obtain the correct value from Shimadzu Corporation's Quality Assurance Department. - Page 76 3,000 to 6,000. If the offset value is well outside this range, perform offset calibration. (The method is described in the GC-2014 instruction manual.) If the gain value is well outside this range, obtain the correct value from Shimadzu Corporation's Quality Assurance Department.
- Page 77 3,000 to 6,000. If the offset value is well outside this range, perform offset calibration. (The method is described in the GC-2014 instruction manual.) If the gain value is well outside this range, obtain the correct value from Shimadzu Corporation's Quality Assurance Department.
-
Page 78: When The [Control Mode] Is [Total Flow] And The [Split Mode] Is [Direct]
7,000 to 12,000. If the offset value is well outside this range, perform offset calibration. (The method is described in the GC-2014 instruction manual.) If the gain value is well outside this range, obtain the correct value from Shimadzu Corporation's Quality Assurance Department. - Page 79 3,000 to 6,000. If the offset value is well outside this range, perform offset calibration. (The method is described in the GC-2014 instruction manual.) If the gain value is well outside this range, obtain the correct value from Shimadzu Corporation's Quality Assurance Department.
-
Page 80: Precautions For Flowrate Control Settings (Detapc)
3,000 to 10,000. If the offset value is well outside this range, perform offset calibration. (The method is described in the GC-2014 instruction manual.) If the gain value is well outside this range, obtain the correct value from Shimadzu Corporation's Quality Assurance Department. -
Page 81: Temperature Control
After removing the igniter, clean the metal portion of the collector in a liquid such as hexane. (Refer to 4.11.2 Maintenance The collector is dirty. Procedures in the Operation Manual for details on mounting and removing the collector.) The H flowrate is fluctuating. Replace the APC. GC-2014 Service Manual... -
Page 82: Fpd
C-R8A and to "PC" in the case of GCsolution. Specify the setting in accordance with the Chromatopac The analog signal-type setting is incorrect (in the used. (Refer to 2.2 Outputting Analog Signals to the case of analog output). Chromatopac in the Instruction Manual.) GC-2014 Service Manual... -
Page 83: Other Problems
2. Chromatopac is not started by GCSTART when the Chromatopac signal cable is used. Cause Countermeasure The channel started by the link device code in Set the channel started to ON. [Configuration settings] is not ON. GC-2014 Service Manual... - Page 84 4. The baseline fluctuates when ready status is entered after sample injection. Cause Countermeasure Either set [Zero at Ready] to OFF in [Other [Zero at Ready] is ON. configuration settings] or program so that ready status is not entered during analysis. GC-2014 Service Manual...
-
Page 85: Service Window
"Check the value set for No. XXXX with the ID window" issued from our Quality Assurance Department. It is planned that this window will be used for remote maintenance in the future. GC-2014 Service Manual... -
Page 86: Flow Adjust (Car)
PrimOfs (pf6)..Performs offset calibration of the primary pressure sensor (pressure of supply to GC-2014). When performing offset calibration, be sure to remove the GC-2014's carrier-gas supply piping from the GC-2014. Normally, the value should be in the range 32,000 to 33,000. -
Page 87: Flow Adjust (Detapc) (Options Only)
ROM wrt pf5: BASE, INJECTION UNIT A ASSY 8.3 Flow Adjust (AUX APC) Note: There is no display for AUX APCs that have not been installed. Default value Default value Default value pf4: ROM wrt pf5: Offset GC-2014 Service Manual... -
Page 88: Temp. Sensor Use Time
Note: The display items vary with the unit. With the GC-2014, the time for which the temperature sensor has been used at a temperature of 300 C or higher is calculated. As a rough guide, a warning is issued after approx. -
Page 89: Serial Number
The type of character can be changed using the pf2 and pf3 keys. The pf2 key is used to switch between alphabetical and numerical characters, and the pf3 key is used to switch between upper and lower case. GC-2014 Service Manual... -
Page 90: Unit Serial Numbers
The letter that appears before "S/N" can be used to ascertain the attached/removed status of the corresponding part. A: Attached R: Removed If all the information cannot be displayed together, the window can be scrolled. The pf3 key is enabled when Chromatopac is connected. GC-2014 Service Manual... -
Page 91: Fan & Lcd Use Time
After replacing the column-oven fan or the LCD unit, reset the corresponding operation time. pf2: Pressing [Reset] clears the counter at the cursor position. 8.9 Init. for Shipment This window is used only when being shipped from the factory. CAUTION Do not use this window. GC-2014 Service Manual... - Page 92 Chapter 8 Service Window This page is intentionally left blank. GC-2014 Service Manual...
-
Page 93: Chapter 9 Appendix
9.1 GC-2014 Update Software Instruction Manual 1. Overview The Flush ROM Update software is used to update the GC-2014. Be careful, as this is completely different from the update method to date using "ktx". With Flush ROM Update, you can select the connection COM port. - Page 94 Chapter 9 Appendix 3.3 GC-2014 Settings (Transmission Rate Settings and Update Settings) Turn OFF the GC-2014. Press and hold the HELP key and SET key while turning it ON again. The [GC-2014 Boot Loader << Boot menu >>] menu will be displayed.
-
Page 95: Changes From The Previous Gc-2014 Model
Chapter 9 Appendix 9.2 Changes from the Previous GC-2014 Model 1. Nameplate Changes Preparation Model for RoHS Non-RoHS Compliant Model 2. Changes to GC Chassis Cooling Port Shape and Finger Guard Duct shape change (square octagonal) Back panel changes... - Page 96 7. Motor Changes (In common with the 2010Plus) Changes to the motor fastening method (Floating mount abolished, close to 2025) Preparation Model for RoHS Non-RoHS Compliant Model 8. Flap Size Changes in Accordance With Expanded Intake/Exhaust Port for Oven Interior GC-2014 Service Manual...
- Page 97 Chapter 9 Appendix 9. Flap Shaft Attachment Parts Changed: Supply/Exhaust Oven Back Panel (Same as 2025) Preparation Model for RoHS Non-RoHS Compliant Model 10. Abolished Fastening of Flap Return Spring with Tape GC-2014 Service Manual...
- Page 98 Chapter 9 Appendix This page is intentionally left blank GC-2014 Service Manual...
Need help?
Do you have a question about the GC-2014 and is the answer not in the manual?
Questions and answers