Advertisement
Advertisement
Table of Contents

Subscribe to Our Youtube Channel
Related Manuals for Mistral MPAC1600R


Summary of Contents for Mistral MPAC1600R
- Page 1 16K BTU Portable Aircon with Remote MPAC1600R PORTABLE AIR CONDITIONER...
-
Page 2: Important Safety Instructions
IMPORTANT SAFETY INSTRUCTIONS Warning • This appliance is not intended for use by individuals with reduced physical, sensory, or mental capabilities, or those who lack experience and knowledge unless they have been given supervision or instruction by a person responsible for their safety. •... -
Page 3: Product Technical Parameters
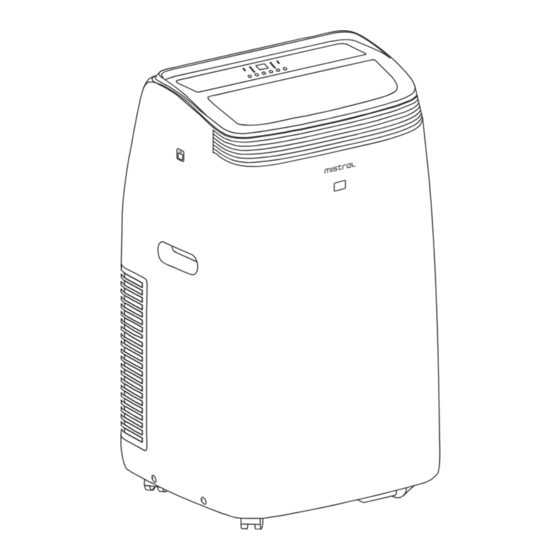
PRODUCT TECHNICAL PARAMETERS MODEL RATED VOLTAGE RATED POWER AIR FLOW AREA MPAC1600R 220-240V~ 50Hz 1560 W 410 m 16-27 m INTRODUCTION OF PARTS Control Panel De ector Remote Control Reciever Handles Castors Intake Grille Middle Drainage Air Outlet Grille Intake Grille... - Page 4 Accessories Hose Exhaust Hose Hose Outlet Battery Window Slider Kit Control Panel Remote Control Note: • “ * “ means the heat symbol only the heat pump model have this function. • “ ** “ means only Wi-Fi model have this function. •...
-
Page 5: Controls And Operations
CONTROLS AND OPERATIONS Installation Exhausting hot air When use the appliance in cool mode, the hot air exchange of the condenser must be exhausted out of the room completely. First position unit on a at oor and make sure there's a minimum of 18”(45cm) clearance around the unit, and is within the vicinity of a single circuit outlet power source. - Page 6 Window Slider Kit Installation Installation Parts Panel Panel with one hole Screw to lock window kit in place How to assemble the window slider kit: Slide Panel B into Panel A and size to window width. Windows sizes vary. With the width that your window requires to ensure that there are no gaps or air pockets in the window kit assembly after installation.
- Page 7 Cool Mode Ideal for hot muggy weather when you need to cooling and dehumidify the room. To set this mode correctly: Press the Mode button a number of times until the cool symbol appears. Select the target temperature18˚C - 32˚C by pressing. The increase or decrease button until the corresponding value is displayed.
- Page 8 Smart Mode • The appliance chooses automatically whether to operate in cool, fan or heat (certain • models only) mode. To set this mode correctly, press the Mode button until the Sleep icon appears and until the screen show like below: •...
- Page 9 Oscillation This function moves the de ectors to adjust the direction of the air ow. To set this function correctly: Select the operating mode (cool, dry, fan) as described above. Press the Oscillation button to select the horizontal de ector to automatically move up and down.
- Page 10 Temperature When the appliance is running, press and hold the Temperature button to change the unit • of temperature. • For example: Before change, in cool mode, the screen display like g1. After change, in cool mode, the screen display like g2. Fig.
- Page 11 Turbo Press the Function button and the Turbo icon will ash on display. Press the Function button again to con rm and the Turbo icon starts. This function set the appliance directly to Cool mode with setting temperature 18˚C and High fan speed in order to reach low temperature in the shortest time.
- Page 12 Remote Control How to use the Remote Control • Point the remote control at the receiver on the appliance. • The remote control must be no more than 7 meters away from the appliance (without obstacles between the remote control and the receiver). •...
-
Page 13: Wifi Operation
WIFI OPERATION Operation Steps Items New Account Re-install App (Registered Before) Download and Install the App Active App Registration Account Login Add Device to Control Registered Device will remain. This device complies with part 15 of the FCC Rules. Operation is subject to the following two conditions: •... - Page 14 Basic parameters for Wi-Fi: Parameters Details Network Frequency 2.400 - 2.500GHz Standards of WLAN IEEE 802.11 b/g/n(channels 1-14) Download and Install the App Method 1 • Please scan the QR code with a browser scanner, download and install the App. Method 2 •...
- Page 15 Registration Enter your E-mail address. Tap the button "Get Veri cation Code". Enter the veri cation code you received from E-mail. Set the Password with 6-20 characters including characters and numbers. Tap "Done". Log in If you already have account, tap "Log in with Existing Account". Enter your registered account and password.
- Page 16 Registration If you don't have any account please tap button "Register". Read the "Privacy Policy" and tap "Agree". Tap " > " and choose the country. • Search the country or slide the screen up/down to nd and choose the country.
- Page 17 Forgot the password If you forgot the password or you want to reset the password, operate as below: Tap "Forgot password". Enter your account(E-mail address) and tap button "Get veri cation code". Enter the veri cation code received by your E-mail. Set the new password and tap button "Done".
- Page 18 CF mode Click “ ” in the upper right corner of the "Home" screen or tap "Add device" on the room which has no device. Tap the "Portable Air Conditioner” logo. Input the password of the Wi-Fi which the same as your smart phone connected, then tap "Next".
- Page 19 Click “ ” in the upper right corner and select the "CF Mode" or “EZ mode”, and tap "Next". AP mode Note • The original state of the newly bought unit is in CF mode If you choose to use AP mode, Please press the “FAN” button 6 times within 4 seconds, wait about 10 seconds, until the LED screen show “AP”, then start to connect it.
- Page 20 Tap the "Portable Air Conditioner” logo. Input the password of the Wi-Fi which the same as your smart phone connected, then tap "Next". (Note: Please make sure the “Password” is correct, or the connect will be failure.) Power on the appliances, no need to launch the appliances. Follow the comments on the next screen, Click “...
- Page 21 Select the device as name “Smartlife-XXXX” at the WLAN setting, then back to the APP interface, the APP will automatically do match. You can see the percent rate of connecting process, at the same time "PP", "SA", "AP" shining in turn on the appliances display. •...
- Page 22 If connect Wi-Fi failure, please try to reset WIFI module and connect it again. Reset methods There are three methods to reset the WIFI module: Press the “FAN” button on the control panel 6 times within 4 seconds; Hold the “ON/OFF” button on the control panel about 5 seconds; Hold the “Mode”...
-
Page 23: Troubleshooting
TROUBLESHOOTING Problem Analysis of cause Please enable the permissions of Storage / Location / Camera / Wi-Fi / Bluetooth for this APP when installing. Otherwise it will have some problems when operating. Check the mobile connected WLAN router SSID and password is correct. - Page 24 Water drainage method • When there is excess water condensation inside the unit, the appliance stops running and shows “ ”(FULL TANK as mentioned in SELF-DIAGNOSIE). This indicates that the water condensation needs to be drained using the following procedures: Manual Draining Water may need to be drained in high humidity areas Unplug the unit from power source.
- Page 25 Middle drainage When unit running in Dry mode, you can choose the way below to drainage. Unplug the unit from the power source. Remove the drain plug( g A). While doing this operation some residual water may spill so please have a pan to collect the water. Connect the drain hose (1/2"...
-
Page 26: Cleaning And Maintenance
CLEANING AND MAINTENANCE • Before cleaning or maintenance, turn the appliance o by pressing the Power button on the control panel or remote control, wait for a few minutes then unplug from the mains socket. Cleaning the Cabinet • Clean the appliance with a slightly damp cloth then dry with a dry cloth. •... - Page 27 TROUBLESHOOTING Problem Cause of Issue Solution Please contact the Service Centre. The appliance has a self diagnosis Empty the internal safety tank, system to identify a number of following the instructions in the Probe Failure (Sensor Damaged) malfunctions. "End of season operations" paragraph.
Need help?
Do you have a question about the MPAC1600R and is the answer not in the manual?
Questions and answers