Table of Contents
Advertisement
Quick Links
Thank you for purchasing the AHUJA Direct Coupled Class D Amplifier.
t
t
Please read this manual thoroughly before making connections and turning on the power.
Following the instructions in this manual will enable you to obtain optimum performance from your
new AHUJA Direct Coupled Class D Amplifier.
t
Please retain this manual for future reference.
®
XDA-7002
Dual Channel
Class D Amplifier
2400W + 2400W RMS
Advertisement
Table of Contents

Related Manuals for Ahuja XDA-7002


Summary of Contents for Ahuja XDA-7002
- Page 1 2400W + 2400W RMS XDA-7002 Thank you for purchasing the AHUJA Direct Coupled Class D Amplifier. Please read this manual thoroughly before making connections and turning on the power. Following the instructions in this manual will enable you to obtain optimum performance from your new AHUJA Direct Coupled Class D Amplifier.
- Page 2 Cleaning: Disconnect this equipment from the AC mains and external battery before cleaning. Clean with a damp cloth, but do not allow any liquid to enter the set. Do not clean with liquids or aerosols. XDA-7002...
-
Page 3: Table Of Contents
Specifications ............16 XDA-7002... -
Page 4: Features/General Description Of Product
Slide switch selection of Mono / Stereo Mode provided on rear panel. Switchable ground lift to break the unwanted ground loops. Low pass filter switchable to 80Hz or 120Hz, to use for subwoofer applications. Limiter On/Off switch. XDA-7002... -
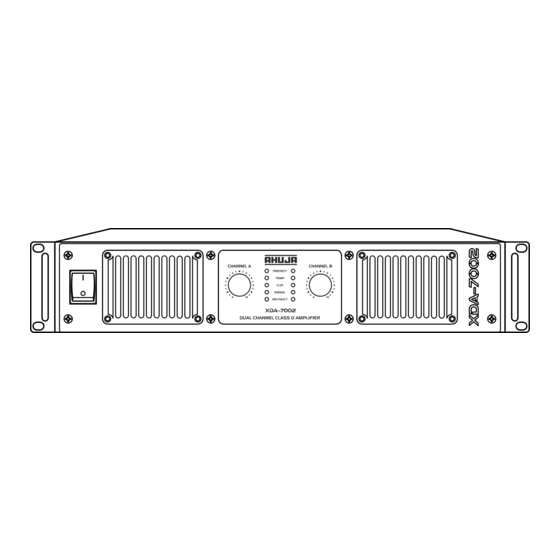
Page 5: Front Panel Controls & Features
DC fuse blown OFF. Signal Indicator LEDs for Channel A & B Indicate the presence of signal in channel A and B respectively. Volume Control for Channel B It is used in Stereo/Mono mode for adjusting the volume level of channel B. XDA-7002... -
Page 6: Rear Panel Controls & Features
Limiter is active when switch is at ON position. It is advised to use the Limiter ON in normal operations. Whenever it is selected for limiter OFF, drive the amplifier for controlled output to protect the speakers from failure. XDA-7002... -
Page 7: Limiter Setup & Tips For Safe Operation
4 or 8 ohms in mono/stereo Do not obstruct the front or rear of the amplifier for modes. necessary intake of air. This is a fan cooled amplifier. For 4 ohm applications, it is recommended to use speakon connectors only. XDA-7002... -
Page 8: Setup & Operations
CD Player PA Mixer CH. B Input CH. A Input XDA-7002 Speaker System Speaker System In STEREO mode, both channels A & B are fully independent of each other. The balanced / unbalanced inputs can be connected either to a stereo signal source or two independent mono signal sources. Each channel can separately drive loudspeaker loads of 8/4 ohms. - Page 9 Play Input CD Player PA Mixer CH. A Input CH. A Input XDA-7002 Speaker System Speaker System CH. B Input When operating in MONO mode, the signal source should be connected to the balanced / unbalanced input of channel A only. Both channels provide similar output to their respective loudspeakers. Each channel can separately drive loudspeaker loads of 8/4 ohms.
-
Page 10: Typical Applications
A & B at desired frequency (80Hz or 120Hz). Also, adjust the volume control of channel A & B in amplifier 2 (XDA-7002) to control the levels of Feed the output signal of the DA-88 to the their respective SWX-2100. - Page 11 Line Output Wireless Microphone AMX-1412 Play Input CD Player PA Mixer CH. A Input Amplifier-1 ALX-11000 XDA-7002 (Mono Mode) (2 Arrays in Parallel) (2 Arrays in Parallel) CH. A Input Amplifier-2 XDA-7002 (Mono Mode) SWX-2100/SWX-2600 (4W) SWX-2100/SWX-2600 (4W) ALX-11000 (2 Arrays in Parallel) Amplifier-3 CH.
-
Page 12: Protections & Installations
Amplifier-1 + This installation of two Subwoofers SWX-2100 and and 2 to Mono mode. four Line Arrays connected to 2 x XDA-7002, is RIGHT STACK of Line Array. + For Amplifier-1, keep the Low Pass filter switch in OFF position. For Amplifer-2 keep the Low Pass + Finally adjustment of output levels will be by their filter switch in either 80 Hz or 120 Hz positions. -
Page 13: Input - Output Connections
6.3 mm (¼") Mono Phone Plug 3 Pin Male XLR Signal Ground Signal Signal Shield Shield (Ground) Fig. 3 Output Connections - Stereo / Mono Mode Speakon Cable Connector Output Channel A Output Channel B (Inside View) Speaker Speakon Cable Speakon Cable Connector Connector XDA-7002... -
Page 14: Trouble Shooting
The Amplifier is in fulat mode due to which DC fuse have been blown OFF. ORANGE An amplifier which keeps shutting off may have a serious internal fault. Turn it off, TEMP remove AC power cord and get the amplifier serviced by a qualified technician. CLIP SIGNAL XDA-7002... - Page 15 The amplifier should never be operated at a level which causes the clip LEDs to CLIP illuminate continuously. It will give distorted sound. Also check the impedance of speakers, shorting of speaker connections if any. SIGNAL Rectify the fault and then switch ON the amplifier for normal operation. XDA-7002...
-
Page 16: Specifications
Technical specifications are subject to production tolerances. We cannot be held responsible for printing errors, should they occur. is a registered trademark of Ahuja Radios in India and other countries. © Copyright Ahuja Radios, 2023. All rights reserved. Any unauthorized reproduction or use of logos, images or design elements is strictly prohibited by law.
Need help?
Do you have a question about the XDA-7002 and is the answer not in the manual?
Questions and answers