Advertisement
PROFESSIONAL INSTALLATION REQUIRED – contractor and plumber needed for installation
Important Note: Please read all instructions carefully and completely before beginning assembly.
Pre-Installation:
Remove all parts and hardware from boxes along with any protective packaging. Identify each part
and each piece of hardware included. Do not discard any contents until after installation is complete
to avoid accidentally discarding small parts or hardware. Keep all parts out of the reach of children.
A standard 8" spread faucet should be used with this sink console.
Note: Consoles need to be leveled and mounted to both wall and floor. Some hardware items needed for proper
assembly and installation are not included: ex. shim, spacer, high quality silicone or acrylic based bath sealant, etc.
NOTE: Avoid moving the top after it has been set into place.
Parts Included:
A. Square Basin (1PC)
Leveler adjustment: Levelers are pre-installed on the legs and adjust as needed to make sure the console is level.
Turn counter-clockwise to increase height, clockwise to decrease height.
SEVILLE SINK CONSOLE
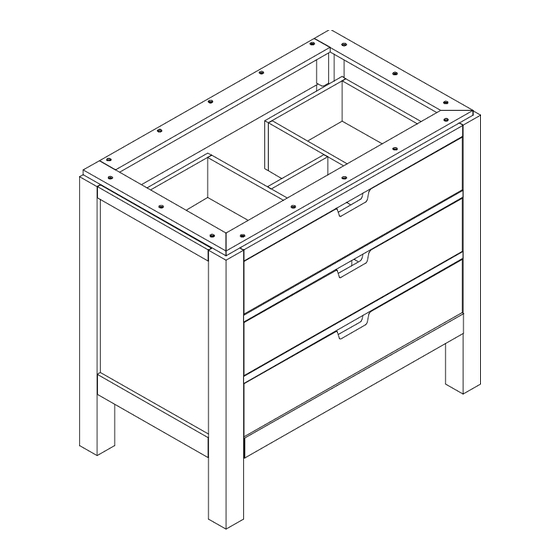
B. Console Base (1PC)
B
Page 1 of 3
Advertisement
Table of Contents

Related Manuals for Pottery Barn SEVILLE SINK CONSOLE


Summary of Contents for Pottery Barn SEVILLE SINK CONSOLE
- Page 1 SEVILLE SINK CONSOLE PROFESSIONAL INSTALLATION REQUIRED – contractor and plumber needed for installation Important Note: Please read all instructions carefully and completely before beginning assembly. Pre-Installation: Remove all parts and hardware from boxes along with any protective packaging. Identify each part and each piece of hardware included.
- Page 2 SEVILLE SINK CONSOLE Step 1: -Apply a high quality silicone or acrylic based bath sealant to the corners of the basin rim where it will contact the base. Place basin flat on console base. Avoid moving the basin after it has been set into place.
- Page 3 SEVILLE SINK CONSOLE Back view Page 3 of 3...
Need help?
Do you have a question about the SEVILLE SINK CONSOLE and is the answer not in the manual?
Questions and answers