Table of Contents
Advertisement
Quick Links
The PROSIXCO-EU is a wireless Carbon Monoxide (CO) detector intended for use with Control Panels that support SiX™ series devices. The CO alarming circuit of this
device is designed to detect carbon monoxide gas from any source of combustion. The carbon monoxide detection circuit of this device is not designed to detect smoke, fire,
or any other gases.
WarningS:
• The CO detector is not a substitute for the proper installation and maintenance of appliances that burn fuel.
• Do not attempt to repair this device. The risk of malfunction is possible if tampered with.
Note: Installation shall be performed by trained professionals in accordance with local regulations.
FEATURES
Features include:
• 10-year life Carbon Monoxide (CO) detector
• CO detector End-of-Life reporting (detector needs replacing)
• Low Battery detection
• One Go / All Go: all detectors in the system programmed as "one-go-all-go" will sound on alarm.
The detector also features:
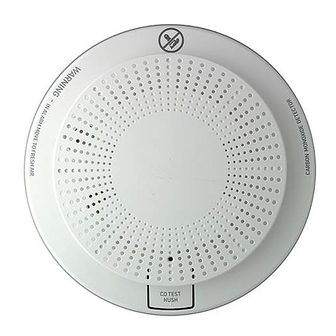
• A Test/Hush button [A] to test or silence the built-in sounder which provides an audible alert during an alarm condition,
as well as a chirping sound during a maintenance condition (CO end-of-life and/or low-battery).
• A tri-color top LED [B] to indicate detector status:
o Green = Supervisory indication; flashes during power on, reset, and normal operation
o Amber = Signals maintenance and/or trouble events
o Red = Signals CO Alarm conditions
• Side LED [C] Light Ring to indicate a CO alarm:
o Blue = CO alarm
ENROLLING
Each Carbon Monoxide (CO) detector has unique data (serial number) that is used for enrollment in separate zones. The detector must be enrolled in the Control Panel before
it can be used. Registration and programming are conducted through the AlarmNet 360™ cloud-based management platform. The detector automatically enrolls as a CO
device with a CO "Response" type. To enroll the detector, perform the following:
1.
From AlarmNet 360:
• Select "SENSORS"
• Select "ADD SENSOR"
• Select "LEARN" and wait for the Control Panel to be in learning mode.
Note: For detailed programming instructions refer to the Installation Instructions for the Control Panel with which this device is used.
2.
Rotate the cover of the detector 15 degrees counterclockwise and remove it from the mounting bracket.
3.
Carefully remove (and discard responsibly) the battery tab [A] to activate the detector and begin the enrollment process for the detected zone. (If already powered, press
the Test button [B] for less than 3 seconds to enroll).
4.
The detector attempts enrollment.
•
The LED [C] flashes green rapidly during enrollment (for up to 20 seconds).
•
The detector sends data to the Control Panel to register the device.
Note: Enrollment time varies depending on the signal strength between the detector and the panel.
5.
Enrollment is confirmed when the LED is on steady green for 3 seconds.
Note: CO End-of-Life is automatically enrolled for the respective CO zones. Upon this condition, a "Carbon Monoxide End-of-Life" message is sent for the respective zone.
Supervision: Detector supervision is factory set for 120 minutes and is not programmable. If the detector is not successfully registered during the enrollment period, the LED
will go out and the device will be turned off. Activate the tamper or press the Test button to restart the enrollment process.
SILENCE THE DETECTOR
If it has been determined that the surrounding area is safe from carbon monoxide leakage, and you want to silence the CO alarm feature, perform the following:
WARNING: Prior to silencing the detector, you should always assume the alarm is due to dangerous levels of carbon monoxide and the dwelling should be evacuated.
Note: The detector can only be silenced one time per event.
1.
Press the Test button or disarm the system at the Control Panel.
2.
The detector will sound again after 5 minutes if the alarm condition has not been resolved.
3.
When programmed in one-go-all-go mode, all programmed detectors can only be silenced from the panel.
If the alarm fails to operate correctly, please contact the manufacturer for corrective action.
Mounting CONSIDERATIONS
During installation, please ensure that all country-specific regulations and guidelines are followed. If in doubt, verify all mounting considerations with your local Fire Service.
Note: Before mounting the detector permanently, conduct a sensor test (see the Control Panel instructions) to verify adequate signal strength and adjust the device location
and orientation as necessary with the red LED facing towards the escape route.
The detector can be mounted on a wall or ceiling.
•
Carbon monoxide is slightly lighter than air. As a result, CO gas may be contained in warm rising air and a central ceiling position or wall position (away from damp/humid
locations, dust vents/fans, doors/windows, etc.) are recommended locations. The detector must be mounted away from any "Dead Air Space" corners [A].
•
Mount the detector at least 30 cm from walls and corners [B].
•
Mount the detector 30-60 cm from the apex of the ceiling [C].
•
If ceiling mounting is impractical, CO detectors can also be mounted on a wall, provided the top of the detector is between 15 and 30 cm below ceiling [D] and the bottom
is at least 150 cm above the floor [E].
IMPORTANT! Do not attach the detector to removable ceiling panels. Attach the detector across panel support.
MOUNTING LOCATION GUIDELINES
Early warning CO detection is best achieved by the installation of CO detection equipment in all rooms and areas of the household as follows:
•
For minimum protection a CO detector should be installed in each separate sleeping area, in every room and on each additional floor of a multi-floor family living unit,
including basements.
•
It is recommended that you install CO detectors in the any rooms above attached garages.
•
Install CO detectors in the room where the alarm control panel is located.
•
Installation of CO detectors in kitchens or in garages is not normally recommended.
•
Install CO detectors between 1m–3m from all potential sources of carbon monoxide (fuel burning appliances).
•
If there is a partition in the room, mount the detector on the same side of the partition as the potential source.
•
If installed in rooms with sloped ceilings, the CO detectors should be located at the high side of the room.
Installation and Setup Guide
PROSIXCO-EU
Wireless CO Detector
Advertisement
Table of Contents

Related Manuals for resideo PROSIXCO-EU


Summary of Contents for resideo PROSIXCO-EU
- Page 1 Installation and Setup Guide The PROSIXCO-EU is a wireless Carbon Monoxide (CO) detector intended for use with Control Panels that support SiX™ series devices. The CO alarming circuit of this device is designed to detect carbon monoxide gas from any source of combustion. The carbon monoxide detection circuit of this device is not designed to detect smoke, fire, or any other gases.
- Page 2 Smoke Detector S Heat Detector CO Detector No Detector MOUNTING After enrolling and before mounting permanently, conduct Sensor test to verify adequate signal strength with the detector in its intended mounting location (refer to the Control Panel instructions). Note: The detector contains battery indicator tabs, which prevent installation on the rear mounting bracket unless all batteries are installed. If one of the batteries is missing or not properly seated the detector will start to display "low battery"...
- Page 3 LEDS AND SOUNDER The detector has a tri-colored top LED (red/amber/green), a side LED Light Ring (blue) with four windows, and an 85 dB sounder. Refer to the following table for operation of these features. LED and Sounder Indication Table MODE Top Status LED (Red/Green/Amber) Side LED Light Ring (BLUE)
- Page 4 WARRANTY Sécurité Communications SAS (SECOM) Ademco 1 Ltd., 200 Berkshire Place 1198, Avenue du Docteur Maurice Donat Winnersh Triangle, Berkshire, RG41 5RD – UNITED KINGDOM 06250 Mougins - FRANCE PROSIXCO-EU © 2023 Resideo Technologies, Inc. R800-27553B 06/23 Rev B www.resideo.com...
Need help?
Do you have a question about the PROSIXCO-EU and is the answer not in the manual?
Questions and answers