Table of Contents
Advertisement
Quick Links
Advertisement
Table of Contents

Related Manuals for Rockwell Automation Allen-Bradley 931U-C9C7C-BC


Summary of Contents for Rockwell Automation Allen-Bradley 931U-C9C7C-BC
- Page 1 Configurator Software Catalog Number 931U-C9C7C-BC User Manual...
- Page 2 Page | 2...
-
Page 3: Foreword
Foreword Foreword Revision history Version Date Change 0.0 08/25/2011 First edition Contact address Rockwell Automation 1201 South Second Street Milwaukee, Wisconsin 53204‐2496 USA Phone (1) 414‐382‐2000 Fax (1) 414‐382‐4444 Internet www.ab.com ... -
Page 4: Table Of Contents
Contents Contents Foreword ..........................3 Revision history ............................ 3 Contact address ............................ 3 Contents ..........................4 Approvals ......................... 6 1.1 CE ............................... 7 1.2 UL ............................... 7 1.3 ATEX ............................ 7 1.4 Class 1 Division 2 ........................ 7 ... - Page 5 Contents 6.2 931U‐CABLE USB introduction .................... 27 6.3 Configuration / diagram wiring .................... 28 931U-C9C7C-BC Configurator Software ............. 29 7.1 Description .......................... 30 7.2 Installation .......................... 30 7.3 Starting/exiting 931U‐C9C7C‐BC Configurator ................ 30 7.4 Title bar ............................ 31 7.5 Overview parameters ....................... 33 7.6 Run mode .......................... 43 7.7 Product identification ....................... 44 Troubleshooting ....................46 8.1 Troubleshooting ........................ 47 ...
-
Page 6: Approvals
Contents Approvals 1.1 CE ............................... 7 1.2 UL ............................... 7 1.3 ATEX ............................ 7 1.4 Class 1 Division 2 ........................ 7 Page | 6... -
Page 7: Atex
CE Declaration is available from Rockwell Automation. Listing approval cULus ATEX Approval according ATEX directive EN 60079‐0 and EN 60079‐15 for NON Sparking Class 1 Division 2 Approval according C1D2 Zone 2: ISA121201 Page | 7... -
Page 8: Notes On Safety
Notes on Safety 2.1 Electrical precautions ......................... 9 2.2 Handling ............................. 9 Page | 8... -
Page 9: Electrical Precautions
There are no procedures which involve the user re‐ Electrical precautions moving the product electronics from its housing. Set‐up or Re‐configuration (see chapter 6 ) is via a 1 4 0 H 1 4 0 H 1 4 0 H connector located behind the front cover, which is DANGER! opened with the use of a small screwdriver (see F igure 1). This product may be connected to po‐ 1 4 1 H 1 4 1 H 1 4 1 H tentially lethal voltages! ... -
Page 10: Introduction
Introduction 3.1 Symbol identification ........................ 11 3.2 Types / article numbers ...................... 11 3.3 General description / applications / examples ................ 11 Page | 10... -
Page 11: Symbol Identification
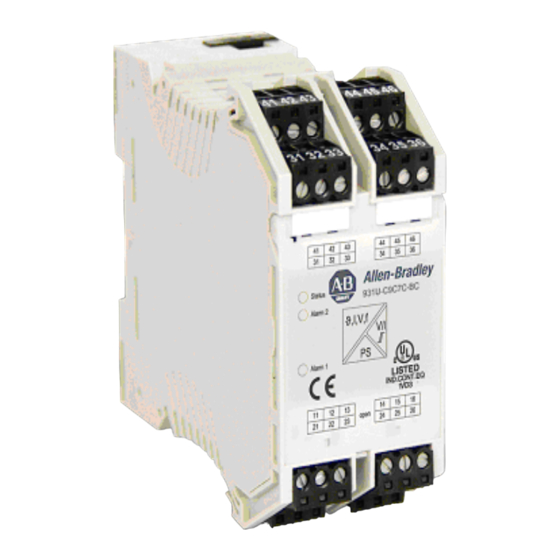
Symbol identification General description / appli- cations / examples The 931U‐C9C7C‐BC is an accurate and stable signal DANGER! converter / isolator / alarm generator for use in measurement and control systems. A wide variety Potentially lethal voltages. of input / output range and type settings can be configured, using the 931U‐CABLE Programming Cable and the 931U‐C9C7C‐BC Configurator soft‐ ware. The 931U‐C9C7C‐BC can be powered from DC The CE mark proves the compliance of or AC sources between 18 and 264 volts. the product with the requirements of the directives. The primary characteristic of the 931U‐C9C7C‐BC is its versatility of input / output configurability. Hence many of the standard functions performed Types / article numbers by DIN rail mounted signal conditioners can be done by the 931U‐C9C7C‐BC, such as This User Manual covers the following products: • Conversion (current to voltage, and vice versa) 931U‐C9C7C‐BC Signal Conditioner ... - Page 12 Typical Applications Typical of applications for the 931U‐C9C7C‐BC is the conversion of thermocouple temperature input (low range of millivolts) into a high level (e.g. 4‐20 mA) value for transmission to a control system. In this type of installation the 931U‐C9C7C‐BC pro‐ vides: • Linearization of the standard thermocouple temperature/millivolts characteristic. • Isolation of the input signal to the control sys‐ tem. This allows the user to use a thermocouple with a grounded hot junction for a quick re‐ sponse at the measurement point. This would otherwise convey electromagnetic influences (high frequency noise) into the control system. • Selectable output value for a thermocouple‐ break event. • Flashing LED status indicator on the unit front on thermocouple‐break. • Relay alarm output if required on thermocouple‐ break. • Relay alarm output on high or low process tem‐ perature. Page | 12...
- Page 13 ϑ V, I V, I Figure 2 Installation n overview Page | 13 3...
-
Page 14: Operation
Operation 4.1 Status & alarm LEDs ........................ 15 4.2 Functional block diagram ...................... 17 4.3 Specifications ........................... 18 Page | 14... - Page 15 Status & a alarm LE put short circ cuit lashes at 5 H Hz ld Junction e error 2 pulses, rest s, 2 pulses Status LE sh memory e error pulses, rest s, 3 pulses Under norm mal condition ns this (green n) LED is on c con‐ tinuously. Tabl le 1 Stat tus Indicator rs A B C Figure 3 LEDs Status LE ED ALARM 2 2 ...
- Page 16 Analog Output status with alarm • User may select output value under fault condi‐ tions • Output compliant with NAMUR recommenda‐ tions (NE43) can be set (< 3.6 mA or > 21 mA) Input fault detection Input faults such as short circuit or open circuit can be detected for most input types. These are shown in the table below. Input type Detection Open cir- Short cir- cuit cuit Thermocouple Yes Yes RTD Yes Yes Millivolts Yes No Volts (Positive) Yes No Milliamps ...
- Page 17 unctiona al block d diagram Figure 4 Functional block diagra am Page | 17...
-
Page 18: Specifications
Specifications Input types Thermocouple Range ‐200...+1820 °C Types B, E, J, K , L, N, R, S, T to IEC 60584 plus custom specific RTD 2, 3, 4 wire, within the range ‐200...+850 °C, for Pt100, Pt1000 to IEC 60571 and for Ni100 / Ni1000 to DIN 43760, for Cu10 and,100 plus custom specific Potentiometer 10 Ω...100 kΩ Resistance 10 Ω...5 kΩ Frequency 2 Hz...100 kHz Voltage within the range ‐200...600 mV (min span 4 mV), within the range ‐20...50 V DC (min span 0.5 V) Current within the range ‐20...50 mA (min span 1 mA) Current Loop supply +24 V DC Sensor break output Selectable between ‐2% and 102% output Analog Output DC voltage 0...5, 1...5, 0...10, 2...10 V or span‐settable between ‐10...10 V (min span 2.5 V) DC current 0...20, 4...20, 0...10 mA, or span‐settable between 0...20 mA (min span 5 mA) Max load (current / voltage) 700 Ω / >10 kΩ (>20 kΩ for ‐10 V…+10 V) Action Direct or Inverted Operation Digital Output Relay ... - Page 19 Min. / max. power supply 18…264 V AC/DC (according VDE) 18…40 V AC / 18…56 V DC (ATEX Zone 2) Rated power < 3,5 W Ambient operating range ‐40...+70 °C Isolation test 1,5 kVrms / 1 min. between PE and power supply, as well as between PE and input or output 2,5 kVrms / 1 min between input and output Rated insulation voltage 300 V protective separation between power supply and input or output, as well as between Relay output and all other circuits 100 V protective separation between input and output 300 V basic insulation between input and output Performance Accuracy DC, RTD inputs <0.1% span. Thermocouple inputs: 0.2% span (or 1 °C) + CJ error Ambient temp effects DC & RTD inputs < 0.01%/K Thermocouple inputs < 0.01% of full scale/K + CJ error 0.07 °C/K Step Response/ Settable within 60 ms ‐1880 ms / 1 Hz (3 dB) Cut‐off Frequency Physical Dimensions 92.4 x 112.5 x 45 mm No. of connections 12 Connection types screw Housing material UL 94 V0 Housing color Gray Ingress protection IP20 Approvals ...
-
Page 20: Installation
Installation 5.1 General (Competence Warning) .................... 21 5.2 Mounting / Environmental / EMI protection / warm up ............ 21 5.3 Electrical Connections ....................... 22 5.4 Connection diagram ......................... 24 Page | 20... -
Page 21: General (Competence Warning)
General (Competence Warn- Environment ing) The 931U‐C9C7C‐BC is designed for use either in‐ doors (IP20) in a control panel, or in a weather‐ The 931U‐C9C7C‐BC should only be installed by proof field enclosure. Its atmosphere should be dry, technically qualified personnel with sufficient quali‐ well ventilated and dust‐free. fication or knowledge in the subject of instrumenta‐ tion and control engineering. Avoid mounting in locations subject to vibration or physical impact. Mounting / Environmental / EMI protection / warm up The 931U‐C9C7C‐BC is suitable for EX applications and approved for installation in Zone 2. They shall Mounting be installed in an enclosure providing a degree of 931U‐C9C7C‐BC is designed to be mounted onto a protection of at least IP54. TS35 DIN rail. It clips onto the rail via a spring‐loaded mounting EMI protection foot, and can be removed via a spring release on the edge of the product near the mounting rail. Do not install input, output and power supply ca‐ bles close to sources of electrical interference. For example, such sources could include relays, contac‐... -
Page 22: Electrical Connections
Electrical Connections When auxiliary power is switched on, for the first 200 ms the 931U‐C9C7C‐BC Input, output and power supply wiring is made via will consume up to 200 mA. numbered, pluggable connectors, which may be screw clamp or tension clamp type, depending on the item article number. The connectors are coded to prevent the power supply connector being fitted in the wrong position. Test terminals are included to permit input and output currents to be monitored without discon‐ nection of cables (see connection diagram below). WARNING! 931U‐C9C7C‐BC and PC have to be fully de‐energized, before the programming interfaces 931U‐CABLE will be connect‐ ed. NOTICE Ensure that the connectors are inserted into the correct position (see connec- tion diagram). Page | 22... - Page 23 Page | 23...
-
Page 24: Connection Diagram
Connection diagram The connection diagram below is printed on the side of the 931U‐C9C7C‐BC housing. Connection diagram – Power supply Term. No. 24 0 V 25 PE 26 24 ‐ 240 V DC / AC Table 4 Power supply Connection diagram – Input Resistor / RTD Passive Active Term. TC / V <50 <20 Poti Freq 3-Wire 4-Wire <50 V <600 mV Wire 11 ... - Page 25 Connection diagram – Analog output Term. No. 0…20 mA 0…10 V -10 V…+10 V 31 TP+ 32 Out+ / TP‐ 33 Out‐ 41 Out‐ 42 Out+ Out+ 43 Out‐ Table 6 Analog output ...
-
Page 26: Setup / Configuration
Setup / Configuration 6.1 Default setting .......................... 27 6.2 931U‐CABLE USB introduction .................... 27 6.3 Configuration / diagram wiring .................... 28 Page | 26... - Page 27 Default setting 931U-CABLE USB introduc- tion The 931U‐CABLE is the configuration interface for Input range 4‐20 mA the 931U‐C9C7C‐BC. This is the same interface as can be used for configuring the 931U‐C9A2C‐OP ADS Speed medium Signal conditioner. Transfer function Linear Connection to the computer is via USB port, and to Response time 0.25 s the 931U‐C9C7C‐BC via a jack connector. Tx and Rx Output range 4‐20 mA status are indicated by LEDs on the 931U‐CABLE. Action direct Low limit 0 mA High Limit 20 mA Output @ error 21.5 mA Disabled Digital outputs 1 and ...
- Page 28 Configura ation / di agram w wiring nnection to 9 931U‐ C7C‐BC is un der the fron nt cover 931U‐CAB BLE with conn nection to the USB B port on com mputer 1606 6 Power Supp AC Powe er Figure 6 Configurati ion / diagram m wiring Page | 28...
-
Page 29: 931U-C9C7C-Bc Configurator Software
931U-C9C7C-BC Configurator Software 7.1 Description .......................... 30 7.2 Installation .......................... 30 7.3 Starting/exiting 931U‐C9C7C‐BC Configurator ................ 30 7.4 Title bar ............................ 31 7.5 Overview parameters ....................... 33 7.6 Run mode .......................... 43 7.7 Product identification ....................... 44 Page | 29... -
Page 30: Description
Double‐click on the icon Descriptio on your The Window ws based 93 1U‐C9C7C‐BC C Configurat tor computer de sktop. software is used to set u up the 931U ‐C9C7C‐BC v via Click on the W Windows Sta art button, th hen select: the interfac ce 931U‐CAB BLE. Programs > A Allen‐Bradley y > 931U‐C9C C7C‐BC Con‐ igurator > 93 31U‐C9C7C‐B BC Configura ator nstallatio System Re equiremen Exit ting 931U-C C9C7C-BC Configura ator... -
Page 31: Title Bar
Title bar Sett tings mperature un nit Set the u nit of the tem mperature File for the co onfiguration. . Celsius or New Chan nge the setti ng to default t Fahrenhe eit setti ngs. Open Open n a configura ation file *.tt ta from m the hard di sk. Save Save e the actually y configuratio on Figu re 9 Title e bar ‐ Settin ngs ‐ Temper rature unit ... - Page 32 Info About Open n an informa ation window w abou ut the softwa are version a and the c contact addr ress of Allen‐ ‐ Brad dley Figure 11 Title bar ‐ I nfo Page | 32 2...
-
Page 33: Overview Parameters
Overview parameters Input parameters Type of Voltage ‐ Range V: ‐20 … +50 V DC input Min. Span 0.5 V mV: ‐200 … +500 mV DC Min. Span: 4 mV Current ‐ Range Passive Range mA: ‐20 … +50 mA Min. Span: 1 mA Active Range mA: 0 … +20 mA Min. Span: 1 mA Type of Thermocouple K: ‐200 … +1372 °C R: ‐50 … +1767 °C J: ‐210 … +1200 °C S: ‐50 … +1767 °C T: ‐200 … +400 °C B: +50 … +1820 °C E: ‐200 … +1000 °C L: ‐200 … +900 °C N: ‐200 … +1300 °C U: ‐200 … +600 °C User defined RTD RTD type: ... - Page 34 Voltage range Pin21: ‐50 V … +50 V DC Voltage range Pin22: ‐30 V … +30 V DC Pin High noise Low noise Max. voltage reduction reduction range High Level Low Level 22 550 mV 140 mV ±30 V 21 7.8 V 1.9 V ±50 V Page | 34...
- Page 35 Transfer parameters Transfer Transfer function for the output signal: function Function linear SQRT X^1.5 X^2.5 1,5 2 2,5 formula Out = In Out = In Out = In Out = In x Out = In x x 10 x 0.1 0.01 0.001 Input Output Output Output Output Output in % in % in % in % in % in % 0 ...
- Page 36 Figure 1 12 Transf fer functions s Figure 1 13 User‐d defined trans sfer function n ADC Speed d Fast ghest sam pling 9.5 ms Page | 36...
- Page 37 Medium 50 ‐ 60 Hz 60 ms Slow 50 ‐ 60 Hz 180 ms Response Response time is the time between an input step and the output step. Time Respons Voltage / mV / Potentiometer speed e time in Current Therm / RTD 2-Wire 3-Wire 4-Wire min. 140 60 90 60 Fast max. 1000 1000 1000 1000 min. ...
- Page 38 Analog output parameters Type of Voltage Current output Voltage Max. Range: Max. Range: ‐10.1 … +11 V DC 0 mA to 20 mA DC Min. Span: 2.5 V DC Min. Span: 5 mA DC Output – range Lowest Value Lowest Value low This is the minimum voltage value This is the minimum current value at the output (related to 0% in‐ at the output (related to 0% input). put). Output – range Highest Value Highest Value high This is the value at the output (re‐ This is the maximum current value lated to 100% input). at the output (related to 100% in‐ put). Direct or Direct action is output increasing Direct action is output increasing reverse function ...
- Page 39 Digital ou utput param meters Alarm outp put nction Operating sabled modes e alarm is di sabled. w Type e alarm is sw witched on, if f the input v alue is lower r than the se etpoint. gh Type e alarm is sw witched on, if f the input v alue is highe er than the se etpoint. indow e alarm is sw witched on, if f the input v alue is outsid de the windo ow value: ndow range = setpoint ± window val ue g.: setpoint 4 40%, window w 10% = wind...
- Page 40 ON De elay witch on dela y in seconds s In 0.1 second s steps OFF De elay witch off dela ay in seconds s In 0.1 second s steps Windo ow t a range aro ound the Set point in perc cent Error A Action arm ON e alarm relay y is activated d when an er rror is detect ted. arm OFF e alarm relay y is deactiva ted when an n error is det ected. old ...
- Page 41 Window A Alarm Figure 16 Window Al l arm Page | 41...
- Page 42 Alarm Tim me Delay Figure 17 Alarm Time e Delay In this exam mple the time e delay is set t for 20 seco nds. At t the e measurem ent exceeds the alarm v alue, but this only las sts for 10 sec conds so the re is no trip. At t the me easurement again exceed ds the alarm trip value and this last ts for longer than 20 sec onds so the alarm trip oc ccurs after 2 0 seconds. Page | 42...
-
Page 43: Run Mode
• Output: 931U‐C9C7C‐BC output value in percent. Run mode • CJC Temperature: This the temperature in Centi‐ Start communication with the 931U‐C9C7C‐BC grade or Fahrenheit at the cold junction point in Connect the 931U‐C9C7C‐BC to a Power supply. the 931U‐C9C7C‐BC. • Alarm1: Shows the status of the first alarm relay Connect the 931U‐C9C7C‐BC with the 931U‐ CABLE to an available USB port on the PC. - LED = red = relay switched on (alarm) Start the 931U‐C9C7C‐BC Configurator Software. - LED = off = relay switched off (no alarm) Input configuration Select the input value. Output configuration Select the output value. Alarm configuration Set the alarm relay behaviour. Send configuration to 931U‐C9C7C‐BC. The button "Save to Instrument” transmits the new configuration to the 931U‐C9C7C‐BC. Enter Password Enter your password (the default password is 0000). Read Values With the button "Read Values” the actual values of the 931U‐C9C7C‐BC are displayed in the win‐ dow "Running values”. If the button "Read Continuous” is activated the values are updated every second (monitoring). Read from Instrument To check the current configuration in the con‐ nected 931U‐C9C7C‐BC click on the "Read from instrument” button. ... -
Page 44: Product Identification
• Alarm2: Shows the status of the second alarm Table 10 Product identification relay - LED = red = relay switched on (alarm) - LED = off = relay switched off (no alarm) Product identification Unit Type: Description of the module Serial No.: The serial number is printed on the side of the module. Firmware No.: The firmware number of the 931U‐C9C7C‐BC which is connected. Configured by: The company name of the person who last config‐ ured the module. Initials: Initials or the name of the person who last config‐ ured the module. Date: The date when the mod‐ ule was last configured the module. ID Tag: Typically, the user’s plant reference User Reference: ... - Page 45 A Figure 18 Unit‐ID Termina ls Page | 45 5...
-
Page 46: Troubleshooting
Troubleshooting 8.1 Troubleshooting ........................ 47 Page | 46... - Page 47 Troublesh hooting Status LED D indicatio The 931U‐C9C7C C‐BC is instal led, the wiri ng is done, If a 931U‐C9 9C7C‐BC is n ot working a as expected, the but it shows no LED indicatio on. best view o f its complet te set‐up is v via the 931U‐ ‐ C9C7C‐BC C Configurator Software. Check the po ower supply a and consider r the wiring diagrams and d description ns in chapter 4 and 5 . Below are s some examp les of checks...
- Page 48 The green Status LED is flashing It indicates sensor wiring (short circuit or open cir‐ cuit) or internal fault. See description in chapter 3 to identify 1 7 1 H 1 7 1 H 1 7 1 H fault source. The DC output is incorrect Ensure the input type and range are configured as required and wiring connections are correct. Check the output configuration settings for cor‐ rect range and transfer functions including direct or re‐verse action. The alarm relays have no function Check the relay configuration settings including ...
-
Page 49: Appendix
Appendix Index ……………………………………………………………………………………………………………….50 Page | 49... -
Page 50: Index
Index Figure Page Figure 1 Handling 9 Figure 2 Installation overview 13 Figure 3 LEDs 15 Figure 4 Functional block diagram 17 Figure 5 Mounting on DIN rail 21 Figure 7 Configuration / diagram wiring 28 Figure 8 Title bar ‐ File 31 Figure 9 Title bar ‐ Language 31 Figure 10 Title bar ‐ Settings ‐ Temperature unit 31 Figure 11 Title bar ‐ Settings ‐ Set point unit 31 Figure 12 Title bar ‐ Info 32 Figure 13 Transfer functions 36 Figure 14 ... - Page 51 Table Page Table 1 Status Indicators 15 Table 2 Input fault detection 16 Table 3 Specifications 19 Table 4 Power supply 24 Table 5 Input 24 Table 6 Analog output 25 Table 7 Digital output 25 Table 8 Default settings 27 Table 9 Parameter 40 Table 10 Product identification 44 Table 11 Article overview Error! Bookmark not defined. Page | 51...
- Page 52 ...
- Page 53 Rockwell Automation 1201 South Second Street Milwaukee, Wisconsin 53204‐2496 USA Phone (1) 414‐382‐2000 Fax (1) 414‐382‐4444 Internet www.ab.com DIR 10000203490 (Version 00) ...
- Page 54 Allen-Bradley and Rockwell Software are trademarks of Rockwell Automation, Inc. Publication 931-UM001A-EN-P -August 2011 - DIR 10000203490 (Version 00) Copyright ©2011 Rockwell Automation, Inc. All Rights Reserved. Printed in USA.
Need help?
Do you have a question about the Allen-Bradley 931U-C9C7C-BC and is the answer not in the manual?
Questions and answers