Table of Contents
Advertisement
Available languages
Available languages
Quick Links
Model No./Modèle n°/Modello No.: TF3807TR-L
220-240V~50-60Hz 45W
EN_IMPORTANT, RETAIN FOR FUTURE REFERENCE: READ CAREFULLY.
FR_IMPORTANT : A LIRE ATTENTIVEMEN ET A CONSERVER POUR VOUS Y REFERER
ULTERIEUREMENT
IT_IMPORTANTE! CONSERVARE IL PRESENTE MANUALE PER FUTURO RIFERIMENTO E
LEGGERLO ATTENTAMENTE.
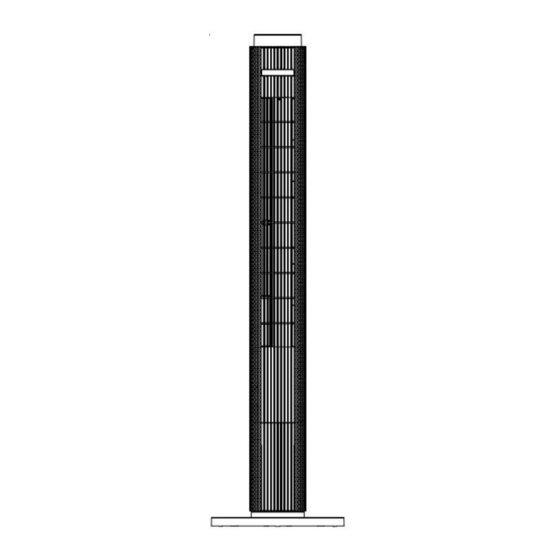
Tower fan
Ventilateur tour
Ventilatore a torre
1
IN231000491V01_FR_IT
824-076V90
Advertisement
Table of Contents

Related Manuals for HOMCOM 824-076V90


Summary of Contents for HOMCOM 824-076V90
- Page 1 IN231000491V01_FR_IT 824-076V90 Tower fan Ventilateur tour Ventilatore a torre Model No./Modèle n°/Modello No.: TF3807TR-L 220-240V~50-60Hz 45W EN_IMPORTANT, RETAIN FOR FUTURE REFERENCE: READ CAREFULLY. FR_IMPORTANT : A LIRE ATTENTIVEMEN ET A CONSERVER POUR VOUS Y REFERER ULTERIEUREMENT IT_IMPORTANTE! CONSERVARE IL PRESENTE MANUALE PER FUTURO RIFERIMENTO E...
-
Page 2: Important Safety Information
READ CAREFULLY BEFORE ATTEMPTING TO ASSEMBLE, INSTALL, OPERATE OR MAINTAIN THE PRODUCT DESCRIBED. PROTECT YOURSELF AND OTHER BY OBSERVING ALL SAFETY INFORMATION. FAILURE TO COMPLY WITH INSTRUCTIONS COULD RESULT IN PERSONAL INJURY AND/OR PROPERTY DAMAGE ! IMPORTANT SAFETY INFORMATION 1. Read all instructions carefully before using the FAN. 2. -
Page 3: Parts Name
To avoid danger of electric shock, unplug from outlet when not in use and before cleaning. If the supply cord is damaged, it must be WARNING : replaced by the manufactory or it’s service agent or a similarity qualified person in order to avoid a hazard. PARTS NAME Control panel LED display... -
Page 4: Remote Control
REMOTE CONTROL 1. Included a button cell battery (the type of battery CR2025). Storage the remote control at the back of fan. 2. The Remote Control Power button is labeled as such(Fig 3). All the functions performed with the Remote Control work identically to the Manual Controls. (Fig 3) (Fig 4) OPERATION... -
Page 5: Maintenance
7.DISPLAY :Can be switched off temporarily by press the LED button on the remote or by pressing and holding the SPEED button on the control panel for more than 3 seconds, the display will light up again once any control button is activated. (Fig 5) 8.CABLE HOOK : The cable hook is packed in the user manual, take it out and install... -
Page 6: Consignes De Sécurité Importantes
LISEZ ATTENTIVEMENT AVANT D'ESSAYER D'ASSEMBLER, D'INSTALLER, DE FAIRE FONCTIONNER OU D'ENTRETENIR LE PRODUIT DÉCRIT. PROTÉGEZ-VOUS ET LES AUTRES EN OBSERVANT TOUTES LES INFORMATIONS DE SÉCURITÉ. LE NON- RESPECT DES INSTRUCTIONS PEUT ENTRAÎNER DES BLESSURES CORPORELLES ET/OU DES DOMMAGES MATÉRIELS ! CONSIGNES DE SÉCURITÉ... -
Page 7: Nom Des Pièces
l'utilisateur ne doivent pas être effectués par des enfants sans surveillance. 18. Le boîtier arrière ne doit pas être démonté, son retrait serait dangereux. 19. Cet appareil n'est pas destiné à être utilisé par des personnes (y compris des enfants) ayant des capacités physiques, sensorielles ou mentales réduites, ou un manque d'expérience et de connaissances, à... - Page 8 2. Mettez le fil dans la rainure, puis fixez la base sur le corps du ventilateur avec quatre vis (fournies) et tournez les vis dans le sens des aiguilles d'une montre. (Fig 2) (Fig 2) TÉLÉCOMMANDE 1. Comprend une pile bouton (de type CR2025). Rangez la télécommande à l'arrière du ventilateur.
- Page 9 - Mode SOMMEIL : 1) Si vous réglez le mode sur vitesse élevée, le ventilateur fonctionnera à vitesse élevée pendant 30 minutes, puis passera à la vitesse moyenne pendant 30 minutes et passera à la vitesse basse jusqu'à l'arrêt du ventilateur. 2) Si vous réglez le mode sur vitesse moyenne, le ventilateur fonctionnera à...
-
Page 10: Entretien
ENTRETIEN 1. Cela ne peut être fait que par un agent de service autorisé tel que votre revendeur local ou tout agent qualifié pour effectuer des réparations électriques. 2. Si l'appareil a besoin d'un nettoyage externe, assurez-vous qu'il est éteint et débranché... -
Page 11: Importanti Informazioni Di Sicurezza
LEGGERE ATTENTAMENTE PRIMA DI TENTARE DI ASSEMBLARE, INSTALLARE, UTILIZZARE O ESEGUIRE LA MANUTENZIONE SUL PRODOTTO QUI DESCRITTO. PROTEGGERE SÉ STESSI E GLI ALTRI OSSERVANDO TUTTE LE PRECAUZIONI DI SICUREZZA. IL MANCATO RISPETTO DELLE ISTRUZIONI POTREBBE CAUSARE LESIONI PERSONALI E/O DANNI MATERIALI! IMPORTANTI INFORMAZIONI DI SICUREZZA 1. -
Page 12: Nomi Delle Parti
18. L'alloggiamento posteriore non deve essere smontato, la rimozione è pericolosa. 19. Questo apparecchio non e' pensato per l'uso da parte di persone (inclusi i bambini) con capacità fisiche, sensoriali o mentali ridotte, o con mancanza di esperienza e conoscenza tecnica, tranne se posti sotto supervisione o se hanno ricevuto istruzioni relative all'uso dell'apparecchio da una persona responsabile della loro sicurezza. -
Page 13: Funzionamento
2.Inserire il cavo nella scanalatura, quindi fissare la base sull’alloggiamento del ventilatore con le quattro viti (incluse) e stringere le viti in senso orario. (Fig 2) (Fig 2) TELECOMANDO 1. Inclusa una batteria a bottone (modello Cr2025). Conservare il telecomando nel vano posto sul retro del ventilatore. -
Page 14: Display Led
- Modalità NOTTE : 1) Se si imposta la modalità ad alta velocità, il ventilatore funzionerà a velocità alta per 30 minuti, quindi passerà alla velocità media a 30 minuti e passerà alla velocità più bassa finche’ il ventilatore non si spegne. 2) Se si imposta modalità... -
Page 15: Manutenzione
MANUTENZIONE 1. La manutenzione può essere eseguita solo da un agente di servizio autorizzato come il rivenditore locale o qualsiasi agente qualificato per effettuare riparazioni elettriche. 2. Se l’apparecchio richiede una pulizia esterna, assicurarsi che sia spento e scollegato dalla rete elettrica. Utilizzare un panno morbido o un panno per la pulizia generale. Per rimuovere lo sporco o la sporcizia più...
Need help?
Do you have a question about the 824-076V90 and is the answer not in the manual?
Questions and answers