Table of Contents

Related Manuals for Promax Promaks DC-900


Summary of Contents for Promax Promaks DC-900
- Page 1 DC-900 Double Chamber Vacuum Packaging Machine Operation Manual Version 6.9.1 PROMARKS INC 1915 E. Acacia Street, Ontario, CA91761, U.S.A : 1-909-923-3888 FAX : 1-909-923-3588 http://www.promarksvac.com S/N: QC SIGNATURE:...
-
Page 2: Table Of Contents
TABLE OF CONTENTS 1. SAFETY ........................1 1.1 SAFETY RECOMMENDATIONS ................1 1.2 PERSONAL SAFETY ....................2 1.3 FOOD SAFETY ......................3 2. INSTALLATION ..................... 4 2.1 UNPACKING ........................4 2.2 MOVING THE MACHINE ................... 4 2.3 MACHINE SPECIFICATIONS ..................5 2.4 ENVIRONMENT REQUIREMENTS ................ - Page 3 6.4 CHAMBER LID,TOP DIAGRAM ................47-48 6.5 SEALING BAR CONFIGUATIONS,TOP ..............49 6.5.1 SEALING BAR (FB)....................49-51 6.5.2 SEALING BAR (PK) ..................... 52-54 6.6 ELECTRICAL BOXES....................55 6.6.1 ELECTRICAL BOX(FB) ..................55 6.6.2 ELECTRICAL BOX(TB)..................55-56 Explanation of Abbreviations (FB) Standard Front / Back (FBG) Front /Back with Gas (FBPK) Front / Back with Perforating Knife...
-
Page 4: Safety
Failure to follow these safety rules and take necessary precautions can result in serious injury or death as well as cause damage to the equipment. 1) Never operate or service your Promax / Promarks machine until you have read this manual completely and understand it fully. -
Page 5: Personal Safety
The following procedures and guidelines must be observed to avoid problems that can result in property damage, personal injury or death. If you have any questions regarding this information please contact Promax /Promarks, Inc. Service Department at (909) 481-3338. Hazardous Voltage: DANGER Electrical power must be disconnected and locked out before servicing or cleaning of the machine. -
Page 6: Food Safety
1.3 FOOD SAFETY While many Promax / Promarks machines are used in applications involving vacuum packaging and vacuum cooking, there are inherent risks associated with these techniques that can result in serious illness or death to the consumer of the food product. -
Page 7: Installation
TC Machines: Some of the smallest TC units may be lifted off of their wooden skid and moved manually. However Promax /Promarks recommends that moving even the smallest of their TC units should not be attempted by one person. The larger TC units should be lifted with the aid of a fork lift or other approved lifting aid. -
Page 8: Machine Specifications
2.3 DC-900 SPECIFICATION 2.4 ENVIRONMENT EQUIREMENTS The machine will be difficult to start if the air temperature is very low. This is caused by the increase in the vacuum pump’s oil viscosity due to the low temperature. To prevent this, please set up machine according to the installation checklist described as below: Temperature: around 5 ~ 40℃... -
Page 9: Check Oil Level
* Check the oil level on a daily basis * When checking the oil level use the sight gauge shown in figure 1 below. The level should be between the arrows indicating Minimum and Maximum. If the level is below the minimum arrow add oil until the maximum arrow is reached. -
Page 10: Operation
3. OPERATION 3.1 VACUUM SETTING GUILDLINES Products Vacuum time/Sec. Storage life when stored at 2 ~ 6 ℃/day Fresh meat Pork Beef Meat with liquid 15 ~ 30 Pasta 3 ~ 9 Sliced sausage Cold cuts 10 ~ 21 3.2 BASIC OPERATING INSTRUCTIONS ... -
Page 11: Operation Of The Pnc-01 Digital Control Panel
3.4 OPERATION OF THE PNC-01 DIGITAL CONTROL PANEL 3.4.1 Operation of the Model PNC-01 Digital Control Panel When following the instructions for programming your machine please refer to Fig. 5 below. Figure 5 PRO G RA M PROGRAM TIME / % SK I P STO P CY CLE... - Page 12 D. Changing Program Settings 1. Choose the program number you wish to edit 2. Press and hold down the Right Arrow key for 3 seconds. 3. You will see the Time / % display begins to flash. 4. Change the settings as indicated in steps E to J. Important Note: If your machine is equipped with the most recent version of the PNC-01 control you will not need to implement the instructions above in order to change program settings.
-
Page 13: Setting The Parameters For The Optional Settings
Press the Right Arrow key to move to the next setting. The Soft Air LED will remain on. However you are now setting the Vent Off time. 4. Using the Plus/Minus keys set the amount of time you want the vent valve to remain closed between each vent pulse. - Page 14 4. Press the Left Arrow key again you will see that the Gas LED remains lit. You will set a time value for the next two settings only if you wish to use the PULSE GAS feature. 5. Using the Plus / Minus keys set a GAS ON time 6.
- Page 15 1. The first setting will be Total Vacuum Time. Using the Plus/Minus keys set the total time you want the vacuum cycle to last. 2. Press the Right Arrow key to move to the next setting. The VAC LED will remain on.
-
Page 16: Maintenance
4.MAINTENANCE 4.1 Basic Maintenance The following maintenance procedures should be followed no matter what model Promarks machine you own. 4.1.1 Daily Visual Inspection Your machine should have the following items inspected daily. If this inspection is performed daily prior to the start of your days production you will find that your machine will always perform consistently, last longer and suffer less down time. -
Page 17: Daily Cleaning
4.1.2 Daily cleaning Important Note: The following daily cleaning points are meant to help keep your machine in proper working order. They are in no way intended to provide the required level of sanitation needed for the packaging of food products. As noted earlier in this manual your company should consult with an expert in the sanitation field to design a robust sanitation routine when packaging food products. - Page 18 b. Seal bars are located in the lid on larger SC Series machines and all DC Series machines. 2. Remove the screws that hold the Teflon holding strap in place. Refer to Figure A on the next page. 3. Remove the old Teflon cover. 4.
-
Page 20: Maintenance Interval Chart
4.4 MAINTENANCE INTERVALS AND CHECK ITEMS Maintenance Intervals/ Daily Yearly Biyearly 3 ~ 5 years Note Bimonthly Quarterly Check items Keep the vacuum lid open after finished working and let vacuum pump running about 15 minutes. Check the oil level Check the sound of motor Oil come out from... -
Page 21: Troubleshooting
5. TROUBLESHOOTING 5.1 PROBLEMS AND CORRECTIONS Problem and Corrections - Review installation procedure section to ensure the installation is correct. If correct, the troubleshooting chart below lists possible problems, causes, corrections, and reference guide. Problem Cause Correction Control panel is under normal The KM1, QM1, MCB1, MCB2 Check each part and turn on the function, but vacuum pump does... -
Page 22: Pin D Type Terminal Wiring Connection Instructions
Problem Cause Correction No or improper sealing. Sealing wire is broken. Replace it. Sealing wire is loose. Tighten it. Insufficient pressure. Pressure bar is damaged, replace Replace it. Sealing transformer is damaged. Replace it. Teflon tape or silicone rubber is damaged. -
Page 23: Pneumatic Diagram
5.3 PNEUMATIC DIAGRAM... -
Page 24: Electrical Diagram (Fbtb)
5.4 ELECTRICAL DIAGRAM (FB) - Page 25 5.4 ELECTRICAL DIAGRAM (TB)
-
Page 26: Fabrication
6. FABRICATION 6.3 SEALING BAR, BOTTOM 6.4 CHAMBER LID 6.5 SEALING BAR, TOP 6.2 WORKING BED, BOTTOM 6.1 BODY... -
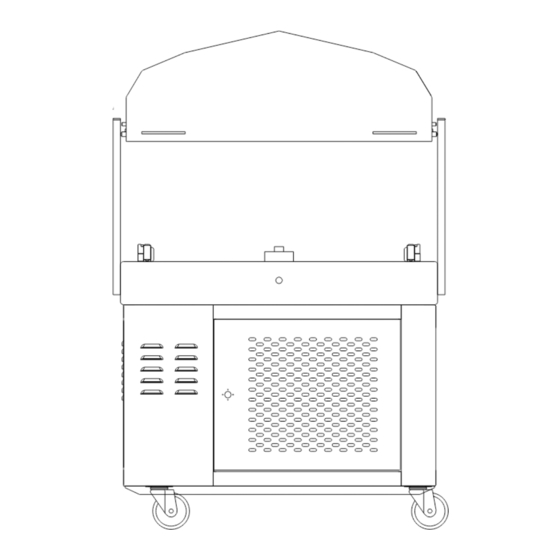
Page 27: Body Diagram
6.1 BODY Body Diagram DC90100000... - Page 28 DC90101P00 NO. PART NO. DESCRIPTION DC90101000 Frame DC90103001 Vacuum pump mounting bracket DC90106000 Electrical box mounting bracket DC90107000 Electrical box mounting bracket D1KK102000 Plate DC90115002 Side door D1KK116000 Side door D1KK117000 Back door - L D1KK118000 Back door - R 10 DC80120000 Cover plate 11 2874045 Control panel...
- Page 29 DC90101P01 NO. PART NO. DESCRIPTION 36 2705301 Split lock washer 37 27072032 38 2700439 Screw, Hex Hd M6x25 (S) 39 2705151 Washer, Flat M6 (S) 40 2705302 Washer, Split Lock M6 (S) 41 2707204 Nut, Hex Hd M6 (S) 42 2705155 Washer, Flat M14 43 29091751 Fitting, Nylon Tube 90°...
-
Page 30: Working Bed (Bottom)
6.2 WORKING BED (BOTTOM) Working bed,Bottom Diagram DC90200000... - Page 31 D1KK200P00 PART NO. DESCRIPTION DC90218000 Welded body (FB ; PK) D1KK201001 Welded body (TB;TK) DC90202000 Main shaft D88K205000 Washer D88K203000 Bearing bracket 27281157 BEARING GE35ES 27401402 Nipple, Grease 1/8" 27062201 Ring, R55 D88K204000 Bearing bracket D1KK293000 Base, Shaft 10 DC90294000 Shaft 11 D1KK298000 Link, Universal Joint 12 D1KK297000 Bracket, Mounting - Universal Joint 13 2920674...
- Page 32 DC90200P01 PART NO. DESCRIPTION 35 2870049 Round Flat Button YW1B-M1E10G 36 2705189 WasherFlat M10 37 27004001 Hex Head Screw M10 x 20 38 DC80215000 Limit Switch Bracket 39 2705151 WasherFlat M6 40 27004011 Hex head screw M6 x 20 41 2707204 Nut, Hex Hd M6 42 2853023 Limit switch V-153-1A5...
- Page 33 DC90200P02 PART NO. DESCRIPTION 69 2703318 Screw, Round Hd M5x10 70 2861037 Fitting MG-16A-10G 71 2861026 Fitting MG-32A-25B 72 2861038 Fitting MG-20A-14B 73 2875314 Box, Wiring Ensto SABP131308G 74 2728419 Rod Eye, PHS M16x2 75 27070123 Nut, Hex Hd M16x2 76 27284911 Rod Eye, PHS M22x1.5 77 2703307...
-
Page 34: Sealing Bar/ Cushion Bar Configurations
6.3.1 CUSHION BAR (FB) Cushion Bar Diagram D1KK2FB000... - Page 35 D1KK2FBP00 PART NO. DESCRIPTION NOTE DC80202000 Cover - Vacuum Suction 2705154 Flat Washer M4 2705306 Split Lock Washer M4 2703308 Round Screw Hd M4x12 D1KK223000 Sealing Bar (FB) D1KK252000 Sealing Silicon D80K226000 Silicon Bar End Insert-L D80K225000 Silicon Bar End Insert-R D80K224000 Inner Plate 10 2701164...
-
Page 36: Cushion Bar (Fbg)
6.3.2 CUSHION BAR (FBG) Cushion Bar Diagram D1KK2FBG00... - Page 37 D1KK2FBP0G PART NO. DESCRIPTION NOTE DC80202000 Cover - vacuum suction 2705154 Flat washer M4 2705306 Split lock washer, M4 2703308 Round head screw M4 x 12 D1KK223000 Sealing bar (FB) D1KK252000 Sealing silicon D80K226000 Silicon bar end insert-L D80K225000 Silicon bar end insert-R D80K224000 Inner plate 10 2701164...
-
Page 38: Cushion Bar (Fbpk)
6.3.3 CUSHION BAR (FBPK) Cushion Bar Diagram D1KK2PK000... - Page 39 D1KK2PKP00 PART NO. DESCRIPTION NOTE DC80202000 Cover - vacuum suction 2705154 Flat washer M4 2705306 Split lock washer, M4 2703308 Round head screw M4 x 12 D1KK251000 Sealing bar-bottom (PK) D1KK252000 Sealing silicon-bottom D80K256000 Silicon bar end insert D1KK253000 Teflon tape bar D80K224000 Inner plate 10 2701164...
-
Page 40: Cushion Bar (Fbpkg)
6.3.4 CUSHION (FBPKG) Cushion Bar Diagram D1KK2PKG00... - Page 41 D1KK2PKP0G PART NO. DESCRIPTION NOTE DC80202000 Cover - vacuum suction 2705154 Flat washer M4 2705306 Split lock washer, M4 2703308 Round head screw M4 x 12 D1KK251000 Sealing bar-bottom (PK) D1KK252000 Sealing silicon-bottom D80K256000 Silicon bar end insert D1KK253000 Teflon tape bar D80K224000 Inner plate 10 2701164...
- Page 42 6.3.5 SEALING BAR, BOTTOM (FBTB) Sealing Bar,Bottom Diagram D1KK2TB000...
-
Page 43: Sealing Bar (Fbtb)
D1KK2TBP00 PART NO. DESCRIPTION NOTE DC80202000 Cover - vacuum suction 2705154 Flat washer M4 2705306 Split lock washer, M4 2703308 Round head screw M4 x 12 D1KK263001 Sealing bar - bottom (TB) D88K286000 Isolated plate-heating D88K289000 Isolated plate VA04277000 Spring D80K224000 Inner plate 10 2701164... - Page 44 6.3.6 SEALING BAR, BOTTOM (FBTBG) Sealing Bar,Bottom Diagram D1KK2TBG00...
- Page 45 D1KK2TBP0G PART NO. DESCRIPTION NOTE DC80202000 Cover - vacuum suction 2705154 Flat washer M4 2705306 Split lock washer, M4 2703308 Round head screw M4 x 12 D1KK263001 Sealing bar- bottom (TB) D88K286000 Isolated plate-heating D88K289000 Isolated plate VA04277000 Spring D80K224000 Inner plate 10 2701164 Socket set screw M4 x 10...
- Page 46 6.3.7 SEALING BAR, BOTTOM (FBTBPK) Sealing Bar,Bottom Diagram D1KK2TK000...
- Page 47 D1KK2TKP00 PART NO. DESCRIPTION NOTE DC80202000 Cover - vacuum suction 2705154 Flat washer M4 2705306 Split lock washer, M4 2703308 Round head screw M4 x 12 D1KK257000 Sealing bar- bottom (TK) D88K286000 Isolated plate-heating D88K289000 Isolated plate VA04277000 Spring D80K224000 Inner plate 10 2701164 Socket set screw M4 x 10...
- Page 48 6.3.8 SEALING BAR, BOTTOM (FBTBPKG) Sealing Bar,Bottom Diagram D1KK2TKG00...
- Page 49 D1KK2TKP0G PART NO. DESCRIPTION NOTE DC80202000 Cover - vacuum suction 2705154 Flat washer M4 2705306 Split lock washer, M4 2703308 Round head screw M4 x 12 D1KK257000 Sealing bar - bottom (TK) D88K286000 Isulation plate-heating D88K289000 Isulation plate VA04277000 Spring D80K224000 Inner plate 10 2701164...
-
Page 50: Chamber Lid,Top Diagram
6.4 CHAMBER LID DIAGRAM Chamber Lid,top Diagram DC90300000... - Page 51 DC90300P00 PART NO. DESCRIPTION D1KK301001 Chamber lid(10PK) D1KK328000 Swing arm D1KK326000 Swing arm DC80310000 Shaft - top cover D1KK341000 Bar - handle 2740168 O-ring D1KK329000 Cover - electric conduit 27283201 Dried bearing BM2025 D1KK327000 Holder 10 2703307 Round head screw M4 x 10 11 2701179 Hex socket head screw M8 x 40 12 2705306...
-
Page 52: Sealing Bar Configuations,Top
6.5.1 SEALING BAR, TOP (FB) Sealing Bar-Top Diagram D1KK312A00... - Page 53 D1KK312P00 PART NO. DESCRIPTION D1KK302000 Holder - sealing bar (F) D1KK303000 Holder - sealing bar (B) D1KK311000 Holder - sealing bar 2702084 Flat head screw M6x16 2705151 Flat washer M6 2705302 Split lock washer M6 2707204 Hex nut M6 D1KK307000 Jointer - sealing bar 2705150 Flat washer M5 10 2705303...
- Page 54 D1KK312P01 PART NO. DESCRIPTION 35 2707110 Hex nylock nut M6 36 D80K377000 Lining plate 37 D80K375000 Spring fixed plate D1KK312A00 Sealing bar assembly- top...
- Page 55 6.5.2 SEALING BAR, TOP (PK) Sealing Bar-Top Diagram D1KK350A00...
- Page 56 D1KK350P00 PART NO. DESCRIPTION D1KK322000 Sealing bar plate(F) D1KK323000 Sealing bar plate(B) D1KK358000 Knife mold stand DC8035A000 Compression spring DC80359000 Sealing bar bushing 2701160 Hex socket head screw M5x25 D88K357000 Teflon tape clamp 2702251 Round head screw M4x10 D1KK35B000 Cushion 10 D1KK35C000 Sraight perf knife 11 DC8035D000 Compression spring 12 2703315...
- Page 57 D1KK350P01 PART NO. DESCRIPTION NOTE 36 2700414 Hex screw hd M5x12 37 2705304 Split lock washer M10 38 D80K308000 Bushing 39 D80K309001 Compression spring 40 D1KK410000 Gas nozzle sealing silicone plate OPTION 41 D1KK411000 Gas nozzle sealing silicone OPTION 42 2705301 Split lock washer M8 2701199 Hex screw hd M8x75...
-
Page 58: Electrical Boxes
6.6 ELECTRICAL BOX(FB) 6.6 ELECTRICAL BOX(TB) - Page 59 ITEM PART NO. DESCRIPTION SPECIFICATION Q’TY NOTE 2810762 TE LC1D50B7 (AC24V) Contactor Option 2810746 TE LC1D326(AC24V) MOELLER 2810755 Contactor DILMP20(AC24V) TE LR3D3355(30-40A)220V 2811637 300 P Overload Relay Option LR3D22 (16- 2811639 24A)380 ~480V 300 P 2830132 Relay RU4S-C-A24 2831106 Socket, Relay SY4S-05D 2850636 Hook...
- Page 60 2807122 Switch, Selector P3-63/V/SVB-SW 28071221 Link Bracket MOELLER ZVV-P3 28071222 Link-Selector SW MOELLER ZAV-P3 2843209 Terminal Block PTU-30 2843212 Terminal Block PTU-10 2843213 Terminal Block PTU-80 2843210 Plate, Terminal Block PTU-30L 28432131 Plate, Terminal Block PTU-80L 2843207 Brake, Terminal Block SBN-20(TA-002) Electrical Box D1KK801A00 Electrical Wire...
Need help?
Do you have a question about the Promaks DC-900 and is the answer not in the manual?
Questions and answers