Table of Contents
Advertisement
Available languages
Available languages
Quick Links
TYXIA 1701
Télécommande 1 canal pour volet roulant
FR
1-channel remote control for roller shutter
EN
1-Kanal-Fernbedienung für Rollläden
DE
1-kanaals afstandsbediening
NL
voor rolluik
1-kanałowy pilot do rolet
PL
Telemando de 1 canal
ES
para persiana motorizada
Telecomando 1 canale
IT
per tapparella
1
2
Advertisement
Chapters
Table of Contents

Related Manuals for DELTA DORE TYXIA 1701


Summary of Contents for DELTA DORE TYXIA 1701
- Page 1 TYXIA 1701 Télécommande 1 canal pour volet roulant 1-channel remote control for roller shutter 1-Kanal-Fernbedienung für Rollläden 1-kanaals afstandsbediening voor rolluik 1-kanałowy pilot do rolet Telemando de 1 canal para persiana motorizada Telecomando 1 canale per tapparella...
- Page 2 Caractéristiques techniques • Alimentation par pile Lithium 3V, CR2430 • Isolement classe III • Fréquence d’émission X3D : 868,7 MHz à 869,2 MHz • Puissance radio maximale < 10 mW • Récepteur de catégorie II • Portée radio jusqu’à 300 mètres en champ libre, variable selon les équipements associés (portée pouvant être altérée en fonction des conditions d’installation et de l’environnement électromagnétique)
-
Page 3: Table Of Contents
1/ Emplacement / Fixation ........5 1.1 Fixé au mur ............... 5 1.2 Posé sur une surface plane ........5 2/ Association radio ..........6 2.1 Association d’un moteur radio DELTA DORE en commande individuelle ........6 2.2 Association d’un récepteur micromodule Tyxia en commande individuelle ........8 2.3 Association de plusieurs moteurs radio... - Page 4 AVERTISSEMENT! Ne pas ingérer l’accumulateur, risque de brûlure chimique. Ce produit contient un accumulateur bouton. En cas d’ingestion, l’accumulateur bouton, peut causer des brûlures internes sévères en à peine 2 heures qui peuvent être mortelles. Conserver les accumulateurs neufs et usagés hors de portée des enfants.
-
Page 5: 1/ Emplacement / Fixation
1/ Emplacement / Fixation 1.1 Fixé au mur 1.2 Posé sur une surface plane... -
Page 6: 2/ Association Radio
2/ Association radio Si vous êtes en possession d’un moteur solaire, se référer à sa notice. 2.1 Association d’un moteur radio DELTA DORE en commande individuelle A la mise sous tension, un moteur vierge d’association radio se signale toujours par un mouvement bref. Il est en attente d’association pendant 10 minutes. - Page 7 2.1.2 Si plusieurs moteurs sont sous tension ❶ Sur la télécommande, appuyez simultanément sur pendant 3 secondes, jusqu’à ce que le voyant rouge clignote. Relâchez. La télécommande recherche les différents moteurs. Son voyant clignote (flash) rouge, puis brièvement vert dès qu’un nouveau moteur est détecté.
-
Page 8: Association D'un Récepteur Micromodule Tyxia
Le volet s’actionne brièvement pour confirmer l’association. La télécommande sort automatiquement du mode association. 2.3 Association de plusieurs moteurs radio DELTA DORE ou micromodules Tyxia en commande centralisée Important : si vous associez plusieurs moteurs à la télécommande, vous n’aurez plus accès aux réglages... - Page 9 Si vous souhaitez associer plus de 16 moteurs /micromodules Tyxia en commande centralisée, scannez ce QR Code pour plus d’informati ons. ❶ Mett ez les moteurs en att ente d’associati on (appui 3 secondes sur la touche de leur télécommande individuelle ou via l’applicati on Tydom).
-
Page 10: 3/ Enregistrer Les Positions Favorites
3/ Enregistrer les positi ons favorites Vous pouvez enregistrer jusqu’à 2 positi ons favorites à parti r de la télécommande : ❶ ❷ Mett ez le volet dans la positi on correspondante à l’une des positi ons favorites que vous souhaitez enregistrer. -
Page 11: 4/ Utilisation
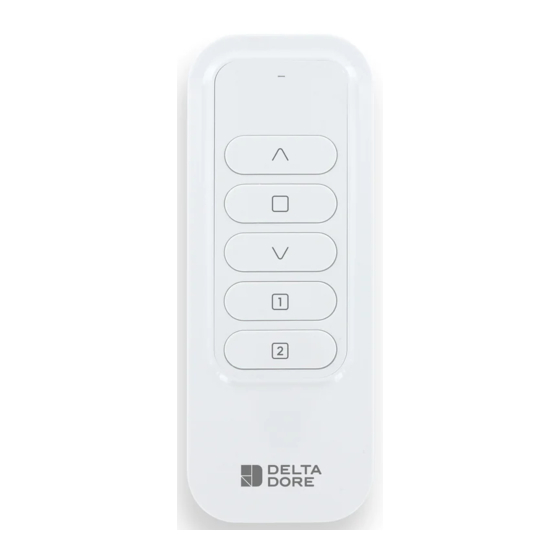
4/ Uti lisati on • Appuyez sur pour monter, sur pour descendre. Appuyez sur pour stopper le(s) volet(s). Le voyant s’allume rouge, puis vert si le moteur/récepteur a bien reçu l’informati on. • Appuyez sur pour att eindre la positi on favorite 1 (si elle a été... -
Page 12: 5/ Aide
5/ Aide • Le voyant rouge clignote plusieurs fois à chaque appui sur une touche. La pile est usée. Changez la pile. • Eff acer une associati on - Enlevez la face avant de la télécommande. - Appuyez sur la touche A. Le voyant rouge clignote (fl ash). - Page 13 . Les volets s’actionnent. - Appuyez sur la touche A pour sortir. • Votre télécommande est perdue ou hors d’usage Condition initiale : La télécommande perdue n’était associée qu’à un seul moteur. Coupez l’alimentation du moteur, attendez 10 secondes, puis remettez le moteur sous tension.
- Page 14 Technical characteristics • Power supplied by 3V lithium battery, CR2430 • Class III insulation • X3D Transmission frequency: 868.7 MHz to 869.2 MHz • Maximum radio power < 10 mW • Receiver category II • Wireless range: Up to 300 meters outside, variable depending on the associated equipment (the range can vary depending on the installation conditions and the electromagnetic environment)
- Page 15 1/ Location/Mounting ........17 1.1 Mounted on the wall ..........17 1.2 Placed on a flat surface ........17 2/ Wireless association ........18 2.1 Association of a DELTA DORE radio motor on individual order ..........18 2.2 Association of a Tyxia micromodule receiver on individual order ..........20 2.3 Association of several DELTA DORE radio motors or Tyxia micromodules in centralized control ..............20...
- Page 16 WARNING ! Do not ingest battery, chemical Burn Hazard. This product contains a coin/button cell battery. If the coin/button cell battery is swallowed, it can cause severe internal burns in just 2 hours and can lead to death. Keep new and used batteries away from children.
-
Page 17: 1/ Location/Mounting
1/ Location/Mounting 1.1 Mounted on the wall 1.2 Placed on a flat surface... -
Page 18: 2/ Wireless Association
2/ Wireless association If you own a solar motor, refer to its instructions. 2.1 Association of a DELTA DORE radio motor on individual order When connecting to the power supply, a motor that has never been wirelessly paired before will always perform a brief movement. - Page 19 2.1.2 If several motors are switched on ❶ On the remote control, press at the same time and hold for 3 seconds, until the red LED flashes. Release the buttons. The remote control searches for the various motors. The LED flashes red, then briefly green as soon as a new motor is found.
-
Page 20: Association Of A Tyxia Micromodule Receiver
The shutter activates briefly to confirm the pairing. The remote control automatically exits pairing mode. 2.3 Association of several DELTA DORE radio motors or Tyxia micromodules in centralized control Important: if you pair several motors with the remote control, you will no longer have access to the stop settings from this remote control. - Page 21 If you wish to associate more than 16 Tyxia motors/micromodules in centralized control, scan this QR Code for more informati on. ❶ Set the motors to pending pairing (press the butt on on their individual control for 3 seconds, or via the Tydom app).
-
Page 22: 3/ Save The Favourite Positions
3/ Save the favourite positi ons You can save up to 2 favourite positi ons from the remote control: ❶ ❷ Move the shutter to the position corresponding to one of the favorite positions you want to save. ❸ Press for 3 seconds to save the positi ons. -
Page 23: 4/ Use
4/ Use • Press to raise, and to lower. Press to stop the shutt ers. The LED changes from red to green if the motor/receiver has correctly received the informati on. • Press to go to favourite positi on 1 (if it has been saved). -
Page 24: 5/ Troubleshooting
5/ Troubleshooti ng • The red LED fl ashes several ti mes every ti me a butt on is pressed. The batt ery is low. Change the batt ery. • Remove an associati on - Remove the front face of the remote control. - Page 25 - Press the buttons at the same time and hold for 3 seconds. The shutters start. - Press button A to exit. • Your remote control is lost or not functioning Initial condition: The lost remote control was only associated with a single motor Turn off the power to the motor, wait 10 seconds, then turn the motor back on.
- Page 26 Technische Eigenschaften • Spannungsversorgung: Lithium-Batterie CR2430, 3 V • Schutzklasse III • X3D-Sendefrequenz: 868,7 MHz bis 869,2 MHz • Maximale radio Leistung: < 10 mW • Empfänger Kategorie II • Funk-Reichweite bis zu 300 Meter in hindernisfreier Umgebung je nach Einsatzkombination (Reichweite vom Einbau und möglichen elektromagnetischen Störungen abhängig) •...
- Page 27 Inhalt 1/ Einbauort/Befestigung ........29 1.1 Wandbefestigung ..........29 1.2 Auf einem ebenen Untergrund ......29 2/ Funkzuordnung ..........30 2.1 Verein eines DELTA DORE Funkmotors auf individuelle Bestellung ........30 2.2 Zuordnung eines Tyxia-Mikromodulempfängers auf individuelle Bestellung ........32 2.3 Zusammenschluss mehrerer Delta-Dore- Funkmotoren oder Tyxia-Mikromodule zur zentralen Steuerung ..........32 3/ Speichern der Zwischenstellungen .....
- Page 28 WARNUNG ! Die Batterie darf nicht verschluckt werden. Es besteht die Gefahr von Verätzungen. Dieses Produkt enthält eine Knopfzellenbatterie. Wenn eine nopfzellenbatterie verschluckt wird, kann dies in nur 2 Stunden zu schweren inneren Verätzungen und zum Tod führen. Bewahren Sie neue und verbrauchte Batterien außerhalb der Reichweite von Kindern auf.
-
Page 29: 1/ Einbauort/Befestigung
1/ Einbauort/Befestigung 1.1 Wandbefestigung 1.2 Auf einem ebenen Untergrund... -
Page 30: 2/ Funkzuordnung
2/ Funkzuordnung Wenn Sie einen Solarmotor besitzen, lesen Sie bitte die entsprechende Bedienungsanleitung. 2.1 Verein eines DELTA DORE Funkmotors auf individuelle Bestellung Beim Einschalten der Stromversorgung macht sich ein Motor, der noch nicht per Funk gekoppelt wurde, immer durch eine kurze Bewegung bemerkbar. Er ist 10 Minuten lang kopplungsbereit. - Page 31 2.1.2 Wenn die Stromversorgung für mehrere Motoren aktiviert wurde ❶ Drücken Sie auf der Fernbedienung gleichzeitig 3 Sekunden auf , bis die rote Kontrollleuchte blinkt. Loslassen. Die Fernbedienung sucht die verschiedenen Motoren. Die Kontrollleuchte blinkt (blitzt) rot und anschließend grün, sobald ein neuer Motor erkannt wurde. ❷...
-
Page 32: Zuordnung Eines Tyxia-Mikromodulempfängers Auf Individuelle Bestellung
2/ Funkzuordnung 2.2 Zuordnung eines Tyxia-Mikromodulempfängers auf individuelle Bestellung ❶ Schalten Sie den Empfänger ein und versetzen Sie ihn in den Kopplungsmodus, indem Sie die Taste 3 Sekunden lang gedrückt halten, bis die rote Kontrollleuchte blinkt. Dann loslassen. ❷ Drücken Sie auf der Fernbedienung gleichzeitig 3 Sekunden auf , bis ihre rote Kontrollleuchte blinkt. - Page 33 Wenn Sie mehr als 16 Tyxia-Motoren/ Mikromodule in einer zentralen Steuerung verknüpfen möchten, scannen Sie diesen QR-Code für weitere Informati onen. ❶ Stellen Sie sicher, dass die Motoren kopplungsbereit sind (3 Sekunden lang die Taste auf Ihrer individuellen Fernbedienung gedrückt halten oder über die Tydom-App).
-
Page 34: 3/ Speichern Der Zwischenstellungen
3/ Speichern der Zwischenstellungen Sie können über die Fernbedienung bis zu 2 Zwischenstellungen speichern: ❶ ❷ Bewegen Sie den Rollladen in die Position, die einer der Lieblingspositionen entspricht, die Sie speichern möchten. ❸ Drücken Sie 3 Sekunden auf oder , um die Positi on zu speichern. Die Kontrollleuchte leuchtet rot und dann grün, wenn der Motor/Empfänger die Informati on erhalten hat. -
Page 35: 4/ Verwendung
4/ Verwendung • Zum Hochfahren auf drücken, zum Herunterfahren auf drücken, um den/die Rollladen/Rollläden anzuhalten. Die Kontrollleuchte leuchtet rot und dann grün, wenn der Motor/Empfänger die Informati on erhalten hat. • Drücken Sie auf , um die 1. Zwischenstellung einzustellen (falls diese gespeichert wurde). •... -
Page 36: 5/ Hilfe
5/ Hilfe • Die rote Kontrollleuchte blinkt mehrmals nach jedem Tastendruck. Die Batt erie ist leer. Tauschen Sie die Batt erie aus. • Eine Zuordnung löschen - Nehmen die Vorderseite der Fernbedienung ab. - Drücken Sie auf die Taste A. Die rote Kontrollleuchte blinkt (Blitzlicht). - Page 37 . Die Rollläden schalten sich ein. - Drücken Sie auf die Taste A, um zu verlassen. • Sie haben Ihre Fernbedienung verloren oder sie funktioniert nicht mehr. Anfangsbedingung: Die verlorene Fernbedienung war einem einzigen Motor (bzw. Empfänger) zugeordnet. Schalten Sie die Stromversorgung des Motors aus, warten Sie 10 Sekunden und schalten Sie den Motor dann wieder ein.Mit einer neuen Fernbedienung: - Drücken Sie 2-mal auf die Taste B, bis die Kontrollleuchte...
- Page 38 Technische kenmerken - Voeding door lithiumbatterij - CR2430 - 3V • Klasse III isolatie • Zendfrequentie X3D: 868,7 MHz tot 869,2 MHz • Maximaal radio vermogen < 10 mW • Categorie receptor II • Zendbereik van tot 300 meter meter in open veld, afhankelijk van de aangesloten toestellen (het bereik kan variëren in functie van de plaatsingsomstandigheden en de elektromagnetische...
- Page 39 Inhoudsopgave 1/ Plaatsing/Bevestiging ........41 1.1 Wandmontage ............41 1.2 Op een vlakke ondergrond .........41 2/ Radiokoppeling ..........42 2.1 Koppeling van een DELTA DORE-radiomotor op individuele bestelling ........42 2.2 Koppeling van een Tyxia-micromoduleontvanger op individuele bestelling ........44 2.3 Vereniging van verschillende DELTA DORE- radiomotoren of Tyxia-micromodules in gecentraliseerde besturing ........44...
- Page 40 WAARSCHUWINGEN ! Houd nieuwe en gebruikte batterijen uit de buurt van kinderen. De batterij niet inslikken, gevaar voor chemische brandwonden. Dit product bevat een knoopcel. Als de knoopcelbatterij wordt ingeslikt, kan dit binnen slechts 2 uur leiden tot ernstige inwendige brandwonden met mogelijk de dood als gevolg.
-
Page 41: 1/ Plaatsing/Bevestiging
1/ Plaatsing/Bevestiging 1.1 Wandmontage 1.2 Op een vlakke ondergrond... -
Page 42: 2/ Radiokoppeling
2/ Radiokoppeling Raadpleeg de handleiding als u een motor op zonne- energie hebt. 2.1 Koppeling van een DELTA DORE-radiomotor op individuele bestelling Wanneer een motor die nog nooit via radio werd gekoppeld onder spanning wordt gebracht, geeft die dit altijd met een korte beweging aan. De motor wacht gedurende 10 minuten op een koppeling. - Page 43 2.1.2 Als meerdere motoren onder spanning staan ❶ Druk gedurende 3 seconden simultaan op op de afstandsbediening, tot het rode lampje knippert. Laat los. De afstandbediening zoekt de verschillende motoren. Het rode lampje knippert (flits), vervolgens wordt het even groen zodra een nieuwe motor wordt gedetecteerd. ❷...
-
Page 44: Koppeling Van Een Tyxia-Micromoduleontvanger
Het rolluik treedt kort in werking om de koppeling te bevestigen. De afstandsbediening verlaat de koppelingsmodus automatisch. 2.3 Vereniging van verschillende DELTA DORE- radiomotoren of Tyxia-micromodules in gecentraliseerde besturing Belangrijk: als u meerdere motoren aan de afstandsbediening koppelt, hebt u via deze afstandsbediening geen toegang meer tot de instellingen van de eindaanslagen. - Page 45 Als u meer dan 16 Tyxia-motoren/ micromodules wilt koppelen aan gecentraliseerde besturing, scan dan deze QR-code voor meer informati e. ❶ Stel de motoren in op wachten op koppeling (druk 3 seconden op de toets van hun individuele afstandsbediening of via de Tydom-app). en/of Stel de motoren in koppelingsmodus (druk 3 seconden op hun toets of via de Tydom-app).
-
Page 46: 3/ Favoriete Posities Opslaan
3/ Favoriete positi es opslaan Via de afstandsbediening kunt u tot 2 favoriete positi es opslaan: ❶ ❷ Verplaats de sluiter naar de positie die overeenkomt met een van de favoriete posities die u wilt opslaan. ❸ Druk 3 seconden op om de positi e te registreren. -
Page 47: 4/ Gebruik
4/ Gebruik • Druk op om omhoog te gaan, op om naar beneden te gaan. Druk op om het/de rolluik(en) te stoppen. Het lampje licht rood op en vervolgens groen, dit betekent dat de motor/ontvanger de informati e heeft ontvangen. • Druk op om de favoriete positi e 1 in te stellen (indien opgeslagen). -
Page 48: 5/ Ondersteuning
5/ Ondersteuning • Het rode lampje knippert meerdere keren bij elke druk op de knop. De batt erij is leeg. Vervang de batt erij. • Een verbinding verwijderen - Verwijder de voorzijde van de afstandsbediening. - Druk op de knop A. Het rode lampje knippert (fl ash). - Page 49 - Druk gelijktijdig 3 seconden op De rolluiken gaan omhoog/omlaag. - Druk op A om te verlaten. • U bent de afstandsbediening kwijt of deze is defect Voor aanvang: De verloren afstandsbediening werd verbonden met een enkele motor (ontvanger). Schakel de stroom naar de motor uit, wacht 10 seconden en schakel de stroom dan weer in.Met de nieuwe afstandsbediening: - Druk 2 keer op B, totdat het oranje lampje knippert.
- Page 50 Dane techniczne • Zasilanie: bateria litowa 3 V, CR2430 • Izolacja klasa III • Częstotliwość emisji X3D: od 868,7 MHz do 869,2 MHz • Moc radio maksymalna < 10 mW • Kategoria receptor II • Zasięg radiowy od do 300 metrów w wolnym polu, zmieniający się...
- Page 51 2.1 Stowarzyszenie silnika radiowego DELTA DORE na indywidualne zamówienie ......54 2.2 Stowarzyszenie odbiornika mikromodułowego Tyxia na indywidualne zamówienie ....56 2.3 Połączenie kilku silników radiowych DELTA DORE lub mikromodułów Tyxia w scentralizowanym sterowaniu ......56 3/ Zapamiętywanie położeń ulubionych ..58 4/ Obsługa ............. 59 5/ Pomoc ..............61...
- Page 52 OSTRZEŻENIE ! Nie spożywać baterii, zagrożenie poparzeniem środkami chemicznymi. Z produktem zawiera się bateria wielkości monety / guzika. Jeśli bateria guzikowa zostanie połknięta, może spowodować poważne oparzenia wewnętrzne w ciągu zaledwie 2 godzin i może prowadzić do śmierci. Trzymaj nowe i zużyte baterie z dala od dzieci.
-
Page 53: 1/ Lokalizacja/Mocowanie
1/ Lokalizacja/mocowanie 1.1 Mocowanie do ściany 1.2 Montaż na płaskiej powierzchni... -
Page 54: 2/ Powiązanie Radiowe
2/ Powiązanie radiowe Jeśli masz napęd solarny, zapoznaj się z jego instrukcją. 2.1 Stowarzyszenie silnika radiowego DELTA DORE na indywidualne zamówienie Po włączeniu napęd bez przypisania radiowego zawsze syngalizuje gotowość krótkim ruchem. Przez najbliższe 10 minut możliwe jest jego przypisanie. 2.1.1 Jeśli tylko jeden napęd jest podłączony do zasilania ❶Na pilocie naciśnij jednocześnie... - Page 55 2.1.2 Jeśli zasilany jest więcej niż jeden napęd ❶ Na pilocie naciśnij jednocześnie przytrzymaj 3 sekundy do momentu, aż zapali się czerwona dioda. Puść przycisk. Pilot wyszukuje różne napędy. Lampka sygnalizacyjna miga (błyska) na czerwono, a następnie krótko na zielono, gdy tylko zostanie wykryty nowy napęd.
-
Page 56: Stowarzyszenie Odbiornika Mikromodułowego Tyxia Na Indywidualne Zamówienie
Rolety uruchamiają się na krótko, aby potwierdzić przypisanie. Pilot automatycznie wychodzi z trybu powiązania. 2.3 Połączenie kilku silników radiowych DELTA DORE lub mikromodułów Tyxia w scentralizowanym sterowaniu Ważne: w przypadku powiązania kilku napędów z pilotem zdalnego sterowania następuje utrata dostępu do regulacji ograniczników za pomocą... - Page 57 Jeśli chcesz powiązać więcej niż 16 silników/ mikromodułów Tyxia w scentralizowanym sterowaniu, zeskanuj ten kod QR, aby uzyskać więcej informacji. ❶ Przełącz silniki w stan oczekiwania na przypisanie (naciśnij przez 3 sekundy przycisk na ich indywidualnym pilocie lub za pośrednictwem aplikacji Tydom).
-
Page 58: 3/ Zapamiętywanie Położeń Ulubionych
3/ Zapamiętywanie położeń ulubionych Za pomocą pilota można zapisać do 2 ulubionych pozycji: ❶ ❷ Przesuń migawkę do pozycji odpowiadającej jednej z ulubionych pozycji, którą chcesz zapisać. ❸ Aby zapamiętać to położenie, naciśnij na 3 sekundy przycisk albo Lampka sygnalizacyjna zapala się na czerwono, a następnie na zielono, jeśli silnik/odbiornik odebrał... -
Page 59: 4/ Obsługa
4/ Obsługa • Naciśnij , aby podnieść, , aby opuścić. Naciśnij , aby zatrzymać roletę(y). Lampka sygnalizacyjna zapala się na czerwono, a następnie na zielono, jeśli silnik/odbiornik odebrał informację. • Aby ustawić roletę w położeniu ulubionym 1 (jeżeli zostało zapamiętane), naciśnij przycisk •... -
Page 60: 5/ Pomoc
5/ Pomoc • Przy każdym naciśnięciu przycisku czerwona lampka sygnalizacyjna miga wielokrotnie. Bateria jest rozładowana. Wymień baterię. • Usuwanie powiązania - Zdejmij pokrywę przednią pilota zdalnego sterowania. - Naciśnij przycisk A. Miga (błyska) czerwona lampka sygnalizacyjna. - Aby włączyć napęd (odbiornik), który ma zostać... - Page 61 - Naciśnij równocześnie na 3 sekundy przyciski Rolety uruchamiają się. - Aby wyjść, naciśnij przycisk A. • Pilot został zgubiony lub nie nadaje się do użytku Warunek początkowy: Zgubiony pilot był powiązany z jednym napędem (odbiornikiem). Wyłączyć zasilanie silnika, odczekać 10 sekund, a następnie ponownie włączyć...
- Page 62 Características técnicas • Alimentación por pila de litio de 3V, CR2430 • Aislamiento clase III • Frecuencia de emisión X3D: 868,7 MHz a 869,2 MHz • Potencia radio máxima < 10 mW • Receptor categoría II • Alcance radio hasta 300 metros en campo libre, variable según los equipos asociados (el alcance se puede ver alterado en función de las condiciones de instalación y del entorno electromagnético).
- Page 63 1/ Ubicación / Fijación........65 1.1 Fijado en la pared ..........65 1.2 Colocado en una superficie plana .....65 2/ Asociación vía radio ........66 2.1 Asociación de un motor radio DELTA DORE en control individual ..........66 2.2 Asociación de un micromódulo receptor Tyxia para control individual ..........68 2.3 Asociación de varios motores radio...
- Page 64 ADVERTENCIA ! No ingiera las baterías, riesgo de quemaduras químicas. Este producto contiene baterías del tipo botón/ moneda. Si la batería del tipo botón/moneda se ingiere, podría causar quemaduras internas severas en apenas 2 horas, y podría causar la muerte. Mantenga las baterías nuevas y usadas fuera del alcance de los niños.
-
Page 65: 1/ Ubicación / Fijación
1/ Ubicación / Fijación 1.1 Fijado en la pared 1.2 Colocado en una superficie plana... -
Page 66: 2/ Asociación Vía Radio
2/ Asociación vía radio Si dispone de un motor solar, consulte su manual de instrucciones. 2.1 Asociación de un motor radio DELTA DORE en control individual Durante la puesta en marcha, un motor sin asociación al sistema radio siempre se señala con un breve movimiento. - Page 67 2.1.2 Si hay varios motores encendidos ❶ En el mando a distancia, pulse simultáneamente durante tres segundos, hasta que el indicador luminoso rojo parpadee. Suelte. El mando a distancia busca los diferentes motores. Su indicador luminoso parpadea (flash) en rojo y brevemente en verde cuando se detecta un nuevo motor.
-
Page 68: Asociación De Un Micromódulo Receptor Tyxia Para Control Individual
El mando a distancia abandona automáticamente el modo asociación. 2.3 Asociación de varios motores radio DELTA DORE o micromódulos Tyxia en control centralizado Importante : si asocia varios motores al mando a distancia, no volverá a tener acceso a los ajustes de los... - Page 69 Si desea asociar más de 16 motores/ micromódulos Tyxia en control centralizado, escanee este Código QR para obtener más información. ❶ Ponga los motores en espera de asociación (pulse tres segundos en la tecla de su mando a distancia individual o vía la aplicación Tydom). Ponga los receptores en modo asociación (pulse tres segundos su tecla o vía la aplicación Tydom).
-
Page 70: 3/ Registrar Las Posiciones Favoritas
3/ Registrar las posiciones favoritas Puede guardar hasta dos posiciones favoritas desde el mando a distancia : ❶ ❷ Mueva la persiana a la posición correspondiente a una de las posiciones favoritas que desea guardar. ❸ Pulse simultáneamente tres segundos para guardar la posición. El indicador del mando a distancia se enciende en rojo, después en verde si el motor/receptor ha recibido la información. -
Page 71: 4/ Utilización
4/ Uti lización • Pulse para subir, para bajar. Pulse para detener la/s persiana/s. El indicador luminoso se enciende en rojo, seguidamente a verde si el motor/receptor ha recibido correctamente la información. • Pulse para alcanzar la posición favorita 1 (si se ha guardado). -
Page 72: 5/ Ayuda
5/ Ayuda • El indicador rojo parpadea varias veces cada vez que se pulsa una tecla. La pila está agotada. Cambie la pila. • Eliminar una asociación - Reti re la parte delantera del telemando. - Pulse la tecla A. El indicador luminoso rojo parpadea (fl ash). - Page 73 - Pulse simultáneamente durante 3 segundos las teclas . Las persianas se accionan. - Pulse la tecla A para salir. • Su telemando se ha perdido o no funciona Condición inicial: El telemando no encontrado estaba asociado a un solo motor (receptor). Desde un nuevo telemando: - Pulse 2 veces la tecla B, hasta que el indicador luminoso parpadee en naranja.
- Page 74 Caratteristiche tecniche • Alimentazione mediante pila al Litio 3V, CR2430 • Isolamento classe III • Frequenza di emissione X3D: 868,7 MHz - 869,2 MHz • Potenza radio massima < 10 mW • Categoria del ricevitore II • Portata radio fino a 300 metri in campo libero, variabile in base ai dispositivi associati (portata che può...
- Page 75 2.1 Associazione di un motore radio DELTA DORE su ordine individuale ..........78 2.2 Associazione di un micromodulo ricevitore Tyxia su ordine individuale ..........80 2.3 Associazione di più motori radio Micromoduli DELTA DORE o Tyxia a controllo centralizzato 80 3/ Registrate le posizioni preferite....82 4/ Utilizzo............... 83 5/ Assistenza ............85...
- Page 76 AVVERTENZA ! Tenere le batterie nuove e usate lontano dalla portata dei bambini. Non ingerire la batteria; esiste il rischio di ustioni chimiche. Questo prodotto contiene una batteria con celle a moneta/bottone. Se la batteria con celle a moneta/bottone viene ingerita, può causare gravi ustioni interne in sole 2 ore e provocare la morte.
-
Page 77: 1/ Posizionamento / Fissaggio
1/ Posizionamento / Fissaggio 1.1 Fissato al muro 1.2 Appoggiato su una superficie piana... -
Page 78: 2/ Associazione Radio
2/ Associazione radio Nel caso di un motore a energia solare, leggere le istruzioni corrispondenti. 2.1 Associazione di un motore radio DELTA DORE su ordine individuale Alla messa sotto tensione, un motore senza associazione radio, viene sempre segnalato da un breve movimento dello stesso. - Page 79 2.1.2 Se più motori sono sotto tensione ❶ Sul telecomando, premere simultaneamente su per 3 secondi, fino a quando la spia rossa lampeggia. Rilasciare il tasto. Il telecomando cerca i diversi motori. La sua spia lampeggia (flash) di colore rosso, poi brevemente di colore verde non appena viene rilevato un nuovo motore.
-
Page 80: Associazione Di Un Micromodulo Ricevitore Tyxia It
Il telecomando esce automaticamente dalla modalità di associazione. 2.3 Associazione di più motori radio Micromoduli DELTA DORE o Tyxia a controllo centralizzato Importante: se si associano diversi motori al telecomando, non si avrà più accesso alle impostazioni di finecorsa a partire da quest’ultimo. - Page 81 Se desideri associare più di 16 motori/ micromoduli Tyxia al controllo centralizzato, scansiona questo codice QR per maggiori informazioni. ❶ Mett ere i motori in att esa di associazione (premere per 3 secondi il tasto del telecomando individuale corrispondente o tramite l’app Tydom). Mett ere i ricevitori in att esa di associazione (premere per 3 secondi il tasto corrispondente o tramite l’app Tydom).
-
Page 82: 3/ Registrate Le Posizioni Preferite
3/ Registrate le posizioni preferite Con il telecomando è possibile registrare fi no a 2 posizioni preferite: ❶ ❷ Spostare la tapparella nella posizione corrispondente ad una delle posizioni preferite che si desidera salvare. ❸ Premere simultaneamente per 3 secondi per registrare la posizione. Se il motore/ricevitore ha ricevuto corrett amente il comando, la tapparella del telecomando si illumina di rosso e poi verde. -
Page 83: 4/ Utilizzo
4/ Uti lizzo • Premere su per salita, su per adiscesa. • Premere per fermare la/e tapparella/e. La spia si accende di colore rosso e poi verde se il motore/ ricevitore ha ricevuto corrett amente l’informazione. • Premete per raggiungere la posizione preferita 1 (se è... -
Page 84: 5/ Assistenza
5/ Assistenza • La spia rossa lampeggia più volte a ogni pressione su un tasto. La pila è esausta. Sosti tuite la pila. • Cancellare un’associazione - Togliete il lato anteriore del telecomando. - Premete il tasto A. La spia rossa lampeggia. - Premete più... - Page 85 - Premete simultaneamente per 3 secondi i tasti Le tapparelle si azionano. - Premete il tasto A per uscire. • Il vostro telecomando è andato perso o è fuori uso Condizione iniziale: Il telecomando perso era associato a un solo motore (ricevitore). Spegnere il motore, attendere 10 secondi, quindi riaccendere il motore.
- Page 88 www.deltadore.com...
Need help?
Do you have a question about the TYXIA 1701 and is the answer not in the manual?
Questions and answers