Table of Contents
Advertisement
Advertisement
Table of Contents

Related Manuals for JVC LT-32CA120


Summary of Contents for JVC LT-32CA120
- Page 1 Hey Google Instruction Manual LED Smart Full HD Android TV™ LT-32CA120...
-
Page 3: Table Of Contents
Contents 1 Safety Warnings ...................................6 2 Preparation ....................................9 Unpacking the TV ..........................................9 Installing / Removing the Stand ....................................10 − Fitting the Stand ........................................10 Mounting the TV to a Wall ......................................11 Front View and Controls .........................................11 Rear View and Sockets ........................................12 Installing Batteries in the Remote Control ................................13 Remote Control Operation Range ....................................13 Remote Control ..........................................14... - Page 4 5 Customising TV Settings ................................36 Adjusting the Picture Settings ....................................36 − Selecting Picture Settings ....................................36 − Picture Settings Table ......................................37 Adjusting the Sound Settings ..................................... 38 − Selecting Sound Settings ....................................38 Making a Play Next Row ........................................ 39 6 Menus ......................................40 Live TV Menus - Channels, TV Options and Record ............................
- Page 5 Remote Control Codes ........................................85 − Sky Codes ..........................................85 − Virgin Media Codes (TiVo box) ..................................85 − BT Vision ..........................................85 Declaration of Conformity ......................................85 Product Fiche and Specifications ..................................... 86 License Information used with JVC Televisions ..............................87...
-
Page 6: Safety Warnings
Chapter Safety Warnings • Read all the instructions carefully before using the unit Wall Mounting and keep them for future reference. • Read the TV and wall mount instructions before mounting your TV on the wall. • Retain the manual. If you pass the unit onto a third party make sure to include this manual. - Page 7 Safety Warnings Mains Cable Country Restrictions for Wireless Internet • Make sure the unit or unit stand is not resting on top of • This device is intended for home and office use in the mains cable, as the weight of the unit may damage all EU countries (and other countries following the the mains cable and create a safety hazard.
- Page 8 Safety Warnings Earthing • Apparatus connected to the protective earthing of the building installation through the MAINS connection or through other apparatus with a connection to protective earthing - and to a television distribution system using coaxial cable, may in some circumstances create a fire hazard.
-
Page 9: Preparation
Certain services are subject to change or withdrawal at any time, may not be available in all areas, or in 4K, HDR or DOLBY VISION or DOLBY ATMOS and may require separate subscriptions. JVC 32' Android LED Smart HD TV LT-32CA120 Quick Start Guide.indd 1 JVC 32' Android LED Smart HD TV LT-32CA120 Quick Start Guide.indd 1... -
Page 10: Installing / Removing The Stand
Preparation Installing / Removing the Stand The LCD display is very fragile, and must be protected at all times when installing and removing the base stand. Be sure that no hard or sharp object, or anything that could scratch or damage the LCD display, comes into contact with it. DO NOT exert pressure on the front of the TV at any time because the screen could crack. -
Page 11: Mounting The Tv To A Wall
Preparation Mounting the TV to a Wall Remove the stand assembly before mounting the TV onto the wall. 1. Remove the screw from each leg and detach. SPDIF Optic.OUT AV IN 2. This TV is designed to be wall-mounted 75mm with a standard 75 mm x 75 mm 75mm mounting kit (sold separately) designed... -
Page 12: Rear View And Sockets
Preparation Rear View and Sockets 5Vdc SPDIF Max. 500mA SPDIF Optic.OUT AV IN Optic.OUT 5Vdc Max. 500mA AV IN 5Vdc Max. 500mA SPDIF Optic.OUT 5Vdc Max. 500mA AV IN Item Description Connects to a High-Definition (HD) signal output device, such as a set-top box, blu-ray HDMI 1, 2 (ARC) &... -
Page 13: Installing Batteries In The Remote Control
Preparation Installing Batteries in the Remote Control 1. Press the catch and lift the battery 2. Insert two AAA size batteries. 3. Click the battery compartment cover. Make sure to match the (+) and back into place. ( - ) ends of the batteries with the (+) and ( - ) ends indicated in the battery compartment. -
Page 14: Remote Control
Preparation Remote Control 1. STANDBY Button • Press to switch between on and standby. • Press for 1 second to Power Off the TV. This will enter low power standby mode. 2. Microphone & LED • Speak into the microphone when using Google Assistant. •... - Page 15 Preparation 21. Input Button Press to switch between inputs. 22. REWIND - STOP - FAST FORWARD - RECORD - PAUSE/PLAY - TEXT Buttons • Press to rewind videos. • Press to Pause videos. • Press the fast forward videos. • Press to Record Live TV, a storage device must be connected. •...
-
Page 16: Initial Setup
Chapter Initial Setup Turning the TV On for the First Time Do not connect the TV to the mains supply until you have completed all the connections. SPDIF Optic.OUT AV IN SPDIF Optic.OUT AV IN RF coaxial cable (not included) Router (not included) 1. -
Page 17: Choosing Your Language, Country And Pairing Your Remote Control
Initial Setup Choosing your language, Country and Pairing your Remote Control The first time you switch your TV on it will automatically be in the initial setup mode. This will guide you through the whole setup process of, selecting your desired language, country, paring your remote control connecting to the internet, signing in to your Google account and tuning in TV channels. -
Page 18: Setting Up Your Tv Using Your Android Phone
Initial Setup Setting up your TV using your Android Phone The quickest way to setup your TV is by using your Android phone. Your Google account details will be copied from your Android phone to your TV. If you don’t have an Android phone you can also setup your TV using the remote control. To setup using remote control refer to 'setting up using a your Remote control' . - Page 19 Initial Setup 8. Choose your Google account. 9. Your account will now be copied to your TV. 10. Enter your account password and select SIGN IN. 11. Now continue setup on your TV. Now go to the Confirm 'Terms of Service' and Google Setting section on page 21.
-
Page 20: Setting Up Your Tv Using Your Remote Control
Initial Setup Setting up your TV using your Remote Control When setting up your TV for the first time you'll be given 2 choices of how you would like to setup your TV. The first choice is to setup using your Android phone so you'll have to SKIP this. The second choice is setup using the remote control. If you don't have an Android phone then this is the option you need. -
Page 21: Sign In To Your Google Account
Initial Setup Sign in to your Google Account If you already have a Google account you can sign in here using your remote control and the onscreen keyboard. You can always use a wireless keyboard if you have one, it will speed up the process. 5. - Page 22 Initial Setup 4. You’ll now see examples of Google Assistant can do for you, press continue. 5. You can read the Service and your privacy notice by highlighting SERVICE or Continue by pressing OK. AND YOUR PRIVACY and then pressing 6.
-
Page 23: Tv Setup
Initial Setup TV Setup You now need to select Home mode and choose if to allow access to the built-in Chromecast. 1. Highlight the Home TV mode then press OK. 2. Select if you would like to allow the built-in Chromecast to be always available or not then press OK. - Page 24 Initial Setup 4. Once the scan is complete highlight FINISH and press OK. 5. Accept the MANUFACTURER USAGE & DIAGNOSTICS by pressing OK. 6. Accept the TERMS AND CONDITIONS by pressing OK. 7. Wait a few moments and you’re all set-up.
-
Page 25: Home Screen Overview
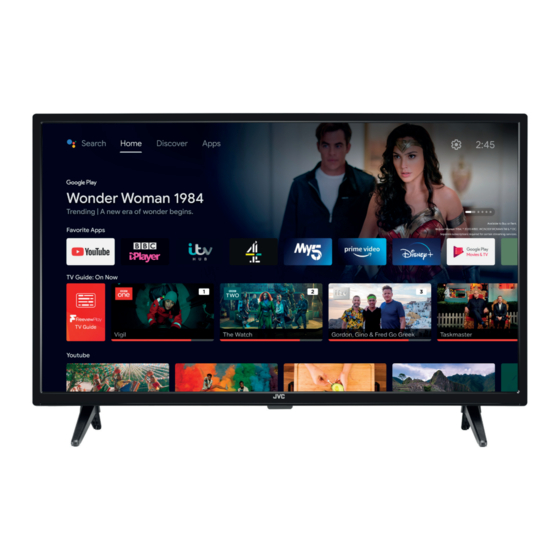
Initial Setup Home Screen Overview Once you have setup your TV, the first screen you will see will be the Home screen. This is the screen where you can access all your TVs content. It will also start to show recommendations for you over time. Customise your home screen Item Description... -
Page 26: Discover Tab
Initial Setup Discover Tab The Discover tab helps you find new and exciting content with personalized recommendations across your streaming services. Recommendations are based on what you’ve watched in the past and your interests from your Google account, or from trending and popular content in your region. -
Page 27: Google Assistant
Google Assistant Having Google Assistant built-in to your TV means that you can use Google to control your TV. Its the simplest way of controlling your TV, with one simple button press and speaking to Google, like "Hey Google, Tune to Channel 1' . Your TV will automatically switch to BBC 1 so you can watch Live TV. -
Page 28: Live Tv
Chapter Live TV Selecting Live TV Tune to channel 101 Live TV refers to channels that have been tuned in via an aerial connection. If you watch Live TV via a Set-Top box such as Sky or Virgin that will be controlled via your Set-Top boxes remote. -
Page 29: Channel Selection
Live TV Channel Selection There are 3 ways to change the channel. • Press the PROGRAMME buttons on the remote control. • Press the buttons to enter the channel number. GOOGLE ASSISTANT • Use Google Assistant, press the button and say "Tune to channel ..." Volume Adjustment There are 2 ways to change the volume on your TV. -
Page 30: Live Tv Guide
Live TV Live TV Guide The Guide is to help you navigate through all the possible Live TV viewing options. The Guide supplies information such as programme listings, start and end times for all available services. In addition, detailed information about the programme is often available in the Guide (the availability and amount of programme information will vary, depending on the particular broadcaster). -
Page 31: Selecting A Programme From The Guide
Live TV Selecting a Programme from the Guide • Press the buttons to select the desired programme. Press the button and your TV will switch to your selected programme. Selecting a Day in the Programme Guide You can select any day to view 7 days before or after the current day using the Schedule option. 1. -
Page 32: Freeview Play On Now Guide
Live TV 1. While watching a TV channel press the LIVE TV button. Programme information will be displayed. 2. Press the button and the Mini Guide will appear. The top line of the Mini Guide shows a list of channels, your current channel will be highlighted. Freeview Play ON NOW Guide Press the FPLAY... - Page 33 Live TV Channel List The Channel list show a list of all TV and Radio channels/stations that are available on your TV. 1. To access the CHANNEL LIST press the button while watching a TV channel. 2. To view a channel from the list scroll up or down the list, highlight your chosen channel and press the button.
-
Page 34: Red Button + (Interactive Services)
Live TV Red Button + (Interactive services) Red button + services are available on BBC TV and Radio channels. The services are gradually changing to an internet based service rather than the conventual over air (though your aerial). To make the most out of the Red Button + services make sure your TV is connected to the internet. -
Page 35: Viewing Channels With Subtitles
Live TV Viewing Channels with Subtitles While you are watching live TV you can select subtitles by pressing the SUBTITLE button. You'll find more Subtitle options in the Accessibility menu where you are able to customise the text size, font and much much more. -
Page 36: Customising Tv Settings
Chapter Customising TV Settings Adjusting the Picture Settings You can adjust the picture settings separately for each source. Selecting Picture Settings 1. First select the source that you wish to adjust the picture settings of. 2. Press the MENU Button. 3. -
Page 37: Picture Settings Table
Customising TV Settings Picture Settings Table The following table show all the available picture setting adjustment on your TV. Not all of these setting apply to all Inputs. Your TV has some pre-set picture modes: STANDARD - VIVID - SPORT - MOVIE - GAME. The default setting Picture Mode is STANDARD. -
Page 38: Adjusting The Sound Settings
Customising TV Settings Adjusting the Sound Settings You can adjust the sound settings separately for TV and Composite sources, if you adjust the sound setting on one HDMI source it will adjust all 4 HDMI sources. Selecting Sound Settings 1. First select the source that you wish to adjust the picture settings of. 2. -
Page 39: Making A Play Next Row
Customising TV Settings The following table show all the available sound setting adjustment on your TV. Sound Mode has 7 different settings USER - STANDARD - VIVID - SPORTS - MOVIE - MUSIC - NEWS. The Sound Style default setting is Standard. Highlight your desired setting then press OK. The speaker balance can be adjusted from a setting of -50 to 50. -
Page 40: Menus
Chapter Menus Live TV Menus - Channels, TV Options and Record If you need to change or adjust anything while watching Live TV you'll be able to find the required setting via the CHANNELS, TV OPTIONS and RECORD menus simply by pressing the MENU button on your remote. - Page 41 Settings Menu TV Options Highlight SOURCE and press to view the Inputs list. • TV • AV • YPbPr Source • VGA • HDMI 1 • HDMI 2 • HDMI 3 Highlight PICTURE MODE and press to view the Picture Modes list. These are just preset setting you can not manual adjust the picture mode here.
- Page 42 Settings Menu • Set your device name • Take bug Report • Network & Internet • Channel Settings • Accounts & sign-in • Apps • Device Preferences • Bluetooth Remotes & accessories Record Record List • Shows a list of all your recordings. Device Info •...
-
Page 43: Inputs Menu
Settings Menu Inputs Menu Use the Inputs menu to change between inputs. There are 3 different ways to access the Input menu, see below. Selecting the Inputs Menu Using the Input Button on the Remote 1. Press the INPUT button the Input menu will appear. If you're on the home screen when you press the INPUT button it will first switch to LIVE TV. -
Page 44: Changing An Inputs Name
Settings Menu Changing an Inputs Name The input name can be changed for HDMI and Composite inputs. If you have a Blu-ray player connected to HDMI 1 this can be renamed the Blu-ray. This will make it easy for you to select inputs when using voice commands. 1. -
Page 45: Settings Menu
Settings Menu Settings Menu The Settings menu can be accessed via the Live TV menu bar or by selecting the SETTINGS icon on the top right of the HOME screen. Settings Menu Suggestions Give your device a name to help identify it when casting or connecting to it from other devices. Select a name from the list or enter a custom name. -
Page 46: Network & Internet Menu
Settings Menu Network & Internet Menu The Network & Internet menu can be accessed via the Live TV menu bar or by selecting the SETTINGS icon on the top right of the HOME screen. MENU • To access the Network & Internet menu while watching Live TV press and select SETTINGS. -
Page 47: Connecting To The Internet Using Wi-Fi
Settings Menu Connecting to the Internet using Wi-Fi You can connect your TV to your router using the built in wireless connection. This may not always give you the fastest connection speed but may be the most convenient connection method. Best connection Maximum distance speed... -
Page 48: Channel Menu
Settings Menu Channel Menu The Channel menu can be accessed via the Live TV menu bar or by selecting the SETTINGS icon on the top right of the HOME screen. MENU • To access the Channel menu while watching Live TV press and select SETTINGS. - Page 49 Settings Menu Set the Parental Controls. Here you can block channels and inputs or set programme restriction. This Parental Controls is also where you can Change the pin number. This is the number you entered when you setup your Choose the audio language of the programmes you are watching if available. The default language Audio Language is English, if you choose another language and its not available then English will continue to be used.
-
Page 50: Accounts & Sign-In Menu
Settings Menu Accounts & Sign-In Menu The Accounts & Sign-In menu can be accessed via the Live TV menu bar or by selecting the SETTINGS icon on the top right of the HOME screen. MENU • To access the Accounts & Sign-In menu while watching Live TV press and select SETTINGS. -
Page 51: Apps Menu
Settings Menu Apps Menu The Apps menu can be accessed via the Live TV menu bar or by selecting the SETTINGS icon on the top right of the HOME screen. In the Apps menu you will first see a list of your recently opened apps, then lower down you will see the Permissions options for apps. -
Page 52: App Permissions
Settings Menu App permissions To select App permissions go to SETTINGS - APPS - APP PERMISSIONS. In the App permissions menu you will see a list of all the apps that you have allowed to access certain information. For example below you can see that out of 7 apps, 2 of them have access to contact details. -
Page 53: Special App Permissions
Settings Menu Shows the number of apps that have access to your Storages. To allow or deny access highlight Storage STORAGE, then highlight the desired app and press OK. If the slider is to the right and blue permissions are allowed. Shows the number of apps that have access to your Telephone. -
Page 54: Device Preferences Menu
Settings Menu Device Preferences Menu The Device Preferences menu can be accessed via the Live TV menu bar or by selecting the SETTINGS icon on the top right of the HOME screen. About - Settings about your TV To select About go to SETTINGS - DEVICE PREFERENCES - ABOUT. Here you will see all the information about your TV. This menu will be helpful if you need help with your TV, it will tell you model, version and software versions that your TV is currently running. -
Page 55: Date & Time - Settings The Correct Date And Time
Settings Menu Date & Time - Settings the Correct Date and Time To select Date & Time go to SETTINGS - DEVICE PREFERENCES - DATE & TIME. Here you'll be able to set and adjust all the Date and Time settings on your TV. Date &... -
Page 56: Timer - Set Your Tv To Automatically Switch On And Off At Set Times
Settings Menu Timer - Set your TV to Automatically Switch ON and OFF at Set Times To select Timer go to SETTINGS - DEVICE PREFERENCES - TIMER. Here you'll be able to select a time for your TV to automatically switch on or off. -
Page 57: Language - Set The Language Menus Are Displayed In
Settings Menu Language - Set the Language Menus are Displayed in To select Language go to SETTINGS - DEVICE PREFERENCES - LANGUAGE. Here you'll be able to select the language that you want your menus and home screen to be displayed in. Keyboard - Select Which Type of Keyboard you Want to Use To select Keyboard go to SETTINGS - DEVICE PREFERENCES - KEYBOARD. -
Page 58: Inputs - Rename And Adjust Inputs Setting
Settings Menu Inputs - Rename and Adjust Inputs Setting To select Inputs go to SETTINGS - DEVICE PREFERENCES - INPUTS. Here you'll be able rename your inputs and adjust Consumer Electronic Controls (CEC). These setting will be useful when connecting externals devices like soundbars and games consols. Inputs HDMI, 3, 2, If you select any input you can choose if you want to make this input visible by selecting SHOW THIS INPUT. -
Page 59: Power - Adjust Switch Off Times For Various Modes
Settings Menu Power - Adjust Switch Off Times For Various Modes To select Power go to SETTINGS - DEVICE PREFERENCES - POWER. Here you'll be able set various timers which allow the TV to switch off after a set amount of time. The picture can also be switched off to save power when listening to music for example. Power You can set a sleep timer to automatically switch your TV off after a selected time. -
Page 60: Picture - Adjust Picture Modes And Settings
Settings Menu Picture - Adjust Picture Modes and Settings To select Picture go to SETTINGS - DEVICE PREFERENCES - PICTURE. Here you'll be able to adjust all the picture modes and picture setting. The following table show all the available picture setting adjustment on your TV. Not all of these setting apply to all Inputs. Picture Your TV has some pre-set picture modes: STANDARD - VIVID - SPORT - MOVIE - GAME. - Page 61 Settings Menu DI Film mode has 2 setting AUTO and OFF. The default setting is OFF. Highlight your DI Film Mode desired setting then press SELECT. Blue Stretch Blue Stretch can be switched ON or OFF. Game Mode Game Mode can be switched ON or OFF. PC Mode PC Mode can be switched ON or OFF.
-
Page 62: Sound - Adjust Sound Styles And Settings
Settings Menu Sound - Adjust Sound Styles and Settings To select Sound go to SETTINGS - DEVICE PREFERENCES - SOUND. Here you'll be able to adjust all the Dolby Audio Processing setting and all other sound setting. The following table show all the available sound setting adjustment on your TV. Sound Mode has 7 different settings USER - STANDARD - VIVID - SPORTS - MOVIE - MUSIC - NEWS. -
Page 63: Storage - See Available Storage Space On The Tv Or External Device
Settings Menu Storage - See Available Storage Space on the TV or External Device To select Storage go to SETTINGS - DEVICE PREFERENCES - STORAGE. Here you'll be able to see the storage capacity of your TV and a breakdown of what's using the storage. You'll also see the storage capacity of any external devices that you have connected to the USB ports. -
Page 64: Home Screen - Personalising The Home Screen
Settings Menu Home Screen - Personalising the Home Screen To select Home Screen go to SETTINGS - DEVICE PREFERENCES - HOME SCREEN. Here you'll be able to personalise your home screen content by moving around and reordering apps and games. Home screen Customise This is where you have all the options to customise which channels you want to display on the home screen. -
Page 65: Store Mode - Switch Store Mode On
Settings Menu Store Mode - Switch Store Mode On To select Store Mode go to SETTINGS - DEVICE PREFERENCES - STORE MODE. This mode is only for demonstrations in a store. Switching on Store Mode will adjust picture settings to make the screen brighter and a demo will play showing your TVs features. To interrupt the demo press any button on your TV. -
Page 66: Google Assistant - Personalise Google Assistant Settings
Settings Menu Google Assistant - Personalise Google Assistant Settings To select Google Assistant go to SETTINGS - DEVICE PREFERENCES - GOOGLE ASSISTANT. See the Google account that's connected to your TV and personalise your Google Assistant settings. Google Assistant This switches Google Assistant on or off. Accounts This shows the account that is connected to your TV. -
Page 67: Screen Saver - Settings
Settings Menu Screen Saver - Settings To select Screen Saver go to SETTINGS - DEVICE PREFERENCES - SCREEN SAVER. Here you can adjust the screen saver setting and activate the screen saver. Screen Saver Here you have 3 options, you can turn the screen saver off or choose to have it on with either backdrop Screen saver photographs or abstract colours. -
Page 68: Location - Settings
Settings Menu Location - Settings To select Location go to SETTINGS - DEVICE PREFERENCES - LOCATION. Here you switch location on and off and see the apps that have requested your location. Location Location Here can choose if you want to use Wi-Fi to estimate your location or switch location off. status Recent This shows a list of apps that have recently requested your location. -
Page 69: Usage & Diagnostics - On/Off
Settings Menu Usage & Diagnostics - ON/OFF To select Usage & Diagnostics go to SETTINGS - DEVICE PREFERENCES - USAGE & DIAGNOSTICS. Here you switch Usage & Diagnostics on and off. If you select ON, your TV will send diagnostic information to Google to help it improve its services. -
Page 70: Manufacturer Usage & Diagnostics - On/Off
Settings Menu Manufacturer Usage & Diagnostics - ON/OFF To select Manufacturer Usage & Diagnostics go to SETTINGS - DEVICE PREFERENCES - MANUFACTURER USAGE & DIAGNOSTICS. Here you switch Manufacturer Usage & Diagnostics on and off. If you select ON, your TV will send personal information to the manufacturer to ensure your TV works properly. -
Page 71: Accessibility - Switch On/Off Accessibility Features
Settings Menu Accessibility - Switch on/off Accessibility Features To select Accessibility go to SETTINGS - DEVICE PREFERENCES - ACCESSIBILITY. Here you switch on accessibility features such as Audio Description and Spoken Subtitles. Screen Saver Audio description is a descriptive track that plays at the same time as the normal audio. It describes the Audio scene so visually impaired views can understand the scene better. -
Page 72: Reset - Factory Reset Your Tv
Settings Menu Reset - Factory Reset Your TV To select Reset go to SETTINGS - DEVICE PREFERENCES - RESET. If you want to totally clear and reset your TV then choosing Reset will wipe all saved channels and accounts on your TV. This will take it back to the state it first came out of the factory in. -
Page 73: Bluetooth Remotes & Accessories Menu
Highlight your device and press OK. Your device should now pair. Checking Remote Control Status To check your remote control status go to SETTINGS - REMOTES & ACCESSORIES - JVC-RM-C3250_1. Here you are able to change the name of your remote control, unpair it and check the remaining battery life. -
Page 74: Browsing Usb Storage
Chapter Browsing USB Storage Viewing Media on a USB Storage Device If you have a USB storage device plugged into one of the USB sockets you can view these files by selecting the MultiMedia Player app. • Supported file - Video formats: MKV, MP4, MOV, FLV, and AVI. •... -
Page 75: Checking And Formatting A Usb Drive
Browsing USB Storage Checking and Formatting a USB Drive You can check that amount of available storage on your USB device or format the device from the STORAGE menu. 1. Press MENU and go to SETTINGS - DEVICE PREFERENCES - STORAGE. Your USB storage device will be shown under REMOVABLE STORAGE. -
Page 76: Google Home Speaker
Chapter Google Home Speaker Using Your Google Home Speaker to Control Your TV You can use your Google Home speaker to control some of the functionality of your TV. For example, once setup you can ask your Google Home speaker to show videos on You Tube. Your TV will switch on and play the content you asked for. Both devices will need to be on the same network and connected so that they can see each other. - Page 77 Google Assistant Some things try with your TV and Google Home speaker Your TV must be on the same network as your Google Home Speaker to use your Google Home Speaker to control your TV. “Hey Google, Open You Tube” •...
-
Page 78: Connecting Devices
Chapter Connecting Devices Connecting a Soundbar via HDMI (ARC) The ARC (Audio Return Channel) function allows you to send audio from your ARC-compliant TV to ARC-compliant audio devices (e.g. soundbar) through a single HDMI connection. SPDIF SPDIF Optic.OUT AV IN Optic.OUT AV IN ARC enabled devices... -
Page 79: Connecting A Usb Storage Device
Connecting Devices HDMI 2 (ARC) HDMI 3 Connecting a USB Storage Device ANT. You must use a USB storage device with a minimum of 2GB of storage space. 1. Switch off the TV before connecting any USB storage device. 2. Connect your USB storage device to the USB port of your TV. If your USB device is powered by the main, plug the connected devices into the mains socket and switch on. -
Page 80: Ci (Common Interface)
ANT. Connecting Devices CI (Common Interface) The common interface allows the use of a Common Access Module to enable you to view scrambled (pay-per-view) services. This is for services that may become available in the future. The Common Access Module and viewing card can be obtained from the service provider when available. -
Page 81: Connecting To The Internet (Wired)
Connecting Devices Connecting to the Internet (Wired) For the fastest and most reliable connection we recommend connecting your TV to the internet using an ethernet cable. SPDIF Optic.OUT AV IN SPDIF Optic.OUT AV IN Router (not included) 1. With the TV switched off connect an Ethernet cable from your Router to your TV, plug it into the socket marked LAN. -
Page 82: Technical Information And Help
Chapter Technical Information and Help Maintenance Careful and regular cleaning can prolong the life of your TV. Be sure to press the button on the remote control and disconnect the mains cable from the mains socket before any cleaning. 1. Use a soft dry cloth to wipe away the dust from the screen and surfaces. 2. -
Page 83: Hints And Tips
Technical Information and Help Hints and Tips The following table contains various hints and tips to get the best performance from your TV. If you require additional assistance please call our Call Centre on (UK) 0344 561 1234 or (Ireland) 1 890 818575. Our Customer Contact Centre is open 24/7. The TV does not operate properly. - Page 84 Technical Information and Help The audio function does not work. • Press the VOL + / – buttons. MUTE button. • Sound muted? Press the Picture OK but no sound • Try another channel. The problem may be caused by the broadcaster. •...
-
Page 85: Remote Control Codes
Technical Information and Help FAQs (Frequently Asked Questions) • It happens sometimes if you have a weak signal. Usually it just means you’ll need to Why have I lost some / all of my re-tune your TV. Don’t worry, it is easy to do. And once you’ve done it, you should channels? get all the Freeview channels available to you. -
Page 86: Product Fiche And Specifications
Technical Information and Help Product Fiche and Specifications Brand Model LT-32CA120 Standby Power Consumption 0.5W Networked Standby (Wake On LAN) < 2.00W Networked Standby (Wake On WLAN) < 2.00W Display Resolution 1366 pixels (horizontal) x 768 pixels (vertical) Panel System... -
Page 87: License Information Used With Jvc Televisions
EULAs. Some of the software components distributed under EULAs are made available for use by the user on the premise that they are not copyrighted or warranted by JVC or any third party. - Page 88 All the support you need. Whether it’s a tech emergency or you need plain good advice, we’re always on hand to help, Currys.co.uk call (UK) 0344 5611234 or (Ireland) 1 890 818 575. Visit Partmaster.co.uk today for the easiest way to buy electrical spares and accessories. With over 1 million spares and accessories available we can deliver direct to your door the very next day.
- Page 92 Currys Ireland Limited (259460) 3rd Floor Office Suite Omni Park SC, Santry, Dublin 9, Republic of Ireland This product is distributed and warranted exclusively by Currys Group Limited. “JVC” is the trademark of JVCKENWOOD Corporation, used by Currys Group Limited. Under licence. (IB-LT-32CA120-230912V2)
Need help?
Do you have a question about the LT-32CA120 and is the answer not in the manual?
Questions and answers