Table of Contents
Advertisement
COLOUR TELEVISION
INSTRUCTIONS
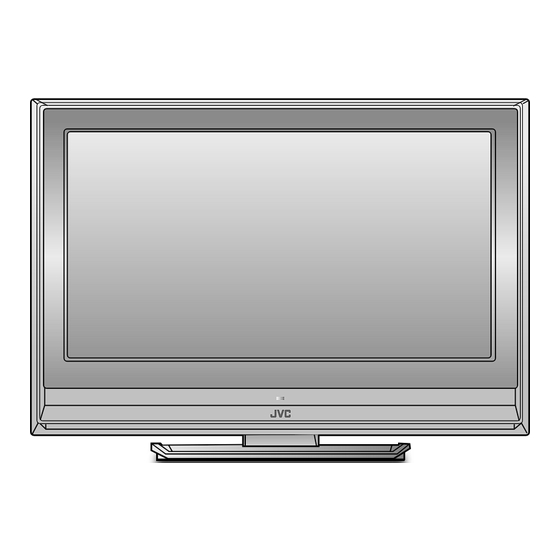
This illustration shows LT-32EX17.
The illustrations of LT-32EX17 is used in this instruction manual for explanation
purpose. Your TV may not look exactly the same as illustrated.
LT-32EX17
TV/VIDEO
LT-32EX177
MENU/OK
LT-37EX17
LT-42EX17
CHANNEL
VOLUME
Contents
Safety precautions ......................... 2
Set up and connections ................. 3
Initial settings ................................. 5
and functions ................................. 6
TV buttons and functions ............... 7
Operating the menus ..................... 8
Picture setting ................................ 9
Original features for picture ......... 12
Sound setting .............................. 13
Customized setting ...................... 14
other devices ............................... 16
TV channel presetting ................. 18
Troubleshooting ........................... 19
CH/CC List ................................... 21
Specification ................................ 22
GGT0191-001A-H
Advertisement
Table of Contents

Subscribe to Our Youtube Channel
Related Manuals for JVC LT-32EX177


Summary of Contents for JVC LT-32EX177
-
Page 1: Table Of Contents
Operating the menus ... 8 Picture setting ... 9 Original features for picture ... 12 Sound setting ... 13 Customized setting ... 14 Operate JVC recorders and other devices ... 16 TV channel presetting ... 18 Troubleshooting ... 19 CH/CC List ... 21 Specification ... -
Page 2: Safety Precautions
• For more details on installation, usage and safety \ Consult your retailer. Thank you for buying this JVC colour television. If the TV is damaged or behaving strangely, stop using it at once! \ Unplug the power cord and contact your retailer. -
Page 3: Set Up And Connections
Connect the power cord only to a 110-240 V, 50/60 Hz AC outlet. • (Except China, Russia : connect to a 220-240 V, 50/60 Hz AC outlet.) ■ When attaching the TV to the wall, use the optional JVC wall mounting unit. Consult a qualified technician. - Page 4 Set up and connections (continued) You can connect many different devices to the rear panel of the TV. Please read the user manuals of each device before setting up. (Connecting cables are not supplied with this TV.) DVD player (HDMI compatible) VCR / DVD Player Amplifier INPUT...
-
Page 5: Initial Settings
Initial settings Turn on the TV. • Show only when powering on for the first time. • The power on the unit can also be used. Select a language LANGUAGE ‰∑¬ ENGLISH Tieá n g Vieä t FRANÇAIS УKPAЇHCЬKA PУCCKИЙ CASTELLANO Select the teletext language group TELETEXT LANGUAGE... -
Page 6: Remote Control Buttons And Functions
Remote control buttons and functions Turn the volume Off / On RETURN PLUS function Return to the frequently viewed channel. Choose the channel you want to programme RETURN PLUS PROGRAMMED! Press and hold To cancel RETURN PLUS CANCELED! Press and hold RETURN function If you have not set or have canceled the RETURN PLUS channel, this will return to the previously... -
Page 7: Tv Buttons And Functions
TV buttons and functions Remote control sensor Power lamp ON: Lit (Green) OFF: Unlit ● Power lamp lights while the TV is on. TV/VIDEO Switch between TV / VIDEO devices MENU/OK Display on-screen menu / set Change channel / page CHANNEL Hyper Scan Function Volume... -
Page 8: Operating The Menus
Operating the menus. Display the menu bar MENU PICTURE SOUND FEATURES SET UP Select a menu Select Next PICTURE Select an item PICTURE MODE BACK LIGHT Select CONTRAST BRIGHT Items SHARP COLOUR TINT FEATURES Adjust / Configure PICTURE MODE Adjust / Select ■... -
Page 9: Picture Setting
Picture setting COLOUR SYSTEM You can select the appropriate colour system when the picture is not clear or no colour appears. MENU PICTURE menu FEATURES AUTO SECAM NTSC3.58 For the colour system in each country or region, see the table below: Area Country or Region Bahrain, Kuwait, Oman, Qatar, United Arab Emirates,... -
Page 10: Digital Vnr
Picture setting (continued) SHARP You can change the sharpness of the picture. MENU PICTURE menu SHARP Choose 1 : Softer COLOUR You can change the sharpness of the picture. MENU PICTURE menu COLOUR Choose 1 : Lighter TINT You can adjust Tint only in NTSC. MENU PICTURE menu TINT... -
Page 11: Colour Management
Picture setting (continued) 4:3 AUTO ASPECT You can change the aspect ratio. MENU PICTURE menu FEATURES PANORAMIC REGULAR 16 : 9 4 : 3 Select a default aspect ratio for Auto in “ZOOM” ZOOM AUTO REGULAR ZOOM PANORAMIC 14 : 9 ZOOM 16 : 9 ZOOM 16 : 9 ZOOM SUBTITLE FULL... -
Page 12: Original Features For Picture
Original features for picture TELETEXT You can watch the Teletext broadcast channel with TEXT function. TV mode TEXT twin mode Selecting other Teletext pages. to return to the TV mode. You can also operate the teletext using the following buttons: Hold a teletext page. -
Page 13: Sound Setting
Sound setting BASS You can adjust the low tone of the sound. MENU SOUND menu BASS Choose 1 : Weaker 2 : Stronger TREBLE You can adjust the high tone of the sound. MENU SOUND menu TREBLE Choose 1 : Weaker 2 : Stronger BALANCE You can adjust the volume balance between the left and right speakers. -
Page 14: Customized Setting
Customized setting SLEEP TIMER You can set the TV to turn off automatically to standby mode after a set time. MENU FEATURES menu TIMER SLEEP TIMER Cancel Set the time to “0”. Remaining You can confirm the remaining time, after repeating this process. -
Page 15: Channel Guard
Customized setting (continued) LANGUAGE You can choose the desired on screen display language. MENU SET UP menu CHANNEL GUARD You can stop children from watching specific channels. MENU FEATURES menu FEATURES Select “CHANNEL GUARD” TIMER CHANNEL GUARD BLUE BACK CHILD LOCK AUTO SHUTOFF FAVOURITE SETTING ) APPEARANCE... -
Page 16: Operate Jvc Recorders And Other Devices
• Confirm the code for your recorder by checking the manual it came with. • Some models of JVC devices cannot be operated with this remote control. • JVC DVD recorders and HDD recorders are set to code “C” or “3” by default. Note: •... - Page 17 Operate JVC recorders and other devices Operate the device • Other buttons can be used to operate the TV at any time. Operate the VCR, DVD recorder or HDD recorder (VCR / DVR) Operate DVD / HDD recorder menus Playback / Record etc.
-
Page 18: Tv Channel Presetting
TV channel presetting To register the TV channels automatically (AUTO PROGRAM) You can register the TV channels into the TV’s channel list (PR LIST) automatically. MENU SET UP menu AUTO PROGRAM to start and to stop AUTO PROGRAM function. To EDIT / MANUAL menu appears. To edit the TV channels (EDIT / MANUAL) MENU... -
Page 19: Troubleshooting
Troubleshooting If a problem occurs when you are using the TV, check the below troubleshooting guide before calling for repair. Problem Actions Severe noise or snow • Check the aerial cable and TV connections. • Check the direction of the aerial. •... - Page 20 Troubleshooting If a problem occurs when you are using the TV, check the below troubleshooting guide before calling for repair. Problem Actions No picture, • Use the cable marked with HDMI logo. No sound for HDMI signal • Check if the device is compliant with HDMI. •...
-
Page 21: Ch/Cc List
CH/CC List To use the INSERT function, find the “CH/CC” number corresponding to the TV’s channel number from this table. The US channel numbers are the channel numbers used in the United States, Philippines, etc. CCIR: The CCIR channel numbers are the channel numbers used in the Middle East, Southeast Asia, etc. OIRT: The OIRT channel numbers are the channel numbers used in Eastern Europe, Russia, Vietnam, etc. -
Page 22: Specification
Specification Main unit Model LT-32EX17/LT-32EX177 Broadcasting systems B / G / I / D / K / M Colour systems PAL, SECAM, NTSC 3.58 / NTSC 4.43 MHz Channels and frequencies VHF low channel (VL) = 46.25 to 140.25 MHz VHF high channel (VH) = 147.25 to 423.25 MHz...
Need help?
Do you have a question about the LT-32EX177 and is the answer not in the manual?
Questions and answers