Table of Contents
Advertisement
Quick Links
Engineered For Your Mission
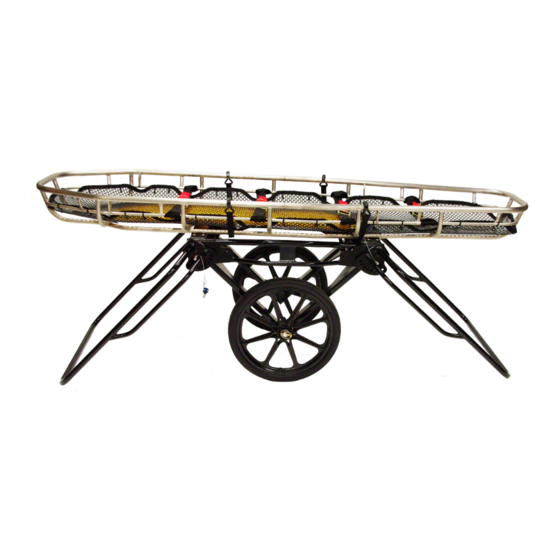
Model 11-2224............... ............... ......... Porter Litter 2 Wheel with 8 Position Handles, Black
Model 11-2224-G............... Porter Litter 2 Wheel with 8 Position Handles, Black– Large "S" Hooks
Traverse Rescue, LLC
TR111v03
®
Porter Transport System
Porter Transport System
USER MANUAL
Advertisement
Table of Contents

Related Manuals for Ferno TRAVERSE rescue 11-2224


Summary of Contents for Ferno TRAVERSE rescue 11-2224
- Page 1 ® Porter Transport System USER MANUAL Engineered For Your Mission Model 11-2224………..………..……… Porter Litter 2 Wheel with 8 Position Handles, Black Model 11-2224-G………..Porter Litter 2 Wheel with 8 Position Handles, Black– Large “S” Hooks Traverse Rescue, LLC TR111v03 Porter Transport System...
-
Page 2: Safety Information
Via B.Zallone, 26 1.2 Important 40066 Pieve di Cento, Italy +39 0516860028 Boxes like the one below emphasize important information. Ferno (UK) Limited Stubs Beck Lane, Cleakheaton IMPORTANT West Yorkshire BD19 4TZ, United Kingdom 44 (0) 1274 851999 Rescue procedures using ropes, harnesses, bridles and other Personal Protective Equipment require special skills and are potentially hazardous activities. -
Page 3: Operator Skills And Training
User Manual Porter Transport System 1.4 Safety Labels 3.2 General Specifications Labels place important information from the Users’ Manual on the Porter. Porter (Deployed) Read and follow label instructions. Replace worn or damages labels Length 33 in 84 cm immediately. New labels are available from Traverse. Width 26 in 66 cm... - Page 4 User Manual Porter Transport System 3.3 Components Porter, No Handles Rescue Litter Main Frame Support with Anti-Slip Surface [2] Vinyl-Coated Hooks Handle Mount [4 Tie-Down Strap with Ratchet Buckle [2] Axle Lynch Pin All-Terrain Tire Porter with Handles Handle [2] Handle Mount Plate [4] Quick Release Pin...
- Page 5 User Manual Porter Transport System 4. Operating the Fasteners 4.3 Tensioning the Strap Work handle up and down until strap is properly tensioned to secure 4.1 Ratchet Buckles load, then close handle fully to lock and hold strap (Fig. 3). The Porter is equipped with two tie-down straps fitted with ratchet buckles (Fig.
- Page 6 User Manual Porter Transport System 5. Deployment & Breakdown 2. Unfold the top handle and lock in place with quick release pins (Fig 12). 5.1 Deployment without Handles 1. Begin with the Porter in storage position and remove the lynch pin from the axle (Fig 7).
- Page 7 User Manual Porter Transport System 5.3 Break Down without Handles 2. Remove quick release pins from handle and fold handle over top of the Porter (Fig 22). 1. Join strap hooks on top of the Porter and tension straps tight against the frame (Fig 17).
-
Page 8: Repair Parts And Service
User Manual Porter Transport System 7. Repair, Parts and Service 9. Traverse Customer Care If the Porter shows excessive wear or cracks (either in the material or at Customer Care and product support are important aspects of each the welds) it is time to retire it from service. Do not attempt to repair or Traverse product. -
Page 9: Training Schedule
User Manual Porter Transport System Training Schedule Date Name Training Method Maintenance Record Date Maintenance Performed Pg 9 ©Traverse Rescue, LLC | TR111v03...
Need help?
Do you have a question about the TRAVERSE rescue 11-2224 and is the answer not in the manual?
Questions and answers