
Related Manuals for Tait TP3300


Summary of Contents for Tait TP3300
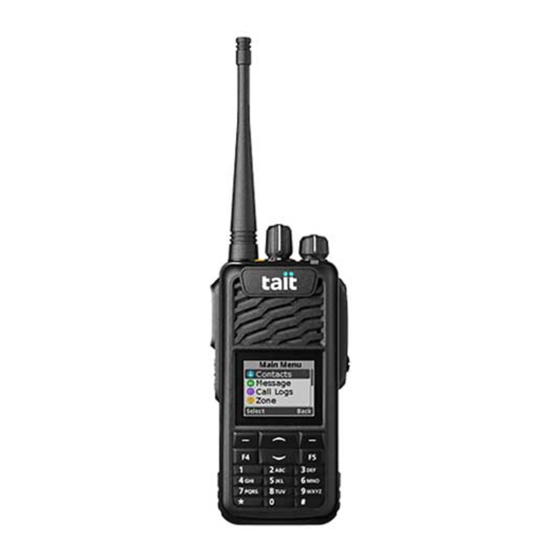
- Page 1 TP3300/TP3350 DMR Conventional Portable Radios User's Guide MPE-00001 - Issue 05 - March 2023...
-
Page 2: Table Of Contents
Contents Contact Information European Simplified Declaration of Conformity UK Simplified Declaration of Conformity About this guide Safety warnings used in this guide Related documentation Before using your radio Package Contents For your safety—battery warning Attaching labels to the radio or battery Charging the battery before first use Attaching the battery Removing the battery Attaching the antenna Removing the antenna Replacing the belt clip Attaching an audio accessory Getting started About your DMR digital radio About the radio controls Understanding the radio display Understanding the radio indicators Using function keys to access frequently used features Navigating the radio’s menus Menu map Operation Turning the radio on and off Adjusting the speaker volume MPE-00001 - Issue 05 - March 2023... - Page 3 Connecting to a Bluetooth® device (TP3350 only) Answering a Call Alert Selecting a zone Selecting a channel Changing a Channel Making a group call Making a private call Turning scanning on and off Making a call alert Sending a quick text message Sending an emergency alarm Turning location information on and off (TP3350 only) Charging and caring for batteries About the chargers 6-way charger safety information Before using the charger Charging temperatures Leaving the battery on charge Charging the Battery While Attached to the Radio Low battery warning Charging a battery for the first time Charging a battery LED behavior Removing the battery from the charger Maintaining battery life and performance Storing batteries Disposing of batteries Troubleshooting About troubleshooting When your radio won’t turn on Identifying the radio’s audible tones Viewing radio information...
- Page 4 General care MPE-00001 - Issue 05 - March 2023...
-
Page 5: Contact Information
By using a Tait product you are agreeing to be bound by the terms of the Tait Software Licence Agreement.Please read the Tait Software Licence Agreement carefully before using this Tait product. If you do not agree to the terms of the Tait Software Licence Agreement, do not use the Tait Product. -
Page 6: European Simplified Declaration Of Conformity
ES Por la presente, Tait International Limited declara que el tipo de equipo radioeléctrico TPEHGD, TPEHGE, TPEHGF, TPEHGG, TPEB1D, TPEB1E, TPEB1F and TPEB1G es conforme con la Directiva 2014/53/UE. El texto completo de la declaración UE de conformidad está disponible en la dirección Internet siguiente: www.taitcommunications.com/our-resources/compliance... -
Page 7: Uk Simplified Declaration Of Conformity
PT O(a) abaixo assinado(a) Tait International Limited declara que o presente tipo de equipamento de rádio TPEHGD, TPEHGE, TPEHGF, TPEHGG, TPEB1D, TPEB1E, TPEB1F and TPEB1G está em conformidade com a Diretiva 2014/53/UE. O texto integ- ral da declaração de conformidade está... -
Page 8: About This Guide
Analog and DMR Tier 2 portable r adio TP3300 Analog and DMR Tier 2 portable r adio, T03-00313-XXXX TP3350 with GPS and BT functionality This user’s guide provides information about the TP3300 and TP3350 DMR conventional and analog port- able radios. Both models are available with the following front panels: n display and 16 keys n display and 4 keys n no display and no keys These front panels are interchangeable. Contact your radio provider for more information. Bluetooth®("Connecting to a Bluetooth® device (TP3350 only)" on page 23), GPS ("Turning loc- ation information on and off (TP3350 only)" on page 30), and man-down features are only avail- able in TP3350 portables. Mandown can operate in all signalling modes. The radio behavior described in this guide applies to radios with the firmware current at date of publication. If your radio does not operate as you expect, contact your radio provider for assistance. Tait International Ltd - March 2023... -
Page 9: Safety Warnings Used In This Guide
This alert is used when there is a hazardous situation which, if not avoided, could result in minor or moderate injury. Notice This alert is used to highlight information that is required to ensure procedures are performed cor- rectly. Incorrectly performed procedures could result in equipment damage or malfunction. This icon is used to draw your attention to information that may improve your understanding of the equipment or procedure. Related documentation The following documentation is also available for your Tait radio, which you can access from the Tait Partner Portal website (partnerinfo.taitradio.com/): n MPC-00006-xx— Li-ion Battery Safety Information (also supplied with each battery.) n MPE-00006-xx — Quick Start Guide (also supplied with each radio.) n MPE-00002-xx — Safety and Compliance Information (also supplied with each radio.) The characters xx represent the issue number of the documentation. Technical notes are published from time to time to describe applications for Tait products, to provide tech- nical details not included in manuals, and to offer solutions to any problems that arise. Look for new or updated technical notes on the Tait technical support website. Tait International Ltd - March 2023... -
Page 10: Before Using Your Radio
Quick Start Guide n Safety and Compliance Information For your safety—battery warning Warning This radio uses a Lithium-ion battery. If the battery is damaged or handled in an unsafe manner, it can cause personal injury and/or damage to property. Tait International Ltd - March 2023... -
Page 11: Attaching Labels To The Radio Or Battery
Notice Tait recommends that you do not affix additional labels to the surfaces between the radio chassis and the battery. The fit between these surfaces is intentionally firm and any added thickness will damage the points of attachment between radio and battery. Charging the battery before first use Before using your battery for the first time, you must charge it. See the instructions in "Charging and caring for batteries" on page 31 Attaching the battery 1. Rotate the power/volume control switch counterclockwise to turn off the radio. 2. Insert the top of the battery into the recess at the back of the chassis. 3. Lightly press the bottom of the battery towards the radio until the battery catch clicks. 4. Make sure that the battery is firmly in position. If the battery has been attached while the radio is turned on, turn the radio off and then on again before use. Tait International Ltd - March 2023... -
Page 12: Removing The Battery
Removing the antenna Warning Do not change the antenna in a hazardous location. An explosion could cause serious injury or death. Use a firm grip and turn the antenna counterclockwise half a turn. Use a lighter grip to fully unscrew the antenna, and carefully remove it. Replacing the belt clip 1. To remove the belt clip, use a Pozidrive screwdriver to undo the two belt clip screws. 2. To attach the belt clip, use a Pozidrive screwdriver to fasten the two belt clip screws. Tait International Ltd - March 2023... -
Page 13: Attaching An Audio Accessory
Attaching an audio accessory Audio accessories plug into the radio’s accessory connector. The accessory connector is protected by a cover, which needs to be removed before an accessory can be installed. Notice The accessory cover protects the accessory connector from electrostatic discharge. Keep the cover in place unless the connector is in use. To remove the accessory cover and install an audio accessory: 1. Use a coin or other blunt object to loosen the screw that secures the accessory cover to the radio. 2. Remove the accessory cover and store it in a safe place. 3. Plug the accessory into the accessory connector. 4. Tighten the screw. 5. Once the radio has recognized the accessory, the accessory icon will appear. Tait International Ltd - March 2023... -
Page 14: Getting Started
static noise in low signal areas, and n radio coverage in marginal reception areas. Lack of static noise On digital networks there is no static noise, even in low signal areas. This lack of static is because your digital radio removes the ‘noise’ from the call, so that you hear only clear voice. Coverage With digital networks, a call remains clear and then drops off quickly at the border of a coverage area. The reason for this is that a digital call is either received or it isn't. With analog networks, the background noise in a call gets progressively worse when you are in fringe areas or even slightly outside normal coverage areas. What you hear on an analog channel On analog channels, your radio may be programmed so that you hear all conversations on a channel, or your user group may be segregated from other user groups by using special signaling. The special signaling is used to control the muting and unmuting of your radio, so that your radio is muted when other user groups are talking and unmuted for members of your user group. There are two muting controls that operate in your radio: n signaling mute n squelch Signaling mute The radio’s signaling mute only allows the radio to unmute if the incoming call carries the tones specific to your user group. Your user group may use tones that are either audible, subaudible or both. Tait International Ltd - March 2023... -
Page 15: About The Radio Controls
Squelch The radio’s squelch allows the radio to unmute only when the strength of the incoming signal is above a pre- determined threshold. This means that only signals of reasonable intelligibility are made audible. About the radio controls The radio controls are the PTT key, power/volume control, channel selector, scroll keys, selection keys, and function keys. Some keys have functions assigned to both short and long key presses: n a short key press is less than one second, and n a long key press is more than one second. The radio controls and their functions are described in the following sections. Name Function PTT key Press and hold to transmit and release to listen Power/volume Rotate to turn the radio on and change the speaker volume control Tait International Ltd - March 2023... -
Page 16: Understanding The Radio Display
Scroll keys messages, or access a pre-programmed menu Function keys Programmed for frequently used options Alphanumeric Used to enter letters and numbers keys Understanding the radio display The messages and icons you see on your radio display depend on the mode in which your radio is operating and the way it is programmed. Radio display icons These are some of the icons you may see on your radio display: Icon Meaning No signal. Signal strength indicator: the more bars, the stronger the signal being received by the radio Battery indicator: shows how much charge is available in the battery. Bluetooth: The Bluetooth feature is enabled but there is no remote Bluetooth device con- nected. Bluetooth connected: The Bluetooth feature is enabled. The icon stays lit when one or more remote Bluetooth devices are connected. Scanning: your radio is monitoring a group of channels or workgroups for activity. Scan land on: Scan feature is enabled. Encryption: Encryption is turned on. GPS available: GPS is turned on. The icon stays lit when a position fix is available. GPS not available/out of range: GPS is turned on. The icon stays lit when a position fix is available. Accessories connected. High-power transmit: Your radio is set to transmit on high power. Tait International Ltd - March 2023... -
Page 17: Understanding The Radio Indicators
Icon Meaning Low-power transmit: Your radio is set to transmit on low power. Direct mode (talkaround mode). In repeater mode no icon is shown. Unread message. VOX enabled. Speaker open. Private Call Indicates a Private Call in progress. In the Contacts list, it indicates a subscriber alias (name) or ID (number). Bluetooth Audio Device Bluetooth-enabled audio device, such as a headset. Item sent successfully. Switch Input Method Long-press the # key to switch input method between: n lowercase n uppercase n numeric Understanding the radio indicators The status LED indicator and the radio’s audible tones—together with the radio display—all combine to give you information about the state of your radio. The most common way the indicators work is described in the following sections. The way these indicators behave may be affected by the way your radio is programmed. Tait International Ltd - March 2023... - Page 18 Warning Your radio may be programmed to be silent, which means you may not hear any alerts. The radio uses audible tones to alert you to its status: n Radio controls and keypress tones—the tones and beeps you hear when you press your radio’s keys or use the controls. n Incoming call tone—when the radio is receiving a call. n Warning tones—when there is an error, or the battery is low, for example. Voice annunciation Your radio may be programmed to play a pre-recorded message n for start-up channel n when changing the channel n for the battery condition Tait International Ltd - March 2023...
-
Page 19: Using Function Keys To Access Frequently Used Features
Using function keys to access frequently used features The function keys provide access to some of the features you will use most often. These features are assigned to the function keys when the radio is programmed. Some keys may have a feature associated with both a short key press and a long key press. Use the following table to record the function keys programmed for your radio: Short key press Long key press For more information about the function keys that can be programmed on your radio, contact your radio pro- vider. Tait International Ltd - March 2023... -
Page 20: Navigating The Radio's Menus
Navigating the radio’s menus Radios with display have a number of menus, each containing lists or submenus. The menus available depend on the way your radio is programmed. To access the menu, press the left selection key whenever Menu appears above it. Use the scroll keys to move through the menu list. When the menu you want is highlighted, press Select (left selection key). To go back one level, press Back (right selection key). Tait International Ltd - March 2023... -
Page 21: Menu Map
Accessories Scan list GPS on/off Position Bluetooth BT on/off My devices Search devices Clear list Data mode TP3350 only Tait International Ltd - March 2023... -
Page 22: Operation
Operation This section describes the basic operation of your radio. Turning the radio on and off Rotate the On/Off/Volume control switch clockwise until you hear a click. You see a welcome message or welcome image. The LED lights up solid orange and the Home screen lights up if the backlight setting is set to turn on auto- matically. To turn off the radio, rotate the switch counterclockwise until you hear a click. You see a brief Powering Down on the radio’s display. Your radio may not turn on if your battery is very low. (See "Low battery warning" on page 33.) Security lock on power-up feature Your radio may be automatically locked each time it is powered-up. 1. Power up the radio. 2. Enter your current six-digit password with the radio keypad. The display shows ******. You hear a positive indicator tone for every digit pressed. 3. Press the right selection key to remove the each * on the display. 4. Press the left selection key to proceed. If the password is correct, your radio proceeds to power up. If the password is incorrect, the display shows Password Input Error. Repeat step 2. Tait International Ltd - March 2023... -
Page 23: Adjusting The Speaker Volume
are compatible with the Bluetooth Specification Version 2.0 or higher. Tait recommends Bluetooth Specification Version 2.1 or higher. n include Bluetooth Headset Profile (HSP) adopted version 1.1 or 1.2, or Bluetooth Handsfree Profile (HFP) version 1.5 or 1.6. Wearing a Bluetooth headset Place the headset on your ear. Depending on which ear you are going to wear the headset, simply adjust the ear hook accordingly. To get the best performance from your headset: 1. Do not block the device’s internal antenna (see the device’s user documentation). The human body can interfere with a Bluetooth signal. 2. If you usually use your radio with your right hand, wear the headset on your right ear. 3. Avoid coming in contact with the internal antenna of a headset or radio. Pairing a Bluetooth device with the radio Before attempting to connect a device, Tait recommends that the device is fully charged. Refer to the documentation of your Bluetooth device for charging instructions. Pairing creates a unique and encrypted wireless link between the radio, and the Bluetooth device. To use a device with your radio, they must first be paired. When you connect to a Bluetooth device for the first time, you need to instruct the radio to search for com- patible devices using Bluetooth wireless technology. The search should take less than one minute. Do not turn off your Bluetooth device or press the right selection key during the finding and con- necting operation as this cancels the operation. Tait International Ltd - March 2023... -
Page 24: Answering A Call Alert
You can also use Search Devices to locate available devices. 5. Select Connect. The display shows Connecting to <device>. Your Bluetooth device may require additional steps to com- plete the pairing. Refer to the documentation of your Bluetooth-enabled device. If successful, the radio display shows <Device> Connected. A tone sounds and √ appears beside the con- nected device. The Bluetooth Connected icon appears on the status bar, or if unsuccessful, the radio display shows Connected Failed. No-key no-display radio 1. Turn on your Bluetooth device and place it in pairing mode. Refer to the documentation of your Bluetooth device. 2. On your radio, press the function key programmed for Bluetooth Connect. A tone sounds and the LED blinks orange. Your Bluetooth device may require additional steps to complete the pairing. Refer to the documentation of your Bluetooth device. If successful, a positive tone sounds, or if unsuccessful, a negative indicator tone sounds. Answering a Call Alert 16-key and 4-key radios: n To answer a call alert on your radio, select View then press and hold the PTT button. Tait International Ltd - March 2023... -
Page 25: Selecting A Zone
The selected zone is indicated by a . 2. Scroll to the required zone and press Select. No-key no display radio n Press the function key programmed for Zone. You hear a positive indicator tone, indicating the radio has switched from Zone 1 to Zone 2. You hear a negative indicator tone, indicating the radio has switched from Zone 2 to Zone 1. Selecting a channel Once the required zone is displayed (if you have multiple zones in your radio), turn the channel selector to select the channel. Changing a Channel To use the quick channel change method simply dial the channel you would like to use. e.g. - dial 502 to move to channel 502. Making a group call 1. Turn the channel selector to select the channel with the active group alias or ID. 2. Hold the radio vertically one to two inches (2.5 to 5cm) from your mouth. 3. Press the PTT key to make the call. The LED lights up solid red and the Group Call icon appears. The first text line shows the group call alias. Tait International Ltd - March 2023... -
Page 26: Making A Private Call
2. Hold the radio vertically one to two inches (2.5 to 5cm) from your mouth. 3. Press the PTT key to make the call. The LED lights up red. The Private Call icon appears. The first text line shows the subscriber alias. The second text line displays the call status. 4. Wait for the Talk Permit tone to finish (if enabled) and speak clearly into the microphone. 5. Release the PTT key to listen. When the target radio responds, the LED lights up green. 6. Your radio may be programmed to create a short alert tone the moment the target radio releases the PTT key, indicating the channel is free for you to respond. Press the PTT key to respond. If there is no voice activity for a predetermined period of time, the call ends. 7. You hear a short tone. The display shows Call Ended. Turning scanning on and off 16-key and 4-key radios n Press the function key programmed to turn scan on and off. 1. 1 Press Menu and select Scan > Scan Switch. 2. Select On or Off. Tait International Ltd - March 2023... -
Page 27: Making A Call Alert
Press the function key programmed to make a call alert to the predefined ID. 1. Press Menu and select Contacts > Contact List. 2. Scroll to required contact and press Select. 3. Select Ctrl Services and Call Alert. or (for 16-key radio only) 1. Press Menu and select Contacts > Manual Dial. 2. Enter the subscriber ID you want to page and press Confirm. 3. In the Ctrl Services menu select Call Alert. The display shows Call Alert and the subscriber alias or ID, indicating that the call alert has been sent. The LED flashes red when your radio is sending the call alert. If the call alert acknowledgement is received, the display briefly shows Success! If the call alert acknowledgement is not received, the display briefly shows Failed! No-key no-display radio n Press the function key programmed to make a call alert to the predefined contact. The LED flashes when your radio is sending the call alert. If the Call Alert acknowledgement is received, two chirps sound. If the Call Alert acknowledgement is not received, a low-pitched tone sounds. Tait International Ltd - March 2023... -
Page 28: Sending A Quick Text Message
3. Use the keypad to edit the message, if required. a. Press to move to the left. b. Press to move to the right. c. Press the * key to delete any unwanted characters. d. Press the # key to input one space to the right. e. Long-press the # key to switch between lowercase, upperacase and numeric input. 4. Press Confirm. You can also press the right selectyion key to quit the operation. 5. Press Send. You can also press Save to save the message in the drafts. 1. Select Contact List, scroll to the required contact and then press Select. Select Manual Dial end enter the subscriber ID and press Confirm. The display shows Sending Msg... and the LED flashes red. If the message is sent, a tone sounds and the display Send Success! If the message is not sent, a low tone sounds and the display shows Send Failed! Tait International Ltd - March 2023... -
Page 29: Sending An Emergency Alarm
1. Press Menu and select Message > Quick Text. 2. Scroll to the required quick text and press Select. 3. Scroll to the required contact and press Select. The display shows Sending Msg... and the LED flashes red. If the message is sent, a tone sounds and the display Send Success! If the message is not sent, a low tone sounds and the display shows Send Failed! No-key no-display radio n Press the function key programmed to send a predefined quick text message to a predefined ID. The LED flashes red. Two chirps indicate that the message has been sent, or a low-pitched tone indicates that the message cannot be sent. Sending an emergency alarm If your radio is set to silent, it will not display any audio or visual indicators during Emergency mode. n Press the function key programmed for emergency. The display shows Tx Alarm and the destination alias. The LED blinks red and the Emergency icon appears. The radio will send an emergency telegram. You can now press PTT to make an emergency call, and receive by releasing PTT. After a call hang time, the radio return to its normal working state. The radio will send an emergency telegram and then transmit voice from the microphone for a preset time. And then goes back to normal working state. Then the radio return to its normal working state. Tait International Ltd - March 2023... -
Page 30: Turning Location Information On And Off (Tp3350 Only)
Turning location information on and off (TP3350 only) Your radio may be enabled to send location information. 16-key and 4-key radios 1. Press Menu and select Accessories > GPS. 2. Select GPS On/Off and select on or off. When GPS is turned on, the GPS icon will appear. Once a GPS signal is available, the GPS icon will change to No-key no-display radio n Press the function key programmed for GPS to turn GPS on or off. If turned on, a positive tone sounds. If turned off, a negative tone sounds. Tait International Ltd - March 2023... -
Page 31: Charging And Caring For Batteries
Charging and caring for batteries This section describes how to charge your Tait radio battery as well as care for it, to ensure safe operation, maximum performance and prolonged battery life. About the chargers Unless otherwise indicated, the charging advice and instructions in this document apply to all chargers. The following chargers are available for your Tait radios and batteries: Part number range Designation T03-00322-xxxx Desktop charger T03-00320-xxxx 6-way charger 6-way charger safety information Warning This device must be connected to an earthed mains socket-outlet. Tait International Ltd - March 2023... -
Page 32: Before Using The Charger
Before using a Li-ion battery, read the Li-ion Battery Safety Information (MPC-00006-xx) included with your battery, and follow the instructions it provides. Incorrect use of a Li-ion battery can cause explosion or fire. n Do not short-circuit the battery contacts, neither intentionally nor accidentally, e.g. by placing the battery with conductive materials such as keys or jewelry inside a pocket or container. Short- circuiting the battery contacts can heat up the conductive material. n Do not obstruct the vent hole(s) on the battery. If the vent on the battery is obstructed the battery may explode, causing personal injury and/or equipment damage. If the vent on the radio is obstructed, audio quality and/or key function may deteriorate and radio seals may be damaged. Notice Turn the radio off before removing the battery, and turn it on again after attaching the battery. This ensures that the radio powers down and up correctly. Failing to follow this procedure may require the radio to be turned off then on again to operate correctly. Charging temperatures Notice Do not expose a battery to very high or very low temperatures for extended periods of time. Doing so will shorten the usable life (‘service life’) of the battery. To achieve the best results when charging your battery: n Before you begin to charge your battery, make sure that the battery temperature is close to the room temperature in which the battery is to be charged. n If possible, charge the battery in temperatures between 50°F and 77°F (between 10°C and 25°C). This temperature range is the optimal charging range. Charging only starts when the battery is between 32°F to 104°F (0°C to 40°C). When the battery temperature is outside the normal charging range, the orange LED on the charger is lit. Charging will start or resume once the temperature is within normal limits, and no action is required by you. Tait International Ltd - March 2023... -
Page 33: Leaving The Battery On Charge
Charging the Battery While Attached to the Radio The radio battery can be charged while still attached to the radio. Notice The radio must be turned off before being placed in the charger. Low battery warning Notice Do not allow a radio battery to fully discharge every time you use it, or you will shorten the service life of the battery. When the battery is low, your radio warns you in the following ways: n The battery symbol on the radio display looks empty. n The status LED on the radio slowly flashes red. n A high-pitched beep sounds. You should recharge or replace the battery as soon as possible. Charging a battery for the first time Fully charge a battery before using it for the first time. The red LED stays lit while the battery charges. Charging a battery The radio should be switched off before placing in the charger. 1. Desktop charger: Connect the charger to the correct Tait power adaptor. 6-way charger: Power on the charger. Tait International Ltd - March 2023... -
Page 34: Led Behavior
The battery is charging. steady Charging complete. Remove the battery, or leave it in the charger. steady The battery temperature is outside the normal charging range. Charging will start or resume once the temperature is within normal limits. No action is required by you. steady There is a fault. Contact your dealer. If the LEDs for all charger slots continuously flash orange, or red then orange, the char- ger itself may be faulty. Contact your dealer. flashing There is a fault. Contact your dealer. all off If the charger does not behave as expected: n Make sure the radio or battery is seated properly in the charger. n Check that the charger is properly plugged into the originally supplied power supply. n Check that the battery and charger contacts are clean. To clean, wipe the contacts with a dry lint- free cloth to remove any dirt, oil or grease. Removing the battery from the charger n Lift the battery/radio out of the charger. Tait International Ltd - March 2023... -
Page 35: Maintaining Battery Life And Performance
Use only Tait chargers and batteries. n Do not expose a battery to very high or very low temperatures for extended periods of time. Doing so will shorten the service life of the battery. Very high: above 140°F (60°C) Very low: less than –4°F (–20°C) n Charge the battery at a room temperature of between 50°F and 77°F (between 10°C and 25°C). This temperature range is the optimal charging range. n Wipe excess moisture and dirt from the radio, radio contacts and battery contacts before charging the battery. n Store batteries properly when not in use. See "Storing batteries" below. Storing batteries When not in use for a month or more, batteries should be stored correctly to prolong their life. n Remove the battery from the radio before storage. n Fully charge the battery if storing for less than one month. n Charge batteries to about 30% if storing for longer than one month. n Store in a cool dry place. Batteries that have been stored for any length of time must be charged before being used. See "Charging a battery for the first time" on page 33. Disposing of batteries Run the battery flat before disposing of it. When disposing of the battery, be sure to do so in an environmentally sensitive manner. Please contact your radio provider for information on recycling programs in your area. Tait International Ltd - March 2023... -
Page 36: Troubleshooting
Is the battery firmly attached to the radio? n Is the battery sufficiently charged? n Is the battery charger working properly? If all appears to be in order, but your radio still fails to operate properly, contact your radio provider for further assistance. Identifying the radio’s audible tones The radio’s audible tones can help you identify a potential problem. See "Audible tones" on page 18. Viewing radio information Your radio provider may ask you for the hardware and firmware version of your radio, for troubleshooting purposes. Use the Radio Info menu to view information such as the hardware and firmware version of your radio, the radio serial number, and various radio identities. 1. Press Menu and select Settings > Radio Info. 2. Scroll to the radio information you want to view. General care Your radio requires no regular maintenance other than ensuring that the battery has sufficient charge and that no damage has occurred to the antenna or the battery. Tait International Ltd - March 2023... - Page 37 Notice To prevent permanent damage to the radio case, do not allow the radio to come into contact with detergents, alcohol, aerosol sprays, or petroleum-based products. For general battery care, see "Maintaining battery life and performance" on page 35. Cleaning the contacts of the battery Notice Do not scratch or scrape the contacts of the battery. If necessary, wipe the contacts of the battery with a dry, lint-free cloth to remove any dirt, oil or grease. Cleaning the radio If you need to clean the radio case, use a cloth dampened with clean water. Do not immerse the radio in flu- ids. Tait International Ltd - March 2023...
Need help?
Do you have a question about the TP3300 and is the answer not in the manual?
Questions and answers