Table of Contents
Advertisement
Advertisement
Table of Contents
Troubleshooting

Related Manuals for Tait TP9400 Series P25


Summary of Contents for Tait TP9400 Series P25
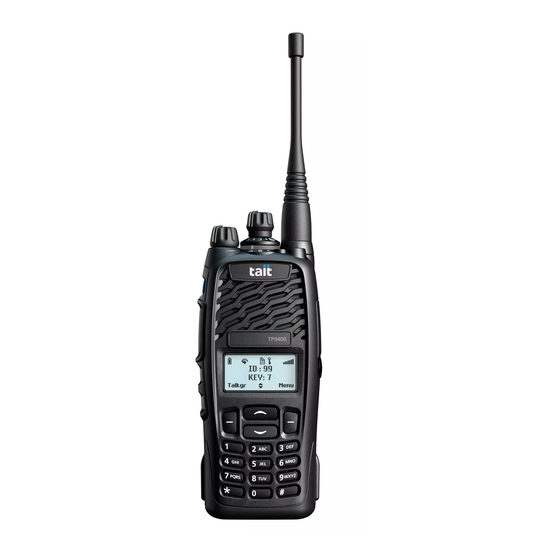
- Page 1 TP9400 P25 Portable Radios User’s Guide MPD-00003-05 · Issue 5 · March 2016...
-
Page 3: Table Of Contents
Contents For your safety............10 Menu maps............26 About this guide ..........28 Safety warnings used in this guide ......... 28 Related documentation........... 29 Before using your radio ........30 For your safety — battery warning........31 Attaching labels to the radio or battery ......31 Attaching a label to the front panel ...... - Page 4 Using a wireless headset ..........51 Wearing the headset ..........51 Pairing a wireless headset with the radio ....52 Managing your headsets ..........53 Selecting a zone............. 56 Selecting a channel ............57 Limiting call time............. 58 Checking recent calls ............. 58 Setting and viewing the radio’s time and date....
- Page 5 About scanning............... 88 Activating standard scanning.......... 90 Activating background scanning........90 Changing the background scan group assigned to the function key ............91 Activating in-zone scanning..........91 Activating talkgroup scanning......... 92 Making a call while scanning .......... 93 Suspending a channel from a scan group ...... 93 Editing a scan group............
- Page 6 Using the Location menu ......... 124 Using the Last stored menu ........125 Loneworker monitoring..........125 Activating loneworker monitoring ......126 Responding to a loneworker alarm ......126 Delaying the emergency action (conventional mode only) ......... 127 11 Encryption ............128 About encryption ............
- Page 7 Changing the radio ID........... 155 Running diagnostics tests..........156 General care..............158 Cleaning the contacts of the battery ......158 Cleaning the radio ............ 158 15 Glossary ............. 159 Index ..............164 Directive 1999/5/CE Declaration of Conformity 168 Tait Software Licence Agreement..... 169 Contents...
- Page 8 Tait Limited. The word TAIT and the TAIT logo are trademarks of Tait Limited. All trade names referenced are the service mark, trademark or registered trademark of the respective manufacturers.
- Page 9 Please be environmentally responsible and dispose through the original supplier, or contact Tait Limited. Tait Limited also complies with the Restriction of the Use of Certain Hazardous Substances in Electrical and Electronic Equipment (RoHS) Directive in the European Union.
-
Page 10: For Your Safety
Refer also to "Rating matching" on page Warning Use only a Tait-supplied, IS-approved battery, charger, antenna, audio accessory, carry accessory or programming adapter with an IS radio. Fitting a battery or accessory that is not IS-approved, using a charger that is... - Page 11 Do not expose the radio to solvents. IS radios and accessories must be serviced only by an agency certified by both the approval authority and by Tait Limited. Any unauthorized repair or substitution of parts invalidates the intrinsic safety rating and the third party IS approval.
-
Page 12: Audio Accessories
Batteries The following batteries have been approved for use with TP9300/ TP9400 IS portable radios. Refer also to "Rating matching" on page Description Product code Li-Ion, 2300 mAh, ATEX, IIA T03-22001-ABAA Li-Ion, 2300 mAh, ATEX, IIC T03-22001-ABCA Li-Ion, 2300 mAh, IECEx, IIA T03-22001-ADAA Li-Ion, 2300 mAh, IECEx, IIC T03-22001-ADCA... -
Page 13: Carry Cases
The following audio accessories have been approved for use with TP9300/ TP9400 IS portable radios. Refer also "Rating matching" on page Description Product code Headset, Heavy Duty, over-the-head T03-22008-BAAA Headset, Heavy Duty, behind-the-head T03-22008-BABA Earphone, in-ear, 2.5 mm jack T03-22008-CAAA Speaker microphone, Storm, IP68-rated, T03-22008-AAAA emergency button, High/Low volume button,... - Page 14 Antenna Use only genuine Tait-supplied antennas. Antennas are not specifically rated and may be used in any area, subject to the rating restrictions of the overall radio system. Programming adapter The IS programming adapter is marked with an IS circle...
- Page 15 Entity parameters The Entity Concept allows interconnection of IS equipment with associated equipment when the following is true: Ui ≥ Uo, Ii ≥ Io, Pi ≥ Po, Ci ≤ Co, Li ≤ Lo, and Li/Ri ≤ Lo/Ro. The installation must be in accordance with the following standards: EN/IEC 60079-25 ■...
- Page 16 Certificates: Radio: TÜV 15 ATEX 7792X IECEx ITA 15.0015X Battery: TÜV 15 ATEX 7791X IECEx ITA 15.0009X Standards EN 60079-0:2012/A11:2013 EN 60079-11:2012 IEC 60079-0:2011 6th edition IEC 60079-11:2011 6th edition Radio frequency exposure information For your own safety and to ensure you comply with the radio frequency (RF) exposure guidelines of the United States Federal Communication Commission’s (FCC), Industry Canada, and those from other...
- Page 17 If you wear your radio, you must always put it in a ■ carrying accessory that has been specifically approved by Tait for this radio. Using non- approved body-worn accessories may mean you expose yourself to higher levels of RF than recom- mended by the FCC’s occupational/controlled...
- Page 18 United States Federal Communications Commission, ■ Code of Federal Regulations; 47 CFR §§ 1.1307, 1.1310, and 2.1093. American National Standards Institute (ANSI) / Insti- ■ tute of Electrical and Electronic Engineers (IEEE) C95.1-1992. Institute of Electrical and Electronic Engineers (IEEE) ■...
- Page 19 Cette radio se conforme aux limites d’exposition de l’IEEE (FCC) et ICNIRP pour les environnements d’exposition au rayonnement RF professionnel et contrôlé aux cycles de marche de 50% en mode transmission et 50% en mode réception. Radio frequency emissions limits in the USA CFR Title 47 Part 15.19 (a) (1) - Receivers Part 15 of the FCC Rules imposes RF emission limits on...
- Page 20 USA public safety bands (764 –776 MHz and 794 – 806 MHz) The Code of Federal Regulations (CFR) Title 47 Subpart R deals with the use of frequencies in the 764 to 776 MHz and 794 to 806 MHz bands. Low-power channels This radio complies with §...
-
Page 21: Declaration Of Conformity
Frequency band reserved for distress beacons Frequency band 406 to 406.1 MHz is reserved for use by distress beacons. Transmissions should not be made within this frequency band. Health, safety and electromagnetic compatibility in Europe In the European Community, radio and telecommunications equipment is regulated by Directive 1999/5/EC, also known as the Radio and Telecommunications Terminal Equipment (R&TTE) - Page 22 Interference with electronic devices Warning Some electronic devices may be prone to malfunction due to the lack of protection from RF energy that is present when your radio is transmitting. Examples of electronic devices that may be affected by RF energy are: aircraft electronic systems ■...
- Page 23 Potentially explosive atmospheres and blasting areas Warning Unless the radio is specifically certified for use in a potentially explosive atmosphere, turn off the radio before entering such an atmosphere. An explosion could cause serious injury or death. Examples of potentially explosive atmospheres include filling stations, and any environment where there are flammable liquids, gases, or dusts.
- Page 24 The radio is designed to satisfy the applicable compliance regulations. Do not make modifications or changes to the radio that are not expressly approved by Tait. Failure to do so could invalidate compliance requirements and void the user’s authority to operate the radio.
- Page 25 Caution Tait recommends that you do not affix additional labels to the surfaces between the radio chassis and the battery. The fit between these surfaces is intentionally firm and any added thickness will damage the points of attachment between radio and battery.
-
Page 26: Menu Maps
Menu maps This section shows the menus and submenus that may be programmed for your radio. Some features are controlled by software licenses (SFEs) and may not be available with your radio. Main menu Channels Repeater Zones Hunt force Local calls Hunt toggle Set status Repeater toggle... -
Page 27: Radio Settings
Radio settings Functions Radio info Low power tx Key settings Monitor Version info Lock radio Radio FW Set scan key Radio HW Squelch override Radio ID Scanning Serial number Voice annunciation Alias Call Settings Customer info Ignore 2-tone P25 IP address Call queuing MDT IP address Extra features... -
Page 28: About This Guide
About this guide This user’s guide provides information about TP9400 portable radios. The radio behavior described in this guide applies to radios with firmware version 2.04. To check the radio’s firmware version, see "Viewing radio information" on page 155. If your radio does not operate as you expect, contact your radio provider for assistance. -
Page 29: Related Documentation
Related documentation The following documentation is also available for your Tait radio, which you can access from the Tait Technical Support website (http://support.taitradio.com): Safety and Compliance Information—supplied ■ with each radio. (The same information is included in this user’s guide.) Li-ion Battery Safety Information—supplied with... -
Page 30: Before Using Your Radio
IS programming adapter, creates a risk of explosion which could cause serious injury or death. For an up-to-date list of approved accessories, contact your regional Tait office. For detailed information about IS radios and how to identify them, "Intrinsically Safe radios and accessories" on... -
Page 31: For Your Safety - Battery Warning
Notice Tait recommends that you do not affix additional labels to the surfaces between the radio chassis and the battery. The fit between these... -
Page 32: Charging The Battery Before First Use
0.03 in (0.8 mm) Charging the battery before first Before using your battery for the first time, you must charge it. Follow the instructions included with your Tait charger. This information is repeated in the section "Charging and caring for batteries" on page 142. -
Page 33: Removing The Battery
3 Place the two lugs at the bottom edge of the battery into the two slots in the bottom of the front panel. 4 Lightly press the top of the battery towards the radio until the battery catch clicks. 5 Make sure that the battery is firmly in position. Removing the battery The battery is secured to the radio by a battery catch in the radio’s rear panel. -
Page 34: Removing The Antenna
Removing the antenna Warning Do not change the antenna in a hazardous location. An explosion could cause serious injury or death. Use a firm grip and turn the antenna counterclockwise half a turn. Use a lighter grip to fully unscrew the antenna, and carefully remove it. -
Page 35: Installing An Audio Accessory
Installing an audio accessory Warning Use only Tait-supplied, IS-approved audio accessories with IS radios. Fitting an audio accessory that is not IS-approved exposes the customer to a risk of explosion which could cause serious injury or death. For an up-to-date list of approved audio accessories, contact your regional Tait office. -
Page 36: Getting Started
Getting started This section gives an overview of your P25 radio, describes the radio’s controls and indicators, and explains how the radio menus are organized. This section covers: About P25 digital radios ■ About the radio controls ■ Understanding the radio display ■... -
Page 37: About P25 Digital Radios
About P25 digital radios Your P25 digital radio can be programmed for P25 conventional or P25 trunked operation. Analog conventional operation is also available, with dual- mode channels able to transmit and receive both digital and analog calls. You may notice differences between digital and analog calls in terms of: static noise in low signal areas, and ■... -
Page 38: About The Radio Controls
About the radio controls The radio controls are the PTT key, power/volume control, channel selector, 3-way selector control (optional), scroll keys, selection keys, and function keys. Some keys have functions assigned to both short and long key presses: a short key press is less than one second, and ■... - Page 39 Name Function PTT key Press and hold to transmit and release to listen Power/volume Rotate to turn the radio on and change control the speaker volume Channel Select and change channels selector 3-way selector Select frequently used features (optional) Left and right Action determined by the text above the selection keys selection key...
-
Page 40: Understanding The Radio Display
Understanding the radio display The messages and icons you see on your radio display depend on the mode in which your radio is operating and the way it is programmed. Radio display icons These are some of the icons you may see on your radio display: Icon Meaning... -
Page 41: Understanding The Radio Indicators
Understanding the radio indicators The status LED indicator and the radio’s audible tones—together with the radio display—all combine to give you information about the state of your radio. The most common way the indicators work is described in the following sections. The way these indicators behave may be affected by the way your radio is programmed. -
Page 42: Audible Tones
Audible tones The radio uses audible tones to alert you to its status: Radio controls and keypress tones—the tones ■ and beeps you hear when you press your radio’s keys or use the controls. Incoming call tone—when the radio is receiving ■... -
Page 43: Voice Annunciation
Tone Meaning Two low- Radio’s temperature is high: The radio’s pitched beeps temperature is in the high-temperature range, but the radio will continue to operate. Two high- Radio’s temperature is very high: The pitched beeps radio’s temperature is in the very high temperature range and all transmissions will now be at low power;... -
Page 44: Using Function Keys To Access Frequently Used Features
Using function keys to access frequently used features The function keys provide access to some of the features you will use most often. These features are assigned to the function keys when the radio is programmed. Some keys may have a feature associated with both a short key press and a long key press. -
Page 45: Navigating The Radio's Menus
Use the following table to record the function keys programmed for your radio: Short key press Long key press 1. On speaker microphone (if fitted) For more information about the function keys that can be programmed on your radio, contact your radio provider. -
Page 46: Accessing Frequently Used Menus
Use the scroll keys to move through the menu list. Main menu Zones Individual call Back Select When the menu you want is highlighted, press Select to open the menu you have chosen. To quickly exit the menu system, press and hold the left selection key when the word Cancel or Back appears above it. - Page 47 In this example, the Channels menu is the Quick Access menu. Use the scroll keys to go directly to the Channels menu. Channel 12 Zone 11 Menu The Channels menu, with a list of your available channels, is now displayed. Channels Channel 1 Channel 2...
-
Page 48: Basic Operation
Basic operation This section describes the basic operation of your radio. This section covers: Turning the radio on and off ■ Adjusting the speaker volume ■ Locking and unlocking the keypad ■ Using a wireless headset ■ Selecting a zone ■... -
Page 49: Turning The Radio On And Off
Turning the radio on and off Rotate the power/volume control switch clockwise to turn the radio on. Rotate the switch counterclockwise to turn the radio off. When the radio is first turned on, the status LED briefly glows red, and the radio gives two short beeps. Your radio may not turn on if your battery is very low. -
Page 50: Adjusting The Speaker Volume
The radio is now locked, and the message Enter PIN appears in the display. The radio remains locked until the correct sequence of keys is pressed. If you forget the unlock sequence or you do not know it, contact your radio provider for assistance. Unlocking the radio To unlock your radio, use the unlock sequence ■... -
Page 51: Using A Wireless Headset
Wireless Headset menu, you can still receive and reply to calls without interrupting the selected operation. Headset compatibility with Tait radios Bluetooth wireless headsets may operate with Tait radios, provided the headset: Is compatible with the Bluetooth Specification Ver- ■... -
Page 52: Pairing A Wireless Headset With The Radio
Pairing a wireless headset with the radio Before attempting to connect a wireless headset, Tait recommends that the headset is fully charged. Refer to the headset installation instructions for charging instructions. Pairing creates a unique and encrypted wireless link between the Bluetooth-capable radio, and the Bluetooth headset. -
Page 53: Managing Your Headsets
4 Select Connect when the required headset appears in the list of new devices, then Yes to add the headset to My Headsets. New devices Add to My HM1100 Headsets? Searching ,,, Cancel Connect The message Connecting appears, while the radio attempts to pair with the headset. - Page 54 c The radio will ask you for confirmation before ■ connecting this headset. My Headsets BlueAnt T1V1. CSR-bc6 Options Back Press Options to disconnect or connect a headset (Disconnect, Connect), change the priority order of the headsets (Move down), or remove a headset from My Headsets (Remove, Remove all).
- Page 55 The radio then prompts you to connect to the headsets in My Headsets, in priority order. Connect. Connect HM1100? BlueAnt T1 2 Select Yes to connect, or No to choose another headset. Changing the way your headset reconnects You can use the Power-on Option menu to change the way your radio reconnects with a headset when the radio is first turned on.
-
Page 56: Selecting A Zone
Selecting a zone Your radio may be programmed to use zones. A zone is a collection of channels. Zones are a way of grouping channels, for example, by public safety agency type (fire, police, ambulance, etc.) or by geographical region (Dallas, Houston, etc.). To select a zone: 1 Press Menu and select Zones. -
Page 57: Selecting A Channel
Selecting a channel Using the channel selector For channels 1 to 16, rotate the channel selector to the channel you want. For all other channels, use the Main menu to select a channel. Using the Main menu 1 Press Menu and select Channels. 2 Scroll to the channel you want and press Select. -
Page 58: Limiting Call Time
left selection key (see "Using the left selection key ■ Quick Access menu" on page scroll keys (see "Using the scroll key Quick ■ Access menu" on page Limiting call time Your radio may limit the amount of time you can talk (transmit) continuously. -
Page 59: Setting And Viewing The Radio's Time And Date
The message Call...? briefly appears in the screen. Press the PTT key to make the call. 3 Alternatively, scroll through the list of recent calls until the call you want appears, and press the PTT to make the call immediately. Setting and viewing the radio’s time and date Your radio may be programmed to use its internal... -
Page 60: Updating The Radio Over The Air
Updating the radio over the air Configuration updates that are delivered over the air are either installed immediately, or once the user has accepted the activation prompt. If the activation prompt is declined, you can manually install the configuration update. 1 Press Menu and select Radio updates >... -
Page 61: Operating In Conventional Mode
Operating in conventional mode This section explains how to operate your radio in conventional mode. This includes how to make and receive calls, and use your radio in different repeater areas. This section covers: Making a call ■ Making an individual call ■... -
Page 62: Making A Call
Making a call To make a call: 1 Select the required zone (see "Selecting a zone" on page 56). 2 Select the required channel (see "Selecting a channel" on page 57). 3 Hold the radio so that the microphone is about one inch (2.5 cm) from your mouth and press the PTT key to transmit. -
Page 63: Understanding Talkgroups
(Depending on how your radio is programmed, you may be able to press a function key or use your Quick Access menu to select individual calls.) 2 Scroll to the person you want to call and press the PTT key to make the call immediately. 3 Alternatively, scroll to the person you want to call and press Select. -
Page 64: Making A Talkgroup Call
Special event talkgroups—may be used to man- ■ age emergencies encompassing a large area, or even events such as visits by heads of state. Making a talkgroup call To make a call to the currently selected talkgroup Press the PTT key. ■... -
Page 65: Making A Local Call
Making a local call For analog channels, each channel on your radio may have one or more local calls programmed. For digital radio-to-radio calls, see "Making an individual call" on page Using the Main menu 1 Select the required channel. 2 Press Menu and select Local calls. -
Page 66: Connecting To A Telephone Network
2 Press Menu and select Dial radio call. Alternatively, your radio may be programmed so a local call can be dialed directly from the default display. In this case, you can start dialing the call without selecting the menu option. A series of X and S characters may appear, prompting you to dial over them. - Page 67 Using a function key Depending on how DTMF patch calls are programmed, some or the following steps may not be necessary. 1 Select the required channel. 2 Press the function key programmed for DTMF patch call. Your radio may send tones to capture the line. 3 Press Send, or press the function key a second time, to send the preset number.
-
Page 68: Making An Emergency Call
7 Once the call has finished, press End. Your radio may send tones to release the line. Making an emergency call For information about making and ending emergency calls together with a explanation of how your radio behaves in emergency mode, see "About emergency calls"... -
Page 69: Receiving Calls
Receiving calls When a call is received with valid signaling, the radio unmutes and you can hear the call. Identifying the talking party or caller Your radio may be programmed to display the name or radio ID of the talking party or caller. For digital calls, if the name of the talking party is in the call Call received... -
Page 70: Receiving A Two-Tone Call
Receiving a two-tone call This feature is available for analog channels only. Two-tone signaling is used to call either individual or groups of radios. When your radio receives a two-tone call that it can decode, it beeps, indicating which type of two-tone call has been received. -
Page 71: Communicating Directly With Other Radios
Communicating directly with other radios You can bypass the radio repeater and communicate directly with another radio using the radio talkaround feature. You can do this when you are out of range of the repeater, or if the repeater is busy. While repeater talkaround is active, all calls are made on your current channel’s receive frequency. -
Page 72: Checking That The Channel Is Clear
Checking that the channel is clear Monitor allows you to override some or all of the radio’s mutes, allowing you to hear if there is any traffic (including talkgroup and individual calls) on a channel. For analog channels, this is so that you can check that the channel is clear before you make a call. -
Page 73: Selecting A Voting Group
Selecting a voting group Using the channel selector You can use the channel selector to select a preset voting group, if your radio is programmed in this way. Rotate the channel selector to the group ■ you want. Using a function key To use a function key to select a voting group: Press the function key to select and activate a ■... -
Page 74: Hearing Faint And Noisy Signals
Channel nuisance deleted The channel remains removed from the voting group until you either select another voting group or the radio is turned off and then on again. The function key programmed to activate a voting group may be programmed so that a short key press activates voting and a long key press activates nuisance delete. -
Page 75: Operating In P25 Trunking Mode
Operating in P25 trunking mode This section explains how your radio operates on a P25 trunking system. This includes how to make group calls, individual calls and phone calls. This feature is controlled by a software license (SFE) and may not be available with your radio. The features described in this chapter are only available for radios configured for P25 trunking operation. -
Page 76: About P25 Trunking
About P25 trunking Your radio may be able to operate on a P25 trunking system as well as a conventional repeater-based system. On a conventional system, radio users compete for access to individual channels, and one channel can be overloaded with traffic while others are often unused. - Page 77 Service is lost If access to the trunking system is lost, no longer appears, the bars in the RSSI icon disappear the display shows No service. Talkgroup 1 No service Menu The radio sounds five beeps to indicate the loss of service, followed by a repeating double beep.
-
Page 78: Making A Talkgroup Call
P25 phase 2 fallback mode If there is a fault on the phase 2 network, operation may fall back to phase 1 mode. Failsoft operation Your radio may be programmed to enter ‘failsoft’ mode when service is lost due to failure of a trunking site controller. - Page 79 Your radio now indicates the zone in which it is operating, either as a letter in the top right corner of the display, or as a zone name in the second line of the display. zone represented as one or two letters Channel 1 Zone 2 zone name...
-
Page 80: Receiving A Talkgroup Call
While you are transmitting, the LED glows red and appears in the display. Talkgroup 2 Zone 2 Menu Receiving a talkgroup call To hear calls from other members of a talkgroup, your radio must have that talkgroup selected, or the talkgroup must be part of an active scan group. -
Page 81: Receiving An Individual Call
2 Scroll to the person you want to call and press Select or press the PTT key. Individual call Car 2 Car 1 Cancel Select The message Calling... briefly appears. Calling... Car 2 Cancel Menu 3 When the called party accepts the call, you will hear three short beeps. -
Page 82: Emergency Calls
Emergency calls In an emergency, you can summon help by sending an emergency call. When an emergency call is initiated, the radio enters ‘emergency mode’. For more information on emergency mode, see "Standard emergency mode" on page 120. Making an emergency call You can make an emergency call using the emergency function key (function key 1). -
Page 83: Making A Phone Call
Making a phone call This feature is only available for radios with alphanumeric keys. You may be able to use your radio to connect to a telephone network and make a phone call. Caution In some situations, your call will not proceed. -
Page 84: Unconnected Calls
Unconnected calls If your call is not connected, the way your radio behaves is explained in the following table. Radio behavior Explanation The system is too busy to process your System talkgroup or individual call. queued The system is now available to process your Busy channel talkgroup or individual call. -
Page 85: Failsoft Mode Operation
Failsoft mode operation If your radio is unable to access the trunking system, it may be programmed to enter failsoft mode. Failsoft mode operates in one of two ways: ‘radio-based’ failsoft and ‘infrastructure’ failsoft. Radio-based failsoft When you lose access to the trunking system, longer appears, the bars in the RSSI icon disappear and the display shows No service. -
Page 86: Dynamic Regrouping
You may still be able to communicate with your dispatcher and other talkgroup members, depending on the type of system failure that has occurred, and how your radio is programmed. When the trunking system returns to normal operation, your radio is notified, and will attempt to register on the control channel it was previously using. -
Page 87: Scanning
Scanning This section explains the different types of scanning that may be available on your radio, and also how to view and edit scan group members. This section covers: About scanning ■ Activating standard scanning ■ Activating background scanning ■ Activating in-zone scanning ■... -
Page 88: About Scanning
About scanning The scan feature is used to monitor groups of channels or talkgroups for activity of interest. This means that you are able to operate across multiple channels or talkgroups at the same time. For example, you may need to monitor your own conventional dispatch channel as well as other local area channels, such as a local sheriff and highway patrol channel. - Page 89 background scanning (P25 conventional and ana- ■ log channels, and may include some voting groups) in-zone scanning (P25 conventional and analog ■ channels, and P25 trunked talkgroups) talkgroup scanning (P25 trunked talkgroups, and ■ may include some P25 conventional and analog channels,).
-
Page 90: Activating Standard Scanning
Activating standard scanning A standard scan group scans conventional channels (P25 and analog) from across zones, and can also scan one or two voting groups. A standard scan group appears and behaves on the radio like a separate channel, and all standard scan groups are included in the channel list. -
Page 91: Changing The Background Scan Group Assigned To The Function Key
Background scanning remains on until you either press the function key again, or select a standard, in-zone or talkgroup scan group. Changing the background scan group assigned to the function key 1 Press Menu and select Radio settings > Functions > Set scan key. 2 Scroll through the list of background scan groups available and press Select. -
Page 92: Activating Talkgroup Scanning
Activating talkgroup scanning Talkgroup scanning monitors calls from multiple trunked talkgroups, and up to five additional conventional channels (P25 or analog), from across zones. If conventional channels are included as group members, your radio will briefly leave the trunking control channel to scan these channels at regular intervals. -
Page 93: Making A Call While Scanning
Making a call while scanning If you want to make a call while your radio is scanning: 1 Press the PTT key to transmit. If the icon is flashing, your radio calls the currently selected channel. If there has been no recent activity on the channel (the icon is not flashing), then the channel that is called depends on the way your radio has been... -
Page 94: Editing A Scan Group
If the channel has been removed successfully, the message Channel nuisance deleted appears in the display. Channel nuisance deleted The function key programmed to activate scanning may be programmed so that a short key press activates scanning and a long key press activates nuisance delete. - Page 95 Group members: shows the current members ■ of a group, and may also show the designated transmit channel and priority channels. Add or Delete channel: adds or deletes ■ member channels of a group. Change tx: changes the group’s transmit ■...
-
Page 96: Viewing Group Membership
Viewing group membership 1 In the Radio settings menu, select Edit groups and select a scan group. Press Select. 2 In the Edit Group menu, select Group members and press Select. Edit group Group members Add channel Back Select 3 Scroll through the list of group members. The names of the group members may be shortened. -
Page 97: Deleting A Channel From A Group
For all types of scanning except standard scanning, if your radio is programmed to use the scroll keys to scroll through a list of channels and also has a function key programmed to Nuisance Delete, you can permanently add or delete a channel to the active group by scrolling to the channel and pressing the Nuisance Delete function key. -
Page 98: Changing A Group's Transmit Channel
Changing a group’s transmit channel You can change the group’s transmit channel only if it has been pre-programmed. 1 In the Radio settings menu, select Edit groups and select a scan group. Press Select. 2 In the Edit Group menu, select Change tx and press Select. -
Page 99: P25 Services
P25 services This section describes the P25 services that may be available on your radio. This feature is controlled by a software license (SFE) and may not be available with your radio. This section covers: Messages ■ Status update ■ Status request ■... -
Page 100: Messages
Messages You may be able to send short messages to another radio user. These messages are defined at programming time. If you are on a P25 trunk channel, you can send a message to any other radio on a trunk channel on the same network. - Page 101 The LED glows red and a message may be displayed to advise you whether the message has been sent successfully or not. If an acknowledgement is not received from the recipient’s radio, you will have the option of either canceling or resending the call alert page. Sending a message to a person of your choice 1 Press Menu and select Services >...
-
Page 102: Status Update
Status update You can inform another radio user of your current status by sending them a status update, for example, ‘At scene’. You may be able to send the status update to a predetermined person or talkgroup, or to a person of your choice. -
Page 103: Status Request
The LED glows red and a message may be displayed to advise you whether the status update has been sent successfully or not. If an acknowledgement is not received from the recipient’s radio, you will have the option of either canceling or resending the request. -
Page 104: Call Alert
If an acknowledgement is not received from the recipient’s radio, you will have the option of either canceling or resending the request. Call alert You can let another radio user know that you want to talk to them by sending them a call alert page. When the other radio user receives the call alert page, they can call you back when it is convenient. -
Page 105: Radio Check
Answering a call alert page If you receive a call alert page from another radio user, the message Page rx’d from... briefly appears in the display. Select Call to return the page or No to delete it. If you miss the call alert page, the identity of the caller may be saved in your recent calls list. -
Page 106: Radio Unit Monitor
If an acknowledgement is not received from the recipient’s radio, you will have the option of either canceling or resending the request. Radio unit monitor This feature is controlled by a software license (SFE) and may not be available with your radio. This software license is only required for the radio that sends the radio unit monitor request. -
Page 107: Radio Inhibit And Uninhibit
If the other radio has received your request, it will now call you, so that you can monitor activity near the radio. Call received Car 2 Menu If an acknowledgement is not received from the recipient’s radio, you will have the option of either canceling or resending the request. - Page 108 The LED glows red and a message appears in the display. Sending inhibit to Car 2 Cancel If the radio has been successfully immobilized, an acknowledgement message is displayed. Ack received Sending a radio uninhibit request 1 Press Menu and select Services > Radio uninhibit.
-
Page 109: Location Services
Location services This section explains how to use the location services that may be available on your radio. This feature is controlled by a software license (SFE) and may not be available with your radio. This section covers: About location information ■... -
Page 110: About Location Information
About location information While you may be able to view your location information on analog channels, sending location information is only available for digital channels. If your radio is connected to the receiver of a satellite navigation system, you can view location information such as latitude and longitude, true course, speed, and coordinated universal time. -
Page 111: Viewing Location Information
Viewing location information 1 Press Menu and select Location Svs > Own location. (Depending on how your radio is programmed, you may be able to press a function key to access the Own location menu.) Location information is now shown in the display, if it is available. -
Page 112: Sending Location Information
Location UTC: Coordinated Universal Time ■ 23:36:20 UTC time: 24 hour clock Exit Location The radio’s altitude in metres Altitude: ■ above or below mean sea level Exit MGA: Map Grid of Australia ■ MGA: coordinate system Zone: UTM zone number ■... - Page 113 1 Press Menu and select Location Svs > Send on PTT. Location Svs Send Logs Send on PTT Back Select 2 Scroll to Off (or On) and press Select. (The current setting is highlighted.) Send on PTT Back Select Using a function key You may be able to use a function key to manually send your location to either all radios on the channel, or to your dispatcher (depending on how your radio is...
-
Page 114: Receiving And Logging Location Information
Receiving and logging location information This feature is controlled by a software license (SFE) and may not be available with your radio. When your radio receives location information, the display shows Location, along with the digital ‘alias’ of the sending radio. If the radio alias is not available, the radio ID appears. -
Page 115: Accessing Logged Location Information
Radios can also be added to Team Locations by pressing Menu, selecting Location Svs > Team Locations, pressing Options and selecting Add; then select whether to add a radio from the Recent talkers list, or by entering a Dialed number. Accessing logged location information This feature is controlled by a software license... - Page 116 Select Delete from the Options menu to remove the location information for the radio, and stop logging it. Accessing Recent Locations The latest location data received, including Team Locations, can be viewed using the Recent Contacts menu option. Up to 10 entries will be available. To view the Recent Contacts information: 1 Press Menu and select Location Svs >...
-
Page 117: 10 Emergency Operation
10 Emergency operation This section describes how to make different types of emergency calls. This section covers: About emergency calls ■ Making a priority call ■ Standard emergency mode ■ About manual emergency operation ■ Accessing emergency location information ■ Loneworker monitoring ■... -
Page 118: About Emergency Calls
About emergency calls Warning When emergency mode is activated, your encryption keys may be automatically deleted from your radio. In an emergency you can summon help by sending an emergency call. There are three types of emergency calls: Call type Explanation Priority call (Digital channels only.) An emergency alert... -
Page 119: Making A Priority Call
Making a priority call This feature is available for digital channels only. When you turn the priority call feature on, the radio automatically sends an emergency alert (message) to the current talkgroup. Any calls you make while the priority call feature is turned on are flagged as emergency calls. -
Page 120: Standard Emergency Mode
Standard emergency mode When you press the emergency key your radio enters ‘emergency mode’, if your radio is programmed in this way. When the radio enters emergency mode, it will automatically send alerts together with your radio unit ID to the dispatcher. These alerts are usually sent on a designated emergency channel. -
Page 121: Activating Emergency Mode
Activating emergency mode You can activate emergency mode using the emergency function key. 1 Long press the function or emergency key to activate emergency mode. ‘Emergency mode’ appears in the display. Emergency mode One or more emergency calls are sent to your dispatcher or another predetermined radio user. -
Page 122: Making A Manual Emergency Call
Making a manual emergency call Warning You will not be able to make a voice call on the channel until the 3-second emergency alarm has finished. 1 Press and hold the emergency key for longer than three seconds. The radio gives three short beeps, rising in pitch. Emergency appears in the display, and remains until the manual emergency call is canceled. -
Page 123: Canceling A Manual Emergency Call
Canceling a manual emergency call If the emergency situation has been resolved, the manual emergency call can be canceled either by you or another member of your group. Canceling an emergency call you have made Press and hold the emergency key for longer than ■... -
Page 124: Accessing Emergency Location Information
The message Emergency ack. sent briefly appears in the display. Emergency ack. sent Accessing emergency location information If Location appears in the display, above the left selection key, you can display the current location of the radio that has sent a manual emergency call. The last location of the radio will still be available even if the radio is turned off and then on again. -
Page 125: Using The Last Stored Menu
Using the Last stored menu 1 Press Menu and select Emergency > Last stored to display the current location of the radio. Emergency Last stored Acknowledge Back Select 2 Use the scroll keys to view more location information. Zone: 55 Stored valid valid... -
Page 126: Activating Loneworker Monitoring
Activating loneworker monitoring 1 Press Menu and select Radio Settings > Extra features > Loneworker. (Depending on how your radio is programmed, you may be able to press a function key to turn loneworker monitoring on and off.) Extra features Loneworker Back Select... -
Page 127: Delaying The Emergency Action (Conventional Mode Only)
Delaying the emergency action (conventional mode only) In conventional mode, an additional emergency entry delay may be programmed which allows you to press a scroll key within a programmed time (usually 10 seconds) after the response time expires to delay the emergency action. -
Page 128: 11 Encryption
11 Encryption This section describes how to use encryption to make your communications completely private. This feature is controlled by a software license (SFE) and may not be available with your radio. This section covers: About encryption ■ Encrypting calls ■... -
Page 129: About Encryption
About encryption The encryption feature is available for digital and dual-mode channels only. To make communications with other users on your system completely private, your radio may be able to encrypt outgoing calls, using a confidential encryption key. The radio receiving your call must have the same encryption key installed before it can hear your encrypted call. -
Page 130: Making An Encrypted Call
To turn encryption on or off: 1 Press Menu and select Security > Encryption. (Depending on how your radio is programmed, you may be able to press a function key to turn encryption on and off.) 2 Scroll to On (or Off) and press Select. Encryption Back Select... -
Page 131: Receiving An Encrypted Call
The name of the encryption key that your radio is using for the transmission may briefly appear in the display. Channel 8 Key 7 Menu While you are transmitting, the LED glows red and appears in the display. Receiving an encrypted call When you receive an encrypted call, your radio unmutes and you can hear clear speech, so long as the key required to decode the call is stored in... -
Page 132: Changing The Transmit Encryption Key
Warning Once you change the encryption key, it may also automatically update the encryption keys used to encrypt calls on other channels. Changing the transmit encryption key 1 Press Menu and select Security > Change all. 2 Scroll to the key you want and press Select. Change all Key 2 Key 1... -
Page 133: Removing Encryption Keys From The Radio
2 Scroll to 01 or 02 and press Select. Change keyset Cancel Select The message Keyset selected briefly appears in the display. Removing encryption keys from the radio It may be possible for you to delete encryption keys from your radio. Warning When emergency mode is activated, or when your radio is immobilized (‘inhibited’), your encryption keys may be automatically deleted from... -
Page 134: Updating Encryption Keys Over-The-Air
Updating encryption keys over-the-air You may be able to update your encryption keys using over-the-air-rekeying (OTAR). This feature is controlled by a software license (SFE) and may not be available with your radio. This feature is only available for digital channels operating in conventional mode. -
Page 135: Making An Encrypted Call Using The Demo Key
Making an encrypted call using the demo key To encrypt your transmissions using the demo key: 1 Activate the demo key on your radio. 2 Turn on encryption. See "Encrypting calls" on page 129. 3 Make the call. See "Making an encrypted call" on page 130. -
Page 136: Customizing Radio Settings
12 Customizing radio settings This section describes the ways in which you can customize your radio. This section covers: Extending battery life on a shift ■ Changing the volume of all audible indicators ■ Changing the volume of keypress tones ■... -
Page 137: Extending Battery Life On A Shift
Extending battery life on a shift You can reduce the power consumption of your radio (and thereby extend the life of the battery during a shift) in the following ways: Transmit at low power (if your radio is not already ■... -
Page 138: Changing The Volume Of All Audible Indicators
Changing the volume of all audible indicators You can set the volume of all the audible indicators to either high or low. Audible tones include incoming call tones, warning tones and confirmation tones. To change the volume of your radio’s audible tones: 1 Press Menu and select Radio settings >... -
Page 139: Changing To Quiet Operation
Changing to quiet operation When quiet operation is on, keypress tones and confirmation tones are turned off. Incoming call tones, signaling tones and warning tones all remain audible. To turn quiet operation on or off: 1 Press Menu and select Radio settings > Alert settings >... -
Page 140: Turning On Backlighting
Turning on backlighting Whenever a key is pressed or a call is received, the keypad and display light up automatically. Backlighting only remains on for a few seconds, unless there is further radio activity. When backlighting is turned on, it remains on until the setting is changed to Off, regardless of radio activity. -
Page 141: Adjusting The Display Contrast
Adjusting the display contrast To change the contrast of your radio display to suit the lighting conditions that you are working in: 1 Press Menu and select Radio settings > Display settings > Contrast adjust. Display settings Contrast adjust RSSI Back Select 2 Use the scroll keys to adjust the display contrast to... -
Page 142: Charging And Caring For Batteries
13 Charging and caring for batteries This section describes how to charge your Tait radio battery as well as care for it, to ensure safe operation, maximum performance and prolonged battery life. This section covers: About the chargers ■ Special conditions when using IS radios ■... -
Page 143: About The Chargers
About the chargers Unless otherwise indicated, the charging advice and instructions in this chapter apply to all chargers. There are four types of charger available for your Tait radio battery: Desktop charger: Small enough to ■ fit on a desk, it charges one bat- tery at a time. -
Page 144: Special Conditions When Using Is Radios
Warning Use only a Tait-supplied, IS-approved battery and charger with an IS radio. Fitting a battery or using a charger that is not IS-approved creates a risk of explosion which could cause serious injury or death. -
Page 145: Before Using The Charger
Before using the charger Notice Turn the radio off before removing the battery, and turn it on again after attaching the battery. This ensures that the radio powers down and up correctly. Failing to follow this procedure may require the radio to be turned off then on again to operate correctly. -
Page 146: Charging Temperatures
Charging temperatures Notice Do not expose a battery to very high or very low temperatures for extended periods of time. Doing so will shorten the usable life (‘service life’) of the battery. To achieve the best results when charging your battery: Before you begin to charge your battery, make ■... - Page 147 Charger for IS batteries only Notice Placing a fully charged battery into the charger for IS batteries may result in both the orange and red LED lighting up. In this case, remove the battery and use as normal. Leaving the battery in the charger may result in the battery being discharged.
-
Page 148: Low Battery Warning
Removing the radio from the charger to make or receive a call ends the charging process. Charging safely recommences when the radio is reinserted into the charger. If a radio was turned on while being charged, the battery indicator may not be accurate when the radio is initially removed from the charger. -
Page 149: Charging The Battery
The red LED stays lit while the battery charges. To charge the battery: 1 Desktop charger: Connect the charger to the correct Tait power adaptor. Multicharger and vehicle charger: Power on the charger. Initially, all three LEDs are lit for two seconds. -
Page 150: Led Behavior
No action is required. ■ There is a fault. Contact your local regional Tait office. If the LEDs for all charger slots continuously flash orange, or red then orange, the multicharger itself may be faulty (e.g. the fan may be jammed or faulty). -
Page 151: Removing The Battery From The Charger
With proper care and maintenance you will maintain the performance and life of the battery. It is recommended that you: Use only Tait batteries and chargers. ■ Do not expose a battery to very high or very low ■... -
Page 152: Cleaning The Contacts Of The Battery
Cleaning the contacts of the battery Notice Do not scratch or scrape the contacts of the battery. If necessary, wipe the contacts of the battery with a dry, lint-free cloth to remove any dirt, oil or grease. Storing batteries When not in use for a month or more, batteries should be stored correctly to prolong their life. -
Page 153: 14 Troubleshooting
14 Troubleshooting This section describes troubleshooting procedures, and basic maintenance. This section covers: About troubleshooting ■ System error message ■ When your radio won’t turn on ■ Identifying the radio’s audible tones ■ Viewing radio information ■ Changing the radio ID ■... -
Page 154: About Troubleshooting
About troubleshooting If you are experiencing difficulty operating your radio, you may find the following sections helpful. Consult your radio provider for assistance, if necessary. System error message If your radio displays a system error message, take a note of the number (X:XXXXXXXX), and consult your radio provider. -
Page 155: Viewing Radio Information
Viewing radio information Your radio provider may ask you for the hardware and firmware version of your radio, for troubleshooting purposes. Use the Radio info menu to view information such as the hardware and firmware version of your radio, function key settings, the radio serial number, and various radio identities. -
Page 156: Running Diagnostics Tests
5 Press Options > Store to save the new ID. Running diagnostics tests Diagnostics tests are available via the main menu. This feature is controlled by a software license (SFE) and may not be available with your radio. 1 Press Menu and select Diagnostics. 2 Scroll to the name of the test you want to run and press Select. - Page 157 Test Description Displays information about the quality of service (P25 channels (received signal strength (RSSI) with an indication of only) digital voice quality). Also displays the channel status (CNV, TCH, CCH ) and the mode (PH1 or RSSI Displays the received signal strength (RSSI) of the current channel.
-
Page 158: General Care
General care Your radio requires no regular maintenance other than ensuring that the battery has sufficient charge and that no damage has occurred to the antenna or the battery. Notice To prevent permanent damage to the radio case, do not allow the radio to come into contact with detergents, alcohol, aerosol sprays, or petroleum- based products. -
Page 159: 15 Glossary
15 Glossary APCO The Association of Public Safety Communications Officials. The APCO Project 25 standards committee (http://www.apcointl.org/) defined a digital radio standard. The standard is often referred to as ‘APCO’ or ‘P25’. channel In a conventional system, a channel is a pair of frequencies used to transmit and receive radio signals. - Page 160 failsoft Failsoft operation offers P25 conventional operation if the radio cannot acquire a control channel on a trunking system for an extended period of time. The conventional channel may be a repeater channel or a direct channel. Federal Communications Commission, an independent United States government agency that regulates interstate and international radio...
- Page 161 Project 25. The Association of Public Safety Communications Officials (APCO) established Project 25 (P25). This project was led by United States Federal, state, and local government representatives to develop standards for interoperable digital radios and systems to meet the needs of public safety users.
- Page 162 repeater A repeater is a relaying site, usually situated above a city or town. The repeater extends the range of radio communications by receiving and re- transmitting signals received from radios. Radio Frequency, the part of the electromagnetic spectrum that is suitable for radio transmissions.
- Page 163 valid signal A valid signal is a signal that the radio responds to by unmuting the receiver. A signal may be valid, for example, when it is stronger than a minimum level or has special signaling that matches the signaling programmed for the receiving radio.
-
Page 164: Index
Index priority channel selector control alert tones see also audible tones compliance information alias control channel see also digital radio ID registration antenna conventional operation safe distance from face individual calls audible tones talkgroups meaning of deleting nuisance channels background scan from groups activating demo key... - Page 165 receiving an encrypted call long and short, explained remove key keypress turning on and off invalid turning on and off using the tones. See audible tones. 3-way selector error messages exposure, to RF lighting conditions adjust display for location information failsoft mode about firmware version...
- Page 166 recent calls red LED nuisance delete related documentation scan groups repeater talkaround voting groups radio display icon for turning on and off revive orange LED RF, exposure to OTAR safe distance, recommended P25 trunking. See trunking from radio operation. safety paging a radio information phone calls (trunking)
- Page 167 talkgroup (trunking) making a call to volume, changing priority voting scanning voting groups selecting removing channels from talkgroup scan changing group membership warning tones. See audible talking directly to other radios tones warnings, on radio display time-out timer traffic channel wireless headset transmission time, limited connecting...
-
Page 168: Directive 1999/5/Ce Declaration Of Conformity
Directive 1999/5/CE Declaration of Conformity Dansk Italiano Undertegnede Tait Limited erklærer Con la presente Tait Limited dichiara che herved, at følgende udstyr TPDB1A, questo TPDB1A, TPDH5A & TPDH7A è TPDH5A & TPDH7A overholder de conforme ai requisiti essenziali ed alle væsentlige krav og øvrige relevante krav i... -
Page 169: Tait Software Licence Agreement
CD, downloaded from the instructions the computer carries out in Tait website, or provided in any other hardware. Executable code may also form, you agree to be bound by the refer to programs written in interpreted terms of this Agreement. - Page 170 Open Source Software are in the Open versions and new releases of the Source Software Licenses of the software provided by Tait; and (iii) may copyright owner and not in this contain one or more items of software Agreement. If there is a conflict owned by a third-party supplier.
- Page 171 (vi) remove, or in any Licensee’s premises, books and way alter or obscure any copyright records, upon reasonable prior notice notice or other notice of Tait or third- to Licensee, during Licensee’s normal party licensor’s proprietary rights; (vii) business hours and subject to...
- Page 172 Vulnerabilities. If Tait cannot correct Intellectual Property developed, the defect within a reasonable time, originated, or prepared by Tait in then at Tait option, Tait will replace the connection with providing the defective Software with functionally Software, Designated Products, equivalent Software, license to...
- Page 173 Licensee has first Licensee's breach of this Agreement obtained from its Customer (and, if will result in irreparable harm to Tait for Licensee is acting as a subcontractor, which monetary damages would be from the interim transferee(s) and from inadequate.
- Page 174 10.2. Licensee’s sole remedy against Tait and Licensee. No third party has Tait will be limited to breach of contract the right to make any claim or assert and Tait sole and total liability for any...
- Page 175 Tait and Licensee to the contrary, this is the complete and exclusive statement of the Agreement between it and Tait in relation to the Software. This Agreement supersedes any proposal or prior agreement, oral or written, and...
- Page 176 Tait Software Licence Agreement...
Need help?
Do you have a question about the TP9400 Series P25 and is the answer not in the manual?
Questions and answers