Tait TP9100 User Manual
Hide thumbs
Also See for TP9100:
- Service manual (326 pages) ,
- Battery charging manual (78 pages) ,
- Product safety and compliance information (15 pages)
Table of Contents
Advertisement
Quick Links
Advertisement
Table of Contents
Troubleshooting

Related Manuals for Tait TP9100


Summary of Contents for Tait TP9100
- Page 3 If the chassis has been engraved, it must be replaced. To our European customers Tait Electronics Limited is an environmentally responsible company which supports waste minimization and material recovery. The European Union’s Waste Electrical and Electronic Equipment...
-
Page 4: For Your Safety
For your safety Before using your radio, please read the following important safety and compliance information. Radio frequency exposure information For your own safety and to ensure you comply with the Federal Communication Commission’s (FCC) radio frequency (RF) exposure guidelines, please read the following information before using this radio. -
Page 5: Compliance With Rf Energy Exposure Standards
If you wear your radio, you must always put it in a carrying accessory that has been specifically approved by Tait for this radio. Using non-approved body-worn accessories may mean you expose your- self to higher levels of RF than recommended by the FCC’s occupational/controlled environment RF... -
Page 6: Radio Frequency Emissions Limits In The Usa
The radio is designed to satisfy the applicable compliance regulations. Do not make modifications or changes to the radio that are not expressly approved by Tait Electronics Ltd. Failure to do so could invalidate compliance requirements and void the user’s authority to operate the radio. -
Page 7: Safe Radio Operation
Use of encryption This radio complies with §90.553 (a) of 47 CFR. This states that: Encryption is not permitted on the nationwide Interoperability calling channels. These channels are defined in §90.531 (b) (1) (ii). Radios using encryption must have a readily accessi- ble switch or control to allow the radio user to dis- able encryption. -
Page 8: Interference With Electronic Devices
Interference with electronic devices Some electronic devices may be prone to malfunction due to the lack of protection from RF energy that is present when your radio is transmitting. Examples of electronic devices that may be affected by RF energy are: vehicular electronic systems such as fuel injection, anti-skid brakes, and cruise control medical devices such as hearing aids... -
Page 9: Menu Map
Menu map... -
Page 10: Radio Controls
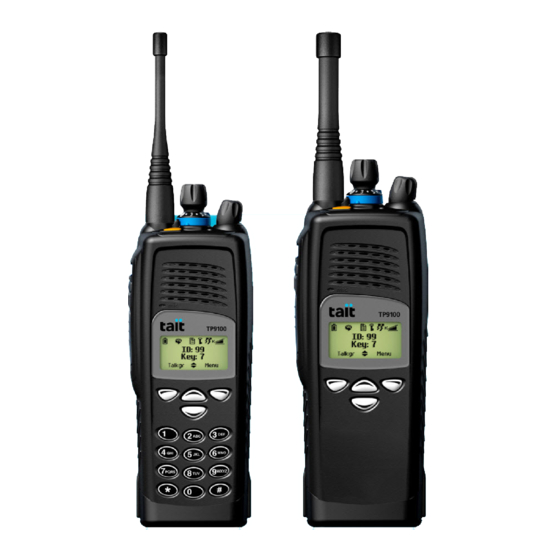
Radio controls For more information about the radio controls, see “About your radio” on page channel selector power / volume control 3-way selector control status LED top key (function key 3) side keys speaker / (function microphone keys 1 & 2) PTT key (press-to-talk) display... -
Page 11: Table Of Contents
Contents Chassis engraving will void warranty ....... i To our European customers ..........i For your safety ..............ii Radio frequency exposure information ......ii Using this radio ............ii Controlling your exposure to RF energy ....ii Compliance with RF energy exposure standards ..iii Radio frequency emissions limits in the USA .... - Page 12 Turning your radio on and off ........10 Adjusting the volume ..........10 About the channel selector ........10 Using function keys to access frequently used features 11 Three-way selector control ........11 Emergency key............11 Viewing your function key settings......12 Understanding the radio display ........
- Page 13 Call alert paging ............29 Sending a call alert page .......... 29 Answering a call alert page ........29 Checking missed calls ..........30 Checking that the channel is clear (monitor) ....31 Turning monitor on and off........31 Using the Main menu........... 31 Using a function key ..........
- Page 14 Understanding emergency mode......47 Stealth and non-stealth emergency modes ... 47 What happens during an emergency call? .... 48 Making an emergency call ........49 Charging and caring for batteries .... 50 Removing the battery ..........51 About your charger ............. 52 About battery charging ..........
- Page 15 Using the Main menu........... 68 Using a function key ..........69 Changing the keypress volume......... 69 Using the Main menu........... 69 Using a function key ..........69 Turning off radio controls and keypress tones (quiet op- eration) ..............70 Using the Main menu........... 70 Using a function key ..........
- Page 16 Contents...
-
Page 17: About This Guide
Related documentation The following documentation is also available for your Tait radio, which you can access from the Tait Technical Support website (http://support.taitworld.com/): TP9100 Battery Care and Charging Guide—supplied with each battery and charger. (The same informa-... -
Page 18: Copyright Information
Copyright information All information contained in this user’s guide is the property of Tait Electronics Limited. All rights are reserved. These manuals may not, in whole or in part, be copied, photocopied, reproduced, translated, stored, or... -
Page 19: Before First Use Of Your Radio
Before first use of your radio Once you have unpacked your radio, there are a few tasks you must do before you can use it. The most important of these is to charge your battery for the first time—allow 14 hours for this. This section covers: Charging the battery before first use Attaching a battery... -
Page 20: Charging The Battery Before First Use
41°F (5°C) and 95°F (35°C). 1 Ensure that the charger is connected to the correct Tait power adaptor. 2 Put the battery in the charger. The red ‘Charging’ LED glows to indicate that the battery is being charged. -
Page 21: Attaching A Battery
Attaching a battery To attach a battery to your radio: 1 Insert the bottom edge of the battery into the two slots at the back of the radio. 2 Press down on the top of the battery to snap it into place. -
Page 22: Fitting A Speaker Microphone
Fitting a speaker microphone The speaker microphone is attached to the radio via a connector. Removing the protective cover Before fitting the speaker microphone, you may need to remove the radio’s protective cover. This cover is located above the battery on the rear of the radio. 1 Insert a coin, or other suitably shaped object, into the slot of the protective cover. -
Page 23: About Your Radio
About your radio This section describes all the various buttons and keys on your radio. This section covers: About your digital radio Basic operation Using function keys to access frequently used features Understanding the radio display Using the menus to access settings and features Understanding the radio indicators About your radio... -
Page 24: About Your Digital Radio
About your digital radio You may notice some differences between digital and analog channels, for example, the lack of static noise in low signal areas and consequently where you notice that coverage is poor. Lack of static noise You may notice the lack of static noise on digital channels. -
Page 25: Basic Operation
Basic operation The radio controls are the PTT key, power/volume control, channel selector, three-way selector control, scroll keys, selection keys, and function keys. Some keys have functions assigned to both short and long key presses: a short key press is less than one second, and a long key press is more than one second The radio controls and their functions are described in the following sections. -
Page 26: Turning Your Radio On And Off
Turning your radio on and off Rotate the power/volume control switch clockwise to turn the radio on. Rotate the switch counterclockwise to turn the radio off. Note: Your radio may not turn on if your battery is very low. (See “Low battery warning” on page 53.) Adjusting the volume With the radio turned on, rotate the power/volume control clockwise to increase the speaker volume and... -
Page 27: Using Function Keys To Access Frequently Used Features
Using function keys to access frequently used features The function keys and three-way selector control provide quick access to some of the features you will use most often. The actions that they perform (when pressed or turned) will depend on how your radio is programmed. -
Page 28: Viewing Your Function Key Settings
Viewing your function key settings You can check which functions are assigned to the function keys. top key (function key 3) side key 1 (function key 1) side key 2 (function key 2) 1 Press Menu and select Radio settings > Radio info >... -
Page 29: Understanding The Radio Display
Scrolling: you can use the scroll keys move through a list Battery indicator: shows how much charge is available in the battery Battery in charger: appears when you place a radio (with a TP9100 battery attached) in the charger Understanding the radio display... -
Page 30: Using The Menus To Access Settings And Features
Using the menus to access settings and features You can access settings and features for your radio using the menu. The selection and scroll keys enable you to make selections and move around the menus. Selection keys left right selection selection There are two selection keys beneath the display screen. -
Page 31: Accessing The Main Menu
Accessing the main menu 1 To access the main menu, press the right selection key whenever Menu appears above it. Talkgroup 01 Zone K Talkgr Menu 2 Use the scroll keys to move through the menu list. Channels Zones Talkgroups Back Select 3 When the menu you want is highlighted, press... -
Page 32: Accessing Frequently Used Menus
Accessing frequently used menus Depending on how your radio is programmed, you may have two different ‘quick access’ menus. One quick access menu is displayed when you press a scroll key, and the other when you press the left selection key. These give you easy access to the menus you use most often. -
Page 33: Using The Left Selection Key Quick Access Menu
Using the left selection key Quick Access menu The text above the left selection key corresponds to the Quick Access menu, for example, Talkgroups. To use this Quick Access menu: Press your left selection key , and the associated menu appears. Talkgroup 01 Zone K Talkgr... -
Page 34: Understanding The Radio Indicators
Understanding the radio indicators The status LED indicator and the radio’s audible tones— together with the radio display—all combine to give you information about the state of your radio. The most common way the indicators work is described in the following sections. Audible tones The radio uses audible sounds (tones and beeps) to alert you to its status:... - Page 35 Tone Meaning One long, low- Invalid keypress: the action you have pitched beep attempted is not permitted, or Transmission inhibited: you have attempted to transmit, but for some rea- son transmission is not permitted at this time One short, low- Function deactivated: a function has been pitched beep turned off (using either the Main menu or a...
-
Page 36: Status Indicators
Status indicators Note: The way these indicators behave may be affected by the way your radio is programmed. status LED Color Meaning Red (transmit) Glowing: your radio is transmitting Flashing: your transmit timer is about to expire Green (receive) Glowing: the current channel is busy Flashing: you have received a call Amber Flashing: your radio has detected activity on a... -
Page 37: Making And Receiving Calls
Making and receiving calls This section describes how to make and receive calls. This section covers: Making calls Receiving calls Communicating directly with other radios Call alert paging Checking missed calls Checking that the channel is clear (monitor) Making and receiving calls... -
Page 38: Making Calls
Making calls 1 Ensure the required zone is selected (see “Selecting a zone” on page 22). 2 Ensure the required channel is selected (“Selecting a channel” on page 23). 3 Ensure the required talkgroup is selected (see “Selecting a talkgroup” on page 25) or individual radio ID (see “Making an individual call”... -
Page 39: Selecting A Channel
Your radio display now shows the zone: zone Channel 6 Talkgroup 01 Talkgr Menu Selecting a channel It is important to distinguish between channels and talkgroups: a channel is frequency-related whereas a talkgroup is a group of radio users. For an explanation of talkgroups, see “Understanding talkgroups”... -
Page 40: Limiting Call Time (Transmit Timer)
Limiting call time (transmit timer) Your radio may limit the amount of time you can talk (transmit) continuously, if it is programmed in this way. This is known as the transmit or time-out timer and allows other radio users to make calls on that channel. The radio warns you before the transmit timer expires by beeping three times. -
Page 41: Making A Talkgroup Call
Special event talkgroups—may be used to manage emergencies encompassing a large area, or even events such as visits by heads of state. Making a talkgroup call To make a call to the currently selected talkgroup, press the PTT. Selecting a talkgroup You can select a new talkgroup (if your radio is programmed in this way): 1 Press Menu and select Talkgroups. -
Page 42: Using A Function Key
2 Scroll to the person you want to call and press Select. 3 Press the PTT to make the call. 4 Press Cancel to end the call. Using a function key You can make an individual call by pressing a function key, if your radio is programmed in this way. -
Page 43: Communicating Directly With Other Radios
The message Talking party ID activated (or Talking party ID deactivated) appears in the display: Talking party ID activated Communicating directly with other radios You can bypass the radio repeater and communicate directly with another radio. This feature is known as repeater talkaround. -
Page 44: Using A Function Key
The message Repeater talkaround activated (or Repeater talkaround deactivated) appears and the repeater talkaround symbol appears in the display. Repeater talkaround activated 3 Change to the required channel and proceed with your call. Using a function key You can turn repeater talkaround on and off using a function key, if your radio is programmed in this way. -
Page 45: Call Alert Paging
Call alert paging Note: This feature is available for digital channels only and applies to individual calls only. You can let another radio user know that you want to talk to them by sending them a Call Alert Page. When the other radio user receives the call alert page together with your radio ID, they can call you back when it is convenient. -
Page 46: Checking Missed Calls
2 Scroll through the list of queued calls until the call you want appears, and then press Done. 3 Press Options to open the Call Queue Options menu. 4 Select Call to return the call or Delete to delete it. Checking missed calls Note: This feature is available for digital channels only... -
Page 47: Checking That The Channel Is Clear (Monitor)
Checking that the channel is clear (monitor) Monitor allows you to hear if there is any traffic (including talkgroup and individual calls) on a channel. For analog channels, this is so that you can check that it is clear before you make a call. Turning monitor on and off Using the Main menu You can turn monitor on and off using the Main menu:... -
Page 48: Listening To Channel Traffic
Listening to channel traffic This section describes scanning a group of channels for activity, and using the squelch override function to hear faint and noisy signals on a channel. This section covers: Scanning a group of channels Understanding the different types of scanning Selecting a scan group Making a call while scanning About nuisance delete... -
Page 49: Scanning A Group Of Channels
Scanning a group of channels The scanning feature is used to monitor a pre- programmed group of channels for activity. When a busy channel is detected in a group, the radio stops on (‘captures’) that channel, and you can now hear the transmission. -
Page 50: Using The Main Menu
Using the Main menu You can select a scan group using the Main menu, if your radio is programmed in this way. Note: This method is only available for standard scan. 1 Press Menu and select Channels. 2 Scroll to the scan group you want and press Done. The LED glows amber and the scanning icon appears in the display: Making a call while scanning... -
Page 51: About Nuisance Delete
your radio calls the channel where activity was last detected, or your radio calls the last free channel. 3 When the called party responds, proceed with your conversation. About nuisance delete If the radio is continuously stopping on an undesired channel (for example, if there is too much activity or even interference) while scanning, you may be able to temporarily remove this channel from the scan group. -
Page 52: Adding A Channel To Your Background Scan Group
When background scan is active, you can scroll through the channel list to see which channel is a member of your background scan group. When the channel is a group member, the scanning icon includes a tick. Note: The function key programmed to activate your background scan group may be programmed so that a short key press activates background scan and a long key press activates nuisance delete. -
Page 53: Removing A Channel From Your Background Scan Group
Removing a channel from your background scan group 1 Press the function key that activates background scan. The LED glows amber and the scanning icon appears in the display. 2 Scroll through the list of channels until the channel that you want to delete appears. 3 Press the nuisance delete key and this channel is now deleted from your background scan group. -
Page 54: Hearing Faint And Noisy Signals
Hearing faint and noisy signals Usually, the radio prevents you from hearing faint or noisy calls on a channel (known as ‘squelch’). Without squelch, the radio would ‘chatter’ on and off in low signal strength areas, for example, which can be annoying. -
Page 55: Sending And Receiving Messages
Sending and receiving messages This section describes sending and receiving messages as well as responding to requests for status information. This section covers: About messages Sending a message Checking received messages Informing other radio users of your status Sending a status update Requesting a status update Sending and receiving messages... -
Page 56: About Messages
About messages Note: This feature is available for digital channels only. You can send short messages to another radio user. These messages are defined at programming time and are known variously as ‘pre-programmed messages’, ‘short data messages’ (SDMs), or ‘short messages’. Note: The person to whom you are sending a message must have the same message programmed into their... -
Page 57: Checking Received Messages
The red LED glows and the message details appear in the display: Sending message to Richard Cancel A message will be displayed to advise you whether the message has been sent successfully or not. Checking received messages If you have received a message, it is saved in the call queue so you can view the message later. -
Page 58: Informing Other Radio Users Of Your Status
Informing other radio users of your status Note: This feature is available for digital channels only. Sending a status update You can inform other radio users or the dispatcher of your current status by sending them a status update, for example, ‘At scene’. -
Page 59: Requesting A Status Update
While the radio sends the message, the red LED glows. Requesting a status update You can find out what another radio user is currently doing (their ‘status’) by asking them to send you a status update. To ask another radio user to inform you of their current status: 1 Press Menu and select Services >... -
Page 60: Safeguarding You And Your Radio
Safeguarding you and your radio This section describes how to prevent unauthorized use of your radio as well as how to get help when you need it most. This section covers: Locking and unlocking the keypad About emergency calls Safeguarding you and your radio... -
Page 61: Locking And Unlocking The Keypad
Locking and unlocking the keypad You can lock the keypad to prevent accidental calls caused by the keypad being bumped. When the keypad is locked, you can still answer calls as normal by pressing the PTT. 1 To lock the keypad, press and hold the right selection key for about one second. -
Page 62: About Emergency Calls
About emergency calls In an emergency you can summon help by sending an emergency call. There are two types of emergency calls: Call type Explanation Priority call (Digital channels only.) An emergency alert is automatically sent to the current talkgroup. Calls made when the priority call feature is turned on are flagged as ‘emergency’... -
Page 63: Understanding Emergency Mode
Press the function key to turn the priority call fea- ture on. The priority call feature remains on until you press the function key again. Understanding emergency mode When you press the emergency key your radio enters ‘emergency mode’, if your radio is programmed in this way. -
Page 64: What Happens During An Emergency Call
What happens during an emergency call? The exact way your radio behaves when it enters emergency mode depends on how your radio is programmed. The main phases for both stealth and non-stealth emergency modes are summarized below. The length of each phase is determined when the radio is programmed. -
Page 65: Making An Emergency Call
Making an emergency call You can activate emergency mode using either a function key or the emergency key, if your radio is programmed in this way. 1 Press the function or emergency key to activate emergency mode, or press Menu and select Emergencies >... -
Page 66: Charging And Caring For Batteries
Charging and caring for batteries This section describes how to charge your Tait radio battery as well as care for it to ensure maximum performance and prolonged battery life. Note: The instructions in this section apply to both the desktop charger and the multi-charger. -
Page 67: Removing The Battery
Removing the battery See also “Attaching a battery” on page 5. To remove the battery from the radio so that the battery can be charged or replaced: 1 Squeeze and quickly release both battery catches to release the catch mechanism. (Don’t push down on the battery;... -
Page 68: About Your Charger
About your charger There are three types of charger available for your Tait radio battery: Desktop charger—small enough to fit on your desk, it charges one battery at a time. Multi-charger—charges up to six batteries. It can be mounted on a desk, on a wall, or in an equipment rack. -
Page 69: About Battery Charging
About battery charging See also “Charging the battery before first use” on page 4. Low battery warning When the battery is almost empty, your radio warns you in the following ways: The battery indicator on the radio display looks empty. The status LED slowly flashes red. -
Page 70: Charging The Battery
If you are charging the battery for the first time, follow the instructions on page 4. 1 Ensure that the charger is connected to the correct Tait power adaptor. 2 Put the battery in the charger. Note: If you’re putting the radio in the charger as well, you can leave it turned on if you're expecting a call. -
Page 71: Receiving And Making Calls While Charging
Receiving and making calls while charging You can receive a call while the radio is in the charger. To answer the call, remove the radio from the charger— the call will not be disrupted. To make a call, remove the radio from the charger. (The radio will not transmit while it is in the charger.) Note: Removing the radio from the charger to make or... -
Page 72: Maintaining Battery Life And Performance
With proper care and maintenance you will maintain the performance and life of the battery. It is recommended that you: Use only Tait chargers. Avoid exposing batteries to high temperatures (above 122°F (50°C)) or extremely cold temperatures for long periods of time (-4°F (-20°C) for NiMH, and -22°F (-30°C) for NiCd). -
Page 73: Storing Batteries
Storing batteries When not in use for a month or more, batteries should be stored correctly to prolong their life: Remove the battery from the radio before storage. Store the battery (in either a charged or discharged state) in a cool dry place. Using nickel-based batteries after storage Batteries that have been stored for any length of time must be charged before being used. -
Page 74: Troubleshooting
Troubleshooting This section describes troubleshooting procedures and basic maintenance. This section covers: Troubleshooting Error messages When your radio won’t turn on Removing a belt clip Checking the version of your radio Troubleshooting your charger General care Cleaning the radio Troubleshooting... -
Page 75: Troubleshooting
Troubleshooting If you are experiencing difficulty operating your Tait radio, you may find the following sections helpful. Consult your radio provider for assistance, if necessary. Error messages If an error message appears in the radio display, refer to the table below. -
Page 76: When Your Radio Won't Turn On
When your radio won’t turn on If the red LED on the radio does not light up when the radio is turned on, it is probable that power is not reaching the radio. Check the following: Is the battery firmly attached to the radio? Is the battery sufficiently charged? Is the battery charger working properly? If all appears to be in order, but your radio still fails to... -
Page 77: Checking The Version Of Your Radio
Possible reason(s) Fault LED and solution Flashing Fault The battery is not compatible with the charger—use only Tait chargers and batteries. There is insufficient voltage to the charger—check you are using the correct power adaptor. The battery may be faulty—... -
Page 78: General Care
General care Your Tait radio requires no regular maintenance other than ensuring that the battery has sufficient charge and that no damage has occurred to the antenna or the battery. To prevent permanent damage to the radio case, do not allow the radio to come into contact with detergents, alcohol, aerosol sprays, or petroleum-based products. -
Page 79: 10 Customizing Your Radio
10 Customizing your radio This section describes the ways in which you can customize your radio. This section covers: About display and keypad backlighting Extending battery life on a shift Customizing the audible alert tone settings Customizing your radio... -
Page 80: About Display And Keypad Backlighting
About display and keypad backlighting Whenever the keypad is pressed, the three-way or channel selector controls are turned, or a call is received, the keypad and display light up automatically to make it easy to read in poor light conditions. Backlighting usually remains on for a few seconds, unless further radio activity is detected. -
Page 81: Using A Function Key
Using a function key You can turn backlighting on and off using a function key, if your radio is programmed in this way. Press the function key to turn backlighting on. It remains on until you press the function key again. Note: You can turn backlighting on momentarily using a function key, if your radio is programmed in this way. -
Page 82: Extending Battery Life On A Shift
Extending battery life on a shift You can reduce the power consumption of your radio (and thereby extend the life of the battery during a shift) in three ways: transmit at low power (if your radio is not already configured to do this) ensure that backlighting automatically turns off when no radio activity is detected (see “About dis- play and keypad backlighting”... -
Page 83: Using A Function Key
The message Low power transmit activated (or deactivated) appears and the low power transmit icon appears in the display. Low power transmit activated Using a function key You can turn low power transmit on and off using a function key, if your radio is programmed in this way. Press the function key to turn low power transmit on for the current channel. -
Page 84: Customizing The Audible Alert Tone Settings
Customizing the audible alert tone settings The radio uses audible sounds (tones and beeps) to alert you to its status: Incoming call tone—when the radio is receiving a call. Warning tones—when there is an error, or the bat- tery is low, for example. Radio controls and keypress tones—the tones and beeps you hear when you press your radio’s keys or use the controls. -
Page 85: Using A Function Key
Using a function key You can change the volume of the audible tones between high or low using a function key, if your radio is programmed in this way. Press the function key to set the volume. The vol- ume setting remains until you press the function key again. -
Page 86: Turning Off Radio Controls And Keypress Tones (Quiet Operation)
Turning off radio controls and keypress tones (quiet operation) You can turn off all the tones and beeps you hear when you press the keys or use the radio controls. This is known as quiet operation. You will still hear incoming call and warning tones. -
Page 87: Hearing Only Channel Traffic (Silent Operation)
Hearing only channel traffic (silent operation) You can turn off all the audible tones that the radio makes so that the only sound you will hear from the speaker is channel traffic. This is known as silent operation. When silent operation is turned on appears in the display. -
Page 88: 11 Glossary
11 Glossary APCO The Association of Public Safety Communications Officials, International (http://www.apcointl.org/). The APCO Project 25 standards committee defined a digital radio standard. The standard is often referred to APCO or P25. chann A channel is a pair of frequencies used to transmit and receive radio signals. - Page 89 Project 25. The Association of Public Safety Communications Officials (APCO) established Project 25 (P25). This project was led by United States Federal, state, and local government representatives to develop standards for interoperable digital radios and systems to meet the needs of public safety users. See http:// www.project25.org for further information.
- Page 90 Intellectual property rights This product may be protected by one or more of Tait patents NZ335198, NZ335704, NZ338097, NZ507555, NZ507556, NZ508054, NZ508340, NZ508806, NZ508807, NZ509242, NZ509640, NZ509959, NZ510496, NZ511155, NZ511421, NZ516280/519742, NZ519118, NZ519344, NZ521450, NZ534369, NZ522236, NZ524378, US5,715,281, US5,745,840 together with their international equivalents, pending patent applications and registered trade marks.
-
Page 91: Licence Agreement
ICENCE SOFTWARE OR FIRMWARE SUPPLIED TO THE LICENSEE NOT WITHSTANDING THE LICENSEE TAIT GRANTS TO YOU AS LICENSEE THE NON MAY OWN THE MAGNETIC OR OTHER EXCLUSIVE RIGHT TO USE THE SOFTWARE OR PHYSICAL MEDIA ON WHICH THE SOFTWARE FIRMWARE ON A SINGLE MACHINE PROVIDED... - Page 92 THIS IS THE COMPLETE AND EXCLUSIVE OR OTHERWISE AT LAW FOR ANY LOSSES OR STATEMENT OF THE AGREEMENT BETWEEN IT DAMAGES WHETHER GENERAL SPECIAL AND TAIT IN RELATION TO THE SOFTWARE OR EXEMPLARY PUNITIVE DIRECT INDIRECT OR FIRMWARE WHICH SUPERSEDES ANY...
-
Page 93: Index
Index Numerics charging time 4 cycles before reaches 3-way selector control 11 maximum capacity 4 disposing of 57 extending shift life 66 fully discharging 56 alarms indicator 13 emergency. See also low battery warning 53 emergency mode. 47 maintaining performance alert tones 18 and life of 56 see also audible tones... - Page 94 caller, identifying 26 calls deleting nuisance channels bypassing repeater 27 from scan groups 35 checking missed calls 30 desktop charger 52 identifying caller 26 digital radio making 22 coverage 8 permitted length of 24 lack of static noise 8 priority call 46 discharging batteries receiving 26 how often 56...
- Page 95 long and short, explained 9 keypad faint signals, hearing 38 backlighting 64 false powerdown locking and unlocking 45 ending 49 keypress explained 47 invalid 19 firmware version, identifying tones. See audible tones. turning off audible beeps for frequency band, reserved for (quiet operation) 70 distress beacons iv valid 18...
- Page 96 sending 40 when using iii missed calls, checking 30 turning on and off 10 monitor 31 version 61 radio display symbol for 13 when to switch of for safety turning on and off 31 reasons iv multi-charger 52 radio check feature 22 radio controls, turning off audible tones for (quiet operation) 70...
- Page 97 membership 35 what happens during 48 removing nuisance channel storing batteries 57 from 35 selecting 33 scanning a group of channels 33 talkaround. See repeater background scan 33 talkaround. priority channels 33 talkgroup radio display symbol for 13 making a call to 25 standard scan 33 selecting 25 turning on 33...
- Page 98 warning tones. See audible tones warnings, on radio display 59 zone selector control 11 zones about 22 selecting 22 Index...
Need help?
Do you have a question about the TP9100 and is the answer not in the manual?
Questions and answers