Zline CROWNSOUND Installation Manual
Hide thumbs
Also See for CROWNSOUND:
- Installation manual and user's manual (11 pages) ,
- Installation and user manual (45 pages)
Advertisement
Quick Links
Advertisement

Related Manuals for Zline CROWNSOUND


Summary of Contents for Zline CROWNSOUND
- Page 1 Installation Manual CROWNSOUND ™ www.zlinekitchen.com...
- Page 2 ZLINE Kitchen and Bath provides Attainable Luxury, where the kitchen and bath of your dreams is never out of reach. Through our unique designs and unparalleled quality, we’re dedicated to providing you an elevated experience in the heart of your home. With an endless selection of...
- Page 3 ZLINE is fueled by a passion for innovation; A relentless pursuit of bringing the highest end luxury designs and professional features into everyone’s homes. Because we continually strive to improve our products, we may change specifications and designs without prior notice.
-
Page 4: Table Of Contents
IMPORTANT SAFETY INSTRUCTIONS ....1 WALL CROWNSOUND INSTALLATION ....2 ™... -
Page 5: Important Safety Instructions
• Electrical installation must be in accordance with the National Electrical Code ANSI/ NPA70-latest edition and/or local codes. • Take care when cleaning the range hood, chimney, crown molding, and CrownSound ™ molding in spray form: never direct the spray onto the electrical wiring, motor, button panel, or light bulbs. -
Page 6: Wall Crownsound Installation
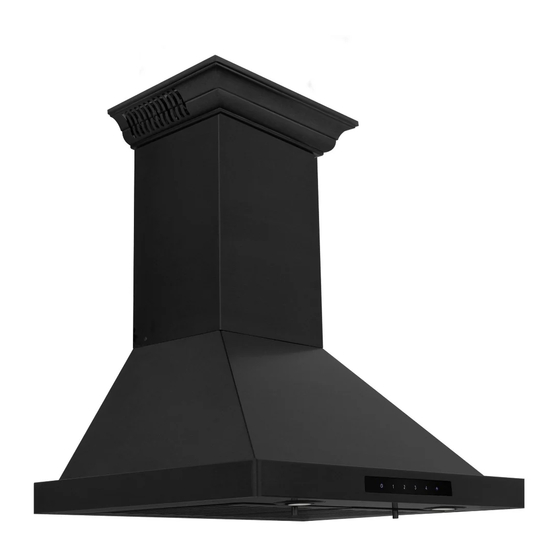
ELECTRIC POWER RATING Frequency: 120VAC/60 HZ Power: 10W Installation Tutorial Video NOTE: Recirculating your range hood is not possible with CrownSound installation. ™ 1. Attach crown molding bracket to ceiling using hardware provided. Figure 1 Figure 1 2. Attach ducting and electrical connections. Plug the speakers into an outlet behind the chimney. - Page 7 The crown should cover the gap. Ensure that it installs properly and is level. Figure 3 Figure 3 4. Open the phone’s Bluetooth settings and find “ZLINE Audio.“ When the connection is successful, a chime will sound. Figure 4 Figure 4 NOTE: CrownSound moldings carry a one-year parts warranty.
-
Page 8: Island Crownsound ™ Installation
ISLAND CROWNSOUND INSTALLATION ™ ELECTRIC POWER RATING Frequency: 120VAC/60 HZ Power: 10W Installation Tutorial Video Attach crown molding bracket to ceiling using hardware provided. Figure 1 Screw: A/C/D Screw: E Figure 1 Screw:A/C/D 2. Attach ducting and electrical connections. Plug the speakers into an outlet behind the Screw:E chimney. - Page 9 The crown should cover the gap. Ensure that it installs properly and is level. Figure 3 Figure 3 4. Open the phone’s Bluetooth settings and find “ZLINE Audio.“ When the connection is successful, a chime will sound. Figure 4 Input...
-
Page 10: Frequently Asked Questions
Check if the electrical connections are secure. A chime will sound if the connection is successful. Turn off and on your smart phone’s Bluetooth settings to allow time for the CrownSound to pair. If “ZLINE Audio” still will not appear, call ZLINE Customer Service at ™ 1-614-777-5004 for help. -
Page 11: Warranty
ZLINE warranty periods begin from the original purchase date of the product and solely cover the original purchaser of the product, delivered new and in its original carton. ZLINE will provide free-of-charge, non-consumable replacement parts for the components that failed due to manufacturing defects. - Page 12 Always check the ZLINE website for the most up-to-date version of its product manuals: www.zlinekitchen.com/pages/manuals. Do not install or operate any ZLINE product if it has missing or broken parts or if it arrives damaged due to shipping. If ZLINE products arrive damaged, contact ZLINE Customer Experience at 1-614-777-5004 for help.
- Page 13 1-614-777-5004 or visit www.zlinekitchen.com/contact to utilize our online Customer Experience Portal. Scan the QR code to view the most up-to-date version of ZLINE’s range hood Installation and User Manuals. Need to purchase a part or accessory for your ZLINE product? Visit...
- Page 14 3.1.0 1-614-777-5004 www.zlinekitchen.com contact@zlinekitchen.com...
Need help?
Do you have a question about the CROWNSOUND and is the answer not in the manual?
Questions and answers