Table of Contents
Advertisement
Quick Links
Advertisement
Table of Contents

Related Manuals for thomann BOTEX SP-1500 DMX Strobe


Summary of Contents for thomann BOTEX SP-1500 DMX Strobe
- Page 1 SP-1500 DMX Strobe Strobe...
- Page 2 Thomann GmbH Hans-Thomann-Straße 1 96138 Burgebrach Germany Telephone: +49 (0) 9546 9223-0 Internet: www.thomann.de 18.01.2024, ID: 277205 (V2)
-
Page 3: Table Of Contents
Table of contents Table of contents General information..........................5 1.1 Symbols and signal words....................... 5 Safety instructions............................. 8 Features............................... 11 Installation..............................12 Starting up..............................15 Connections and controls........................16 Operating..............................20 Technical specifications........................24 Plug and connection assignments....................26 Troubleshooting............................27 Cleaning............................... - Page 4 SP-1500 DMX Strobe Strobe...
-
Page 5: General Information
Our products and documentation are subject to a process of continuous development. They are therefore subject to change. Please refer to the latest version of the documentation, which is ready for download under www.thomann.de. 1.1 Symbols and signal words In this section you will find an overview of the meaning of symbols and signal words that are used in this document. - Page 6 General information Signal word Meaning DANGER! This combination of symbol and signal word indicates an immediate dangerous situation that will result in death or serious injury if it is not avoided. WARNING! This combination of symbol and signal word indicates a pos‐ sible dangerous situation that can result in death or serious injury if it is not avoided.
- Page 7 General information Warning signs Type of danger Warning – danger zone. SP-1500 DMX Strobe Strobe...
-
Page 8: Safety Instructions
Safety instructions Safety instructions Intended use This device is intended to be used as an illumination effect. The device is designed for profes‐ sional use and is not suitable for use in households. Use the device only as described in this user manual. - Page 9 Safety instructions DANGER! Danger to life due to electric current! A short circuit could lead to a fire hazard and risk of death. Do not modify the mains cable or the plug! In case of isolation damage, disconnect immediately the power supply and arrange repair. If in doubt, seek advice from a qualified electrician. WARNING! Risk of eye damage caused by high light intensity! The device generates highly intense light radiation.
- Page 10 Safety instructions NOTICE! Damage to the device if operated in unsuitable ambient conditions! The device can be damaged if it is operated in unsuitable ambient conditions. Only operate the device indoors within the ambient conditions specified in the “Technical specifications” chapter of this user manual. Avoid operating it in environments with direct sun‐ light, heavy dirt and strong vibrations.
-
Page 11: Features
Features Features powerful Stroboscope effect flash light energy: 1500 W strobe frequency steplessly adjustable brightness steplessly adjustable control via DMX (2 channels) operating modes: automatic or manual self-test, DMX DMX address and operating mode adjustable via DIP switches built-in line circuit breaker illuminant included SP-1500 DMX Strobe Strobe... -
Page 12: Installation
Installation Installation Unpack and check carefully there is no transportation damage before using the unit. Keep the equipment packaging. To fully protect the product against vibration, dust and moisture during transportation or storage use the original packaging or your own packaging material suitable for transport or storage, respectively. - Page 13 Installation NOTICE! Risk of overheating and fire due to inadequate distance and bad ventilation! If the distance between the light source and the illuminated surface is too short or the device is badly ventilated, the device can overheat and cause fires. Make sure that illuminated surfaces are more than 2 m away.
- Page 14 Installation NOTICE! Data transfer errors due to improper wiring! If the DMX connections are wired incorrectly, this can cause errors during the data transfer. Do not connect the DMX input and output to audio devices, e.g. mixers or ampli‐ fiers. Use special DMX cables for the wiring instead of normal microphone cables.
-
Page 15: Starting Up
Starting up Starting up Create all connections while the device is off. Use the shortest possible high-quality cables for all connections. Take care when running the cables to prevent tripping hazards. Connections in DMX mode Connect the DMX input of the device to the DMX output of a DMX controller or another DMX device. -
Page 16: Connections And Controls
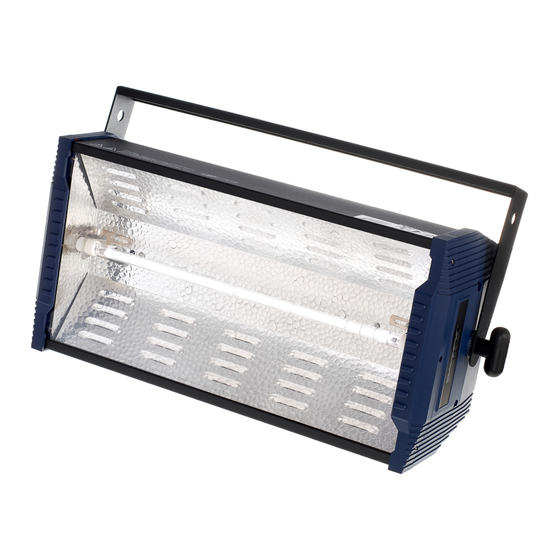
Connections and controls Connections and controls Front panel ö ö SP-1500 DMX Strobe Strobe... - Page 17 Connections and controls 1 Locking screws for the mounting bracket 2 Light source 3 Mounting bracket SP-1500 DMX Strobe Strobe...
- Page 18 Connections and controls Control panel and connections & ® CIRCUIT BREAKER SP-1500-DMX DMX OUT PUSH I ON DMX Dipswitch POWER 1 2 3 4 5 6 7 8 9 10 INDICATOR INDICATOR 2 3 4 5 6 7 8 9 10 ADDRESS TEST POWER INPUT...
- Page 19 Connections and controls 4 [CIRCUIT BREAKER] | Line circuit breaker as automatic fuse. 5 [POWER INPUT] | Mains cable for the power supply. 6 [POWER INDICATOR] | Indicates that the device is connected to the power supply. 7 [DMX Dipswitch] | DIP switch for setting the DMX address and the operating mode. 8 [DMX INDICATOR] | Indicates that a signal is present on the DMX input.
-
Page 20: Operating
Operating Operating When DIP switch 10 is set to ‘ON’ , the device operates in DMX mode and can be controlled by a DMX controller. 1 2 3 4 5 6 7 8 9 10 SP-1500 DMX Strobe Strobe... - Page 21 Operating Setting up the DMX address The value of the DIP switches 1-9 is binary coded. To set the desired DMX address, set the DIP switches so that the sum of the resulting numbers yields the desired DMX address. Please orient yourself by the following table: DMX address 0: DIP switch is in ‘OFF’...
- Page 22 Operating DMX channel allocation Channe Value Function 0 … 255 Increasing flash frequency 0 … 15 Dimmer (0 % bis 100 %) Selecting operating mode ‘Automatic self-test’ Set DIP switches 9 and 10 to ‘OFF’ . ð The self-test starts. 1 2 3 4 5 6 7 8 9 10 SP-1500 DMX Strobe Strobe...
- Page 23 Operating Selecting operating mode ‘Manual self-test’ Set DIP switches 9 to ‘ON’ and 10 to ‘OFF’ . Use the DIP switches 1 to 4 to set the programme speed, and the DIP switches 5 to 8 to adjust the brightness of the self-test. The lowest programme speed or brightness is set when all four DIP switches are set to ‘OFF’...
-
Page 24: Technical Specifications
Technical specifications Technical specifications Suitable light sources Strobe lamps 100 V / 1500 W, e.g. item no. 197075, 416046 Control Number of DMX channels Input connections DMX control XLR panel plug, 3-pin Output connections DMX control XLR panel socket, 3-pin 480 mm Brightness Continuously adjustable from 0 …... - Page 25 Technical specifications Ambient conditions Temperature range 0 °C…40 °C Relative humidity 20%…80% (non-condensing) SP-1500 DMX Strobe Strobe...
-
Page 26: Plug And Connection Assignments
Plug and connection assignments Plug and connection assignments Introduction This chapter will help you select the right cables and plugs to connect your valuable equip‐ ment so that a perfect light experience is guaranteed. Please take our tips, because especially in ‘Sound & Light’ caution is indicated: Even if a plug fits into a socket, the result of an incorrect connection may be a destroyed DMX controller, a short circuit or ‘just’... -
Page 27: Troubleshooting
Troubleshooting Troubleshooting NOTICE! Data transfer errors due to improper wiring! If the DMX connections are wired incorrectly, this can cause errors during the data transfer. Do not connect the DMX input and output to audio devices, e.g. mixers or ampli‐ fiers. - Page 28 2. Check the positions of the individual DIP switches. 3. Try using another DMX controller. If the procedures recommended above do not succeed, please contact our Service Center. You can find the contact information at www.thomann.de. SP-1500 DMX Strobe Strobe...
-
Page 29: Cleaning
Cleaning Cleaning Device components Clean the device components that are accessible from the outside regularly. The cleaning fre‐ quency depends on the operating environment: damp, smoky or particularly dirty environ‐ ments can cause greater accumulation of dirt on the device components. Clean with a dry soft cloth. -
Page 30: Protecting The Environment
Protecting the environment Protecting the environment Disposal of the packing material Environmentally friendly materials have been chosen for the packaging. These materials can be sent for normal recycling. Ensure that plastic bags, packaging, etc. are disposed of in the proper manner. Do not dispose of these materials with your normal household waste, but make sure that they are collected for recycling. - Page 31 Repairing a device or passing it on to another user is an ecologically valuable alternative to disposal. You can return your old device to Thomann GmbH at no charge. Check the current conditions on www.thomann.de. If your old device contains personal data, delete those data before disposing of it.
- Page 32 Notes SP-1500 DMX Strobe Strobe...
- Page 33 Notes SP-1500 DMX Strobe Strobe...
- Page 34 Notes SP-1500 DMX Strobe Strobe...
- Page 36 Musikhaus Thomann · Hans-Thomann-Straße 1 · 96138 Burgebrach · Germany · www.thomann.de...
Need help?
Do you have a question about the BOTEX SP-1500 DMX Strobe and is the answer not in the manual?
Questions and answers