Table of Contents
Advertisement
Quick Links
Advertisement
Table of Contents

Related Manuals for thomann STAIRVILLE SC-X50 MKII


Summary of Contents for thomann STAIRVILLE SC-X50 MKII
- Page 1 SC-X50 MKII LED scanner user manual...
- Page 2 Musikhaus Thomann e.K. Treppendorf 30 96138 Burgebrach Germany Telephone: +49 (0) 9546 9223-0 E-mail: info@thomann.de Internet: www.thomann.de 12.10.2012...
-
Page 3: Table Of Contents
Table of contents Table of contents General notes............................... 5 Safety notes..............................8 Features............................... 14 Installation..............................15 Setup................................18 Connections and controls........................21 Operation..............................26 7.1 Starting up the device........................26 7.2 Main menu............................27 7.3 Settings menu........................... 33 7.4 Gobos..............................37 7.5 Functions in 8-channel DMX mode................... - Page 4 Table of contents Cleaning............................... 54 Technical data............................55 Protecting the environment......................56 LED scanner...
-
Page 5: General Notes
General notes General notes This user manual contains important information on safe operation of the device. Read and follow all safety notes and all instructions. Save this manual for future reference. Make sure that it is available to all persons using this device. If you sell the device to other users, be sure that they also receive this manual. - Page 6 General notes Symbols and signal words This section provides an overview of the symbols and signal words used in this user manual. Signal word Meaning DANGER! This combination of symbol and signal word indicates an immediate dangerous situation that will result in death or serious injury if it is not avoided.
- Page 7 General notes Warning signs Type of danger Warning – high-voltage. Warning – hot surface. Warning – dangerous optical radiation. Warning – suspended load. Warning – danger zone. SC-X50 MKII...
-
Page 8: Safety Notes
Safety notes Safety notes Intended use This device is intended for use as a multifunctional lighting instrument with movable mirror. Use the device only as described in this user manual. Any other use or use under other oper‐ ating conditions is considered to be improper and may result in personal injury or property damage. - Page 9 Safety notes DANGER! Electric shock caused by high voltages inside Within the device there are areas where high voltages may be present. Never remove any covers. There are no user-serviceable parts inside. DANGER! Electric shock caused by short-circuit Always use proper ready-made insulated mains cabling (power cord) with a pro‐ tective contact plug.
- Page 10 Safety notes WARNING! Eye damage caused by high light intensity The lamp used in this device produces an intense beam of visible and invisible light radiation. Do not start the operation of the device without completely fixed covers. Never look directly into the light source. WARNING! Risk of epileptic shock Strobe lighting can trigger seizures in photosensitive epilepsy.
- Page 11 Safety notes WARNING! Risk of burns The surface of the device can become very hot during operation. Do not touch the device with bare hands during operation, and after switching off wait for at least 15 minutes. SC-X50 MKII...
- Page 12 Safety notes CAUTION! Risk of injury due to mirror movements The mirror mounted at the device head may perform very fast movements (pan, tilt) and reflect very bright light. This is also the case immediately after switching on the device, with automatic or remote operation, and while a connected DMX controller is in off state.
- Page 13 Safety notes NOTICE! Operating conditions This device has been designed for indoor use only. To prevent damage, never expose the device to any liquid or moisture. Avoid direct sunlight, heavy dirt, and strong vibrations. NOTICE! Power supply Before connecting the device, ensure that the input voltage (AC outlet) matches the voltage rating of the device and that the AC outlet is protected by a residual current circuit breaker.
-
Page 14: Features
Features Features The LED scanner is especially suited for professional lighting tasks, e.g. during events, on rock music stages, in theatre and musical productions or in discotheques. Special features of this device: White high-power LED (50 W) Control via DMX (8 or 11 channels) and buttons plus display on the unit itself. Built-in automatic show programmes Sound control Master/slave mode... -
Page 15: Installation
Installation Installation Unpack and check carefully there is no transportation damage before using the unit. Keep the equipment packaging. To fully protect the device against vibration, dust and moisture during transportation or storage use the original packaging or your own packaging material suitable for transport or storage, respectively. - Page 16 Installation WARNING! Risk of injury caused by falling objects Make sure that the installation complies with the standards and regulations in your country. Always secure the unit by a second fastening, such as a retaining cable or safety chain. The load capacity of trusses or other fixtures must be sufficient for the intended number of devices.
- Page 17 Installation NOTICE! Possible data transmission errors For error-free operation make use of dedicated DMX cables and do not use ordi‐ nary microphone cables. Never connect the DMX output to audio devices such as mixers or amplifiers. DMX connections The unit offers a 3-pin XLR socket for DMX output and a 3-pin XLR plug for DMX input. Please refer to the drawing and table below for pin assignment.
-
Page 18: Setup
Setup Setup Establish all connections as long as the unit is switched off. Use the shortest possible high- quality cables for all connections. LED scanner... - Page 19 Setup Connections in DMX mode Connect the DMX input of the device to the DMX output of a DMX controller or another DMX device. Connect the output of the first DMX device to the input of the second one, and so on to form a daisy chain.
- Page 20 Setup DMX indicator While the device and the DMX controller are in operation, a flashing white rectangle (DMX indicator) in the display shows that a DMX signal is present at the input. Connections in master/slave When you configure a group of devices in master/slave mode, the first unit will control the mode other units for an automatic, sound-activated, synchronized show.
-
Page 21: Connections And Controls
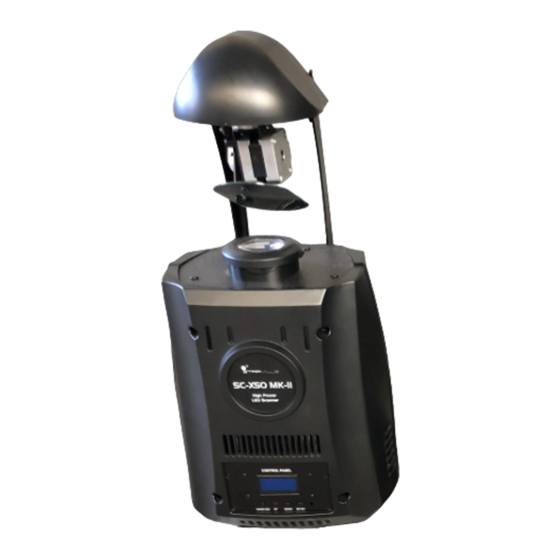
Connections and controls Connections and controls SC-X50 MKII... - Page 22 Connections and controls 1 Device head with movable mirror. 2 Lens. 3 Adjustable suspension. 4 Device body. 5 Control panel. 6 Connections. LED scanner...
- Page 23 Connections and controls Control panel 7 Display. 8 [MODE ESC] button Activates the main menu and moves between menu items. Closes an open sub‐ menu without saving the changes. 9 [UP] button Increments the displayed value by one. SC-X50 MKII...
- Page 24 Connections and controls 10 [DOWN] button Decrements the displayed value by one. 11 [ENTER] button Selects an option in the corresponding mode, confirms the set value. LED scanner...
- Page 25 Connections and controls Connections 12 Plug for mains cable with fuse holder. 13 Eyelet for safety cable. 14 OUTPUT DMX output. 15 INPUT DMX input. SC-X50 MKII...
-
Page 26: Operation
Operation Operation 7.1 Starting up the device CAUTION! Risk of injury due to mirror movements The mirror mounted at the device head may perform very fast movements (pan, tilt) and reflect very bright light. This is also the case immediately after switching on the device, with automatic or remote operation, and while a connected DMX controller is in off state. -
Page 27: Main Menu
Operation To start up the device, connect it to the mains. After a few seconds, the fans start to work, the mirror at the device head moves to the pan and tilt home positions and the display indicates a system reset. After a few more seconds, the device starts to operate in the most recently set mode. - Page 28 Operation Auto show mode Press the [MODE ESC] button repeatedly until ‘AutoMode’ appears in the first line of the dis‐ play. You may now choose an operating mode with the [UP] and [DOWN] buttons: Displayed text when menu Displayed text after con‐ Operating mode is open firming with [ENTER]...
- Page 29 Operation Once the display shows the desired option, press the [ENTER] button to confirm your setting and to close the menu. To close the menu without saving the changes, press the [MODE ESC] button or wait one minute. DMX mode, DMX address Press the [MODE ESC] button repeatedly until ‘DmxMode’...
- Page 30 Operation Reversal of pan direction Press the [MODE ESC] button repeatedly until ‘PanDirt’ appears in the first line of the display. Use the [UP] and [DOWN] buttons to choose between ‘forward’ (normal pan direction) and ‘reverse’ (reverse pan direction). Press the [ENTER] button to confirm your setting and to close the menu. To close the menu without saving the changes, press the [MODE ESC] button or wait one minute.
- Page 31 Operation Resetting the stepper motors This function allows you to return the stepper motors to their home positions (mechanical reset). Press the [MODE ESC] button repeatedly until ‘Rest’ appears in the first line of the display. Press the [ENTER] button. The device performs a reset. General reset This function allows you to restore the factory settings of all parameters that can be changed in the main menu.
- Page 32 Operation Overview (main menu) LED scanner...
-
Page 33: Settings Menu
Operation 7.3 Settings menu Press and hold down the [MODE ESC] button for approx. five seconds to activate the settings menu. Use the [UP] and [DOWN] buttons to enter the device password 2323. The [UP] button modifies the digit at the cursor position, while the [DOWN] button moves the cursor to the next digit. - Page 34 Operation Adjusting the gobo wheel Activate the settings menu. Press the [MODE ESC] button repeatedly until ‘GOBO’ appears in starting position the first line of the display. Use the [UP] and [DOWN] buttons to select a value between 0 and 255 until the gobo wheel is in the desired starting position.
- Page 35 Operation Adjusting the prism starting Activate the settings menu. Press the [MODE ESC] button repeatedly until ‘PRISM’ appears in position the first line of the display. Use the [UP] and [DOWN] buttons to select a value between 0 and 255 until the prism is in the desired starting position. Press the [ENTER] button to confirm your setting and to move to the next menu option.
- Page 36 Operation Overview (settings menu) LED scanner...
-
Page 37: Gobos
Operation There is no setting function available for PAN and TILT. 7.4 Gobos The following figure shows the available gobos and their numbers. SC-X50 MKII... - Page 38 Operation LED scanner...
-
Page 39: Functions In 8-Channel Dmx Mode
Operation 7.5 Functions in 8-channel DMX mode Channel Value Function 0…255 Pan (0° to 180°) 0…255 Tilt (0° to 60°) Colour wheel 0…6 White 7…13 Yellow 14…20 Pink 21…27 Green 28…34 35…41 Blue 42…48 Kelly green 49…55 Salmon orange SC-X50 MKII... - Page 40 Operation Channel Value Function 56…63 Dark blue 64…70 White + yellow 71…77 Yellow + pink 78…84 Pink + green 85…91 Green + red 92…98 Red + blue 99…105 Blue + Kelly green 106…112 Kelly green + salmon orange 113…119 Salmon orange + dark blue 120…127 Dark blue + white 128…191...
- Page 41 Operation Channel Value Function 0…3 Closed (blackout) 4…7 Open 8…215 Strobe effect with increasing speed 216…255 Open Gobo wheel 0…7 Open 8…15 Gobo 1 16…23 Gobo 2 24…31 Gobo 3 32…39 Gobo 4 40…47 Gobo 5 48…55 Gobo 6 56…63 Gobo 7 SC-X50 MKII...
- Page 42 Operation Channel Value Function 64…71 Gobo 7 shake with increasing speed 72…79 Gobo 6 shake with increasing speed 80…87 Gobo 5 shake with increasing speed 88…95 Gobo 4 shake with increasing speed 96…103 Gobo 3 shake with increasing speed 104…111 Gobo 2 shake with increasing speed 112…119 Gobo 1 shake with increasing speed...
- Page 43 Operation Channel Value Function 148…231 Negative rotation direction with increasing speed 232…255 Continuous reversal of rotation direction (bouncing), with increasing angles Prism 0…3 Reserved 4…127 Positive rotation direction with increasing speed 128…251 Negative rotation direction with increasing speed 252…255 Static prism 0…255 Focus SC-X50 MKII...
-
Page 44: Functions In 11-Channel Dmx Mode
Operation 7.6 Functions in 11-channel DMX mode Channel Value Function 0…255 Pan (0° to 180°) 0…255 Tilt (0° to 60°) Colour wheel 0…6 White 7…13 Yellow 14…20 Pink 21…27 Green 28…34 35…41 Blue 42…48 Kelly green 49…55 Salmon orange LED scanner... - Page 45 Operation Channel Value Function 56…63 Dark blue 64…70 White + yellow 71…77 Yellow + pink 78…84 Pink + green 85…91 Green + red 92…98 Red + blue 99…105 Blue + Kelly green 106…112 Kelly green + salmon orange 113…119 Salmon orange + dark blue 120…127 Dark blue + white 128…191...
- Page 46 Operation Channel Value Function 0…3 Closed (blackout) 4…7 Open 8…215 Strobe effect with increasing speed 216…255 Open 0...255 Electronic dimmer (0 to 100 %) Gobo wheel 0…7 Open 8…15 Gobo 1 16…23 Gobo 2 24…31 Gobo 3 32…39 Gobo 4 40…47 Gobo 5 48…55...
- Page 47 Operation Channel Value Function 56…63 Gobo 7 64…71 Gobo 7 shake with increasing speed 72…79 Gobo 6 shake with increasing speed 80…87 Gobo 5 shake with increasing speed 88…95 Gobo 4 shake with increasing speed 96…103 Gobo 3 shake with increasing speed 104…111 Gobo 2 shake with increasing speed 112…119...
- Page 48 Operation Channel Value Function 64…147 Positive rotation direction with increasing speed 148…231 Negative rotation direction with increasing speed 232…255 Continuous reversal of rotation direction (bouncing), with increasing angles Prism 0…3 Reserved 4…127 Positive rotation direction with increasing speed 128…251 Negative rotation direction with increasing speed 252…255 Static prism 0…225...
- Page 49 Operation Channel Value Function 24…31 Blackout during gobo wheel movement 32…39 No blackout during colour wheel movement nor during pan and tilt movement 40…47 No blackout during gobo wheel movement nor during pan and tilt movement 48…55 No blackout during colour wheel movement nor during gobo wheel movement nor during pan and tilt movement 56…95 Reserved...
- Page 50 Operation Channel Value Function 152…159 Reset all channels 160…255 Reserved Built-in programmes 0…7 Reserved 8…23 Programme 1 24…39 Programme 2 40…55 Programme 3 56…71 Programme 4 72…87 Programme 5 88…103 Programme 6 104…119 Programme 7 120…135 Programme 8 136…151 Sound control 1 LED scanner...
- Page 51 Operation Channel Value Function 152…167 Sound control 2 168…183 Sound control 3 184…199 Sound control 4 200…215 Sound control 5 216…231 Sound control 6 232…247 Sound control 7 248…255 Sound control 8 SC-X50 MKII...
-
Page 52: Troubleshooting
Troubleshooting Troubleshooting NOTICE! Possible data transmission errors For error-free operation make use of dedicated DMX cables and do not use ordi‐ nary microphone cables. Never connect the DMX output to audio devices such as mixers or amplifiers. In the following we list a few common problems that may occur during operation. We give you some suggestions for easy troubleshooting: LED scanner... - Page 53 4. Check whether the DMX cables run near or parallel to high-voltage cables that may cause damage or interfer‐ ence to the DMX interface circuit. If the procedures recommended above do not succeed, please contact our Service Center. You can find the contact information at www.thomann.de. SC-X50 MKII...
- Page 54 Cleaning Cleaning Optical lenses and mirrors Clean the optical lenses and mirrors which are accessible from the outside periodically to opti‐ mise light output. The cleaning frequency depends on the operating environment: damp, smoky or particularly dirty environments can cause greater accumulation of dirt on the unit’s optics.
- Page 55 Technical data Technical data Number of DMX channels 8 or 11 channels, depending on operating mode Lamp LED (1 × 50 W, white) Maximum pan angle 180° Maximum tilt angle 60° Dimmer electronic, 0 … 100 % Mains power supply 230 V (AC), 50 Hz Power consumption...
- Page 56 Protecting the environment Protecting the environment Disposal of the packaging mate‐ rial For the transport and protective packaging, environmentally friendly materials have been chosen that can be supplied to normal recycling. Ensure that plastic bags, packaging, etc. are properly disposed of. Do not just dispose of these materials with your normal household waste, but make sure that they are collected for recycling.
- Page 57 Notes SC-X50 MKII...
- Page 58 Notes LED scanner...
- Page 60 Musikhaus Thomann e.K. · Treppendorf 30 · 96138 Burgebrach · Germany · www.thomann.de...
Need help?
Do you have a question about the STAIRVILLE SC-X50 MKII and is the answer not in the manual?
Questions and answers