Table of Contents
Advertisement
Available languages
Available languages
Quick Links
Before Getting Started
Read and follow safety instructions. Refer to
product labels for additional operating instructions
and specifications.
This is the safety alert symbol. When you
see this symbol on your pump control or in
this manual, look for one of the following
signal words and be on alert for the
potential of personal injury:
• DANGER: warns about hazards that will cause
serious personal injury, death, or major property
damage if ignored.
• WARNING: warns about hazards that can cause
serious personal injury, death, or major property
damage if ignored.
• CAUTION: warns about hazards that will or can
cause minor personal injury or major property
damage if ignored.
• NOTICE: indicates special instructions which are
important but not related to hazards.
Carefully read and follow all safety instructions in this manual
and on the pump before operating or installing the Best Boost
device.
WARNING
RISK OF ELECTRIC SHOCK: Disconnect power before working
on or around the device.
This equipment should be installed by technically qualified
personnel. Failure to install this device in compliance with
national and local electrical codes may result in electrical shock
or hazard, unsatisfactory performance, or equipment failure.
Unless supervised or instructed, this equipment must not be
used by children or persons with reduced physical, sensory, or
mental abilities, or people lacking in experience and expertise.
Children may not use the equipment, nor may they play with the
equipment or in the immediate vicinity.
If the power cord is damaged, qualified personnel only must
replace it.
CAUTION
• Keep the work area clean, well-lit, and uncluttered.
• Keep safety labels clean and in good condition.
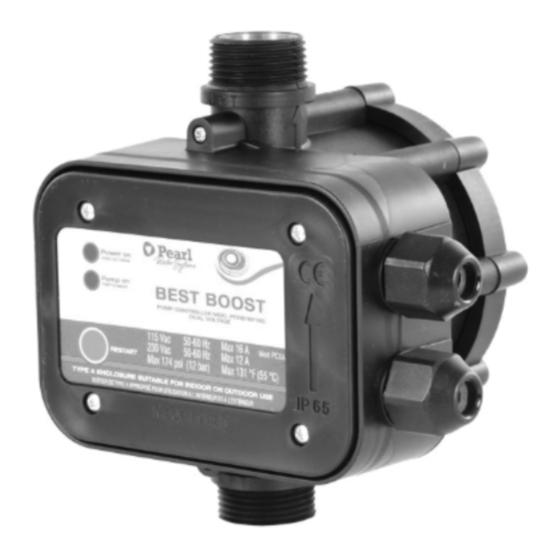
BEST-BOOST
Device for control and protection
Installation and operating instructions
• Wear safety glasses while installing or performing
maintenance on the device.
• Do not run pump dry. Fill the pump with water before
starting or the pump will be damaged.
• Make sure all ELECTRICAL POWER IS OFF before connecting
any electrical wires. Follow all device wiring instructions
provided in the "Wiring" section of this manual.
FEATURES AND ADVANTAGES
• Starts and stops the pump depending on the opening and
closing of the taps.
• Stops the pump in case of a water shortage and protects it
against dry running.
• Can be energized with either 115 Vac or 230 Vac.
• Can be installed with surface or submersible pumps.
• No need for an expansion tank, check valve, filter, or fittings.
• Simple installation saves time and space.
• Maintenance free.
TECHNICAL DATA
SINGLE-PHASE MAINS
VOLTAGE
ACCEPTABLE VOLTAGE
FLUCTUATION
FREQUENCY
MAXIMUM CURRENT
MAXIMUM POWER
DEVICE
MAXIMUM OPERATING
PRESSURE
MAXIMUM OPERATING
TEMPERATURE
FLUID TEMPERATURE
MINIMUM FLOW
MALE CONNECTORS
PROTECTION DEGREE
of the electric pump
115 Vac - 230 Vac
±10%
50 - 60 Hz
16 A at 115 Vac
12 A at 230 Vac
1.1 kW (1.5 HP) at 115 Vac
2.2 kW (3 HP) at 230 Vac
Type 1.C
174 PSI (12 bar)
131 F (55 C)
68 F (20 C)
~0.26 GPM (1 l/min)
Mod. PCXA: NPT 1"
Mod. PCXB: NPT 1 ¼"
Type 4 Indoor use
Advertisement
Table of Contents

Related Manuals for Pearl BEST-BOOST


Summary of Contents for Pearl BEST-BOOST
- Page 1 BEST-BOOST Device for control and protection of the electric pump Installation and operating instructions Before Getting Started Read and follow safety instructions. Refer to product labels for additional operating instructions and specifications. This is the safety alert symbol. When you...
-
Page 2: Inspect Your Shipment
INSPECT YOUR SHIPMENT Disconnect power at the electrical panel before making any electrical connections. Supply voltage must be +/- 10% of device nameplate voltage. All pump controller devices are carefully tested, inspected, and packaged to ensure they arrive in perfect condition. When Low or high voltage can damage the device and will void the the device is received, examine it closely to make certain no warranty. - Page 3 WARNING: Liquid-tight cables, or conduit and fittings, must be used to maintain Type 4 rating (See Figures 6 and 7). If you use liquid-tight cables, follow Figure 6 and tighten the nuts to a torque of 106 in-lbs (13 Nm). If you use conduit fittings, follow Figure 7 and tighten the nuts to a torque of 106 in-lbs (13 Nm).
-
Page 4: Maintenance
STARTING 1. Install the device in a vertical position on the pump delivery and connect to the system. 2. Connect the device to the pump motor and the electrical WARNING: Failure to follow these instructions may network following the instructions paragraph “Electrical result in heating of water, personal injury, pump damage, and/ Wiring”... -
Page 5: Troubleshooting
WARRANTY WARNING: Before disconnecting the pump, make sure that fuse box leads are disconnected, or power is turned off. After reassembling the pump, refer to priming instructions THE WARRANTY PERIOD IS 1 YEAR FROM INSTALLATION DATE before running. WARRANT AND DISCLAIMER OF WARRANTY WARNING: Hazardous voltage can shock, burn, or cause death. -
Page 6: Características Y Ventajas
BEST-BOOST Dispositivo de control y protección de la electrobomba Instrucciones de uso originales Antes de empezar Lea y siga las instrucciones de seguridad. Vea las placas de datos del producto para obtener instrucciones de operación y especificaciones adicionales. Este es el símbolo de alerta de seguridad. -
Page 7: Instalación
INSPECCIÓN DE SU ENVÍO Antes de hacer cualquier conexión eléctrica, desconecte la alimentación en el panel eléctrico. El voltaje de suministro debe estar a +/- 10 % del voltaje indicado en la placa de Examine el producto cuidadosamente para garantizar que identificación del dispositivo. - Page 8 ADVERTENCIA Se deben utilizar cables impermeables o el conducto flexible y los accesorios para man-tener la clasificación tipo 4 (Figuras 6 y 7). Si utiliza cables impermeables para llevar el cable eléctrico a la bomba (Figura 6), apriete el conector del cable suministrado a un par de TENSIÓN VOLTAJE DE POTENCIA...
-
Page 9: Puesta En Marcha
PUESTA EN MARCHA 1. Instale el dispositivo en posición vertical en la alimentación de la bomba y conéctelo al sistema. 2. Conecte el dispositivo al motor de la bomba y a la red ADVERTENCIA El incumplimiento de estas instrucciones de suministro eléctrico siguiendo las instrucciones del puede provocar el calentamiento del agua, lesiones personales, apar¬tado “Cableado eléctrico”... -
Page 10: Anomalías De Funcionamiento
ANOMALÍAS DE FUNCIONAMIENTO GARANTÍA EL PERIODO DE GARANTÍA ES DE 1 AÑO A PARTIR DE LA FECHA PROBLEMA SOLUCIÓN DE INSTALACIÓN La bomba no arranca Reisar las conexiones GARANTÍA Y EXENCIÓN DE RESPONSABILIDAD DE LA GARANTÍA eléctricas La siguiente garantía del producto sustituye a todas las La bomba funciona, pero no La columna de agua es demás condiciones o garantías, ya sean expresas, implícitas o...
Need help?
Do you have a question about the BEST-BOOST and is the answer not in the manual?
Questions and answers