Table of Contents
Advertisement
Quick Links
SYSTEMS CHECK
A)
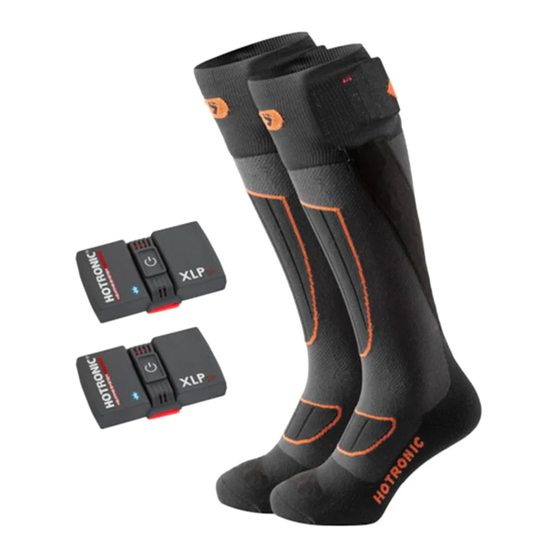
COLLECT ALL "MUST HAVE" ITEMS
Following tests CANNOT be performed properly without following MUST
HAVE items:
•
Known good Recharger.
Known good Battery Pack.
•
•
Known good Heat Sock.
•
Calibrated Infrared Thermometer.
NOTE: Using INFRARED THERMOMETER is a more accurate and consistent
method of detecting heat than fingertips. However, temperature readings
are significantly impacted by surrounding materials and ambient
temperatures. Therefore, temperature readings may or may not be
representative of temperatures attained in standardized testing conditions
used to determine published temperature ranges.
B)
COLLECT ALL COMPONENTS
To perform Systems Check of complete Heat Socks XLP, ALL components of
same Heat Socks MUST be available at the same time (2 Battery Packs XLP, 1
Recharger XLP, and 2 Heat Socks XLP).
C)
INSPECT ALL COMPONENTS
•
Visually inspect Recharger casing, Adapter Plug(s), Power Cords, and
Charging Cradles.
•
Visually inspect Battery Pack casing, Power Button, and 3 Snap
Connector.
•
Visually inspect Heat Sock and double cuff, 3 Snap Connector, and
complete length of Heating Element from inside double cuff to ball of
foot and toe area.
Are all visual inspection points in proper physical
•
condition?
NOTE:
If, at any of the following steps, a failure in any given item is found, it is not
necessary to complete any of the remaining steps pertaining to that given
item.
1)
RECHARGER: POWER TEST
•
Without Battery Packs attached, plug Recharger into known, good, live,
wall outlet.
•
Does Recharger small orange LED turn on?
•
Plug Recharger into outlet several times to confirm properly functioning
Recharger. Watch Recharger LED closely.
2)
RECHARGER: POWER CORDS TEST
With positive Recharger orange LED confirmed and Recharger still
•
plugged into wall outlet, attach known good Battery Pack to each
Charging Cradle.
Does recharging process begin after all Heat Setting
•
LEDs flash semi-quickly for 2 seconds?
•
See 3rd bullet and chart under point 4.
3)
BATTERY PACK: POWER BUTTON TEST
•
Briefly press-and-release Power Button several times.
Does Power Button PHYSICALLY function properly?
•
•
Power Button should compare similarly in physical function to Power
Button on known good Battery Pack.
Winter Season 23/24
© WINTERSTEIGER AG. All Rights Reserved
SYSTEMS CHECK – HEAT SOCKS XLP SERIES
WELCOME TO HOTRONIC FOR 23/24!
KEEPING FEET WARM & DRY!
4)
BATTERY PACK:
RECHARGING PROCESS TEST
•
With known good Recharger plugged into outlet, attach each Battery
Pack to Charging Cradles.
Does recharging process begin after all Heat Setting
•
LEDs flash semi-quickly for 2 seconds?
Recharging process begins when any one of following LED scenarios
•
(see chart below) is displayed after all Heat Setting LEDs flash semi-
quickly for 2 seconds.
If all Heat Setting LEDs continue to flash semi-quickly after 2 seconds,
•
see "MALFUNCTIONS AND SPECIAL FUNCTIONS".
Charge Status
LED Status
st
0 – 25 % charged
1
LED slowly flashes red
st
25 – 50 % charged
1
LED lights up red, 2
st
nd
50 – 75 % charged
1
and 2
LEDs light up red, 3
st
nd
75 – 99 % charged
1
, 2
and 3
th
100 % charged
4
LED lights up green
5)
BATTERY PACK: SETTINGS TEST
•
With known good Recharger still plugged into outlet and Battery Pack
still attached to Charging Cradle, recharge Battery Pack minimally for 2
minutes uninterrupted to ensure accurate test.
•
After minimum 2 minute recharge, remove Battery Pack from Charging
Cradle. With all LEDs off, turn Battery Pack ON to Setting 1, 2, 3, and 4
and then OFF by pressing-and-holding Power Button until all LEDs are
off.
Does Battery Pack Setting function properly?
•
•
Battery Pack MUST be recharged minimally for 2 minutes uninterrupted
for best test results.
Battery Pack MUST be removed from Charging Cradle during Settings
•
Test.
6)
BATTERY PACK: HEAT TEST
•
With positive tests confirmed for Recharger and Battery Pack, and after
minimum 10 minute recharge or longer, remove Battery Pack from
Charging Cradle, connect known good Heat Sock onto Battery Pack,
turn Battery Pack to Setting 3, and then wait for several minutes.
•
Does Battery Pack generate heat in Heating Element
located in toe area of Heat Sock?
•
Use Infrared Thermometer to detect generated heat in toe area of Heat
Sock.
•
Battery Pack MUST be recharged minimally for 10 minutes
uninterrupted when using known good Heat Sock.
7)
HEATING ELEMENT: HEAT TEST
•
Connect Heat Sock to known, good, fully recharged Battery Pack, turn
Battery Pack to Setting 3, and then wait several minutes.
•
Does Heating Element located in toe area of Heat Sock
generate heat?
8)
BATTERY PACK: DURATION TEST
•
Recharge Battery Pack to 100% full charge (green LED light), remove
from Recharger, let rest for minimally 1 hour, turn to Setting 3, connect
to known good Heat Sock, and set external timer for minimum
published duration of Battery Pack XLP.
•
Reset external timer for subsequent 15 minute intervals as needed.
nd
LED slowly flashes red
rd
LED slowly flashes red
rd
th
LEDs light up red, 4
LED slowly flashes red
Page 17
USA CAN
ENG
Advertisement
Table of Contents

Related Manuals for Hotronic XLP Series


Summary of Contents for Hotronic XLP Series
- Page 1 SYSTEMS CHECK – HEAT SOCKS XLP SERIES WELCOME TO HOTRONIC FOR 23/24! SYSTEMS CHECK BATTERY PACK: RECHARGING PROCESS TEST • With known good Recharger plugged into outlet, attach each Battery COLLECT ALL “MUST HAVE” ITEMS Pack to Charging Cradles. Does recharging process begin after all Heat Setting •...
- Page 2 LEDs continue to flash quickly (every 0.1 • Open the Hotronic Heat App and be sure that the Battery Pack in seconds) followed again by an internal check. This process remains until question is connected to the App via Bluetooth.
Need help?
Do you have a question about the XLP Series and is the answer not in the manual?
Questions and answers