Table of Contents
Advertisement
Available languages
Available languages
Quick Links
INSTRUCCIONES DE USO
INSTRUÇÕES DE UTILIZAÇÃO • INSTRUCTIONS OF USE
INSTRUCTIONS D'USAGE • ISTRUZIONI PER L'USO
BEDIENUNGSANLEITUNG
JVTE4240
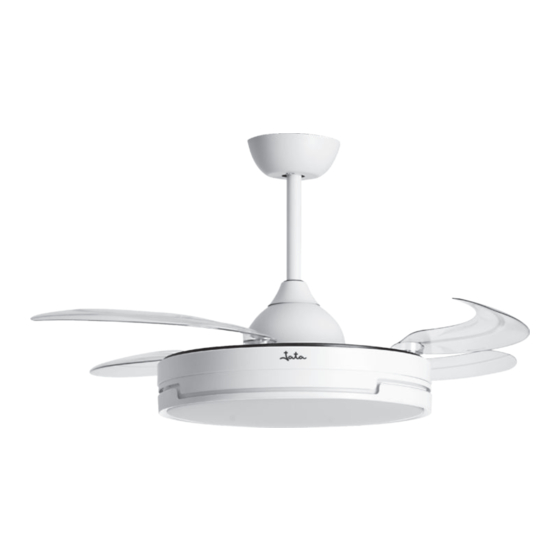
VENTILADOR DE TECHO CON ASPAS RETRÁCTILES Y LÁMPARA
VENTILADOR DE TETO COM PÁS RETRÁTEIS E LUZ
CEILING FAN WITH RETRACTABLE BLADES AND LAMP
VENTILATEUR DE PLAFOND AVEC PALES RÉTRACTABLES ET AMPOULE
VENTOLA DA SOFFITTO CON PALE RETRATTILI E LAMPADA.
DECKENVENTILATOR MIT EINZIEHBAREN PROPELLERFLÜGELN UND LAMPE
Advertisement
Table of Contents

Related Manuals for Jata JVTE4240


Summary of Contents for Jata JVTE4240
- Page 1 INSTRUCCIONES DE USO INSTRUÇÕES DE UTILIZAÇÃO • INSTRUCTIONS OF USE INSTRUCTIONS D’USAGE • ISTRUZIONI PER L’USO BEDIENUNGSANLEITUNG JVTE4240 VENTILADOR DE TECHO CON ASPAS RETRÁCTILES Y LÁMPARA VENTILADOR DE TETO COM PÁS RETRÁTEIS E LUZ CEILING FAN WITH RETRACTABLE BLADES AND LAMP VENTILATEUR DE PLAFOND AVEC PALES RÉTRACTABLES ET AMPOULE...
- Page 3 12. Comando a distanza. 12. Fernsteuerung DATOS TÉCNICOS • DADOS TECNICOS • TECHNICAL DATA 202312 Mod. JVTE4240 220-240 V~ 50 Hz MOTOR: 35 W LED: 36 W Los textos, fotos, colores, figuras y datos corresponden al nivel técnico del momento en que se han impreso. Nos reservamos el derecho a...
- Page 4 F. 1 F. 3 F. 2 F. 4 F. 5 F. 6...
- Page 5 F. 9 F. 8 F. 10 F. 11 INSTRUCCIONES DE MONTAJE INSTRUÇÕES DE MONTAGEM INSTRUÇÕES DE UTILIZAÇÃO ASSEMBLING INSTRUCTIONS INSTRUCTIONS DE MONTAGE ISTRUZIONI DI MONTAGGIO INSTALLATIONSANLEITUNG F. 12...
- Page 6 ESPAÑOL ATENCIÓN • Lea atentamente estas instrucciones antes de poner el ventilador en funcionamiento y guárdelas para futuras consultas. • Este aparato pueden utilizarlo niños con edad de 8 o más años y personas con capacidades físicas, sensoriales o mentales reducidas o falta de experiencia y conocimiento, si se les ha dado la supervisión o instrucción apropiadas respecto al uso del aparato de una manera segura y comprenden los peligros...
-
Page 7: Instrucciones De Uso
postventa o personal similar cualificado con el fin de evitar un peligro. INSTRUCCIONES DE MONTAJE Insertar 1. Asegúrese de que, el lugar donde se va a instalar el ventilador, sea bastante amplio, para mejorar el flujo de aire por la estancia 2. -
Page 8: Mantenimiento Y Limpieza
-Botón de apagado (a) -Control de velocidad (1-2-3-4-5-6) (b) -Botón de iluminación (c) -Temporizador de apagado (1H-2H-4H-8H) (d) -Modo aire natural (e) -Modo invierno (f) • Encienda el ventilador pulsando cualquiera de los números del control de velocidad (b) y pulse el botón de apagado (a), para apagarlo. - Page 9 PORTUGUÊS ATENÇÃO • Leia atentamente estas instruções antes de colocar a ventoinha em funcionamento e guarde-as para futuras consultas. • Este aparelho pode ser usado por crianças maiores de 8 anos e por pessoas com capacidades físicas, sensoriais ou mentais reduzidas ou com falta de experiência e conhecimento, sempre que lhes seja dada a supervisão apropriada ou instruções para a utilização do aparelho de forma segura e de modo a que...
-
Page 10: Instruções De Montagem
pessoal devidamente qualificado, a fim de evitar situações de perigo. INSTRUÇÕES DE MONTAGEM 1. Certifique-se de que o local onde o ventilador será instalado seja bastante amplo para melhorar o fluxo de ar pelo compartimento. 2. Para evitar que as pás colidam com algum objeto, recomenda-se deixar uma distância mínima de 0,60 metros (x) de cada lado. -
Page 11: Limpeza E Manutenção
-Botão para apagar (a). -Controlo de velocidade (1-2-3-4-5-6) (b). -Botão de iluminação ( c ). -Temporizador para apagar (1H–2-4H–8H) (d) -Modo de ar natural (e). -Modo inverno (f) • Ligue o ventilador pressionando qualquer um dos números do controlo de velocidade (b) e, para o desligar, pressione o botão (a). -
Page 12: Assembling Instructions
lack of experience and knowledge if they have been given an appropriate supervision or instruction concerning the safety use of the appliances and understand the dangers involved. • Keep all plastic bags and packaging components out of the reach of children. They are potentially dangerous. •... -
Page 13: Instructions Of Use
6. Two motor support anchors (5) with different lengths are included. Choose the one that best suits your ceiling height. 7. Unscrew the upper screw of the engine mount anchor, slide the plastic plunger down and remove the pin. Fig. 4 8. -
Page 14: Maintenance And Cleaning
• If you want to keep the same light tone always, once turned off, you must wait 1 minute before turning it on again. • To program it, press the timer (d) and select the desired time (1-2-4-8 hours) • Winter mode (f) changes the direction of rotation of the blades, always try to do it when the motor is stopped. -
Page 15: Instructions De Montage
• MISE EN GARDE TRÈS IMPORTANTE: Ne pas immerger le ventilateur dans de l’eau ni dans aucun autre liquide. • Cet appareil est destiné à un usage exclusivement domestique. Veillez à ce que les enfants ne jouent pas avec cet appareil. Tenir le ventilateur hors de leur portée. -
Page 16: Conseils D'utilisation
14. Réalisez les trous au plafond, en considérant les indications précédentes selon les types de surface, et ancrez le cadre de support de plafon (2). Fig. 8. 15. Assurez-vous que le courant électrique est coupé. 16. Placez le ventilateur semi-monté en introduisant le piston de l’ancrage support moteur (5) dans le cadre support plafond (2) en faisant coïncider la rainure du piston avec un petit écrou dans le cadre support. -
Page 17: Protection De L'environnement
• N’utilisez pas de produits chimiques ou abrasifs, d’éponges métalliques, etc., qui pourraient détériorer les surfaces PROTECTION DE L’ENVIRONNEMENT • En votre qualité de consommateur, si vous souhaitez vous défaire de l’appareil, déposez-le pour son ultérieur traitement, dans un centre de recueil de déchets ou un container destiné à cet effet. •... -
Page 18: Istruzioni Di Montaggio
• Posizionarlo sempre su una superficie piana e stabile. • Non deve essere utilizzato all’aperto o in ambienti con elevata umidità o esposti all’acqua. • Se il cavo di alimentazione é danneggiato, deve essere sostituito dal fabbricante, dal suo servizio tecnico o da personale qualificato, in modo da evitare rischi. -
Page 19: Istruzioni Per L'uso
21. Una volta collocato sul soffitto, collocare la plafoniera (10) ruotandola sul supporto a led (8). A questo punto è possibile collegare la corrente di alimentazione. Fig. 11 e 12 ISTRUZIONI PER L’USO • Per collegare il ventilatore al telecomando, premere il pulsante di accensione/spegnimento (a) del telecomando per 2 secondi finché... - Page 20 DEUTSCH ACHTUNG • Bitte lesen Sie sich die Anweisungen vor Inbetriebnahme des Ventilators aufmerksam durch und bewahren Sie diese zum späteren Nachlesen auf. • Dieses Gerät kann von Kindern ab 8 Jahren und Personen mit verminderten körperlichen, sensorialen oder geistigen Fähigkeiten bzw.
- Page 21 • Der Ventilator sollte nicht in Außenbereichen betrieben werden, und auch nicht in Räumen, die hoher Feuchtigkeit oder Wassereintritt ausgesetzt sind. • Wenn das Stromkabel beschädigt ist, muss es vom Hersteller, Kundendienst oder ähnlich qualifiziertem Personal ausgetauscht werden, damit Gefahren vermieden werden. INSTALLATIONSANLEITUNG: 1.
-
Page 22: Wartung Und Reinigung
19. Lösen Sie die Schrauben von der Deckenblende (4). 20. Nach der Verbindungsherstellung setzen Sie die Decken-Zierblende auf, indem Sie die Öffnungen des Rahmens zur Deckenbefestigung (2) durch Drehen aufeinander setzen. Setzen Sie dann die Schrauben ein. 21. Nach der Befestigung an der Decke den Lampenschirm (10) durch Drehen über der LED-Halterung (8) anbringen. - Page 24 www.jata.es...
Need help?
Do you have a question about the JVTE4240 and is the answer not in the manual?
Questions and answers