Table of Contents
Advertisement
Available languages
Available languages
Quick Links
INSTRUCCIONES DE USO
INSTRUÇÕES DE UTILIZAÇÃO • INSTRUCTIONS OF USE
INSTRUCTIONS D'USAGE • ISTRUZIONI PER L'USO
BEDIENUNGSANLEITUNG
JVTE4235
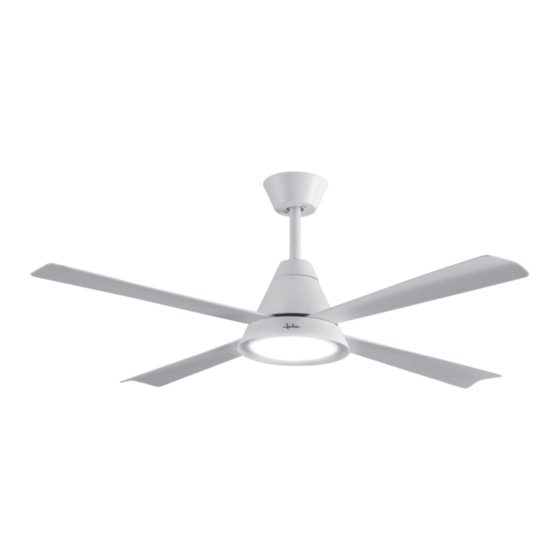
VENTILADOR DE TECHO BLANCO 132 cm CON LUZ
VENTILADOR DE TETO BRANCO 132 cm COM LUZ
WHITE CEILING FAN 132 cm WITH LIGHT
VENTILATEUR DE PLAFOND BLANC 132 cm AVEC LUMIÈRE
VENTILATORE DA SOFFITTO BIANCO 132 cm CON LA LUCE
WEIßER DECKENVENTILATOR 132 cm MIT LICHT
Advertisement
Table of Contents

Related Manuals for Jata JVTE4235


Summary of Contents for Jata JVTE4235
- Page 1 INSTRUCCIONES DE USO INSTRUÇÕES DE UTILIZAÇÃO • INSTRUCTIONS OF USE INSTRUCTIONS D’USAGE • ISTRUZIONI PER L’USO BEDIENUNGSANLEITUNG JVTE4235 VENTILADOR DE TECHO BLANCO 132 cm CON LUZ VENTILADOR DE TETO BRANCO 132 cm COM LUZ WHITE CEILING FAN 132 cm WITH LIGHT VENTILATEUR DE PLAFOND BLANC 132 cm AVEC LUMIÈRE...
- Page 3 13. Comando a distanza. 13. Fernsteuerung DATOS TÉCNICOS • DADOS TECNICOS • TECHNICAL DATA 202312 Mod. JVTE4235 220-240 V~ 50-60 Hz 54 W Los textos, fotos, colores, figuras y datos corresponden al nivel técnico del momento en que se han impreso. Nos reservamos el derecho a...
- Page 4 F. 1 F. 3 F. 2 F. 4 F. 5 F. 6...
- Page 5 F. 9 F. 8 F. 10 F. 11 INSTRUCCIONES DE MONTAJE INSTRUÇÕES DE MONTAGEM INSTRUÇÕES DE UTILIZAÇÃO ASSEMBLING INSTRUCTIONS INSTRUCTIONS DE MONTAGE ISTRUZIONI DI MONTAGGIO INSTALLATIONSANLEITUNG F. 12...
- Page 6 ESPAÑOL ATENCIÓN • Lea atentamente estas instrucciones antes de poner el ventilador en funcionamiento y guárdelas para futuras consultas. • Este aparato pueden utilizarlo niños con edad de 8 o más años y personas con capacidades físicas, sensoriales o mentales reducidas o falta de experiencia y conocimiento, si se les ha dado la supervisión o instrucción apropiadas respecto al uso del aparato de una manera segura y comprenden los peligros...
-
Page 7: Instrucciones De Uso
4. La ubicación elegida para su colocación debe ser capaz de soportar un mínimo de 45 kg para poder soportar el peso del ventilador. 5. Nota: los tornillos de fijación (11) (incluidos) son diseñados para usarse con el ventilador en techo de madera. -
Page 8: Mantenimiento Y Limpieza
-Temporizador de apagado (1H-4H-8H) (d) -Modo aire natural (e) -Modo invierno (f) -Desactivar sonidos (g) -Retardo de apagado (h) -Función antirrobo (i) -Botón apagado (j) • Encienda el ventilador pulsando el botón (a), para apagarlo vuelva a pulsar el mismo. •... -
Page 9: Instruções De Montagem
que lhes seja dada a supervisão apropriada ou instruções para a utilização do aparelho de forma segura e de modo a que compreendam os perigos inerentes. • Não deixe sacos de plástico ou partes da embalagem ao alcance das crianças. Podem ser potenciais fontes de perigo. •... -
Page 10: Instruções De Utilização
13. Coloque as pás (1) tendo em conta que a curvatura das mesmas tem que ficar virada para cima e aparafuse-as bem para que não oscilem quando se encontrarem em funcionamento. Fig. 2 14. Em seguida, coloque o suporte de luzes led (8). Primeiramente, afrouxe os parafusos do sistema de fixação redondo localizado na parte inferior do motor;... -
Page 11: Limpeza E Manutenção
• Se quiser manter sempre o mesmo tom de luz, depois de desligado, deve-se esperar 1 minuto antes de ligá-lo novamente. • Para o programar, pressione o temporizador (d) e selecione o tempo desejado (1-4-8 horas). • O modo inverno (f) altera o sentido de rotação das pás; procure fazê-lo sempre com o motor desligado. Para voltar ao sentido inicial de rotação, pressione-o novamente. -
Page 12: Assembling Instructions
• Make sure the appliance is not in direct contact with hot surfaces or objects. • Always place it on a flat and stable surface. • Do not use outdoors or in any room with high humidity or exposure to water. •... -
Page 13: Instructions Of Use
- Turn on the fan and select maximum power, look at the blade that oscillates the most. - Turn off the fan and wait for it to come to a complete standstill. Place the balance clip in the middle of the blade on the blade that wobbles the most. - Page 14 FRANÇAIS ATTENTION • Avant de mettre en marche le ventilateur, veuillez lire attentivement cette notice et conservez-la pour vous y reporter au besoin. • Cet appareil peut être utilisé par les enfants de plus de 8 ans et les personnes handicapées physiques, sensorielles ou mentales réduites ou sans expérience ni connaissance, si elles ont reçu l’instruction ou la surveillance pertinentes concernant l’utilisation de l’appareil d’une façon sûre et comprennent les...
-
Page 15: Conseils D'utilisation
5. Note : les vis de fixation (11) sont conçues pour fixer le ventilateur sur un plafond en bois. Si le ventilateur doit être installé sur un autre matériau (béton, faux plafond, etc.), il est recommandé d’utiliser les vis de fixation adaptées à ce matériau (non fournies). Fig. 1 6. -
Page 16: Entretien Et Nettoyage
-Désactiver les sons (g). -Délai d’arrêt (h). -Fonction antivol (i). -Bouton d’ârret (j). • Démarrez le ventilateur en appuyant sur le bouton (a). Pour l’éteindre, appuyez sur le même bouton. • Appuyez sur le contrôle de vitesse (b) pour choisir la vitesse souhaitée de 1 à 6. •... -
Page 17: Istruzioni Di Montaggio
• Conservare fuori dalla portata dei bambini le borse di plastica o gli elementi d’imballaggio. Possono essere fonti potenziali di pericolo. • Prima di collegare il forno, accertarsi che il voltaggio indicato nella targhetta delle caratteristiche tecniche corrisponda al voltaggio che state utilizzando. •... -
Page 18: Istruzioni Per L'uso
13. Montare le pale (1) tenendo conto che la curva delle stesse deve essere rivolta verso l’alto e avvitarle bene in modo tale da evitare che oscillino durante il funzionamento. Fig. 2 14. Montare quindi il supporto delle lampadine a led (8). Per prima cosa allentare le viti dell’ancoraggio rotondo, situato sul lato inferiore del motore, far passare il cavo della luce attraverso il foro e avvitare. -
Page 19: Manutenzione E Pulizia
-3 pressioni: luce fredda. -4 pressioni: spegnimento. -5 pressioni: luce calda. -6 pressioni: spegnimento. • Se si vuole mantenere sempre la stessa tonalità di luce, una volta spenta è necessario attendere 1 minuto prima di riaccenderla. • Per impostarlo, premere il timer (d) e selezionare il tempo desiderato (1-4-8 ore) •... - Page 20 • Schließen Sie den Ventilator nicht ans Stromnetz an, ohne zuvor geprüft zu haben, dass die auf dem Gerät angegebene Voltzahl mit der bei Ihnen zu Hause übereinstimmt. • SEHR WICHTIG: Tauchen Sie den Ventilator niemals in Wasser oder andere Flüssigkeiten. •...
- Page 21 13. Platzieren Sie die Propellerflügel (1). Beachten Sie dabei, dass die Wölbung derselben nach oben weisen muss. Schrauben Sie die Propellerflügel gut fest, damit sie im Betrieb nicht schwingen. Abb. 2 14. Bringen Sie danach den LED-Halter (8) an. Lösen Sie zunächst die Schrauben der runden Verankerung, die sich auf der Unterseite des Motors befindet.
-
Page 22: Wartung Und Reinigung
• Um das Licht einzuschalten, drücken Sie die Leuchttaste. -1 x Drücken: kaltes Licht -2 x Drücken: Aus -3 x Drücken: mittelstarkes Licht -4 x Drücken: Aus -5 x Drücken: warmes Licht -6 x Drücken: Aus • Wenn Sie nach dem Ausschalten immer den gleichen Lichtton beibehalten möchten, müssen Sie 1 Minute warten, bevor Sie es wieder einschalten. - Page 24 www.jata.es...
Need help?
Do you have a question about the JVTE4235 and is the answer not in the manual?
Questions and answers