
Related Manuals for Dometic Adventuridge KB2015


Summary of Contents for Dometic Adventuridge KB2015
- Page 1 User Manual Manual del usuario ICELESS ELECTRIC COOLER BLACK PMS 158 C PMS 5797 C NEVERA ELÉCTRICA SIN HIELO English... Page 06 Español.. Página 27 ID: #05007...
-
Page 2: Table Of Contents
Contents Overview ................3 Use ..................5 Product contents/Device parts ...........6 General information ............7 Reading and storing this user manual ........7 Explanation of symbols ............7 Safety ...................8 Proper use ................. 8 Safety notes ................8 First use ................13 Checking the cooler and the product contents ....13 Basic cleaning................ -
Page 5: Use
15.59 inch 11.65 inch 13.46 inch 9.96 inch 12.56 inch 9.05 inch 13.98 inch 10.03 inch... -
Page 6: Product Contents/Device Parts
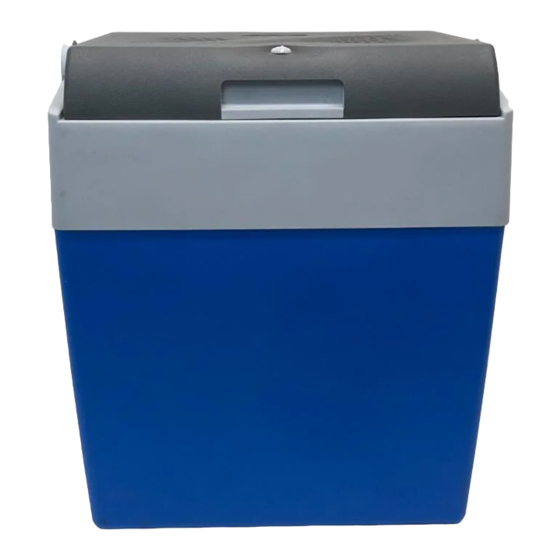
Product contents/Device parts Unit cover Container Cord compartment Plug housing Fuse (including 2× spare fuses) Contact tip of the 12 V DC universal plug 12 V DC universal plug Catch Carrying handle Fan wheel Edge of the cooler Vents Cooling power controller... -
Page 7: General Information
General information General information Reading and storing this user manual This user manual accompanies this iceless electric cooler. It contains important information on start-up and handling. For improved readability, the iceless electric cooler will only be referred to as the “cooler” below. Carefully read this user manual, particularly the safety instructions before you use the cooler. -
Page 8: Safety
Safety Safety Proper use The cooler is only designed for cooling food and bottles containing beverages. It is exclusively for private household use and similar application areas; it is not suitable for commercial application such as: • in staff kitchens, in stores, offices and other work areas, •... - Page 9 Safety WARNING! Danger of explosion! Storing flammable gases and liquids may cause an explosion. − Do not dispose of any flammable gases or spray cans with flammable propellants in the cooler. WARNING! Risk of electric shock! A faulty electrical installation or excessive line voltage may result in an electric shock.
- Page 10 Safety the 12 V cable and the 12 V DC universal plug away from water and other liquids. − Never touch the power plug with wet hands. − Do not pull the power plug or the 12 V DC universal plug out of the socket by the cord; instead, always pull it out by the plug.
- Page 11 Safety WARNING! Danger for children and persons with impaired physical, sensory or mental capacities (e.g. partially disabled per- sons, older persons with reduced physical and mental ca- pacities) or lack of experience and knowledge (e.g. older children). − This cooler may be used by children ages eight and over as well as persons with impaired physical, sensory or mental capacities or those lacking experience and knowl- edge if they are supervised or have been instructed in...
- Page 12 Safety NOTICE! Risk of damage! Improper use of the cooler may cause damage to the cooler. − Make sure there is sufficient ventilation and make sure that the cooler vents are not closed. − Never operate the cooler in a closed room without a sufficient amount of fresh air.
-
Page 13: First Use
First use First use Checking the cooler and the product contents NOTICE! Risk of damage! If you are not cautious when opening the packaging with a sharp knife or other pointy object, you could damage the cooler. − Be very careful when opening. 1. -
Page 14: Using The On-Board Power Plug
Using the cooler Tip: The cooler can be connected to a socket with a line voltage of 120 V AC or to an on-board power socket with 12 V DC of your vehicle (cigarette lighter), boat or motorhome. Tip: If you pre-cool the food and beverages before you place it in the cooler, you will get the best cooling power in the cooler. -
Page 15: Using The Cooler With The Power Cable
Using the cooler Switching the cooler off 1. To switch the cooler off, pull the 12 V DC universal plug out of the on-board power socket. 2. Close the cooler. (see fig. B) in the cord 3. Store the cord with the 12 V DC universal plug (see fig. A). -
Page 16: Opening And Closing The Cooler
Using the cooler To decrease the cooling power, turn the cooling power controller counter- clockwise to the desired cooling level. To check the cooling function of the cooler, you can check the cooling function on the inside of the unit cover a few minutes after the cooler has been switched off. -
Page 17: Cleaning And Maintenance
Cleaning and maintenance Taking the unit cover off and inserting it To facilitate filling the cooler, you can completely remove the unit cover: 1. Disconnect the cooler from the power supply. 2. Store all power cords in the cord compartment (see fig. A). - Page 18 Cleaning and maintenance NOTICE! Risk of damage! Improper cleaning of the cooler and unsuitable cleaners may damage the cooler. − Do not use any aggressive cleaners, sharp or metallic cleaning utensils such as knives, hard scrapers or similar. − Do not in any case place the cooler in the dishwasher. NOTICE! Risk of damage! The cooling unit in the unit cover may get hot during operation.
-
Page 19: Changing The Fuse In The 12 V Dc Universal Plug
Storage Changing the fuse in the 12 V DC universal plug Tip: Only use the same type of fuse (F5L250V) in the 12 V DC univer- sal plug. Damages to devices caused by inserting the wrong fuses are not covered by any warranty or replacement service. A fuse for protecting the cooler is located in the 12 V DC universal plug (see fig. B). -
Page 20: Troubleshooting
Troubleshooting Troubleshooting Tip: For returns, only send the unit cover to our customer service department. Problem Possible cause Solution The cooler does not work The on-board power Immediately pull the with a 12 V DC connection; socket/the cigarette 12 V DC universal plug lighter is dirty (e.g. out of the on-board the fan wheel does not... - Page 21 Troubleshooting Problem Possible cause Solution The 12 V DC universal plug The 12 V DC universal Reassemble the in the on-board power plug has not been 12 V DC universal plug as socket gets very warm. properly assembled. described in the chapter “Changing the fuse in the 12 V DC universal plug”. The on-board power Immediately pull the socket/the cigarette...
-
Page 22: Technical Data
Technical data Technical data Type: KB2015 Supply voltage: 12 V or 120 V , 60 Hz Output: 47 W at 12 V 6.2 W at 120 V (eco mode) 50 W at 120 V (max mode) Category: other compartment (62.6 °F (+17° C) at an ambient temperature of 77 °F (+25° C)) Energy efficiency class: A+++ (eco mode) -
Page 23: Disposal
Disposal Disposal Disposing of packaging − Sort the packaging before you dispose of it. Dispose of paperboard and cardboard with the recycled paper service and wrappers with appropriate collection service. Disposing of old appliances Old appliances may not be disposed of in the household garbage! −... - Page 24 AFTER SALES SUPPORT 1 800 544 4881 customersupportcenter@dometicusa.com...
-
Page 25: Warranty Card
Return your completed warranty card together with the faulty 1 800 544 4881 product to: customersupportcenter@dometicusa.com MODEL: KB2015 PRODUCT CODE: 93386 05/2016 Dometic USA 2320 Industrial Parkway Call charges from your Elkhart, IN 46516 regular landline operator. No additional costs. YEARS WARRANTY... -
Page 26: Warranty Conditions
Warranty conditions Dear Customer, The ALDI warranty offers you extensive benefits compared to the statutory obligation arising from a warranty: Warranty period: 3 years from date of purchase. 6 months for wear parts and consumables under nor- mal and proper conditions of use (e.g. rechargeable batteries). - Page 27 Contenido Contenido Conjunto ....................3 Uso ......................4 Volumen de suministro/Partes del equipo ........28 Generalidades ...................29 Leer y guardar este manual del usuario ........29 Descripción de símbolos ..............29 Seguridad ..................30 Uso apropiado ..................30 Indicaciones de seguridad ............... 30 Primer uso ..................34 Comprobar la nevera y el volumen de suministro .......
-
Page 28: Volumen De Suministro/Partes Del Equipo
Volumen de suministro/Partes del equipo Volumen de suministro/Partes del equipo Tapa de la unidad Receptáculo Compartimento de cableado Estructura del enchufe Fusible (incluye 2 fusibles de repuesto) Tapa Punta de contacto del enchufe universal de 12 V CC Enchufe universal de 12 V CC Pestaña Asa de transporte Hélice de ventilador... -
Page 29: Generalidades
Generalidades Generalidades Leer y guardar este manual del usuario Este manual del usuario pertenece a esta nevera eléctrica sin hielo. Contiene información importante relacionada con la puesta en marcha y el manejo. En aras de una mejor comprensión, la nevera eléctrica sin hielo se denominará... -
Page 30: Seguridad
Seguridad Corriente alterna Corriente continua Seguridad Uso apropiado La nevera está concebida únicamente para enfriar alimentos y botellas de bebidas. Está destinada exclusivamente para el uso personal en casa y en entornos de utilización similares y no es apropiada para fines comerciales, como, p. ej.: •... - Page 31 Seguridad ¡ADVERTENCIA! ¡Riesgo de explosión! El almacenamiento de gases y líquidos inflamables puede causar explosiones. − No almacene gases inflamables ni aerosoles con agentes combustibles en la nevera. ¡ADVERTENCIA! ¡Peligro de descarga eléctrica! Una instalación eléctrica defectuosa o una tensión demasiado alta pueden producir una descarga eléctrica.
- Page 32 Seguridad − Mantenga la nevera, el cable de red, el enchufe de red, el cable de 12 V y el enchufe universal de 12 V CC alejados del agua y otros líquidos. − No toque nunca el enchufe de red con las manos húmedas. −...
- Page 33 Seguridad sido instruidos sobre el uso seguro de la nevera y hayan comprendido el riesgo derivado de su uso. Los niños no deben jugar con la nevera. La limpieza del equipo y el mantenimiento de usuario no deben realizarse por niños sin supervisión.
-
Page 34: Primer Uso
Primer uso − Nunca utilice la nevera en u espacio cerrado con insuficiente aire fresco. − Si utiliza la nevera en el vehículo, active la ventilación del vehículo. − No permita que el cable de red, el enchufe de red, el cable de 12 V o el enchufe universal de 12 V CC entren en contacto con piezas calientes. -
Page 35: Utilización De La Nevera
Utilización de la nevera 2. Antes del primer uso, limpie todos los componentes de la nevera (véase la fig. A) como se describe en el capítulo “Limpieza”: • Receptáculo, • Tapa de la unidad, • Orificios de ventilación (véase la fig. E). Utilización de la nevera ¡AVISO! ¡Riesgo de daños! -
Page 36: Utilización De La Nevera Con El Cable De Red
Utilización de la nevera Conexión de la nevera a la toma de corriente de red de a bordo 1. Cierre la nevera. (véase la fig. B) del 2. Saque el cable con el enchufe universal de 12 V CC compartimento de cableado (véase la fig. - Page 37 Utilización de la nevera Selección y ajuste de los niveles de refrigeración En el modo de red, puede ajustar diferentes niveles de refrigeración con el regulador de la potencia frigorífica (véase la fig. F). La nevera se puede emplear en el modo eco de ahorro de energía o en el modo max. También se pueden emprender ajustes personalizados.
-
Page 38: Apertura Y Cierre De La Nevera
Utilización de la nevera Apertura y cierre de la nevera ¡ATENCIÓN! ¡Peligro de aplastamiento! Cuando coloque la tapa de la unidad o si se cierra de golpe, puede pillarse los dedos. − Bloquee la tapa cuando esté abierta. − Maneje la tapa con cuidado sin poner los dedos en el so- porte de la tapa de la unidad. -
Page 39: Limpieza Y Mantenimiento
Limpieza y mantenimiento 5. Retire con cuidado la tapa de la unidad de los soportes. Ahora puede llenar o vaciar la nevera. Para colocar la tapa de la unidad, proceda al revés y coloque la tapa de la unidad en los soportes con un ángulo de 30°. Cierre de la nevera 1. -
Page 40: Cambio Del Fusible En El Enchufe Universal De 12 V Cc
Limpieza y mantenimiento ¡AVISO! ¡Riesgo de daños! La limpieza incorrecta de la nevera y el uso de detergentes inapropiados pueden dañar la nevera. − No use productos de limpieza agresivos, objetos de limpieza afilados o metálicos, como cuchillos y espátulas duras, y objetos similares. -
Page 41: Almacenamiento
Almacenamiento (véase la fig. B) para El enchufe universal de 12 V CC contiene un fusible proteger la nevera. El volumen de suministro de la nevera incluye dos fusibles de repuesto. Si el fusible se daña, cámbielo así: 1. Afloje la tapa de la estructura del enchufe girándola en sentido contra- rio a las agujas del reloj. -
Page 42: Búsqueda De Fallos
Búsqueda de fallos Búsqueda de fallos Consejo: En caso de reclamación, envíe solo la tapa de la unidad al servicio de atención al cliente. Problema Posible causa Solución Con la conexión de La toma de corriente Extraiga el enchufe uni- 12 V CC, la nevera no de red de a bordo o versal de 12 V CC de la... - Page 43 Búsqueda de fallos Problema Posible causa Solución El enchufe universal de El enchufe universal Vuelva a montar el en- 12 V CC de la toma de co- de 12 V CC no está chufe universal de 12 V CC rriente de red de a bordo bien montado. como se describe en el se calienta mucho.
-
Page 44: Datos Técnicos
Datos técnicos Datos técnicos Tipo: KB2015 Tensión de alimentación: 12 V o 120 V , 60 Hz Potencia: 47 W a 12 V 6.2 W a 120 V (modo eco) 50 W a 120 V (modo max) Categoría: otro compartimento (62.6 °F (+17° C) a temperatura ambiente de 77 °F (+25° C)) Clase de eficiencia A+++ (modo eco) -
Page 45: Eliminación
Eliminación Eliminación Eliminación del embalaje − Elimine el embalaje por tipos de material. El cartón y las láminas han de llevarse a un punto de recogida de papel usado y un punto de recogida de materiales respectivamente. Eliminación de equipos en desuso ¡Los equipos en desuso no deben ser depositados en la basura doméstica! −... - Page 46 SERVICIO DE POSVENTA 1-800-544-4881 customersupportcenter@dometicusa.com...
-
Page 47: Tarjeta De Garantía
1 800 544 4881 defectuoso a: customersupportcenter@dometicusa.com NO DEL MODELO: KB2015 CÓDIGO DEL PRODUCTO: 93386 05/2016 Dometic USA 2320 Industrial Parkway Elkhart, IN 46516 Para la tarifa de red fija regular de su proveedor de telefonía. Sin costes adicionales. -
Page 48: Condiciones De Garantía
Condiciones de garantía Estimado cliente: La garantía de ALDI le ofrece amplias ventajas en comparación a la obliga- ción legal a la que está sujeta una garantía: Periodo de garantía: 3 años a partir de la fecha de compra. 6 meses para piezas de desgaste y consumibles bajo condiciones normales y reglamentarias de uso (p. - Page 49 DISTRIBUTED BY • DISTRIBUIDO POR: ALDI INC., BATAVIA, IL 60510 WWW.ALDI.US AFTER SALES SUPPORT • SERVICIO DE POSVENTA 1 800 544 4881 customersupportcenter@dometicusa.com YEARS WARRANTY AÑOS DE GARANTÍA MODEL: KB 2015 PRODUCT CODE: 93386 05/2016...
Need help?
Do you have a question about the Adventuridge KB2015 and is the answer not in the manual?
Questions and answers