Fisher & Paykel HCB48-12 Installation Manual
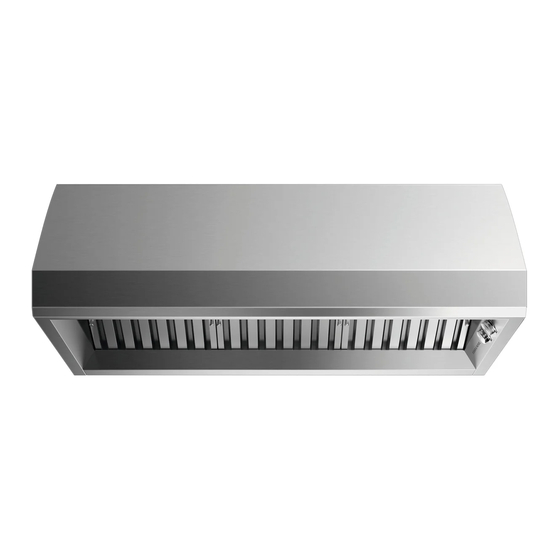
Professional range hood
Hide thumbs
Also See for HCB48-12:
- Installation and user manual (64 pages) ,
- Installation preparation (10 pages) ,
- Installation manual/user manual (64 pages)
Table of Contents
Advertisement
Available languages
Available languages
Quick Links
Advertisement
Chapters
Table of Contents

Subscribe to Our Youtube Channel
Related Manuals for Fisher & Paykel HCB48-12


Summary of Contents for Fisher & Paykel HCB48-12
- Page 1 PROFESSIONAL RANGE HOOD HCB30-6, HCB36-6, HCB36-12, HCB48-12 HC36 (Shell) & HC48 (Shell) models HOTTE PROFESSIONNELLE Modèles HCB30-6, HCB36-6, HCB36-12, HCB48-12 HC36 (Coque) et HC48 (Coque) INSTALLATION GUIDE / USER GUIDE GUIDE D’INSTALLATION / GUIDE D’UTILISATION US CA...
- Page 2 English Page 1 – 29 Français Page 31 – 59...
-
Page 3: Table Of Contents
CONTENTS Introduction Safety and warnings Product information Installation preparation Installation instructions Operating instructions Cleaning and maintenance Maintenance Parts and accessories Service and warranty IMPORTANT! Registration SAVE THESE INSTRUCTIONS Register your product with us so we can The models shown in this user guide may provide you with the best service possible. -
Page 5: Introduction
INTRODUCTION Welcome to the family of Fisher & Paykel appliances. Our team has spent thousands of hours designing, engineering and testing it to make sure you get the perfect product for your home. For more information visit our website or for further support, contact our customer care team. -
Page 6: Safety And Warnings
SAFETY AND WARNINGS WARNING! Weight Hazard The appliance is heavy. Please ensure adequate care is taken when installing the appliance to prevent personal injury. Weight of the products are: HCB30 = 66lb (30kg) HCB36 = 75lb (34kg) HCB48 = 99lb (45kg) HC36 = 68lb (31kg) HC48... - Page 7 SAFETY AND WARNINGS – When cutting or drilling into wall or ceiling, do not damage electrical wiring and other hidden utilities. – Ducted fans must always be vented to the outdoors. – This unit must be grounded. - Do not use replacement parts that have not been recommended by the manufacturer (e.g.
-
Page 8: Product Information
Self Tapping Screw Machine Screw Machine Screw HCB30-6, HCB36-6, HCB36-12, HCB48-12 HC36 (Shell) & HC48 (Shell) models HOTTE PROFESSIONNELLE Modèles HCB30-6, HCB36-6, HCB36-12, HCB48-12 HC36 (Coque) et HC48 (Coque) INSTALLATION GUIDE / USER GUIDE GUIDE D’INSTALLATION / GUIDE D’UTILISATION US CA Range hood with light... - Page 9 #10x 3” #8 x 3/4” ¼-20 x ½” M4 x8 Countersunk Truss Head Pan Head Pan Head Pozidrive Philips Drive Philips Drive Torx Drive Self tapping Screw Self Tapping Screw Machine Screw Machine Screw PRODUCT INFORMATION Wooden bracket (length depending on model) FP Pro Hood Fasteners found mounted to the back of the range hood.
-
Page 10: Installation Preparation
INSTALLATION PREPARATION Product dimensions... - Page 11 INSTALLATION PREPARATION HCB30-6 HCB36-6 HCB36-12 HCB48-12 HC36 HC48 PRODUCT DIMENSIONS inches (mm) inches (mm) inches (mm) inches (mm) Overall height of product 18” (457) 18” (457) 18” (457) 18” (457) Overall width of product 29 7/8” (759) 35 7/8” (911) 35 7/8” (911) 47 7/8”...
- Page 12 INSTALLATION PREPARATION Product dimensions Differences if 10” duct transition is added to HCB36-12, HCB48-12, HC36, HC48 350.00...
- Page 13 INSTALLATION PREPARATION PRODUCT DIMENSIONS inches (mm) Overall height of product with ducting transition added 23” (585) Overall width of ducting transition 22 13/16” (580) Overall depth of ducting transition to wall 11” (280) Outlet diameter 10” (254) Height of transition outlet pipe above range hood 5”...
- Page 14 INSTALLATION PREPARATION Range hood width The range hood width is recommended to be no less than the width of the cooktop. ● A wider range hood can be used to increase the capture area if space is not restricted. ● The range hood should ideally be centered above the cooktop for proper performance.
- Page 15 INSTALLATION PREPARATION Calculating the installation height Installation height for a standard 96” (2438mm) high kitchen ceiling is shown below. Use the following formula to calculate installation height: A = W – (X + Y+Z) Where: A = Installation height W= Ceiling height X = Cooktop surface height Y = Range hood height Z = Duct cover height (if desired)
- Page 16 INSTALLATION INSTRUCTIONS INSTALLATION PREPARATION Optional extras Duct covers Duct covers may be used to fill the space between the range hood and the ceiling in wall mount installations. These covers are available in 6” (152mm) and 12” (305mm) sizes and may be ordered separately, see ‘Parts and accessories’.
- Page 17 INSTALLATION INSTRUCTIONS INSTALLATION PREPARATION Infra-red heat lamp and panel kit If an optional infra-red heat lamp kit was purchased for installation with the range hood, assemble the kit to the range hood prior to installation. See instructions supplied with the kit for assembly to your range hood. WARNING! To avoid any electrical shock the installation of the infra-red heat lamp and panel kit should be done by a qualified electrician and before starting the installation of the...
-
Page 18: Installation Instructions
INSTALLATION INSTRUCTIONS Electrical requirements WARNING! Installation and electrical wiring must be done by qualified person(s) in accordance ● with all applicable codes and standards. This unit must be grounded/earthed. ● This range hood must be connected with copper wire only. ●... - Page 19 INSTALLATION INSTRUCTIONS Compatible blowers This range hood may only be used in connection with these internal or inline blowers: Internal blowers come with the range hood (for HCB30/36/48 range hood models). ● Inline blowers can be purchased separately (for HC36/48 range hood models). ●...
- Page 20 INSTALLATION INSTRUCTIONS Wall mounting installation Cooktop centerline After the range hood installation height has been determined: Wall studs Draw a horizontal line at a distance Wood above the cooktop equal to the desired bracket (included) range hood installation height plus 15 1/2”...
- Page 21 INSTALLATION INSTRUCTIONS Using two people lift and hang the range hood using the keyhole slots (refer to F). Make sure the wood bracket fits into the recess on the back of the range hood. Level the range hood and tighten the 3/4”...
- Page 22 INSTALLATION INSTRUCTIONS Cabinet mounting installation The range hood can be installed under a cabinet by supporting the range hood from the top. For cabinet mounting installation the transition should be mounted after installing the range hood, see ‘Duct transition assembly’ and ‘Product dimensions’ sections.
- Page 23 INSTALLATION INSTRUCTIONS Internal blower installation (HCB30/36/48 range hood models only) The internal blower can be mounted as shown below. From the inside of the range hood, loosen the 1/2” (12.7mm) screws securing the blower plate to the range hood. Slide the blower plate towards you and lower it out of the range hood. Attach the blower plate to the blower using the 3/4”...
- Page 24 INSTALLATION INSTRUCTIONS Electrical connection WARNING! Electrical wiring must be done by qualified person(s) in accordance with all ● applicable codes and standards and the unit must be grounded. Turn off electricity at the service panel before wiring the unit. ● A 120 volt, 60Hz AC-only electrical supply is required on a dedicated 20A branch ●...
- Page 25 INSTALLATION INSTRUCTIONS Wiring diagram...
-
Page 26: Operating Instructions
OPERATING INSTRUCTIONS Control panel CONTROL PANEL FEATURES Fan speed control Turn the range hood fan on or off. ● Turn to LOW, MED, HIGH or MAX as needed. ● Always use the MAX setting when grilling. ● Light control Turn the range hood light on or off. ●... - Page 27 CLEANING AND MAINTENANCE WARNING! Before servicing or cleaning your range hood, switch the power off at the control ● panel and disconnect the power to prevent the range hood from being switched on accidentally. Allow the appliance to cool after the power has been turned off before servicing. ●...
-
Page 28: Cleaning And Maintenance
CLEANING AND MAINTENANCE To remove the grease trays: Grasp the grease tray and push away from you. This will disengage the grease tray from the range hood. Lift the grease tray up and out of the range hood track. To replace the grease trays: Keep the back end of the grease tray tilted down as you insert it, lower the back of the grease tray into the range hood track. -
Page 29: Maintenance
MAINTENANCE Light bulb replacement IMPORTANT! Wear gloves to protect against sharp edges. ● DO NOT TOUCH the light bulb when in use. They may be hot enough to cause injury. ● Note: Replacement bulbs are not covered by warranty. To replace the light bulb: Turn off the range hood and allow the light bulb to cool. -
Page 30: Parts And Accessories
PARTS AND ACCESSORIES Parts FP Pro Hood Fasteners 2 x Halogen light bulbs Filters Infra-red heat lamp ¾” OD x 3/16” ID #10-32 #10x 3” #8 x 3/4” ¼-20 x ½” M4 x8 Flat Washer Pan Head Countersunk Truss Head Pan Head Pan Head Pozi Drive... -
Page 31: Service And Warranty
SERVICE AND WARRANTY For details of your Manufacturer’s Warranty and contacts for servicing, please refer to your separate service and warranty book provided with your range hood. Complete and keep for safe reference: Model Serial No. Purchase Date Purchaser Dealer City State Country... - Page 33 TABLE DES MATIÈRES Introduction Consignes de sécurité et mises en garde Informations sur le produit Préparation pour l’installation Instructions d’installation Instructions d’utilisation Nettoyage et entretien Entretien Pièces et accessoires Service et garantie IMPORTANT! Enregistrement CONSERVEZ CES INSTRUCTIONS Enregistrez votre produit afin que nous Les modèles illustrés dans ce guide d’utilisation puissions vous offrir un service de la peuvent ne pas être disponibles dans tous...
-
Page 35: Introduction
INTRODUCTION Bienvenue dans le monde des appareils Fisher & Paykel. Notre équipe a consacré des milliers d’heures à la conception, l’ingénierie et la mise à l’essai afin de vous offrir le produit idéal pour votre maison. Pour plus d’informations, visitez notre site Web; pour une assistance supplémentaire, communiquez avec notre équipe de service à la clientèle. -
Page 36: Consignes De Sécurité Et Mises En Garde
CONSIGNES DE SÉCURITÉ ET MISES EN GARDE MISE EN GARDE! Risque de poids excessif L’appareil est lourd. Lors de l’installation de l’appareil, veuillez vous assurer de porter une attention appropriée afin d’éviter toute blessure. Poids des produits : HCB30 = 66 lb (30 kg) HCB36 = 75 lb (34 kg) HCB48 = 99 lb (45 kg) HC36... - Page 37 CONSIGNES DE SÉCURITÉ ET MISES EN GARDE carneau (cheminée) de l’appareil. Suivez les consignes du fabricant de l’appareil de cuisson ainsi que les normes de sécurité comme celles publiées par la National Fire Protection Association (NFPA) et la American Society for Heating, Refrigeration and Air Conditioning Engineers (ASHRAE), ainsi que les normes locales.
-
Page 38: Informations Sur Le Produit
Machine Screw Machine Screw PROFESSIONAL RANGE HOOD HCB30-6, HCB36-6, HCB36-12, HCB48-12 HC36 (Shell) & HC48 (Shell) models HOTTE PROFESSIONNELLE Modèles HCB30-6, HCB36-6, HCB36-12, HCB48-12 HC36 (Coque) et HC48 (Coque) INSTALLATION GUIDE / USER GUIDE GUIDE D’INSTALLATION / GUIDE D’UTILISATION US CA Hotte avec ampoules et Guide d’utilisation (1) - Page 39 #10x 3” #8 x 3/4” ¼-20 x ½” M4 x8 Countersunk Truss Head Pan Head Pan Head Pozidrive Philips Drive Philips Drive Torx Drive Self tapping Screw Self Tapping Screw Machine Screw Machine Screw INFORMATIONS SUR LE PRODUIT Support en bois (longueur variant selon le modèle) FP Pro Hood Fasteners monté...
- Page 40 PRÉPARATION POUR L’INSTALLATION INSTALLATION INSTRUCTIONS Dimensions du produit...
- Page 41 PRÉPARATION POUR L’INSTALLATION INSTALLATION INSTRUCTIONS HCB30-6 HCB36-6 HCB36-12 HCB48-12 HC36 HC48 DIMENSIONS DU PRODUIT pouces (mm) pouces (mm) pouces (mm) pouces (mm) Hauteur hors tout du produit 18 po (457) 18 po (457) 18 po (457) 18 po (457) Largeur hors tout du produit 29 7/8 po (759)
- Page 42 PRÉPARATION POUR L’INSTALLATION INSTALLATION INSTRUCTIONS Dimensions du produit Différences lorsqu’une transition de conduit de 10 po est ajoutée au modèle HCB36-12, HCB48-12, HC36 ou HC48 350.00...
- Page 43 PRÉPARATION POUR L’INSTALLATION INSTALLATION INSTRUCTIONS DIMENSIONS DU PRODUIT pouces (mm) Hauteur hors tout du produit avec transition de conduit ajoutée 23 po (585) Largeur hors tout de la transition de conduit 22 13/16 po (580) Profondeur hors tout de la transition de conduit jusqu’au mur 11 po (280) Diamètre de sortie 10 po (254)
- Page 44 PRÉPARATION POUR L’INSTALLATION INSTALLATION INSTRUCTIONS Largeur de la hotte Il est recommandé de choisir une hotte dont la largeur n’est pas inférieure ● à la largeur de la surface de cuisson. Une hotte plus large peut être utilisée pour augmenter la zone d’aspiration ●...
- Page 45 PRÉPARATION POUR L’INSTALLATION INSTALLATION INSTRUCTIONS Calcul de la hauteur d’installation La hauteur d’installation pour un plafond de cuisine standard d’une hauteur de 96 po (2 438 mm) est indiquée ci-dessous. Utilisez la formule suivante pour calculer la hauteur d’installation : A = W – (X + Y + Z) Où : A = Hauteur d’installation W= Hauteur du plafond...
-
Page 46: Préparation Pour L'installation
PRÉPARATION POUR L’INSTALLATION Éléments supplémentaires en option Panneaux de recouvrement de conduit Des panneaux de recouvrement de conduit peuvent être utilisés pour combler l’espace entre la hotte et le plafond dans les installations avec montage au mur. Disponibles en formats 6 po (152 mm) et 12 po (305 mm), ces panneaux de recouvrement peuvent être commandés séparément;... - Page 47 PRÉPARATION POUR L’INSTALLATION Ensemble de panneau et lampe infrarouge Si vous avez fait l’acquisition d’un ensemble de lampe infrarouge en option pour l’installation avec la hotte, assemblez l’ensemble avec la hotte avant l’installation. Consultez les instructions fournies avec l’ensemble pour l’assemblage avec votre hotte. MISE EN GARDE! Pour éviter toute électrocution, faites installer l’ensemble de panneau et lampe infrarouge par un électricien qualifié...
- Page 48 INSTRUCTIONS D’INSTALLATION INSTALLATION INSTRUCTIONS Exigences électriques MISE EN GARDE! L’installation et le câblage électrique doivent être réalisés par une ou plusieurs personne(s) ● qualifiée(s), en conformité avec tous les codes et toutes les normes applicables. Cet appareil doit être mis à la terre. ●...
- Page 49 INSTRUCTIONS D’INSTALLATION INSTALLATION INSTRUCTIONS Ventilateurs compatibles Cette hotte peut être utilisée uniquement avec ces ventilateurs internes ou en ligne : Des ventilateurs internes sont fournis avec la hotte (pour les modèles HCB30/36/48). ● Des ventilateurs en ligne peuvent être achetés séparément (pour les modèles HC36/48). ●...
-
Page 50: Instructions D'installation
INSTRUCTIONS D’INSTALLATION Installation avec montage au mur Ligne centrale de la Après avoir déterminé la hauteur surface de cuisson d’installation de la hotte : Montants Au-dessus de la surface de cuisson, du mur Support tracez une ligne horizontale à une en bois distance correspondant à... - Page 51 INSTRUCTIONS D’INSTALLATION Sur le support en bois, marquez la distance entre les fentes de montage au mur ( dans la section ‘Dimensions du produit’) permettant de suspendre la hotte (reportez-vous à E). Percez deux trous de 1/8 po (3 mm) dans le support en bois et la cloison sèche (il n’est pas nécessaire de percer les montants) (reportez-vous à E).
- Page 52 INSTRUCTIONS D’INSTALLATION Installation avec montage à l’armoire Vous pouvez installer la hotte sous une armoire en la fixant par la partie supérieure. Pour l’installation avec montage à l’armoire, la transition doit être fixée après l’installation de la hotte; consultez les sections ‘Assemblage de la transition de conduit’ et ‘Dimensions du produit’.
- Page 53 INSTRUCTIONS D’INSTALLATION Installation du ventilateur interne (modèles HCB30/36/48 uniquement) Le ventilateur interne peut être installé comme illustré ci-dessous. Depuis l’intérieur de la hotte, desserrez les vis de 1/2 po (12,7 mm) servant à fixer la plaque du ventilateur à la hotte. Glissez la plaque du ventilateur vers vous et abaissez-la hors de la hotte. Fixez la plaque du ventilateur au ventilateur en utilisant les vis de 3/4 po (19 mm) fournies.
- Page 54 INSTRUCTIONS D’INSTALLATION Raccordement électrique MISE EN GARDE! Le câblage électrique doit être réalisé par une ou plusieurs personne(s) qualifiée(s), ● en conformité avec tous les codes et toutes les normes applicables, en veillant à ce que l’appareil soit mis à la terre. Interrompez l’alimentation au panneau électrique avant de procéder au câblage ●...
- Page 55 INSTRUCTIONS D’INSTALLATION Schéma de câblage...
-
Page 56: Instructions D'utilisation
INSTRUCTIONS D’UTILISATION Panneau de commande FONCTIONNALITÉS DU PANNEAU DE COMMANDE Commande de vitesse Permet de mettre en marche ou d’arrêter le ventilateur ● du ventilateur de la hotte. Permet de régler la vitesse à LOW, MED, HIGH ou MAX, ● selon les besoins. - Page 57 NETTOYAGE ET ENTRETIEN MISE EN GARDE! Avant de procéder à l’entretien ou au nettoyage de la hotte, interrompez ● l’alimentation au panneau de commande et déconnectez l’alimentation pour éviter la mise en marche accidentelle de la hotte. Avant de procéder à l’entretien, laissez l’appareil refroidir après l’interruption ●...
-
Page 58: Nettoyage Et Entretien
NETTOYAGE ET ENTRETIEN Pour retirer les plateaux à graisse : Saisissez le plateau à graisse et poussez sur celui-ci. Cela permet de dégager le plateau à graisse de la hotte. Soulevez le plateau à graisse vers le haut et hors du rail de la hotte. Pour réinstaller les plateaux à... - Page 59 ENTRETIEN Remplacement de l’ampoule IMPORTANT! Portez des gants pour vous protéger des rebords tranchants. ● NE TOUCHEZ PAS à l’ampoule pendant l’utilisation. Elle pourrait être suffisamment ● chaude pour causer des blessures. Remarque : Les ampoules de rechange ne sont pas couvertes par la garantie. Pour remplacer l’ampoule : Éteignez la hotte et laissez refroidir l’ampoule.
-
Page 60: Pièces Et Accessoires
PIÈCES ET ACCESSOIRES Pièces FP Pro Hood Fasteners ¾” OD x 3/16” ID #10-32 #10x 3” #8 x 3/4” ¼-20 x ½” M4 x8 Flat Washer Pan Head Countersunk Truss Head Pan Head Pan Head Pozi Drive Pozidrive Philips Drive Philips Drive Torx Drive Wall Plug... -
Page 61: Service Et Garantie
SERVICE ET GARANTIE Pour plus de détails sur la garantie du fabricant et les coordonnées pour le service, veuillez vous reporter au manuel d’entretien et de garantie distinct, fourni avec votre hotte. Remplir et conserver pour référence ultérieure : Modèle N° de série Date d’achat Acheteur Détaillant... - Page 62 FISHERPAYKEL.COM © Fisher & Paykel Appliances 2024. All rights reserved. The product specifications in this booklet apply to the specific products and models described at the date of issue. Under our policy of continuous product improvement, these specifications may change at any time. You should therefore check with your Dealer to ensure this booklet correctly describes the product currently available.
Need help?
Do you have a question about the HCB48-12 and is the answer not in the manual?
Questions and answers