Table of Contents
Advertisement
Quick Links
Advertisement
Table of Contents

Subscribe to Our Youtube Channel
Summary of Contents for Teltonika TAT141
- Page 1 TAT141 Quick Manual v1.3...
-
Page 2: Table Of Contents
How to install USB drivers (Windows) ................................5 Configuration ........................................6 Quick SMS configuration ....................................8 Mounting recommendations ..................................10 LED indications ......................................... 11 Basic characteristics ......................................11 Safety information ......................................13 Certification and Approvals .................................... 14 Warranty ........................................... 16 Warranty disclaimer......................................16 Quick Manual v1.3 // TAT141... -
Page 3: Know Your Device
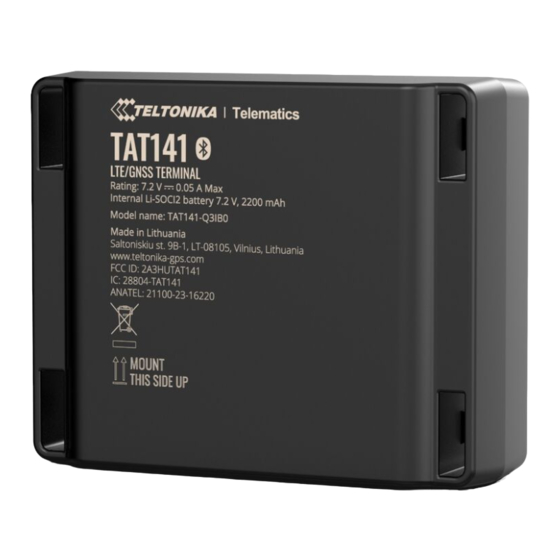
KNOW YOUR DEVICE ON/OFF MICRO-USB BATTERY BUTTON MICRO-SIM SLOT Quick Manual v1.3 // TAT141... -
Page 4: Set Up Your Device
Teltonika Configurator Page 5, “PC Connection Make sure that Micro-SIM (Windows)” card cut-off corner is pointing forward to slot. wiki.teltonika-gps.com/view/ TAT141_First_Start#Safety_ information wiki.teltonika.lt/view/Teltonika_ Configurator Quick Manual v1.3 // TAT141... -
Page 5: Pc Connection (Windows)
PC CONNECTION (WINDOWS) Power-up TAT141 device. LED should start blinking, see ‘’LED indications’’ Connect your device to computer using Micro-USB cable: • You will need to install USB drivers, see ‘’How to install USB Drivers (WINDOWS)“ You are now ready to use the device on your computer. -
Page 6: Configuration
CONFIGURATION At first TAT141 device will have default factory settings set. These settings should be changed according to the users needs. Main configuration can be performed via Teltonika Configurator software. Get the latest Configurator version from here . Configurator operates on Microsoft Windows OS and uses prerequisite MS .NET Framework. Make sure you have the correct version installed. - Page 7 Most important configurator section is GPRS – where all your server and GPRS settings can be configured and Data Acquisition – where data acquiring parameters can be configured. More details about TAT141 configuration using Configurator can be found in our Wiki wiki.teltonika-gps.com/view/TAT141_Status_info wiki.teltonika-gps.com/view/TAT141_Status_info#GNSS_Info wiki.teltonika-gps.com/view/TAT141_Status_info#GSM_Info wiki.teltonika-gps.com/view/TAT141_Status_info#I.2FO_Info wiki.teltonika-gps.com/view/TAT141_Status_info#Maintenance...
-
Page 8: Quick Sms Configuration
2003 – APN password (if there are no APN password, empty field should be left) SERVER SETTINGS: 2004 – Domain 2005 – Port 2006 – Data sending protocol (0 – TCP, 1 – UDP) Quick Manual v1.3 // TAT141... - Page 9 Save configuration to the device by clicking on a Save to device button; • Initiate connection by pressing the Test Connection button. At this point, TAT141 will create one high-priority record and initiate connection to the server immediately. If connection was not initiated, it can mean any of the following: •...
-
Page 10: Mounting Recommendations
2 - if last record had a valid GNSS fix, GNSS module will not be turned on and record will contain last good coordinates. We recommend mounting the TAT141 in such a way that the GNSS antenna is pointed at the sky and the device itself is not... -
Page 11: Led Indications
Transmit Power Class 3 for LTE-TDD: 23±2.7dBm Technology LTE CAT M1/NB-IoT/GSM/Bluetooth Class 3 for LTE-FDD: 23±2.7dBm Bluetooth LE: 6.6 dBm GNSS SMS (TEXT), Network protocols Data support (TCP,UDP) GNSS GPS, GLONASS, GALILEO, BEIDOU Receiver 33 channel Quick Manual v1.3 // TAT141... - Page 12 Configuration, Debug Cellular antenna Internal High Gain Time GNSS, NITZ, NTP Synchronization 2.0 Micro-USB CERTIFICATION & APPROVALS1 LED indication 1 status LED lights Micro-SIM Regulatory PTCRB, FCC, IC, AT&T Memory 128 MB internal flash memory 1 Pending Quick Manual v1.3 // TAT141...
-
Page 13: Safety Information
SAFETY INFORMATION This message contains information on how to operate TAT141 safely. By following these requirements and recommendations, you will avoid dangerous situations. Please read these instructions carefully and follow them strictly before operating the device! INTERFERENCE OPERATE THE DEVICE IN SUITABLE CONDITIONS... -
Page 14: Certification And Approvals
• This equipment has been tested and found any other antenna or transmitter. to comply with the limits for a Class B digital device, pursuant to part 15 of the FCC Rules. Quick Manual v1.3 // TAT141... - Page 15 Cet appareil de classe B est conforme à la norme canadienne ICES-003. IC: 28804-TAT141. équipement conforme limites d'exposition rayonnements ISED établies pour un environnement non contrôlé. Pour se conformer aux exigences de conformité d'exposition Quick Manual v1.3 // TAT141...
-
Page 16: Warranty
Warranty does not apply to any consequential damages. • Warranty is not applicable for supplementary product equipment (i. e. PSU, power cables, antennas) unless the accessory is defective on arrival. • More information on what is RMA wiki.teltonika-gps.com/view/RMA_guidelines Quick Manual v1.3 // TAT141...


Need help?
Do you have a question about the TAT141 and is the answer not in the manual?
Questions and answers