Table of Contents
Advertisement
Quick Links
Advertisement
Table of Contents

Related Manuals for Coltene CanalPro X-Move


Summary of Contents for Coltene CanalPro X-Move
- Page 1 CanalPro X - Move Instructions for Use – User Manual...
- Page 2 It is assumed that the operator is familiar with a root canal apex locator. Intended use The CanalPro X-Move is an endodontic motor, an electro-medical device designed to drive mechanical instruments intended for dental root canal treatment (endodontic files).
-
Page 3: Table Of Contents
Table of Contents 1. Product introduction .................. 5 1.1 Description of the device ....................5 1.2 Components and accessories ..................6 1.3 Technical specifications ....................7 1.5 Contraindications .......................8 1.6 Device safety classification .....................8 1.7 Environmental parameters .....................8 1.8 User qualification .......................8 1.9 Intended use ........................8 2. - Page 4 6.3 Step-by-Step Procedure for the motor handpiece, the AC adapter and the base ............................25 6.4 Step-by-Step Procedure for accessories (contra-angle, lip clip, file holder, touch probe) ............................26 7. Maintenance ......................28 7.1 Calibration.............................28 7.2 Lubrification of the contra-angle ..................28 7.3 Charging of the battery ......................28 7.4 Replacement of the battery ....................29 8.
-
Page 5: Product Introduction
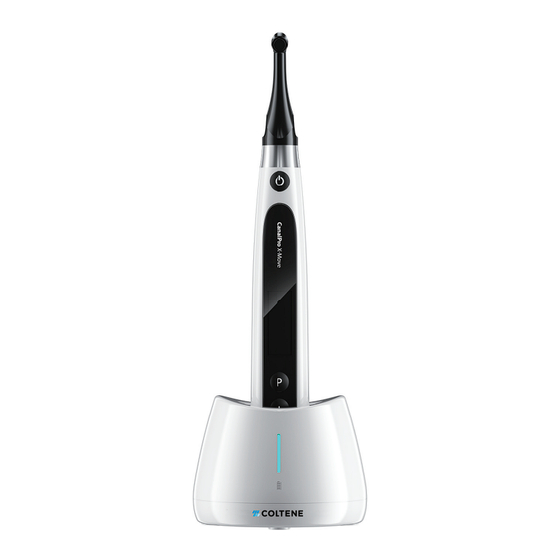
1. Product introduction 1.1 Description of the device The CanalPro X-Move is a cordless endodontic motor with an integrated root canal apex locator. It can be used as an endodontic motor for preparation of root canals and as an apex locator device to determine the root canal work- ing length. -
Page 6: Components And Accessories
1.2 Components and accessories Reference Designation Quantity Weight (g) COLTENE Motor handpiece 65002742 Charging base 65002743 Contra-angle 65002744 Spray nozzle 65002745 Measuring wire 65002747 File holder 65002748 Lip clip 65002749 Touch probe 65002750 "O"-ring < 1 65002751 Universal AC-Adapter 65002746 Battery 37.5... -
Page 7: Technical Specifications
1.3 Technical specifications a) Motor handpiece lithium battery specification 3.7V / 2000mAh b) Power adapter specification Input: ~100V-240V 50Hz/60Hz 0.4A max Output: DC5V/1A Plugs : type C, type A, type G and type I c) Motor handpiece mechanical specification Torque range: 0.4N.cm-5.0N.cm Speed range: 100rpm-2500rpm d) Wireless charging specification Frequency range: 112-205kHz... -
Page 8: Contraindications
It is assumed that the operator is familiar with a root canal apex locator. 1.9 Intended use a) The CanalPro X-Move is an endodontic motor, an electro-medical device designed to drive mechanical instruments intended for dental root canal treatment (endodontic files). -
Page 9: Device Setup Instructions
2. Device setup instructions 2.1 Contra-angle setup 2.1.1 Before the first use and after each treatment a) Clean and disinfect the contra-angle (refer to Chapter 6). b) Lubricate the contra-angle (refer to Chapter 7.2). c) Sterilize the contra-angle (refer to Chapter 6). 2.1.2 Warnings a) Use original contra-angle only. -
Page 10: File Setup
2.2 File setup 2.2.1 Warnings a) Make sure the instruments are compliant to ISO1797 standard (Shanks for rotary and oscillating instruments). b) Connecting and disconnecting files without holding down the Push button may damage the chuck of the contra-angle. c) Be careful when manipulating files to avoid injury to fingers. d) Make sure the file is well connected and locked before starting the motor handpiece. - Page 11 2.3 Apex locator setup 2.3.1 Warnings a) In Apex locator mode, the file holder must properly hold the file. b) In case of bad or wrong connection signal, replace the measuring wire. c) In apex locator mode it is suggested to install the motor handpiece in the charging base to get better visual angle.
- Page 12 2. Connect the lip clip to the white socket of the measuring wire. 3. Connect the file holder plug to the black socket of the measuring wire (this is not required in combined Motor and Apex locator mode). 2.3.3 Connection testing It is strongly recommended to check the connection quality before every use.
-
Page 13: Apex Locator Setup
3. Device Operation modes and display interface 3.1 Motor modes 3.1.1 CW Operation Mode (Clockwise continuous rotation mode) In this mode, the motor handpiece rotates in clockwise direction only (forward direction). 3.1.2 CCW Operation Mode (Counterclockwise continuous rotation mode) In this mode, the motor handpiece rotates in counterclockwise direction only (reverse direction). -
Page 14: Combined Motor And Apex Locator Operation Mode
Stand-by interfaces While the motor is not running, the display shows the actual settings of the motor. a. User Program (M0-M9) or COLTENE preset program (refer to Chapter 4.2) b. Battery level c. Set speed (rpm) d. Set torque limit (N.cm) e. -
Page 15: Device Operating Instructions
1. To power ON the device, press the Power button. The device enters directly in the Coltene File Systems. The Coltene File Systems are already preset in the device, in order to assist and facilitate the use, with pre-settings parameters according to Coltene recommen-... - Page 16 The fact that they are pre-programmed in this endo motor does not prejudge their registration. 2. To select the desired Coltene File System, press the Adjusting button “+”/“-” and press the Setting button “P” to confirm. 3. To select a file, press the Adjusting button “+”/“-” and press the Power button to confirm.
-
Page 17: Select User Programs
The device contains 10 memorized User Programs (M0-M9) and 5 preset/favorite Coltene File Systems available directly from the stand-by state. 1. Press the Setting button “P” to select a program from Coltene File Systems list 2. To select a program from the stand-by state, press the Adjusting button “+”/”-“. - Page 18 4.4.3 User Program parameters list Set Operation Mode Operation modes list: CW, CCW, REC, ATR, EAL (refer to Chapter 3 for modes description) Set Working Speed In continuous rotation modes (CW and CCW), the working speed can be adjusted from 100rpm to 2500rpm (50rpm increments).
- Page 19 Set Apical Action The Apical action applies when the file reaches the set apical reference point (refer to Flash Bar Position below) OFF: Disable Apical Action STOP: The motor stops automatically when the file reach- es the reference point. The motor restarts automatically when the file is pulled away from the reference point.
-
Page 20: Set Device Parameters
Set Apical Slow Down When the Apical Slow Down is activated, the motor slows down to a set final speed as the file tips approaches the apical reference point. The motor speed decreases starting from the position “3.0” of the file progression indication bar. - Page 21 2. To select the desired parameter, press Setting button “P” 3. To set the parameter, press the Adjusting button “+”/“-” and the Power button to confirm. 4.5.1 Device parameters list Auto Power OFF In stand-by state, the device automatically turns OFF after the set timer.
-
Page 22: Torque Overload Protection
4.6 Torque overload protection During operation, if the measured torque load exceeds the torque limit, the motor will automatically reverse the direction of rotation. The motor returns to initial Operation mode (CW) when the torque load goes back below the torque limit. - Page 23 Root canal with liquid overflowing from the opening Root canal with blood or any other liquid overflowing from the opening and in contact with the gingival tissue might disturb the electrical signal. Broken crown If the crown is broken and a section of the gingival tissue intrudes into the cavity surrounding the canal opening, the contact between the gingival tissue...
-
Page 24: Troubleshooting
5. Troubleshooting Failure Possible cause Solutions Device in EAL mode The motor handpiece Changing to CW, CCW, EAL mode is only for canal does not rotate. REC or ATR mode. measurement. The continuous beep There is a continuous Stop the motor handpiece sound is indicating that beep sound after starting and change the operating... -
Page 25: Step-By-Step Procedure For The Motor Handpiece, The Ac Adapter And The Base
d) Do not use chloride detergent materials. e) Do not use bleach or chloride disinfectant materials. f ) For your own safety, please wear personal protective equipment (gloves, glasses, mask). g) The user is responsible for the sterility of the product and of the instruments. h) The water quality must be compliant to the local regulations especially for the last rinsing step or with a washer-disinfector. -
Page 26: Step-By-Step Procedure For Accessories (Contra-Angle, Lip Clip, File Holder, Touch Probe)
Put the handpiece, charger, base and Storage other components back into the clean storage area 6.4 Step-by-Step Procedure for accessories (contra-angle, lip clip, file holder, touch probe) Operation Operating Mode Warning Remove accessories (contra-angle, lip clip, file Preparation holder, touch probe) from handpiece and base. - Page 27 - Check the validity period of the pouch given by the manufacturer to determine Pack the accessories the shelf life. (contra- angle, lip clip, file Packaging - Use packaging which is holder, touch probe) in resistant to a temperature up "Sterilization pouches".
-
Page 28: Maintenance
- Sterility cannot be guaran- teed if packaging is open, damaged, or wet. Keep the accessories - Check the packaging and (contra- angle, lip clip, file the contra-angle before use holder, touch probe) in (packaging integrity, no Storage sterilization packaging in humidity and a dry and clean environ- validity period). -
Page 29: Replacement Of The Battery
5. Connect the new battery and put it in the motor handpiece. 6. Replace the cover and the screw. 7.4.1 Warnings a) Use CanalPro X-Move battery only. b) It is recommended to contact local distributors to replace the battery. 8. Storage... -
Page 30: After Sales Service
11. After sales service a) This package does not include spare parts or accessories for repair servicing. b) The after sales service should be carried out by admitted personnel only. 12. Symbol instruction Follow Instructions for Serial number Date of manufacture Manufacturer Type B applied part Class II equipment... -
Page 31: Statement
Table 1: Guidance & declaration - electromagnetic emissions The model CanalPro X-Move is intended for use in the electromagnetic environ- ment specified below. The customer or the user of the model CanalPro X-Move should assure that it is used in such an environment. -
Page 32: Technical Description Concerning Electromagnetic Immunity
Table 2: Guidance & Declaration - electromagnetic immunity The model CanalPro X-Move is intended for use in the electromagnetic environ- ment specified below. The customer or the user of the model CanalPro X-Move should assure that It is used in such an environment. - Page 33 Table 3: Guidance & Declaration - electromagnetic immunity concerning Conducted RF & Radiated RF The model CanalPro X-Move is intended for use in the electromagnetic en- vironment specified below. The customer or the user of the model CanalPro X-Move should assure that it is used in such an environment.
- Page 34 To assess the electromagnetic environment due to fixed RF trans- mitters, an electromagnetic site survey should be considered. If the mea- sured field strength in the location in which the model CanalPro X-Move is used exceeds the applicable RF compliance level above, the model CanalPro X-Move should be observed to verify normal operation.
- Page 35 The model CanalPro X-Move is intended for use in electromagnetic environment in which radiated RF disturbances is controlled. The customer or the user of the model CanalPro X-Move can help prevent electromagnetic interference by maintaining a minimum distance between portable and...
- Page 36 Guilin Woodpecker Medical Instrument Co., Ltd. Information Industrial Park, Guilin National High-Tech Zone Guilin, Guangxi, 541004 P. R. CHINA Sales Dept.: +86-773-5873196 http://www.glwoodpecker.com E-mail: woodpecker@glwoodpecker.com EC REPRESENTATIVE MedNet EC-Rep GmbH Borkstrasse 10 48163 Muenster GERMANY CanalPro X-Move User Manual Version 1.0-06/04/2023 ZMN-SM-780 V1.0-20230414...
Need help?
Do you have a question about the CanalPro X-Move and is the answer not in the manual?
Questions and answers