Advertisement
Quick Links
Assembly Guide
1
Connect the motor with the display station ( ).
4
a
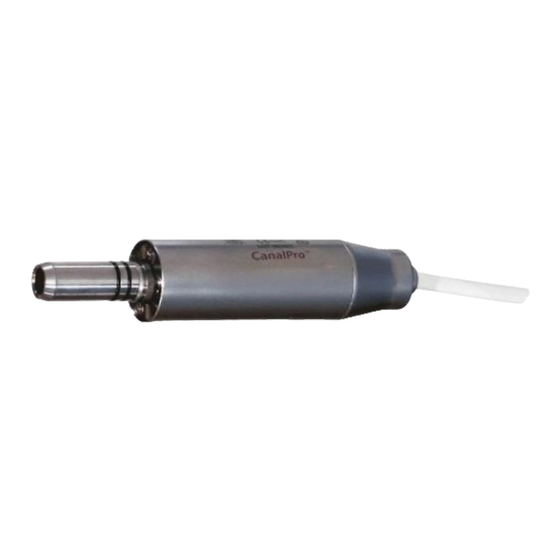
2
Connect the Contra-angle (Iso E-Connection) with
the Motor ( ) (Must not be rotated!).
3
3
4
c
b
e
5
Connect the Basic Unit to the power supply ( )
and check if the SD Card is placed in the SD Card
slot ( ) in the back of the basic unit
2
Set the footpad on the floor within working
distance of the basic unit.
Assemble the Apex locator set and insert it into
the Basic Unit ( ).
Apex locator cable set consisting of:
d
a – Measuring cable with plug
b – Lip clip
c – Cap for socket (for hygienic use of lip clip)
d – Cable for file clamp (if applicable)
e – File clamp (if applicable))
5
1
Advertisement

Related Manuals for Coltene Canal Pro


Summary of Contents for Coltene Canal Pro
- Page 1 Assembly Guide Connect the Basic Unit to the power supply ( ) and check if the SD Card is placed in the SD Card slot ( ) in the back of the basic unit Connect the Contra-angle (Iso E-Connection) with the Motor ( ) (Must not be rotated!).
- Page 2 Switch on the basic unit (On/Off Button First Steps For setting different languages or changes in volume for all sounds except Apex sounds click here. For using only the Apex locator press the For preparation, press the Preparation Apex Button. button.
- Page 3 Set your individual settings for sounds, volume and apex stop here. Click on this button for turning off the apex locator if wanted Before starting the root canal treatment select your needed file, adjust the lip clip and you are ready to start the procedure.
- Page 4 Doctor’s choice – setup In each file setup the Doctor’s choice mode different movement types, torque and speed levels can selected.
Need help?
Do you have a question about the Canal Pro and is the answer not in the manual?
Questions and answers