Logitech M505 User Manual
Hide thumbs
Also See for M505:
- Quick start manual (2 pages) ,
- Quick start manual (2 pages) ,
- Quick start manual (2 pages)
Table of Contents
Advertisement
Advertisement
Table of Contents

Related Manuals for Logitech M505


Summary of Contents for Logitech M505
- Page 1 Wireless Mouse M505 User Manual Chris Stuurman...
-
Page 2: Table Of Contents
Table of Contents Introduction ............................... 1 Setting up your mouse ..........................2 To power the mouse ........................2 To connect the mouse’s hardware to the computer ..............7 To install the mouse’s software on the computer ................ 9 Disconnecting and storing your mouse ..................... 12 To disconnect the transceiver from the computer ............... -
Page 3: Introduction
Introduction Congratulations on your purchase of the Wireless Mouse M505 (hereafter referred to as the “mouse”). This manual is intended to help you use your mouse and minimize the risk of damaging it. With the help of this manual’s information, your mouse can last for many years of use. -
Page 4: Setting Up Your Mouse
Setting up your mouse This major section is intended to aid you in using your mouse with your computer for the first time. Correct set-up is necessary to use the mouse with your computer. This major section includes three topics: to power the mouse, to connect the mouse to the computer, and to install the mouse’s necessary software. - Page 5 2. Press the battery hatch release slider. This will open the battery hatch. NOTE: The battery hatch release slider is spring-operated and will not hold in place after you release it. This is not a malfunction. 3. Turn the mouse over so that the battery hatch is accessible. This will allow you to open the battery hatch.
- Page 6 4. Open the battery hatch by applying pressure under the LASER logo and lifting away from the body of the mouse. This will allow you to access the battery compartments. CAUTION: If the battery hatch does not open easily, it may have locked back into place during handling of the mouse.
- Page 7 6. Replace the battery hatch and apply downward pressure to the LASER logo to lock it into place. You should hear a “click” when the hatch is locked into place. This will protect the internal components of the mouse and make the mouse more ergonomic during use. CAUTION: If the hatch does not lock into place easily, it may have been replaced incorrectly.
- Page 8 8. Set the on/off switch to the “ON” position. This will turn on the mouse and allow you to test whether the mouse is being powered. 9. Turn the mouse over until the on/off light is visible. Confirm that the on/off light is on. TIP: The on/off light automatically turns off after ten seconds, although the mouse is still being powered.
-
Page 9: To Connect The Mouse's Hardware To The Computer
To connect the mouse’s hardware to the computer This minor section is intended to aid you in connecting your mouse’s hardware to your computer. Your mouse’s hardware must be connected to your computer to function correctly. Each step of the process is accompanied by an image to aid comprehension. - Page 10 3. Turn over the mouse so that the on/off switch is visible. This will allow you to switch the mouse 4. Set the on/off switch to the “ON” position. This will turn on the mouse and allow it to transmit information to and from the computer.
-
Page 11: To Install The Mouse's Software On The Computer
7). This is required for the computer to apply the installed software to the mouse. 2. Using the computer, go to www.logitech.com/unifying. Scroll to the bottom of the page and click the Get Unifying software! button. This will load the page where you can download the... - Page 12 3. Once your computer has loaded the new page, select your operating system from the first drop- down menu on the left side of the page (see Fig. 1) and click the Download Software button (see Fig. 2). This will download the mouse’s necessary software to your computer’s hard drive and allow you to use the mouse with your operating system.
- Page 13 Start / All Programs / Logitech / Unifying / Logitech Unifying Software. 6. When the Unifying Software Program has started, follow its instructions. This will allow you to sync your mouse to your computer.
-
Page 14: Disconnecting And Storing Your Mouse
Disconnecting and storing your mouse This major section is intended to aid you in disconnecting your mouse from your computer. Properly following these instructions will allow you to disconnect and store your mouse while minimizing the risk of damaging it. If handled correctly, your mouse can last for many years. This section includes two topics: to disconnect the transceiver from the computer and to store the mouse’s transceiver. - Page 15 2. Set the on/off switch to the “OFF” position. This will allow the two (2) AA batteries to last longer before needing to be replaced. NOTE: It’s recommended to turn the mouse off whenever you’re not using it. This will allow the two (2) AA batteries to last longer before needing to be replaced.
-
Page 16: To Store The Mouse's Transceiver
To store the mouse’s transceiver You can store your mouse’s USB transceiver when you are not using your mouse. Following these instructions will allow you to store your USB transceiver while minimizing the risk of damage. Each step is accompanied by an image to aid comprehension. Storing your transceiver requires the mouse and the USB transceiver. - Page 17 2. Press the battery hatch release slider. This will open the battery hatch. NOTE: The battery hatch release slider is spring-operated and will not hold in place after you release it. This is not a malfunction. 3. Turn the mouse over so that the battery hatch is accessible. This will allow you to open the battery hatch.
- Page 18 4. Open the battery hatch by applying pressure under the LASER logo and lifting away from the body of the mouse. This will allow you to access the USB transceiver port. CAUTION: If the battery hatch does not open easily, it may have locked back into place during handling of the mouse.
- Page 19 6. Replace the battery hatch and apply downward pressure to the LASER logo to lock it into place. You should hear a “click” when the hatch is locked into place. This will protect the internal components of the mouse and make the mouse more ergonomic during use. CAUTION: If the hatch does not lock into place easily, it may have been replaced incorrectly.
-
Page 20: Appendix
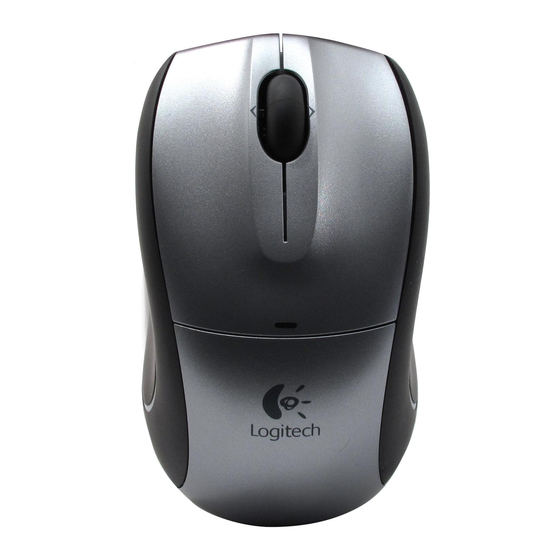
Appendix Your mouse’s important parts This section of the appendix is intended to allow you to correctly identify the parts of your mouse referenced by this manual. The important parts of your mouse are labeled in the following three images: the top of your mouse (Fig. 1), the underside of your mouse (Fig. -
Page 21: Troubleshooting
This section is aid you in diagnosing and treating performance problems with your mouse. Check this section if you are having trouble with your mouse. If the problem persists, or is not covered in this section, contact Logitech Customer Support at www.logitech.com/support. Problem Solution •...
Need help?
Do you have a question about the M505 and is the answer not in the manual?
Questions and answers