Table of Contents
Advertisement
Available languages
Available languages
Quick Links
Advertisement
Chapters
Table of Contents

Related Manuals for Grundig GTN 37250GC


Summary of Contents for Grundig GTN 37250GC
- Page 1 WASDROGER GEBRUIKER MANUEL GTN 37250 G www.grundig.com...
-
Page 2: Table Of Contents
INHOUDSOPGAVE 1 Gelieve deze 5 Voorbereiding gebruikershandleiding eerst te 5.1 Wasgoed dat in de droger kan lezen! worden gedroogd ....17 5.2 Wasgoed dat niet in de droger 2 Belangrijke milieu- en kan worden gedroogd ..... 17 veiligheidsinstructies 5.3 Wasgoed op het drogen 2.1 Algemene veiligheid .... -
Page 3: Gelieve Deze Gebruikershandleiding Eerst Te Lezen
Geachte klant, Dank u voor uw voorkeur van een Grundig product. We hopen dat uw product, dat geproduceerd werd met hoge kwaliteit en technologie, u de beste resultaten geeft. We adviseren u deze handleiding en de andere meegeleverde documentatie grondig door te lezen voor u het product voor het eerst gebruikt en deze bij te houden voor later gebruik. -
Page 4: Belangrijke Milieu- En Veiligheidsinstructies
2. Belangrijke milieu- en veiligheidsinstructies Deze sectie bevat veiligheidsinformatie die zal helpen om de risico's op persoonlijk letsel of materiële schade te beperken. Indien deze instructies niet worden opgevolgd, vervalt de garantie. 2.1 Algemene veiligheid • De wasdroger kan worden gebruikt door kinderen van 8 jaar of ouder en door personen met beperkte of niet volledig ontwikkelde vaardigheden of met gebrek aan ervaring en kennis, mits zij onder toezicht staan of instructies hebben... -
Page 5: Elektrische Beveiliging
2.1.1 Elektrische beveiliging Bij de elektrische aansluiting tijdens de installatie moeten elektrische veiligheidsinstructies worden opgevolgd. Het apparaat mag niet van stroom worden voorzien via een extern schakelmechanisme zoals een timer. Het mag ook niet worden aangesloten op een circuit dat regelmatig wordt in- of uitgeschakeld. -
Page 6: Productbeveiliging
Het erkende servicebedrijf moet op de hoogte worden gebracht bij het vervangen van beschadigde stroomkabels. Als de wasdroger defect is, mag het niet worden gebruikt tenzij het door een erkend servicebedrijf is gerepareerd! U kunt een elektrische schok krijgen! 2.1.2 Productbeveiliging Punten waar in verband met brandgevaar rekening mee gehouden dient te worden: Hieronder vermeld wasgoed of items moeten niet... - Page 7 Hieronder vermeld wasgoed of items moeten in verband met brandgevaar niet in de wasdroger worden gedroogd: • Kleding of kussens gevuld met schuimrubber (la- texschuim), douchemutsen, waterproof textiel, materiaal met rubberen versterking en rubberen schuimkussentjes. • Kleding dat met industriële chemicaliën is gerei- nigd.
-
Page 8: Montage Bovenop Een Wasmachine
• Probeer nooit om de wasdroger zelf te repareren. Voer geen herstelling- of vervangingshandelingen uit op het product, ook al bent u in staat om deze uit te voeren, tenzij dit du- idelijk in de bedieningsinstructies of de handleiding staat aangegeven. -
Page 9: Bedoeld Gebruik
IInstallatietabel voor wasmachine en wasdroger Diepte wasmachine Diepte wasdroger 62 cm 60 cm 54 cm 50 cm 49 cm 45 cm 40 cm Kan worden 54 cm Kan worden geïnstalleerd Kan niet geïnstalleerd worden Kan niet worden geïnstalleerd 60 cm Kan worden geïnstalleerd geïnstalleerd 2.3 Bedoeld gebruik... -
Page 10: Voldoet Aan De Weee-Regelgeving En De Afvoer Van Afvalproducten
2.5 Voldoet aan de WEEE-regelgeving en de afvoer van afvalproducten Dit product voldoet aan de EU-richtlijn WEEE (2012/19/ EU). Dit product is voorzien van een classificatiesymbool voor afvalsortering van elektrische en elektronische apparatuur (WEEE). Dit product werd vervaardigd uit onderdelen en materialen van hoge kwaliteit die hergebruikt kunnen worden en geschikt zijn voor reclycling. -
Page 11: Technische Specificaties
2.8 Technische specificaties Hoogte (Min. / Max.) 84,6 cm / 86,6 cm* Breedte 59,5 cm Diepte 59,8 cm Capaciteit (max.) 7 kg** Netto gewicht (bij gebruik van 51,5 kg plastic voordeur) Netto gewicht (bij gebruik van 53,5 kg glazen voordeur) Voltage Aangeduid gebruikt vermogen Zie typeplaatje***... -
Page 12: Uw Droger
3. Uw droger 3.1 Inhoud verpakking 1. Waterafvoerslang * 2. Filterlade reserve spons * 3. Gebruikershandleiding 4. Droogmand* 5. Gebruikershandleiding droogmand*... -
Page 13: Installatie
4. Installatie 4.1 Geschikte installatieplaats • Installeer de droger op een Voordat u de dichtstbijzijnde Erkende stabiel en vlak oppervlak. Service belt voor de installatie van • De wasdroger is zwaar. Verplaats de droger, zorg ervoor zorgen dat hem zelf niet. de elektrische installatie en de •... -
Page 14: Verwijderen Van De Transportbeveiliging
4.2 Verwijderen van de • Laat, bij installatie onder een aanrecht of in een kast, minstens een transportbeveiliging ruimte van 3 cm tussen de zijwanden Voordat u het product en achterwand van het product. voor de eerste keer gebruikt moet u de 4.4 Aansluiten op de afvoer transportbeveiliging In producten, die zijn uitgerust met... -
Page 15: Verstellen Van De Pootjes
4.5 Verstellen van de pootjes Om te garanderen dat de droger stiller en trillingsvrij werkt, moet deze waterpas en evenwichtig op zijn pootjes staan. Zet de machine in evenwicht door de poten aan te passen. Draai de pootjes naar links of rechts totdat de droger waterpas en stevig staat. -
Page 16: Transport Van De Droger
4.7 Transport van de droger Het tijdens de werking Trek de stekker uit het stopcontact opgevangen water wordt voordat u de droger vervoert. naar de watertank gepomp. Het is normaal dat u tijdens Voer al het water af dat in de droger dit proces pompgeluiden is gebleven. -
Page 17: Voorbereiding
5. Voorbereiding 5.1 Wasgoed dat in de droger kan worden gedroogd Volg altijd de instructies op de kledinglabels op. Droog in deze wasdroger enkel wasgoed met een label waarop staat dat het geschikt is om te worden gedroogd in een wasdroger en zorg ervoor dat u het juiste programma selecteert. -
Page 18: Correcte Laadcapaciteit
• Volg de instructies in de Het is niet aanbevolen gebruikershandleiding voor de wasdroger te laden programmaselectie. met meer wasgoed dan • Open de deur van de machine het niveau dat in de niet tijdens het drogen, tenzij het afbeelding is aangegeven. noodzakelijk is. -
Page 19: Het Product Bedienen
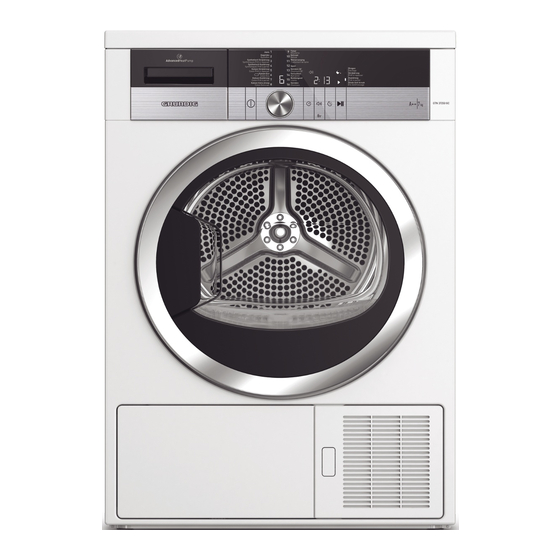
6 Het product bedienen 6.1 Bedieningspaneel 1. Knop Aan/Uit/Annuleren 2. Programmanummer indicator 3. Scherm 4. Start/Pauze knop 5. Eindtijd instelling selectieknop 6. Geluidswaarschuwing niveau/Kinderslot knop 7. Timer programma’s selectieknop 8. Programma selectieknop 6.2 Schermsymbolen Resterende duur indicator* Filterlade reiniging waarschuwingssymbool Filter reiniging waarschuwingssymbool Geluidswaarschuwingssymbool Kinderslot waarschuwingssymbool... -
Page 20: De Machine Voorbereiden
6.3 De machine voorbereiden Normaal wasgoed (bijv. 1. Voer de stekker van de machine tafellakens, ondergoed) in het stopcontact wordt zodanig gedroogd 2. Plaats uw wasgoed in de dat het niet gestreken Kastdroog machine. moet worden voor u het Plus 3. - Page 21 De extra programma’s Er kan een beetje vocht kunnen variëren in aanwezig zijn op de hemden overeenstemming met aan het einde van het de specificaties van uw programma. We raden aan machine. de hemden niet in de droger te laten. •...
- Page 22 Het wordt aanbevolen een stoffen zak te gebruiken om te voorkomen dat delicate kledingstukken en wasgoed gekreukt of beschadigd worden. Verwijder uw wasgoed onmiddellijk uit de droger en hang het op aan het einde van het programma om kreuken te vermijden.
- Page 23 6.7 Programmaselectie en verbruikstabel Capaciteit Centrifugeersnelheid Hoeveelheid resterende Droogtijd Programma’s (kg) in wasmachine (tpm) vochtigheid bij benadering (minuten) Katoen/Gekleurde was A Extra droog 1000 % 60 A Kastdroog 7 / 3,5 1000 % 60 127 / 77 A Strijkdroog 1000 % 60 Hemden 30’...
-
Page 24: Secundaire Functies
6.8 Secundaire functies Als het Filter reinigen Geluidswaarschuwing symbool continu ingeschakeld is, moet u de De machine geen een “Probleemoplossen” sectie geluidswaarschuwing als het raadplegen. programma afloopt. Gebruik de knop Geluidswaarschuwing niveau om het geluidniveau aan te passen. U kunt het geluidsniveau wijzigen voor de start van Waterreservoir het programma of tijdens... -
Page 25: Het Programma Starten
De Eindtijd functie annuleren 1. Open de deur en plaats uw wasgoed in de machine. Als u de Eindtijd aftelling wilt 2. Selecteer het droogprogramma, annuleren en het programma de centrifugeersnelheid opnieuw wilt starten: en, indien noodzakelijk, de 1. Druk op de Aan/Uit/Annuleren secundaire functies. -
Page 26: Het Programma Wijzigen Nadat Het Gestart Is
2. Selecteer het Extra droog Het Slot symbool verschijnt programma met de knop op het scherm wanneer het Programmaselectie. Kinderslot ingeschakeld is. 3. Druk op de knop Start/Pauze om het programma te starten. Wasgoed toe te voegen en te verwijderen in de Pauze modus. Om wasgoed toe te voegen of te verwijderen na de start van het droogprogramma:... -
Page 27: Het Programma Annuleren
6.14 Einde van het programma Als u een nieuw programma De Pluizenfilter reinigen selecteert met de en Waterreservoir Programmaselectie waarschuwingssymbolen lichten op knop terwijl uw machine in de programma opvolging indicator in de Pauze modus aan het einde van het programma. staat, wordt het huidige De deur kan worden geopend de programma onderbroken... -
Page 28: Onderhoud En Reiniging
7. Onderhoud en reiniging Levensduur van het product wordt verlengd en veelvoorkomende problemen verminderen indien het regelmatig wordt gereinigd. 7.1 Pluisfilter / Binnenkant vuldeur reinigen De pluizen en vezels die vrijkomen van het wasgoed in de lucht tijdens • Op de pluisfilterporieën kan, de droogcyclus, worden verzameld in na uw machine enige tijd te de "pluisfilter". -
Page 29: De Sensoren Reinigen
7.2 De sensoren reinigen Er bevinden zich vochtigheidssensoren in de droger 7.3 Leeg het waterreservoir die detecteren wanneer het wasgoed De vochtigheid van het wasgoed droog is of niet. wordt verwijderd en gecondenseerd Het reinigen van de sensoren: tijden het droogproces en het •... -
Page 30: De Filterlade Reinigen
7.4 De filterlade reinigen Afwateren van het waterreservoir: Pluizen en vezels die niet door het • Trek de lade open en verwijder pluizenfilter werden opgevangen, het waterreservoir voorzichtig zijn geblokkeerd in de filterlade achter de beschermingsplaat. Het waarschuwingssymbool Filterladereiniging gaat om u eraan te helpen herinneren maximaal elke 5 droogcycli branden. - Page 31 • Open de filterlade door op de • Was de filterladespons met de rode knop te drukken. hand om de vezels en pluizen van het oppervlak te verwijderen. Wring de spons na het wassen met de hand uit om het overtollige water te verwijderen.
-
Page 32: De Verdamper Reinigen
7.5 De verdamper reinigen • Plaats de beschermplaat terug. Reinig de op de verdamperflappen verzamelde pluizen, die zich achter de filterlade bevinden, met een stofzuiger. Het drogen zonder de geplaatste filterladespons zal uw machine beschadigen! Een vuil pluisfilter en filterlade zullen langere droogduur en hoger energieverbruik veroorzaken. -
Page 33: Probleemoplossen
8 Probleemoplossen Het droogproces duurt lang. • Openingen in de pluizenfilter is verstopt. >>> Was de pluizenfilter met warm water. • De filterlade is verstopt. >>> Reinig de spons en de filterdoek in de filterlade. • Het ventilatierooster vooraan in de machine is verstopt. >>> Verwijder de objecten (indien aanwezig) die de ventilatie verhinderen vooraan in het ventilatieroosters. - Page 34 • De deur is mogelijk niet correct gesloten. >>> Duw op de deur tot u het sluitend geluid hoort. • Er is mogelijk een stroompanne geweest. >>> Druk op de knop Start/ Pauze om het programma te starten. • Waterreservoir kan vol zijn. >>> Maak het waterreservoir leeg. Het wasgoed is gekrompen, gevilt of beschadigd.
- Page 35 DRYER USER MANUAL www.grundig.com...
- Page 36 TABLE OF CONTENTS 1 Please read this user manual 5 Preparation first 5.1 Laundry suitable for drying in the dryer ........50 2 Important instructions for 5.2 Laundry not suitable for safety and environment drying in the dryer ....50 2.1 General safety ....
-
Page 37: Please Read This User Manual First
1. Please read this user manual first! Dear Customer, Thank you for prefering a Grundig product. We hope that your product which has been manufactured with high quality and technology will give you the best results. We advise you to read through this manual and the other accompanying documentation carefully before using your product and keep it for future reference. -
Page 38: Important Instructions For Safety And Environment
2. Important instructions for safety and environment This section contains safety instructions that will help protect from risk of personal injury or property damage. Failure to follow these instructions shall void any warranty. 2.1 General safety • The dryer can be used by children at and above 8 years old and by persons whose physical, sensory or mental capabi- lities were not fully developed or who lack experience and knowledge provided that they are supervised or trained on... -
Page 39: Electrical Safety
2.1.1 Electrical safety Electrical safety instructions should be followed while electrical connection is made during the installation. The appliance must not be supplied through an external switching device, such as a timer,or connected to a circuit that is regularly switched on and off by utility. •... -
Page 40: Product Safety
2.1.2 Product safety Points to be taken into consideration for fire hazard: Below specified laundry or items must not be dried in the dryer considering fire hazard. • Unwashed laundry items • Items soiled with oil, acetone, alcohol, fuel oil, ke- rosene, stain removers, turpentine, paraffin or pa- raffin removers must be washed in hot water with plenty of detergent before being dried in the dryer. - Page 41 Underwear that contains metal reinforcements should not be dried in the dryer. Dryer may be damaged if metal reinforcements come loose and break off during drying. Use softeners and similar products in accordance with the instructions of their manufacturers. Always clean the lint filter before or after each loading. Never operate the dryer without the lint filter installed.
-
Page 42: Mounting Over A Washing Machine
2.2 Mounting over a washing machine • A fixing device should be used between the two machines when installing the dryer above a washing machine. The fitting device must be installed by the authorized service agent. • Total weight of the washing machine and the dryer -with full load- when they are placed on top of each other reaches to approx. -
Page 43: Child Safety
2.4 Child safety • Packaging materials are dangerous for the children. Keep packaging materials away from children. • Electrical products are dangerous for the children. Keep children away from the product when it is operating. Do not let them tamper with the dryer. Use the child-proof lock in order to prevent the children to tamper with the dryer. -
Page 44: Technical Specifications
2.8 Technical Specifications Height (Min. / Max.) 84,6 cm / 86,6 cm* Width 59,5 cm Depth 59,8 cm Capacity (max.) 7 kg** Net weight (plastic front door usage) 51,5 kg Net weight (glass front door usage) 53,5 kg Voltage Rated power input See type label*** Model code * Min. -
Page 45: Your Dryer
3. Your Dryer 3.1 Package Contents 1. Water drain hose * 2. Filter drawer spare sponge* 3. User Manual 4. Drying basket* 5. Drying basket user manual*... -
Page 46: Installation
4. Installation block the opening of the loading door in the place where your Before the calling the nearest dryer is to be installed. Authorized Service for the • Once the dryer is installed, it installation of the dryer, ensure that should stay at the same place electrical installation and water drain where its connections have been... -
Page 47: Under Counter Installation
should drain accumulated water after each drying cycle. You can directly drain accumulated water through the water drain hose supplied with the product instead of periodically draining the water collected in the water tank. Check that no part of Connecting the water drain hose the transportation safety assembly remains inside 1-2 Pull hose at the behind of the... -
Page 48: Adjusting The Feet
We recommend carrying Water drain hose should the dryer in upright be attached to a height of position. If it is not possible maximum 80 cm. to carry the machine in Make sure that the water the upright position, we drain hose is not stepped on recommend carrying it by and it is not folded between... -
Page 49: Changing The Illumination Lamp
4.9 Changing the illumination lamp In case an illumination lamp is used in your laundry dryer To change the Bulb/LED used for illumination of your tumble dryer, call your Authorized Service. The lamp(s) used in this appliance is not suitable for household room illumination. -
Page 50: Preparation
5. Preparation 5.1 Laundry suitable for drying in the dryer • Always obey the instructions given on the garment tags. Dry only the laundry having a label stating that they are suitable for drying in a dryer and make sure that you select the appropriate programme. LAUNDRY DRYING SYMBOLS Drying Suitable for... -
Page 51: Correct Load Capacity
• Follow the instructions in the It is not recommended user manual for programme to load the dryer with selection. laundry exceeding the level • Do not open the loading door of indicated in the figure. the machine during drying unless Drying performance will necessary. -
Page 52: Maintenance And Cleaning
6. Operating the product 6.1 Control panel 1. On/Off/Cancel button 2. Programme number indicator 3. Display 4. Start / Pause button 5. End time setting selection button 6. Audio warning level / Child lock button 7. Timer programmes selection button 8. -
Page 53: Preparing The Machine
6.3 Preparing the machine Normal laundry (E.g.: 1. Plug in the machine. tablecloths, underwear) 2. Place the laundry in the are dried in a way that machine. Cupboard they do not require 3. Press the On/off/cancel button Dry Plus ironing before placing in for 1 second (long). - Page 54 • Bedding • Sport Dry fiber quilts with ‘machine- Use this programme to dry together dryable’ label only. Make sure you are the synthetic and cotton laundry loading the quilt in the correct way items and the laundry items made of to avoid damages on the machine mixed fabrics.
- Page 55 • Refresh Only ventilation is performed for 10 minutes without blowing hot air. You can air the clothes that have been kept in closed environments for a long time and deodorize unpleasant odours thanks to this programme. • Timer programmes You can select one of the 10 min., 20 min., 30 min., 40 min., 50 min., 60 min., 80 min., 100 min., 120 min., 140...
-
Page 56: Programme Selection And Consumption Table
6.7 Programme selection and consumption table Capa- Spin speed in washing Approximate amount of remai- Drying time Programmes city (kg) machine (rpm) ning humidity (minutes) Cottons / Coloreds Extra dry 1000 % 60 Cupboard dry 7 / 3,5 1000 % 60 127 / 77 Iron dry 1000... -
Page 57: Auxiliary Functions
6.8 Auxiliary functions Audio Warning The machine will give an audio warning when the programme comes Water tank to an end. Use the Audio Warning Level button to adjust the sound When the programme is completed, level. a warning symbol will appear to remind that the water tank needs to You can change the sound be drained. -
Page 58: Starting The Programme
3. Press End Time Setting selection Cancelling End Time function button to set the desired End If you want to cancel the End Time Time Setting symbol lights up countdown and start the programme on the display.(When the button immediately: is pressed and hold, End Time 1. -
Page 59: Changing The Programme After It Has Started
Adding / removing laundry in Pause mode In order to add or take out laundry after the drying programme has started: 1. Press Start/Pause button to switch the machine to Pause Child Lock is deactivated mode. Drying process will stop. when the machine is 2. -
Page 60: Cancelling The Programme
6.14 End of programme CAUTION: Do not touch the Lint Filter Cleaning and Water Tank inner surface of the drum warning symbols light up in the when adding or taking out programme follow-up indicator when laundry while a programme the programme comes to an end. The is running. -
Page 61: Maintenance And Cleaning
7. Maintenance and cleaning Service life of the product extends and frequently faced problems decrease if cleaned at regular intervals. CAUTION: Unplug the product from the mains during any maintenance and cleaning works (control A layer can build up on the panel, body, etc.). -
Page 62: Cleaning The Sensors
7.3 Draining the water tank Dampness of the laundry is removed and condensed during drying process and the water that arise accumulates in the water tank. Drain the water tank after each drying cycle. CAUTION: Condensed water is not drinkable! 7.2 Cleaning the sensors There are dampness sensors in the CAUTION: Never remove... -
Page 63: Cleaning The Filter Drawer
3. If there is lint accumulation in the 3. Pull out the filter drawer. funnel of the water tank, clean it under running water. 4. Place the water tank into its seat. 7.4 Cleaning the filter drawer Lint and fiber that could not be captured by the lint filter are blocked in the filter drawer behind the kick plate. - Page 64 7. Wash the filter drawer sponge by 11.Close the kick plate cover. hand to remove the fiber and lint on the surface. After washing the sponge, squeeze it by hand and remove the excess water. It is not necessary to clean the sponge if lint and fiber accumulation on it is not significant.
-
Page 65: Cleaning The Evaporator
7.5 Cleaning the evaporator Clean the lint accumulated on the fins of the evaporator located behind the filter drawer with a vacuum cleaner. CAUTION: You can also clean by hand provided that you wear protective gloves. Do not attempt to clean with bare hands. -
Page 66: Troubleshooting
8. Troubleshooting Drying process takes too much time. • Pores of the lint filter are clogged. >>> Wash the lint filter with warm water. • Filter drawer is clogged. >>> Clean the sponge and the filter cloth in the filter drawer. •... - Page 67 Programme is interrupted without any cause. • The loading door might not be closed securely. >>> Push the loading door to close until you hear a locking sound. • A power failure might have occurred. >>> Press Start / Pause button to start the programme.
- Page 68 Document Number 2960311101_EN/ 281116.1718...
Need help?
Do you have a question about the GTN 37250GC and is the answer not in the manual?
Questions and answers