Table of Contents
Advertisement
Available languages
Available languages
Quick Links
Advertisement
Chapters
Table of Contents

Subscribe to Our Youtube Channel
Related Manuals for Grundig GTN 38250 MGC


Summary of Contents for Grundig GTN 38250 MGC
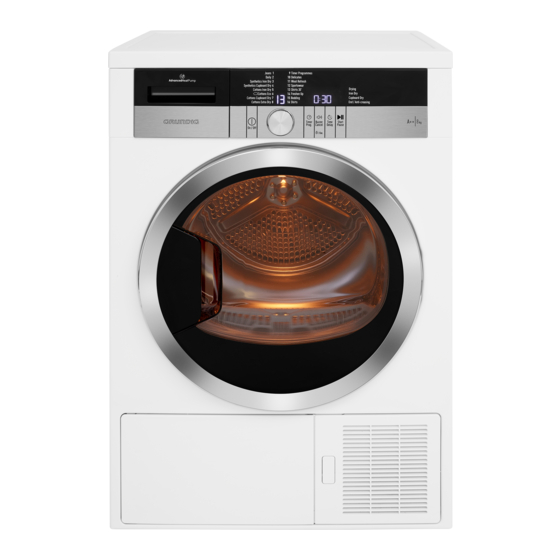
- Page 1 DRYER USER INSTRUCTIONS GTN 38250 MGC www.grundig.com...
-
Page 2: Table Of Contents
5 Preparation ......16 TABLE OF CONTENTS 5.1 Laundry suitable for drying in 1 Please read this user manual the machine ... . . 16 first ........3 5.2 Laundry unsuitable for drying 2 Important instructions for in the machine . -
Page 3: Please Read This User Manual First
1. Please read this user manual first! Dear Customer, Thank you for preferring an Grundig product. We hope that your product which has been manufactured with high quality and technology will give you the best results. We advise you to read through this manual and the other accompanying documentation carefully before using your product and keep it for future reference. -
Page 4: Important Instructions For Safety And Environment
2. Important instructions for safety and environment This section contains safety instructions that will help protect from risk of personal injury or property damage. Failure to follow these instructions shall void any warranty. 2.1 General safety • The dryer can be used by children at and above 8 years old and by persons whose physical, sensory or mental capabilities were not fully developed or who lack experience and knowledge provided that they are supervised or trained on the safe usage... -
Page 5: Electrical Safety
2.1.1 Electrical safety Electrical safety instructions should be followed while electrical connection is made during the installation. The appliance must not be supplied through an external switching device, such as a timer,or connected to a circuit that is regularly switched on and off by utility. •... -
Page 6: Product Safety
2.1.2 Product safety Superheating of the clothes inside of the dryer can occur if you cancel the programme or in the event of a power failure whilst the dryer is running, this concentration of heat can cause self-combustion and fire so always activate the ventilation programme to cool down or quickly remove all laundry from the dryer in order to hang them up and dissipate the heat. - Page 7 • You must provide enough ventilation in order to prevent gases exiting from devices operating with other types of fuels including the naked flame from accumulating in the room due to the back fire effect. Underwear that contains metal reinforcements should not be dried in the dryer.
-
Page 8: Mounting Over A Washing
2.2 Mounting over a washing machine • A fixing device should be used between the two machines when installing the dryer above a washing machine. The fitting device must be installed by the authorized service agent. • Total weight of the washing machine and the dryer -with full load- when they are placed on top of each other reaches to approx. -
Page 9: Child Safety
2.4 Child safety • Packaging materials are dangerous for the children. Keep packaging materials away from children. • Electrical products are dangerous for the children. Keep children away from the product when it is operating. Do not let them tamper with the dryer. Use the child-proof lock in order to prevent the children to tamper with the dryer. -
Page 10: Technical Specifications
2.8 Technical Specifications Height (Min. / Max.) 84,6 cm / 86,6 cm* Width 59,7 cm Depth 57,8 cm Capacity (max.) 8 kg** Net weight (± 4 kg) 46 kg Width Voltage See type label*** Rated power input * Min. height: Height with adjustable feet are closed. Max. -
Page 11: Your Dryer
3. Your Dryer 3.1 Package Contents 1. Water drain hose * 2. Filter drawer spare sponge* 3. User Manual* 4. Drying basket* 5. Drying basket user manual* *It can be supplied with your machine depending on its model. -
Page 12: Installation
4. Installation block the opening of the loading door in the place where your Before the calling the nearest dryer is to be installed. Authorized Service for the • Once the dryer is installed, it installation of the dryer, ensure that should stay at the same place electrical installation and water drain where its connections have been... -
Page 13: Under Counter Installation
connected. Do not use any tools Check that no part of to remove the hose. the transportation safety assembly remains inside 3 Connect one end of the drain the drum. hose supplied with the dryer to the connection point from where 4.3 Under counter installation you removed the hose of the •... -
Page 14: Adjusting The Feet
4.5 Adjusting the feet 4.8 Warnings about sounds In order to ensure that the dryer It is normal to hear a operates more silently and vibration- metallic noise from the free, it must stand level and balanced compressor sometimes on its feet. Balance the machine by during operation. -
Page 15: Changing The Illumination
4.9 Changing the illumination lamp In case an illumination lamp is used in your laundry dryer.To change the Bulb/LED used for illumination of your tumble dryer, call your Authorized Service. The lamp(s) used in this appliance is not suitable for household room illumination. -
Page 16: Preparation
5. Preparation 5.1 Laundry suitable for drying in the dryer Always obey the instructions given on the garment tags. Dry only the laundry having a label stating that they are suitable for drying in a dryer and make sure that you select the appropriate programme. LAUNDRY DRYING SYMBOLS Drying Suitable for... -
Page 17: Correct Load Capacity
• Follow the instructions in the It is not recommended user manual for programme to load the dryer with selection. laundry exceeding the level • Do not open the loading door indicated in the figure. of the machine during drying Drying performance will unless necessary. -
Page 18: Operating The Product
6. Operating the product 6.1 Control panel 1. On/Off/Cancel button 2. Programme number indicator 3. Display 4. Start / Pause button 5. End time setting selection button 6. Audio warning level / Child lock button 7. Timer programmes selection button 8. -
Page 19: Preparing The Machine
6.3 Preparing the machine Normal laundry (E.g.: 1. Plug in the machine. tablecloths, underwear) 2. Place the laundry in the are dried in a way that machine. Cupboard they do not require 3. Press the On/off/cancel button Dry Plus ironing before placing in for 1 second (long). - Page 20 • Bedding completely. Take out and ventilate Dry fiber quilts with ‘machine- the laundry immediately after the dryable’ label only. Make sure you are programme is over. • Daily loading the quilt in the correct way to avoid damages on the machine This programme is used to dry and the quilt.
- Page 21 Programme selection and consumption table Approximate Spin speed in washing amount of Drying time Programs Capacity (kg) machine (rpm) remaining (minutes) humidity Cottons / Coloreds Extra dry 1000 % 60 Cupboard dry 8 / 4 1000 % 60 197 / 115 Iron dry 1000 % 60...
-
Page 22: Auxiliary Functions
6.7 Auxiliary functions Water tank Audio Warning When the programme is completed, The machine will give an audio a warning symbol will appear to warning when the programme comes remind that the water tank needs to to an end. Use the Audio Warning be drained. -
Page 23: Starting The Programme
6.10 Child Lock Additional laundry may be Machine is equipped with a Child loaded / taken out during the Lock which prevents interfering End Time period. At the end with the current programme flow of the End Time countdown by pressing any button. All buttons process, End Time symbol except the On/Off/Cancel button on disappears, drying process... -
Page 24: Changing The Programme
6.11 Changing the programme You may repeat laundry after it has started adding or removing process After the machine starts, you can as many times as you desire change the selected programme during drying. However, and dry your laundry in a different this process will increase programme. -
Page 25: End Of Programme
6.13 End of programme Lint Filter Cleaning and Water Tank warning symbols light up in the programme follow-up indicator when the programme comes to an end. The loading door can be opened and the machine becomes ready for a second cycle. -
Page 26: Maintenance And Cleaning
7. Maintenance and for a while. Wash the lint filter with warm water to remove the cleaning layer that builds up on the lint filter surface. Dry the lint filter Service life of product extends and completely before reinstalling it. frequently experienced problems will be reduced if it is cleaned at regular intervals. -
Page 27: Cleaning The Sensors
7.2 Cleaning the sensor 7.3 Draining the water tank There are dampness sensors in the Dampness of the laundry is removed dryer that detect whether the laundry and condensed during drying process is dry or not. and the water that arise accumulates To clean the sensors: in the water tank. -
Page 28: Cleaning The Filter Drawer
• If there is lint accumulation in • Pull out the filter drawer. the funnel of the water tank, clean it under running water. • Place the water tank into its seat. If the direct water draining is used as an option, there is no need to empty the water tank. - Page 29 • Place the sponge back into its • Place the filter drawer back into place. its place, turn the filter drawer cover in the arrow direction and close it securely. Please place the sponge carefully inside the frame of the filter cassette shown •...
-
Page 30: Cleaning The Evaporator
7.5 Cleaning the evaporator Clean the lint accumulated on the fins of the evaporator located behind the filter drawer with a vacuum cleaner. CAUTION: You can also clean by hand provided that you wear protective gloves. Do not clean the evaporator with bare hands. -
Page 31: Troubleshooting
8 Troubleshooting Drying process takes too much time. • Pores of the lint filter are clogged. >>> Wash the lint filter with warm water. • Filter drawer may be blocked>>>clean the foam inside the filter drawer. • Ventilation grids on the front side of the machine are blocked. >>> Remove the objects (if any) that block ventilation in front of the ventilation grids. - Page 32 Laundry has shrunk, become felted or deteriorated. • A programme suitable for the laundry type is not used. >>> Check the garment tag and select a programme suitable for the fabric type. Drum lighting does not turn on. (On models with lamp) •...
- Page 33 PRODUCT FICHE Complying Commission Delegated Regulation (EU) No 392/2012 GRUNDIG Supplier name or trademark GTN 38250 MGC Model name Rated capacity (kg) Air Vented Type of Tumble Dryer Condenser Energy efficiency class Annual Energy Consumption (kWh) Automatic Type of Control...
- Page 34 USCĂTOR MANUAL DE UTILIZARE www.grundig.com...
- Page 35 CUPRINS 6. Operarea produsului ....52 1. Vă rugăm să citiţi mai întâi acest 6.1 Panoul de comandă .....52 manual de utilizare! ....36 6.2 Simboluri afişaj ......52 6.3 Pregătirea maşinii .......53 2. Instrucţiuni importante de securitate şi mediu ..... 37 6.4 Selectare program .......53 6.5 Programele principale ....53 2.1 Informaţii generale privind...
-
Page 36: Vă Rugăm Să Citiţi Mai Întâi Acest Manual De Utilizare
1. Vă rugăm să citiţi mai întâi acest manual de utilizare! Stimate client, Vă mulţumim pentru alegerea produselor Grundig. Sperăm că produsul nostru, fabricat la standarde de înaltă calitate şi tehnologie, vă va oferi cele mai bune rezultate. Vă recomandăm să citiţi cu atenţie acest manual şi alte documentaţii suplimentare înainte de a utiliza... -
Page 37: Instrucţiuni Importante De Securitate Şi Mediu
2. Instrucţiuni importante de securitate şi mediu Această secţiune conţine instrucţiuni de securitate care vă vor ajuta la protecţia împotriva riscului de rănire sau deteriorarea a proprietăţii. Nerespectarea acestor instrucţiuni va anula orice garanţie. 2.1 Informaţii generale privind securitatea • Uscătorul poate fi utilizat de copii peste 8 ani şi de către perso- ane care nu au abilităţi fizice, senzoriale sau mentale complet dezvoltate sau care nu au experienţă... -
Page 38: Securitatea Electrică
2.1.1 Securitatea electrică Securitatea electrică Instrucţiunile privind securitatea electrică trebuie respectate în timpul efectuării racordării la reţeaua electrică în momentul instalării. Aparatul nu trebuie alimentat printr-un dispozitiv de conectare, cum ar fi un comutator temporizat, sau conectat la un circuit care este activat sau dezactivat regulat de serviciul public utilitar. -
Page 39: Securitatea Produsului
Cablul principal deteriorat trebuie înlocuit, notificând Personalul autorizat de service. Dacă uscătorul este defect, acesta nu trebuie utilizat decât dacă a fost reparat de către un agent autorizat de service! Există pericol de electrocutare! 2.1.2 Securitatea produsului Puncte de luat în considerare în cazul pericolului de incendiu: Următoarele tipuri de rufe sau articole nu trebuie uscate în uscător, având în vedere pericolul de incendiu. - Page 40 Următoarele rufe sau articole specificate nu trebuie uscate în uscător din cauza pericolului de incendiu: • Articole de îmbrăcăminte sau perne întărite cu spumă de cauciuc (spumă latex), bonete de duş, materiale texti- le rezistente la apă, materiale cu întăritură din cauciuc şi perniţe din spumă...
- Page 41 Utilizaţi balsamuri de rufe şi produse similare în conformitate cu instrucţiunile producătorilor acestora. Întotdeauna curăţaţi filtrul de scame înainte sau după fiecare încărcare. Nu operaţi niciodată uscătorul fără a avea filtrul de scame instalat. • Nu încercaţi niciodată să reparaţi dumneavoastră uscătorul. Nu efectuaţi nicio reparaţie sau procedură...
-
Page 42: Montajul Pe O Maşină De Spălat
2.2 Montajul pe o maşină de spălat • Se va utiliza un dispozitiv de fixare între cele două maşini în momentul instalării uscătorului peste o maşină de spălat. Dispozitivul de fixare trebuie instalat de către un agent autorizat de service. •... -
Page 43: Siguranţa Copiilor
2.4 Siguranţa copiilor • Ambalajele sunt periculoase pentru copii. Nu lăsaţi ambalajele la îndemâna copiilor. Produsele electrice sunt periculoase pentru copii. Nu lăsaţi copii în apropierea produsului care este în funcţiune. Nu permiteţi co- piilor să umble la uscător. Utilizaţi un sistem de închidere securi- zat pentru copii pentru a-i împiedica să... -
Page 44: Specificaţii Tehnice
2.8 Specificaţii tehnice Înălţime (Min. / Max.) 84,6 cm / 86,6 cm* Lăţime 59,7 cm Adâncime 57,8 cm Capacitate (max.) 8 kg** Greutate netă (± 4 kg) 46 kg Tensiune Putere nominală de intrare Consultaţi eticheta***. Cod model * Înălţime min.: Înălţimea cu picioarele reglabile închise. Înălţime max.: Înălţimea cu picioarele reglabile deschise la nivelul maxim. -
Page 45: Uscătorul Dumneavoastră
3. Uscătorul dumneavoastră 3.1 Conţinutul ambalajului 1. Furtun pentru scurgerea apei* 2. Burete de schimb pentru sertarul filtrului* 3. Manual de utilizare 4. Tambur de uscare* 5. Manual de utilizare al tamburului de uscare* *Poate fi furnizat împreună cu maşina dumneavoastră în funcţie de modelul acesteia. -
Page 46: Instalare
4. Instalare • Nu acoperiţi grătarele de ventilare ale uscătorului. Înainte de a telefona celui mai • Nu trebuie să existe nicio uşă apropiat Centru de service pentru blocabilă, culisantă sau batantă instalarea uscătorului, asiguraţi-vă care ar putea bloca deschiderea că... -
Page 47: Îndepărtarea Ansamblul De
4.2 Îndepărtarea ansamblul de Adâncime 60 cm 54 cm securitate în transport uscător Îndepărtaţi ansamblul de Număr piesă 2979700200 2973600200 securitate în transport instalare sub blat înainte de a utiliza uscătorul Păstraţi un spaţiu de cel puţin 3 cm pentru prima dată. faţă... -
Page 48: Reglarea Picioarelor
4.5 Reglarea picioarelor • Pentru a vă asigura că uscătorul funcţionează mai silenţios şi fără vibraţii, acesta trebuie să fie aşezat la nivel şi echilibrat pe picioarele sale. Echilibraţi maşina prin reglarea picioarelor. • Rotiţi picioarele către stânga sau dreapta până ce uscătorul este aşezat la nivel şi fix. -
Page 49: Avertismente Privind Sunetele
4.8 Avertismente privind 4.9 Înlocuirea lămpii de iluminare sunetele În cazul utilizării unei lămpi de iluminare în uscătorul Este normal să auziţi dumneavoastră uneori un zgomot metalic Pentru a înlocui becul/LED-ul din compresor în timpul utilizat pentru iluminare în uscătorul funcţionării. -
Page 50: Pregătirea
5. Pregătirea 5.1 Rufe corespunzătoare pentru uscarea în uscător • Respectaţi întotdeauna instrucţiunile prezentate pe etichetele articolelor. Uscaţi doar rufele ale căror etichete specifică faptul că acestea pot fi uscate într-un uscător şi asiguraţi-vă că selectaţi programul potrivit. SIMBOLURI PRIVIND USCAREA RUFELOR Simboluri de Potrivit pentru A nu se călca. -
Page 51: Sarcina Corectă
• Urmaţi instrucţiunile din Nu se recomandă încărcarea manualul de utilizare pentru uscătorului cu rufe peste selectarea programelor. nivelul indicat în imagine. • Nu deschideţi uşa de încărcare Performanţa uscătorului a maşinii în timpul procesului se va degrada atunci când de uscare decât dacă... -
Page 52: Operarea Produsului
6. Operarea produsului 6.1. Panoul de comandă 1. Pornire/Oprire/Anulare 2. Afişare număr program 3. Afişaj 4. Start/Pauză 5. Temporizare 6. Volum sunet alarmă / blocare pentru siguranţa copiilor 7. Express dry / Selectare programe temporizator 8. Selectare program 6.2 Simboluri afişaj Indicator durată... -
Page 53: Pregătirea Maşinii
6.3 Pregătirea maşinii Rufele normale (de ex: 1. Băgaţi aparatul în priză. feţe de masă, lenjerie 2. Puneţi rufele în maşină. intimă) sunt uscate Uscat 3. Apăsaţi butonul Pornire/oprire/ astfel încât să nu pentru anulare pentru 1 secundă (lung). necesite călcare înainte împăturire 4. - Page 54 • Aşternuturi • Îmbrăcăminte de sport Uscaţi doar cuverturi ce au eticheta Folosiţi acest program pentru a ‘potrivit pentru uscare la maşină’. usca împreună rufe sintetice şi Aveţi grijă să puneţi cuvertura în din bumbac şi rufe din materiale mod corect, pentru a evita avarierea combinate.
- Page 55 • Împrospătare Este efectuată doar ventilare timp de 10 minute fără aer cald. Puteţi să aerisiţi hainele ce au fost ţinute în spaţii închise pentru mai mult timp şi să dezodorizaţi mirosuri neplăcute cu ajutorul acestui program. • Prog. temporizator Folosind programe temporizate (10...
- Page 56 Selectare programe şi tabel consum Cantitatea Timp de Capacitate Viteza de stoarcere în aproximativă de Programe uscare (kg) maşina de spălat (rpm) umezeală (minute) rămasă Rufe din bumbac/colorate Uscare suplimentară 1000 % 60 Uscare pentru 8 / 4 1000 % 60 197 / 115 depozitare Uscare pentru călcare...
-
Page 57: Funcţii Auxiliare
6.7 Funcţii auxiliare Avertizare audio După încheierea programului, uscătorul produce un semnal sonor. Rezervor de apă Pentru a ajusta volumul, folosiţi butonul pentru semnal sonor. Atunci când programul s-a încheiat, un simbol de avertizare va apărea, Volumul poate fi ajustat pentru a reaminti că... -
Page 58: Pornirea Programului
şi menţinut, Timp finalizare programul selectat anterior. continuă neîntrerupt). 6.9 Pornirea programului 4. Apăsaţibutonul Start/Pauză. Apăsaţi butonul Start/Pauză pentru a Funcţia Setare oră finalizare începe programul. începe să numere invers. Simbolul Start se va aprinde pentru Simbolul “:” din mijlocul afişajului a indica începerea programului şi Setare oră... -
Page 59: Schimbarea Programului După Pornire
Adăugarea / scoaterea rufelor în Blocarea pentru protecţia modul Pauză copiilor se dezactivează Pentru a adăuga sau a scoate rufe atunci când maşina este după începerea programului de oprită şi repornită folosind uscare butonul Pornire/Oprire/ 1. Apăsaţi butonul Start/Pause Anulare. (Start/Pauză) pentru a pune Atunci când blocarea pentru maşina în modul Pauză. -
Page 60: Anularea Programului
6.13 Terminarea programului Dacă alegeţi un nou Simbolurile de avertizare pentru program rotind butonul curăţarea filtrului de scame Selectare Program în timp şi pentru rezervorul de apă se ce maşina este în modul aprind în indicatorul de urmărire a Pauză, apoi programul programului când programul s-a curent este anulat şi încheiat. -
Page 61: Întreţinere Şi Curăţare
7. Întreţinere şi curăţare Durata de funcţionare a produsului se va extinde, iar problemele întâmpinate frecvent vor fi reduse, dacă produsul este curăţat la intervale regulate de timp. 7.1 Curăţarea filtrului de scame/a suprafeţei interioare a uşii de încărcare • E posibil să se formeze un strat Scamele şi fibrele eliberate din rufe de scame peste porii filtrului care în aer în timpul ciclului de uscare... -
Page 62: Curăţarea Senzorului
7.2 Curăţarea senzorului Apa condensată nu este Uscătorul este dotat cu senzori de potabilă! umezeală care detectează dacă Nu îndepărtaţi niciodată rufele sunt uscate sau nu. rezervorul de apă în timpul Pentru a curăţa senzorii: funcţionării programului! Deschideţi uşa de încărcare a uscătorului. -
Page 63: Curăţarea Sertarului Filtrului
• Deschideţi sertarul filtrului prin Dacă se utilizează ca apăsarea butonului roşu. opţiune scurgerea directă a apei, nu trebuie să goliţi rezervorul de apă. 7.4 Curăţarea sertarului filtrului Scamele şi fibrele care nu au fost captate de filtrul de scame sunt blocate în sertarul filtrului în spatele plăcii de protecţie. -
Page 64: Curăţarea Evaporatorului
Uscarea fără reinstalarea buretelui din sertarul filtrului va deteriora maşina! Un filtru de scame şi un sertar al filtrului murdare vor provoca perioade de uscare mai lungi şi consum mai mare de energie. • Închideţi sertarul filtrului pentru a bloca butonul roşu. Filtrul cu burete nu trebuie înlocuit fiind ud, deoarece poate provoca avarii. -
Page 65: Depanare
8. Depanare Procesul de uscare durează prea mult. • Porii filtrului de scame ar putea fi înfundaţi. >>> Spălaţi filtrul de scame cu apă călduţă. • Sertarul filtrului poate fi blocat>>> curăţaţi spuma din interiorul sertarului filtrului. • Grilele de ventilare din partea din faţă a maşinii sunt blocate. >>> Îndepărtaţi obiectele (dacă... - Page 66 Rufele au intrat la apă, au devenit împâslite sau s-au deteriorat. • Nu este folosit un program adecvat pentru tipul de rufe. >>> Verificaţi etichetele hainelor şi selectaţi un program adecvat tipului de material. Lumina tamburului nu porneşte. (La modelele cu lampă) •...
- Page 67 FIȘĂ PRODUS REGULAMENTUL DELEGAT (UE) NR. 392/2012 AL COMISIEI Grundig Nume furnizor și marcă înregistrată Denumire model GTN 38250 MGC Capacitate nominală (kg) Ventilat Tip uscător Condensator Clasa eficienţei consumului de energie Consum anual de energie (kWh) Automat Tip Control Neautomat Consum energie program bumbac standard la încărcare maximă...
- Page 68 Document Number 2960311699_RO/230218.0814...
Need help?
Do you have a question about the GTN 38250 MGC and is the answer not in the manual?
Questions and answers