Table of Contents
Advertisement
Advertisement
Table of Contents

Related Manuals for Grundig GTN 38110 GCW


Summary of Contents for Grundig GTN 38110 GCW
- Page 1 DRYER USER INSTRUCTIONS GTN 38110 GCW www.grundig.com...
-
Page 2: Table Of Contents
TABLE OF CONTENTS 1 Please read this user manual first! 3 6. Operating the product 6.1 Control panel ....18 2 Important instructions for safety 6.2 Display Symbols. -
Page 3: Please Read This User Manual First
1. Please read this user manual first! Dear Customer, Thank you for preferring an Grundig product. We hope that your product which has been manufactured with high quality and technology will give you the best results. We advise you to read through this manual and the other accompanying documentation carefully before using your product and keep it for future reference. -
Page 4: General Safety
2. Important safety and environmental instructions This section contains safety instructions that will help protect from risk of personal injury or property damage. Failure to follow these instructions shall void any warranty. 2.1 General safety • The dryer can be used by children at and above 8 years old and by persons whose physical, sensory or mental capabilities were not fully developed or who lack experience and knowledge provided that they are supervised or trained on the safe usage... -
Page 5: Electrical Safety
2.1.1 Electrical safety Electrical safety instructions should be followed while electrical connection is made during the installation. The appliance must not be supplied through an external switching device, such as a timer,or connected to a circuit that is regularly switched on and off by utility. •... -
Page 6: Product Safety
2.1.2 Product safety Points to be taken into consideration for fire hazard: Below specified laundry or items must not be dried in the dryer because of fire hazard. • Unwashed laundry items • Items soiled with oil, acetone, alcohol, fuel oil, kerosene, stain removers, turpentine, paraffin or solvents must be washed in hot water with plenty of detergent before being dried in the dryer. -
Page 7: Mounting Over A Washing Machine
Use softeners and similar products in accordance with the instructions of their manufacturers. Always clean the lint filter before or after each loading. Never operate the dryer without the lint filter installed. • Never attempt to repair the dryer by yourself. Do not perform any repair or replacement procedures on the product even if you know or have the ability to perform the required procedure unless it is clearly suggested in the operating instructions or the... -
Page 8: Intended Use
Installation Table for Washing Machine and Dryer Washing Machine Depth Dryer Depth 62 cm 60 cm 54 cm 50 cm 49 cm 45 cm 40 cm Can be 54 cm Can be stacked stacked Cannot be stacked Cannot be 60 cm Can be stacked stacked 2.3 Intended use... -
Page 9: Compliance With The Weee Regulation En And Disposing Of The Waste Product
2.5 Compliance with the WEEE regulation and disposing of the waste product This product complies with EU WEEE Directive (2012/19/ EU). This product bears a classification symbol for waste electrical and electronic equipment (WEEE). This product has been manufactured with high quality parts and materials which can be reused and are suitable for recycling. -
Page 10: Technical Specifications
2.8 Technical Specifications Height (Min. / Max.) 84,6 cm / 86,6 cm* Width 59,5 cm Depth 59,8 cm Capacity (max.) 8 kg** Net weight (plastic front door usage) 38 kg Net weight (glass front door usage) 40 kg Voltage Rated power input See type label*** Model code * Min. -
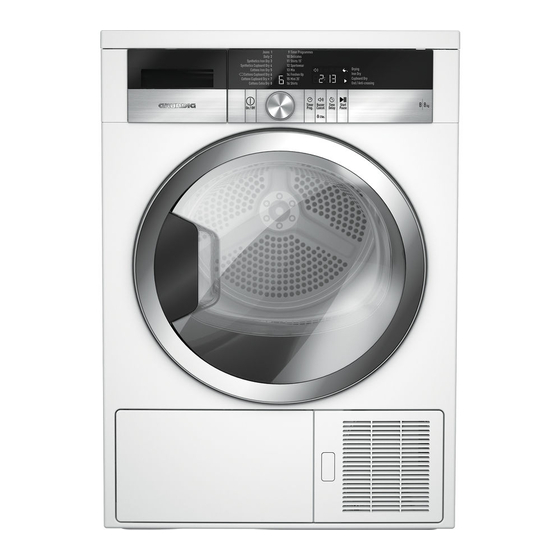
Page 11: Your Dryer
3. Your Dryer 3.1 Overview 1. Top panel 2. Control panel 3. Loading door 4. Kick plate opening button 5. Ventilation grids 6. Adjustable feet 7. Kick plate 8. Type label 9. Lint filter 10. Water tank drawer 11. Power cord... -
Page 12: Package Contents
3.2 Package Contents 1. Water drain hose * 2. Filter drawer spare sponge* 3. User Manual 4. Drying basket* 5. Drying basket user manual* *It can be supplied with your machine depending on its model. -
Page 13: Installation
4. Installation 4.1 Appropriate installation location Refer to the nearest Authorized • Install the product on a stable Service Agent for installation of and level surface. the product. To make the product • Dryer is heavy. Do not move it by ready for use, make sure that the yourself. -
Page 14: Removing The Transportation Safety
4.2 Removing the transportation 4.4 Connecting to the drain safety assembly In products equipped with condenser unit, water accumulates in the water CAUTION: Remove the tank during the drying cycle. You transportation safety should drain accumulated water assembly before using the after each drying cycle. -
Page 15: Adjusting The Feet
4.6 Electrical connection CAUTION: Hose must For specific instructions for be fixed in every type of electrical connection required during connection. Your house installation (see 2.1.1 Electrical will be flooded if the hose Safety) comes loose during water 4.7 Transportation of the product discharge. -
Page 16: Preparation
5. Preparation 5.1 Laundry suitable for drying in the dryer Always obey the instructions given on the garment tags. Dry only the laundry having a label stating that they are suitable for drying in a dryer and make sure that you select the appropriate programme. LAUNDRY DRYING SYMBOLS Drying Suitable for... -
Page 17: Correct Load Capacity
• Follow the instructions in the It is not recommended user manual for programme to load the dryer with selection. laundry exceeding the level • Do not open the loading door of indicated in the figure. the machine during drying unless Drying performance will necessary. -
Page 18: Operating The Product
6. Operating the product 6.1 Control panel 1. On/Off/Cancel button 2. Program number indicator 3. Display 4. Start/Pause button 5. Time delaying selection button 6. Audio warning level button/child-proof lock 7. Timer programmes selection button 8. Program knob 6.2 Display Symbols Remaining time indicator* Filter Drawer Cleaning warning symbol Filter cleaning warning symbol... -
Page 19: Preparing The Machine
6.3 Preparing the machine For further programme 1. Plug in the machine. details, see, "Programme 2. Place the laundry in the machine. selection and consumption 3. Press the on/off/cancel button for table". 1 second (long). 6.5 Main programmes 4. When your machine is operated for the first time, it starts with Depending on the fabric type, the the declaration programme... - Page 20 • Mini 35 • Delicates You can use this programme to dry You can dry your highly delicate your cotton laundry that you have laundry (silk blouses, fine underwear, spun at high speeds in your washing etc.) that are suitable for drying or machine.
-
Page 21: Programme Selection And Consumption Table
6.7 Programme selection and consumption table Approximate Capacity Spin speed in washing amount of Drying time Programmes (kg) machine (rpm) remaining (minutes) humidity Cottons / Coloreds Extra dry 1000 % 60 Cupboard dry 8 / 4 1000 % 60 137 / 78 Iron dry 1000 % 60... -
Page 22: Auxiliary Functions
6.8 Auxiliary functions Audio Warning The machine will give an audio warning when the programme comes to an end. Use the Audio Warning For further programme Level button to adjust the sound details, see, "Programme level. selection and consumption table". You can change the sound level either before the Water tank... -
Page 23: Starting The Programme
3. Press End Time Setting selection 6.10 Starting the programme button to set the desired End Press Start/Pause button to start the Time Setting symbol lights up program. on the display.(When the button Start symbol will light up to is pressed and hold, End Time indicate that the programme has proceeds uninterruptedly). -
Page 24: Changing The Programme After It
• When the Child-proof Lock is You may repeat laundry activated: adding or removing process • Display symbols will not as many times as you desire change even if the position of during drying. However, Programme Selection knob is this process will increase changed while the machine is the programme time running or in halt. -
Page 25: End Of Programme
6.14 End of programme Lint Filter Cleaning and Water Tank warning symbols light up in the programme follow-up indicator when the programme comes to an end. The loading door can be opened and the machine becomes ready for a second cycle. -
Page 26: Maintenance And Cleaning
7. Maintenance and cleaning Service life of the product extends and frequently faced problems decrease if cleaned at regular intervals. CAUTION: Unplug the product from the mains during any maintenance and cleaning works (control panel, body, etc.). A layer can build up on the 7.1 Lint Filter / Loading Door filter pores that can cause Inner Surface... -
Page 27: Cleaning The Sensors
7.3 Draining the water tank Dampness of the laundry is removed and condensed during drying process and the water that arise accumulates in the water tank. Drain the water tank after each drying cycle. CAUTION: Condensed water is not drinkable! 7.2 Cleaning the sensors CAUTION: Never remove There are dampness sensors in the... -
Page 28: For The Condenser
3. If there is lint accumulation in the 4. Clean the condenser by applying funnel of the water tank, clean it pressurized water with a shower under running water. armature and wait until the water 4. Place the water tank into its seat. drains. -
Page 29: Troubleshooting
8. Troubleshooting Drying process takes too much time. • Pores of the lint filter are clogged. >>> Wash the lint filter with warm water. • Condenser may be clogged. >>> Clean the Condenser. • Ventilation grids on the front side of the machine are blocked. >>> Remove the objects (if any) that block ventilation in front of the ventilation grids. - Page 30 Programme is interrupted without any cause. • The loading door might not be closed securely. >>> Make sure that the loading door is closed securely. • A power failure might have occurred. >>> Press Start / Pause button to start the program. •...
-
Page 31: Electrical Connection
9. Electrical In order to avoid hazards, damaged supply cord should be replaced by the Connection manufacturer, its service agent or similarly qualified people. Make sure that you have an earthed power outlet socket rated at 13 amps (minimum). Do not operate without the top 9.1 Attention! cover fitted. - Page 32 Repairs necessary as a direct or indirect result of: Accidental damage, misuse or abuse of a product. An attempted repair of a product by anyone other than a Grundig authorised repairer. Installation or use of a product where such installation or use fails to meet the requirements contained in this guarantee or the User Instructions Booklet.
- Page 33 This guarantee is limited to the cost of repairing the product. To the extent permitted by law, Grundig does not accept and will not be held liable for any financial loss incurred in connection with the failure of any product to operate in accordance with the expected standards. Such financial loss includes but is not limited to loss arising from: •...
- Page 34 For missed appointments. Payment of these costs are due immediately upon Grundig providing you with an invoice. If you fail to pay the costs for the service call in a timely manner, Grundig reserves the right to terminate the guarantee.
- Page 35 Should you experience any difficulty in obtaining service contact the Grundig Customer Helpline on Tel: 0333 207 9920 or e-mail: customerservice@support.grundig.co.uk …………………………………………………………..............
- Page 36 Document Number 2960311305_EN/071216.1142...
Need help?
Do you have a question about the GTN 38110 GCW and is the answer not in the manual?
Questions and answers