Advertisement
Quick Links
Advertisement

Related Manuals for NuWave BRIO PLUS 8QT


Summary of Contents for NuWave BRIO PLUS 8QT
- Page 1 Owner’s Manual 37401 37402 37403 37404 37405 Model # Black Gray Cozy Blue Cream Deep Blue Color *All-natural ceramic coating is applied to the cooking surface making it non-stick, ensuring a cooking surface that is free from per- and polyfluoroalkyl substances (PFAS).
- Page 2 THANK YOU! Congratulations on your NuWave® purchase. We know there are many options available and sincerely appreciate the trust you have placed in us. For the last 30 years, we have committed to introducing products that promote healthy living at affordable prices. By combining the highest quality designs with cutting edge technology, we have always strived to blend feature, function, and innovation into every product we make.
-
Page 3: Table Of Contents
CONTENTS Owner’s Manual Electrical Information ..................3 Important Safeguards ..................4-5 Parts & Accessories ..................6 Assembly Guide ....................7 Operating Instructions ..................8-13 Cleaning & Maintenance .................. 14 Troubleshoot Guide ..................15-16 Limited Warranty ..................17-18 Para la versión en español de este manual, visita www.nuwavenow.com If the information in this manual doesn’t match your model, we in- vite you to visit https://www.nuwavenow.com/brio-plus-8qt-manual for the digital version tailored to your specific model. -
Page 4: Important Safeguards
IMPORTANT SAFEGUARDS HOUSEHOLD USE ONLY • READ ALL INSTRUCTIONS BEFORE USE ALWAYS KEEP THIS MANUAL HANDY FOR FUTURE REFERENCE. When using electrical appliances, basic safety precautions should always be followed to reduce the risk of fire, electric shock, and/or injury to persons including the following: Read all directions NEVER immerse the cord, plug, or the Brio in water or other liquids. - Page 5 ALWAYS unplug the Brio and contact NuWave Customer Service* if an excess amount of smoke escapes the unit during operation. Note: A small amount of smoke is normal when using the Brio for the first time. NEVER put the Brio against the wall or other appliances or allow anything to block the air vents.
-
Page 6: Parts & Accessories
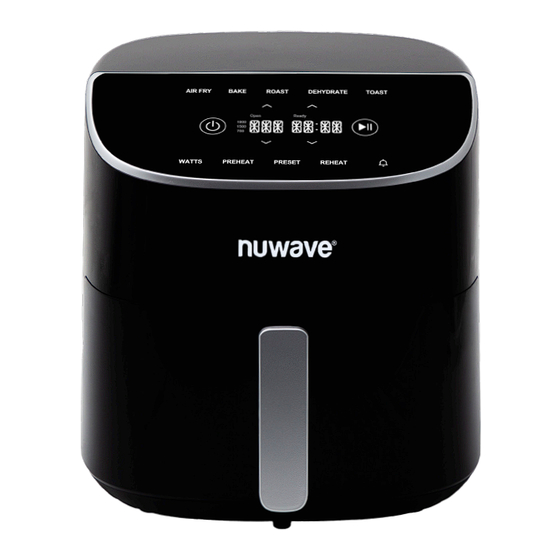
PARTS & ACCESSORIES Open Ready 1800 1500 Power Base Rubber Air Circulation Silicone Base Tray Feet Riser Tabs Color Black Gray Cozy Blue Cream Deep Blue (Model Number) (37401) (37402) (37403) (37404) (37405) Powerbase BYA1 BYA2 BYA3 BYA4 BYA5 Base Tray BYA6 BYA7 BYA8... -
Page 7: Assembly Guide
ASSEMBLY GUIDE Assembling the Brio Removing the Base Tray & Air Circulation Riser Using the handle, pull the Base Tray straight out from the Power Base and remove the Air Circulation Riser by poking a hole in the center of the paper and lifting. -
Page 8: Operating Instructions
OPERATING INSTRUCTIONS Open Ready 1800 1500 NOTE: For best results, use the recommended amount of ingredients as listed in the Quick Start Guide. May need to cook in batches for optimal results. On/Off Turns the Brio On or Off and cancels all functions. The default is 350°F for 15 minutes. - Page 9 Up and Down Arrows Press to adjust cooking temperature, time, or select a preset*. To change Temperature Press the up or down arrow on the left to Open Ready 1800 increase or decrease temperature in 5-degree increments between 1500 50°F and 400°F. Hold the arrows down to adjust in larger increments. To change the TIME press the up or down arrow on the right to increase or decrease time in 1-minute increments up to 99 hours and Open...
- Page 10 Auto Preheat The Brio can be set to automatically preheat prior to cooking. 1. Press and hold PREHEAT. 2. The Brio will beep twice, indicating the auto preheat has been turned on. 3. Repeat to disable automatic preheat. Note • Auto Preheat will remain enabled even when the Brio is turned off or unplugged. Notification notification will inform you when it is time to shake the basket or flip your food halfway through cooking.
- Page 11 3. Once selection is made, press the Up/Down arrows on the right once to display the temperature and time and adjust if desired. 4. Press to begin the cooking cycle. 5. When finished the Brio will display “END” and beep 3 times. Making your own Presets 101-150: 1.
- Page 12 Watts For your convenience the Brio has 3 different wattages to suit your needs (1800W, 1500W, 700W). This allows the Brio to be used in places like dorms, RVs, or older homes that don’t support 1800W. 1. Change the wattage by pressing WATTS to your selection. To Lock in the Wattage 1.
- Page 13 Mute- To mute the Brio, press and hold Bake until you hear 2 beeps. Repeat to unmute. Lock- To lock the settings press AIR FRY + BAKE simultaneously. Lock will appear in the display. When locked all buttons are disabled except the power button and AIR FRY + BAKE.
-
Page 14: Cleaning & Maintenance
CLEANING & MAINTENANCE Cleaning Clean the Brio after every use or in between batches. The Base Tray and Air Circulation Riser have a non-stick coating. Do not use metal utensils or harsh abrasives when cleaning as these can damage the coating. 1. -
Page 15: Troubleshoot Guide
TROUBLESHOOTING GUIDE The Brio is not turning on or working. 1. The Brio is not plugged in. 2. You did not press the Power button. 3. The Base Tray is not properly in the Brio. Insert the plug into an appropriate grounded power socket. Press the Power button. Place the Base Tray into the Brio. - Page 16 The Brio has short circuited. Err1 The Brio circuit has broken. Err2 If you still have any questions about operatiion or warranty of the product, please contact NuWave LLC. For Amazon Purchases: support@nuwavenow.com For All Other Purchases: help@nuwavenow.com 16 | nuwavenow.com...
-
Page 17: Limited Warranty
LIMITED WARRANTY THE MANUFACTURER WARRANTS NuWave, LLC warrants the Brio Plus 8Q will be free from manufacturer defects for 1 year from the date of purchase, under normal household use, and when operated in accordance with the Manufacturer’s written instructions. The Limited Warranty covers the Original Purchaser only. - Page 18 TION OR WARRANTY OF THE PRODUCT, PLEASE CONTACT NUWAVE LLC. DISPUTE RESOLUTION PROCEDURE For disputes relating to use of the website or use or purchase of a NuWave product or ser- vice (collectively “Disputes”), you agree to first contact NuWave LLC at legal@nuwavenow.
- Page 19 NOTES nuwavenow.com | 19...
- Page 20 Para la versión en español de este manual, visita www.nuwavenow.com. For patent information please go to: www.nuwavenow.com/legal/patent Designed & Developed in USA NuWave LLC 560 E. Bunker Ct. BM37401 Vernon Hills, IL 60061, U.S.A. Rev.1-V3-JL Made in China 02-13-24 ©2024 NuWave LLC • All Rights Reserved.
Need help?
Do you have a question about the BRIO PLUS 8QT and is the answer not in the manual?
Questions and answers
I am looking for the time to cook vegetable on air fry on the Nuwave Brio Plus Air Fryer—-is there a part for recipes/cooking instructions?