Table of Contents
Advertisement
Available languages
Available languages
Advertisement
Table of Contents

Related Manuals for NuWave Brio 15.5Q


Summary of Contents for NuWave Brio 15.5Q
- Page 1 OWNER’S MANUAL Air Fryer/Grill/Rotisserie Oven nuwavenow.com...
- Page 2 As a special thank-you for registering your NuWave DOWNLOAD THE QR CODE Brio, you’ll automatically receive an additional 3 months added to your limited manufacturer’s warranty!* APP TO YOUR MOBILE DEVICE All you have to do is follow these simple steps.
- Page 3 IMPORTANT SAFEGUARDS TABLE OF CONTENTS HOUSEHOLD USE ONLY • READ ALL INSTRUCTIONS BEFORE USE WARNING: When using the Do not let the cord hang OWNER’S MANUAL Brio, basic safety precautions over the edge of any Important Safeguards ............5-8 should always be followed: table or counter, or touch Parts &...
- Page 4 IMPORTANT SAFEGUARDS HOUSEHOLD USE ONLY • READ ALL INSTRUCTIONS BEFORE USE SAVE THESE INSTRUCTIONS It is normal for some smoke 15. Do not clean the Brio with Electrical Information to escape the Brio when Read and understand the entire metal scouring pads. Pieces A short power-supply cord is manual before using the Brio.
- Page 5 If there is an accessory listed above that was not included with your order, or if you misplaced any of your Brio parts or accessories, contact NuWave Customer Service to place an order – subject to availability.
- Page 6 ASSEMBLY GUIDE Before Use Place the second Rotisserie Adjust the top lid to fit over 1. Remove all the packaging Skewer fork onto the other your food: Place ends of the materials. end of the Skewer and top lid into slots. Squeeze push the fork forward until it 2.
- Page 7 ASSEMBLY GUIDE Grill/Griddle Plate Assembly To Remove the Brio Door Non-Stick Baking Pan Bring down the right side of the bar and place it into the With the Mesh Rack in either bracket, then insert the left Position 1 or 2, place the Grill side of the bar into the hole Baking Pan on top of the Rack.
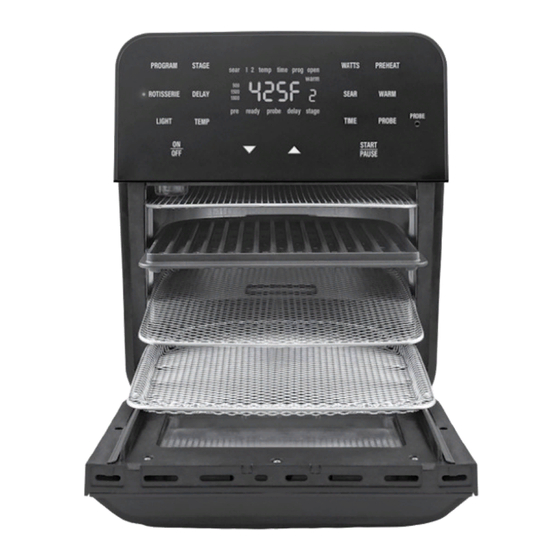
- Page 8 QUICK START TEMP To adjust the cooking temperatures, press TEMP and adjust with the Up and Down Arrows. You can do this before and during the cooking 1500 process. 1800 • To convert from Fahrenheit to Celsius, press TEMP for1 second. Do the same to change again.
- Page 9 INSTRUCTIONS Switch from Hours : Minutes to Note: Preset temperatures Probe Temp Guide Minutes : Seconds and times may need minor adjustments to best suit your By default, the Brio displays all Meats Temp. Rare Well Time Min. Rare Well culinary needs.
- Page 10 INSTRUCTIONS LIGHT Getting Started The Delay time can be Press the Up or Down arrows Press LIGHT once to turn the adjusted up to 24 hours to adjust the temperature light on. Press again to turn it off. (24:00). and time. To change the light bulb in 350F •...
- Page 11 INSTRUCTIONS when two or more stages are Press the Up or Down arrows • During preheat the • After it has reached the used. Display will not show to adjust the temperature set cooking temperature, cooking temperature can stage cooking number if only the Brio will go into a and time.
- Page 12 INSTRUCTIONS • Once the Sear 1 cycle WARM Press START/PAUSE to Press ON/OFF. Adjust is complete, the Brio begin cooking. cooking temperature and time Warm can be used as an will beep once and for regular (stage 1) cooking. independent function to heat Once Sear 1 is complete, automatically go into up your food.
- Page 13 INSTRUCTIONS • Warm can be set immediately Once your program number Press START/PAUSE to the program number to after adjusting the regular is chosen, press START/ begin cooking your set save your program (101- cooking times and PAUSE to begin cooking. program (recipe).
- Page 14 INSTRUCTIONS View During Cooking Press TIME. Press the Up • Preset temperatures and times Press START/PAUSE. The for program recipes 1-100 Press STAGE to review and Down arrows to adjust current Probe temperature can be adjusted. Adjusted each phase (function) of the the cooking time.
- Page 15 INSTRUCTIONS ROTISSERIE • The Brio will cook for the time. The display will show Slow-Cook “10F” (“-12C”). Press the Up amount of time you set for Slow-cook roasts, chicken, or or Down arrows to set the any other food items. slow cooking.
- Page 16 CLEANING & MAINTENANCE Remove Door Glass for Cleaning 1 inch Hand-wash Storage Clean your Brio after every use or in between a number of large Unplug the Brio and let it cool batches. Do not use metal utensils or harsh abrasives when cleaning down completely.
- Page 17 TROUBLESHOOT GUIDE Error Message: Solution(s): The Brio is not turning on or working. The Probe is not connected to the Brio. Plug The Brio is not plugged in. Prb1 the Probe into the Brio’s Probe Jack. Did not press ON/OFF button. Insert the plug into an appropriate grounded power socket.
- Page 18 DISPUTE RESOLUTION PROCEDURE. For disputes relating to use padding material to prevent damage in transit. The original container of the website or use or purchase of a NuWave product or service is ideal for this purpose. Include in the package the owner’s name, (collectively “Disputes”), you agree to first contact NuWave LLC...
- Page 19 NuWave product. For any dispute arising out of your use of NuWave’s website, you have thirty (30) days from the date you provided information to the website to opt out of arbitration.
- Page 20 QR ubicado en la etiqueta de su producto ubicada en la parte posterior de el Brio. Se le dirigirá a la página de registro del producto NuWave con el número de serie único de su producto que se ingresa automáticamente en el campo correspondiente.
- Page 21 MEDIDAS DE SEGURIDAD IMPORTANTES !para una garantía adicional de PARA USO DOMÉSTICO SOLAMENTE Y LEA TODAS LAS INSTRUCCIONES ANTES DE USARLO meses! ADVERTENCIA: Al usar el No se recomienda el uso Brio, siempre se deben seguir de otros accesorios que las precauciones básicas de no estén diseñados para seguridad:...
- Page 22 MEDIDAS DE SEGURIDAD IMPORTANTES PARA USO DOMÉSTICO SOLAMENTE Y LEA TODAS LAS INSTRUCCIONES ANTES DE USARLO 14. Desenchufe el Brio del 23. Tome extrema precaución GUARDE ESTAS El cable más largo tomacorriente cuando no cuando retire la Bandeja de INSTRUCCIONES debe ser colocado de Lea y comprenda todo el esté...
- Page 23 MEDIDAS DE SEGURIDAD IMPORTANTES PARA USO DOMÉSTICO SOLAMENTE Y LEA TODAS LAS PARTES Y ACCESORIOS INSTRUCCIONES ANTES DE USARLO No coloque el Brio cerca PRECAUCIÓN de materiales inflamables, unidades de calefacción o • Siempre ponga los ambientes húmedos. ingredientes para freír No coloque ningún otro en la bandeja o en la tamaño de sartén para...
- Page 24 Brio, comuníquese con el platos, o en el lavavajillas, Servicio al cliente de NuWave solo en la rejilla superior. para realizar un pedido, sujeto Izquierda Apriete el tornillo del Pincho. Si a disponibilidad.
- Page 25 INSTRUCCIONES Ensamblaje de la Jaula del Notas: Después de colocar Revestimientos de Silicona Asador la comida en la Jaula • Siempre verifique que haya para Cupcakes Para ensamblar la Jaula del y asegurarla, tome la suficiente espacio encima y Asador en el Brio, siga los pasos Jaula y deslícela entre la debajo de los alimentos para e ilustraciones a continuación:...
- Page 26 INSTRUCCIONES INICIO RÁPIDO Sartén Antiadherente 1 inch (25mm) halar Con la rejilla de malla en la posición 1 o 2, coloque la bandeja para hornear encima de 1500 1800 la rejilla. • También puede colocar la bandeja en la parte inferior sin una rejilla.
- Page 27 INSTRUCCIONES INICIO RÁPIDO Nota: Las temperaturas y Cambiar de horas: minutos a TEMP Ajuste las temperaturas de cocción. Presione TEMP, ajuste con las minutos: segundos tiempos preestablecidos pueden flechas hacia arriba y hacia abajo, antes y durante el proceso de cocción. Por defecto, el Brio muestra necesitar ajustes menores todos los tiempos en horas y...
- Page 28 INSTRUCCIONES Una vez que el Brio termine Empezando Guía de Temperatura del Sensor de cocinar, aparecerá End y el Brio emitirá un pitido tres Tres Bien Carnes Temp. Poco Medio Cocido Tiempo Minutos Cuartos Cocido veces. 350F • Para silenciar/activar Pechuga de pollo 6 - 8 per lb (13 - 18kg) 360F/...
- Page 29 INSTRUCCIONES DELAY TEMP • 350F~400F (177C~204C): • Cuando el Brio haya La función de Demora se utiliza 00:00-01:00 (1 hora). terminado de cocinar, se para retrasar el tiempo de inicio mostrará End y el Brio • Stage 1 defecto: 350F (177C), 350F de la cocción.
- Page 30 INSTRUCCIONES PREHEAT PRECALENTAR AUTOMATICO • El Brio mantendrá Presione ON/OFF. Presione PROGRAM La función de precalentamiento la temperatura de Presione SEAR una vez. y PREHEAT al mismo garantiza que su Brio alcance precalentamiento durante • Ajuste la temperatura para tiempo para activar la temperatura deseada antes la cuenta regresiva de 5 el fiador 1.
- Page 31 INSTRUCCIONES • Una vez que se complete Mantenga presionado WARM luego la etapa de cocción de cocción regulares. Pulse el ciclo de cocción de durante 1 segundo. El Brio regular, y depués sellará SEAR una vez. Se mostrará la etapa regular, el Brio comenzará...
- Page 32 INSTRUCCIONES • Para cancelar la función • Los números 101-150 son Presione PROGRAM por Presione PROGRAM por un WARM en cualquier programas únicos un segundo. Presione las segundo nuevamente para momento, presione WARM. creados (recetas). flechas hacia arriba y hacia guardar y guardar la receta La función de calentamiento abajo para elegir el número...
- Page 33 INSTRUCCIONES Editar durante la cocción: Notas: Continúe presionando Viendo la receta actual del STAGE para desplazarse Cuando el Brio esté • Si alguna receta se guarda programa durante la cocción: por cada función cocinando, presione en un programa (ranura Mientras el Brio está programada para el número ETAPA.
- Page 34 INSTRUCCIONES • Presione las flechas hacia sensor. Cuando se alcance Presione START/PAUSE arriba y hacia abajo para la temperatura objetivo, para comenzar a cocinar. establecer la temperatura se mostrará End y el Brio El trinche del rostizador 0 1 00 interna deseada que emitirá...
- Page 35 INSTRUCCIONES Carryover Cooking LOCK Presione PROBE y Si desea realizar una búsqueda PROGRAM al mismo El bloqueo se utiliza para detener alta al final de la cocción tiempo. La pantalla mostrará la función del Brio. Mientras mientras usa de el Sensor, 10F.
- Page 36 LIMPIEZA Y MANTENIMIENTO Limpieza IMPORTANTE - No sumerja el Brio en agua ni intente lavar Limpie el Brio después de cada uso o entre varios lotes grandes. No en el lavavajillas. La superficie exterior se puede limpiar utilice utensilios metálicos o abrasivos fuertes al limpiar, ya que esto frotando cuidadosamente con un paño húmedo o una esponja.
- Page 37 SOLUCIÓN DE PROBLEMAS El Brio no enciende ni funciona. Las papas fritas no son crujientes cuando salen del Brio. Brio no está enchufado. Presionó el botón “ON/OFF”. El sabor crujiente de las papas fritas depende de la cantidad Inserte el enchufe en una toma de corriente con conexión de aceite y agua en las papas fritas.
- Page 38 Brio Comuníquese con el Departamento de Prb3 en el Departamento de Servicio de NuWave LLC. Después del Servicio al Cliente al 1-877-689-2838 o vencimiento de la garantía, el costo de la mano de obra y las piezas help@nuwavenow.com.
- Page 39 NuWave. Para cualquier disputa que surja de su uso del CONTACTE A NUWAVE LLC. sitio web de NuWave, tiene treinta (30) días a partir de la fecha en PROCEDIMIENTO DE RESOLUCIÓN DE CONTROVERSIAS. Para que proporcionó información al sitio web para optar por no participar disputas relacionadas con el uso del sitio web o el uso o la compra en el arbitraje.
- Page 40 LEA EL MANUAL DE SU PROPIETARIO Si aún tiene preguntas sobre el funcionamiento o la garantía del producto, comuníquese con NuWave LLC al: 1-877-689-2838 o envíe un correo electrónico a help@nuwavenow.com. garantía limitada nuwavenow.com...
- Page 41 REPLACEABLE PARTS To replace the entire unit use part number 38005. To order replaceable parts head over to NuWaveNow.com Part Name Part Description Part No. Electrical base/housing of the Brio. Base 38005 Removable door opens and 38208 Door closes appliance. Used to place food on.
- Page 42 If you misplaced any of your Brio accessories or simply wish to add to your Brio cooking experience, contact NuWave Customer Service to order any of these parts and accessories – subject to availability. NuWave Customer Service can be reached by calling 1-877-689-2838 or emailing help@nuwavenow.com Monday-Friday...
- Page 43 Designed & Developed in USA by: NuWave LLC 560 bunker Ct. Vernon Hills, IL 60061, U.S.A. Print No: BM38020 Customer Service: Rev. 03-OG 1-877-689-2838 • help@nuwavenow.com 11-05-20 Made in China ©2020 NuWave LLC • All Rights Reserved. DJ01 CC01...
Need help?
Do you have a question about the Brio 15.5Q and is the answer not in the manual?
Questions and answers
MY AIR FRYER IS NOT HEATING PROPERLY WHAT SHOULD I DO? ALL BUTTON ARE WORKING PROPERLY BUT LAST WEEK WHEN I START USING IT, THE FOOD THAT I WAS COOKING SEEMS LIKE IT'S NOT COOKING WELL.- Model is: Nuwave Brio 15.5Qt Air Fryer Toaster Oven & Rotisserie Kit, 2024 New Advanced Turbo Convection Tech, Healthy PFAS Free, Max Even & Crisp, Powerful 1800W, 50-425°F, 150
Door gasket keeps coming off , 4 pieces of gasket