Table of Contents
Advertisement
Quick Links
Advertisement
Table of Contents

Related Manuals for Huvema HU 350 DC


Summary of Contents for Huvema HU 350 DC
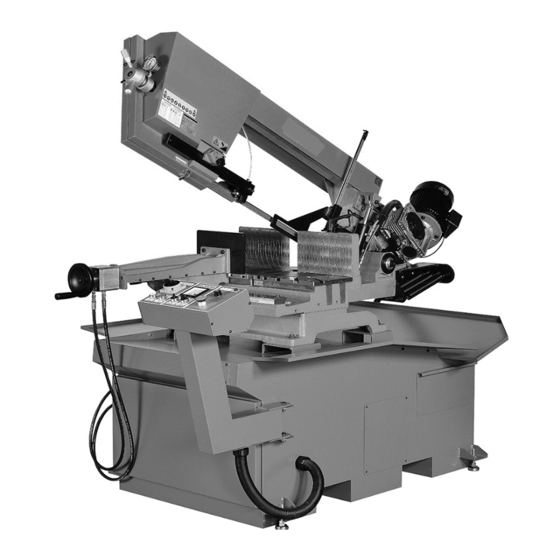
- Page 1 HU 350 DC / HU 420 SAI SEMI-AUTO BAND SAWING MACHINE...
-
Page 2: Caution
Caution: Please read and understand the manual, warnings and risks to avoid injuries and damage of machine. This manual consists of the necessary information and instructions how to operate the machine and maintaining, adjustments and repairing the machine. We firmly advice not to alter or make changes to the machine. Improper use or changes made to the machine is not allowed. -
Page 3: Table Of Contents
TABLE OF CONTENT • Cover sheet • Caution page 1 • Table of content page 2 • General and preface page 3 • Noise level of the machine page 4 • Health and Safety requirements page 7 • Warranty terms page 8 •... - Page 4 GENERAL: First our gratitude purchasing our band sawing machine. HU 350 DC & HU 420 SAI Models: Although both models are similar there are certain passages are specifically for one of the models. Options or differences will be clearly stated throughout the manual. This operating, instruction and maintenance manual provides the necessary information to make the utmost of the life span of your machine.
-
Page 5: Noise Level Of The Machine
Noise level of the machine: The machines noise level is preformed during various operating conditions. Meaning, idle running, hydraulic unit, various movements of the machine and during cutting. We conducted our measurement at 3 points; left side / front / right side of the machine. Each measurement is expressed in dB(A). - Page 6 HEALTH ADDITIONAL REQUIREMENTS FOR SAFETY Operation chattering generated .Before highlighted all must fulfill the instructions of the value of the machine during prescribed the fourth item of Article 2.2, Annex I of the European Directive 89/392 with the following changes need some more health and safety requirements, as in the models from operator be done manually in all phases of work, vibrate.
- Page 7 4. WARRANTY Specialized accessories for customers who as part of a commercial or professional The manufacturer warrants that this product has been subjected to strict control, and production materials used are error-free. This warranty applies to the User 12 months from the date of the delivery or the distributor / dealer 18 Months.
- Page 8 The manufacturer provides no other written or oral, explicit or implied warranties in relation to its products and provides no implicit Warranties with respect to its merchantability or fitness for particular Uses which were not provided in the agreement So the above limitations may, in countries where a Product provided warranty period may not apply.
-
Page 9: Technical Details
5. TECHNICEL DETAILS EMC - Danger from electromagnetic fields The user is responsible for installation and use of this machine according to this manual! manuals described responsible. This equipment complies with the safety 89/336/EEC, 92/31/EEC and 93/68/EEC Electromagnetic Compatibility EMC) and the technical requirements EN 61000-6-2:2005, EN 61000-6- 4:2007+A1:2011 and is intended for use in industrial, but not provided in residential buildings... - Page 10 6. INSTALLATION, MINIMUN REQUIREMENT The connection to a public power supply (instead of Power network) MAY cause interference or interference during operation We advise you to avoid the proximity with the following elements: - Signal, control and telephone cables, - Radio and television stations and receivers - The supply cable must be as short as possible and must not be twisted or be involved.
-
Page 11: Reloading And Transport
7. RELOADING AND TRANSPORT Only the systems listed below may be used for the transportation of the be used. In each case must be secured that the transport and Lifting means are enough to withstand the weight of the machine with its Packaging (500 kg) to wear. - Page 12 into account the lifting process and the resulting effective Capacity When the lifting chains should come with machine parts in contact shall Nylon straps used or the ropes or chains must jute. Adequately clean rag be wrapped. Especially when you hit and the movement is to make sure that worked or painted surfaces are not damaged.
- Page 13 Man, the machine can lift with a rope (see Fig.) You have to watch that the machine is well balanced. CAUTION: When the machine is loaded on an open truck, they must be a tarp to be covered. MAN SHOULD NEVER SAW ARM THAN LAST The saw arm must always be at the bottom for transport.
- Page 14 The saw arm has blocked in completely lowered position at subsequent displacements of the machine must be taken into account: the ends of the lifting means are hooked; you have free to use some versions are attached to the four corners of the support column plates.
- Page 15 8 OPTINAL INSTALLATION OF ACCESSORIES 8.1 The short description of the installation instructions which are Supplied with! Supply and discharge roller conveyor To install these components correctly, the machine has been leveled and be attached. The stability shall be proven (we recommend the supply side (left) for each 2m 4mm higher to install to the return of the (To favor coolant)
- Page 16 8.2 The spray clean system Minimal lubrication The minimal lubrication is used specifically for pipes and profiles with the minimum lubricating device to the sawing, which is installed, the traditional coolant emulsion can be almost completely eliminated. The processed material is so clean and spread or waste of emulsion and water is avoided.
- Page 17 switched off. 9. SELECTION THE BANDSAW BLADE In this section the relationship between saw blade and will to be cutting material explains. To full power of the machine it is useful to apply the correct species and the possible limitations of the tools used to understand. The saw blade to be used must have the following dimensions (in mm): Max length: 3840, Min Length: 3800, Standard length: 3820mm Wild: 27 mm for YCM-350SA...
- Page 18 * with closely spaced teeth for cutting thin materials such as tubes and profiles * with a wide tooth spacing for cutting solid material or work pieces, *which a long section of channel (e.g. the centerpiece of a "U" profile) or softer materials such as aluminum, copper, soft bronze.
- Page 19 Recommended Full Large Profile Bundle Gearing material Wall Wall section Diameter thickne thickness length (mm) (mm) (mm) Variable Teeth 1,5max 14 M42 1 bis 2 10/14 M42 8/12 M42 20max 2 bis 4 6/10M42 40max 4 bis 8 5/8 or 5/7 m42 30 bis 80 6 bis 12 50 bis 100...
- Page 20 ALLOY BAND SPEED MATERIAL ASTM NO. FT./MIN M/MIN Copper 173,932 Alloy 330,365 623,624 230,260,272 280,264,632,655 101,102,110,122,172 1751,182,220,510 625,706,715,934 Carbon 1117 Steel 1137 1141,1144 1141 HI STRESS 1030 Carbon 1008, 1015, 1020, 1025 Steel 1035 1018, 1021, 1022 1026, 1513 A36(SHAPES),1040 1042,1541 1044,1045 1060...
-
Page 21: Intended Use And Contraindications
440C 304,324 304L 316,316L 10. INTENDED USE AND CONTRAINDICATIONS... - Page 22 The machine can perform working cycles, at the end of each of the commitment of the Operator is required to replace the work piece, and the cut May alter or restart the cycle cutting conditions = SEMI-AUTOMATIC CYCLES So many times when the machine is performed manually, and other Phase in which it automatically executes the operation (in which Is limited operator or monitoring).
- Page 23 Power supply is attached. 2 - Make yourself before working with the proper operation and setting of familiarize machine. 3 - Prevent yourself or other people unnecessarily exposing hazard, use, for example, protective goggles and gloves when cleaning and for the material movement.
- Page 24 supply). 13 -Keep away hands and body parts during the cutting process from the cutting zone 14 -Check that the workpiece is actually excited when the vise is automatically closed, and the clamping pressure is correct. 15 The support material is on both sides of the cut appropriately so can’t not be fallen down;...
- Page 25 20 - When operating the machine use ear protectors (ear protection, etc.). WORK WITH CAUTION ALWAYS AND REASON AND YOU HAVE NEVER UNNECESSARY RISKS FROM! In some parts of the machine pictograms are mounted on the Point security measures that people who works on the machine comply needs.
- Page 26 machine be present. -Overload protection by bimetal switch for the individual motors -Overheating protection by thermal switch that is directly in the tape engine is mounted. -Emergency stop with the immediately stop for all machine movements, In order to restore it, it must be rotated ¼ turn. -Sensor for the belt tension: When a tool breaks or reduction the clamping force the machine stops automatically.
- Page 27 Vice for the cut with max. Hub 7 mm in accordance with the standards on automatic closures. Frame with extended coverage on both sides Coolant for the cutting process entirely and so contains a Prevents spreading on the floor. Machine parts with rounded or chamfered edges. 10.2.3 illuminating the work area Insufficient lighting can cause injury to the operator, therefore, the work area must be adequately illuminated.
-
Page 28: Preparation Before Use
This is a semi-automatic metal cutting band saw with hydraulic feed Takes you cuts from 0 ° to 60 ° left and 45 ° right of profiles and Solid materials made of metal. It is not suitable for wood and similar materials (see Machinery Directive 89/392, Appendix. - Page 29 It is necessary to check that the machine has no visible damage or defects and the supplied standard equipment - including key, setting tools, machine manual, etc. - is in order. if additional units are included, the corresponding adjustment to the examine the machine.
- Page 30 Chip support plate 5. Assemble the foot-pad support to adjust the ground level 6. All moving parts are already lubricated (tape guides, pivots, storage, etc.) 2.1 cooling lubrication...
- Page 31 Cutting oil and water in the proportion 1:10, 1:15, or in accordance with the Manufacturer's instructions of the product mix carefully (the container Liters). Pour the cooling water in the rear tank. Check the cooling tank in the right position at the left side of the machine 12.1.1 Adjust the value of the cooling liquid quantity form the blade guide holder 12.2 Power supply...
- Page 32 It is important to ensure that the voltage and line frequency on the Nameplate information listed correspond (on the side of the control panel). Deviations above 10% lead to more or less distinct Irregularities in operation. The supplied connector to a suitable power outlet (if this needs to be replaced, this work must by authorized personnel e.g.
-
Page 33: Blade Tension
the Button is displayed turn. c)Turn the black main switch to ON and the controller switches. d)The white warning lights should light up after about 5 seconds press the white button (hydraulic) on the control panel and the Hydraulic motor turns on. e) Check them that the pressure gauge (A) on the hydraulic unit at least Displays a bar and lift the saw frame / lower the front panel, saw frame up / take down. -
Page 34: Function And Description Of Controls
The machine is supplied with a tensioned belt (the engine start is only possible if the belt is properly tensioned.) If this is not the case, it should be checked off machine that the band did not slip out of the guide. Opening the guard, and checks that the strip seated on the wheels and is properly inserted in the guide shoes if necessary, of the belt-tension to loosen a few turns, Insert the tape again and close the hood again, making sure that the machine at... - Page 35 This model has a fixed control panel. The control panel is very easy to use and helps the operator with Error displays when something does not work. The control panel has the following device: 1) Lockable main switch. 2) Control panel with display, buttons and switches 3) Emergency stop button 1.
- Page 36 Item 3 Low voltage circuit (24V AC) glows white = OK Item 11 Cover blade guard, overheating protection, Saw blade motor lights green = OK band voltage If the indicator lights go out in the work cycle, the machine stops and it the cause must be sought, which led to the disorder (sheet not tense / hood open / motor overload / fuse blown etc.).
- Page 37 2) When the selector switch to " Reduce saw frame” is rotated, moves the Saw arm in the "Rapid traverse" as long as this is activated down. Should the Cause material detection button, switches the "Rapid traverse" and an Downward movement is above the value set on the feed regulator determined. Speed selector switch This switch is used to adjust the speed of the saw blade motors (37-0 -74 m / min), for machines with frequency, the speed continuously (25 -90 m / min) can be...
- Page 38 This 2 - 3 mm of play between the work piece and the clamping jaws (for automatic Clamping device necessary) let. It is also possible the whole vise from one side to the other to lay side of the worktop, so that he is not in the line of intersection, eg for miter cuts.
- Page 39 14.2.3 *Load the work piece to the desired length. *Check that the Miter clamping lever is fixed. Miter clamp lever Start the hydraulic pump and the vice with the corresponding close selector. pressure is independent, could adjust the pressure for clamp . hydraulic The standard is 8 kg/cm2 from manufactory.
- Page 40 Vise pressure gauge Vise adjust pressure value Check that the work piece is actually clamped between the jaws and the closing force is sufficient, but no deformation of the Caused material. Bring the front saw belt into position so that if Down stroke does not bump against the work piece or the jaw, to the clamping, loosen and slide the guide.
- Page 41 14.2.5 Set the cut end switch so that the work piece also is actually cut. Adjustment end cut switch 14.2.6 Check the Average start switch on the right position Average start switch...
- Page 42 14.2.7 Adjustment cutting pressure. The pressure of cutting could be adjustment. The adjustment will follow the cutting material. The standard pressure will be 10 kg/cm2. 1. Cutting pressure adjustment value Cutting pressure gauge The oil flow for down the Bow saw-arm The oil flow for up the Bow saw-arm...
- Page 43 14.3 Operation (Semi-automatic cycle) After turning on the main switch, the indicator lights must be on, then the hydraulic button must be pressed to the hydraulic unit to start (when the machine is not used 15 minutes, turns the Hydraulic automatically). *Select speed of the saw blade.
- Page 44 14.5 ESC Electronic Speed Control The electronic drive enables continuous speed change of Saw band motors, so that the wear of the saw band and the optimized Services are adapted to the specific work piece. To prevent the saw blade breaks or stuck in the material remains, should No large changes be made during the cutting only during rotation idle.
- Page 45 14.7 Rotation of the saw table for miter cuts Lever Remove the right jaws. Turn the saw frame by hand to the angle of view they want to set, they clamp the lever fixed for or cuts up to left 45 °. right 90 °. And the saw arm could auto-stop at 6 different angles of 0 °...
- Page 46 14.9 Position of the operating unit Loosen the control unit located under the clamping lever, so that the Control unit can be rotated. This is particularly miter cuts on 45 ° is necessary to prevent a strike of the saw frame on the control Panel.
- Page 47 15. Setting for sawing machine 15.1 vise - play adjustment on the guide rails The selector switch to open. Open the chuck completely, loosen all screws and nuts. Then screw the first two screws, and then again a ¼ Solve rotation to adjust the guide.
- Page 48 15.2 Band saw - Setting the saw band shoes when changing the tape thickness This must be performed when the tape thickness of 0.9 mm or deviates the tape, after long use, by the hard metal plates no longer is performed properly. This can be checked most easily as follows: Take a straight piece of band saw blade with blunt teeth in the Introduce guide shoes and repeatedly slide back and forth to the...
- Page 49 Squareness of the saw band between band and worktop : This setting is very important and ensures together with the belt tension the Implementation of straight cuts. In this case, set the table to 0 °, the chuck fully open and set the saw arm upward. A very precise 90 ° Set angle on the counter (next to the jaws) and the saw band Create (in a position where the teeth contact not interfere).
- Page 50 position it so the slots. The screws firmly tighten. In this step, the bracket should be at the top. When this process should be difficult, the set screw can back Lower before you pull the spring, and then again in the same position provide.
- Page 51 16. USER MAINTENANCE The works cited are to be performed regularly in order to the manufacturer characteristics foreseen in terms of technology, safety and performance as possible long to obtain. 16.1 Saw band This is the most common maintenance operation, since the band saw blade during the operation deteriorated: * Move the saw arm in the position under * Unlock the Buckle...
- Page 52 Support system of band cover Blade tension adjustment handle Band cover...
- Page 53 16.2 Blade Clean Brush The machine had included the clean brush. The brush had auto-rotating The rotating power from the driver wheel. And it could be adjustment by the screw to tough the saw blade. Adjustment screw 16.4 Changeable support parts The vise extend support parts is changeable.
- Page 54 16.5 Regular work Daily or more often in highly-demanding machine: Remove filings and turnings from the machine, the smallest parts in the Transport chip tray which must be removed and emptied, the Check and top up coolant level, check the condition of the saw band and replace if necessary, the belt cleaning brush and the drive ring against the Disc presses control.
- Page 55 Overview Lubricant...
-
Page 56: Breaking Of The Saw Blade
17. BREAKING THE SAW BLADE To achieve a higher output of the machine, and a longer life of the To ensure the saw blade, it must be well broken in. When a new band saw blade is recommended that the feed rate at which the Saw blade penetrates into the work piece up to a half of the normal value - 40 cm ²... -
Page 57: Entering Of The Machine
18. ENTERING IN THE MACHINE The required for the machine maintenance is required to the for proper operation and to maintain the original obligations to the To ensure time. In the first period of their operation must also some additional work is carried out to ensure that all machine parts may shrink properly. - Page 58 A * Electric motor does not (for the blade) 3-4-5-9 B * Electric motor does not (for hydraulic unit) 1-2-3-4-5-9-17 C * Electronic control will not turn on 6-7-8-9 D * hydraulic circuit not under pressure 10-11-12-13 E * Hydraulik pump runs noisily 14-15-16-17 F * coolant is missing or not enough 18-19-20-21 G * sawing material moves or deforms 22-23-24 H * The cycle does not start 23...
- Page 59 20.2 error on tape / Causes / Solutions When broken teeth, broken bands or insufficient the life of the belt lay broken tape on the floor, the defects on the belt body and to the Teeth determine, in the Search the table below and read the appropriate remedy 1) EARLY AND EXCESSIVE WEAR OF TEETH Thrust too weak: increase;...
- Page 60 3) BREAKING THE TEETH Teeth are too big for the piece to be cut; Material is not well constrained; Coolant is not suitable; Insufficient coolant; Average pressure is too high: Check chips; Speed of the flywheels too low; Grooves are crowded with cut material. 4) CUT TO COARSE SURFACE Select strengthening the links;...
- Page 61 Average pressure decrease 7) Manifold Cut The approach saw band shoes to the cut; Check that the bearing surface of the work piece is level with the material to be cut; Check that the tape is perpendicular to the work surface: otherwise the Setting the saw band; teeth too tight;...
- Page 62 14) Span welded up the tooth / chips ARE TO COARSE, Average pressure decrease; Use a suitable coolant in sufficient quantity; Check wear of the brush to remove the chips from the flutes. 15) The band is on one side lined or Check the wear on the Saw band operations;...
-
Page 63: Disposal Of The Machine
21. DISPOSAL OF THE MACHINE This section provides instructions for the removal of the machine. There is no special procedure required only care so that Machine is not being damaged at the end of its life. In general: Container of the refrigerator Empty, the oil from the housing of the transmission and taken from the hydraulic system and dispose of properly.
Need help?
Do you have a question about the HU 350 DC and is the answer not in the manual?
Questions and answers