Table of Contents
Advertisement
Quick Links
Advertisement
Table of Contents

Related Manuals for XONTEL XT-M5CAM


Summary of Contents for XONTEL XT-M5CAM
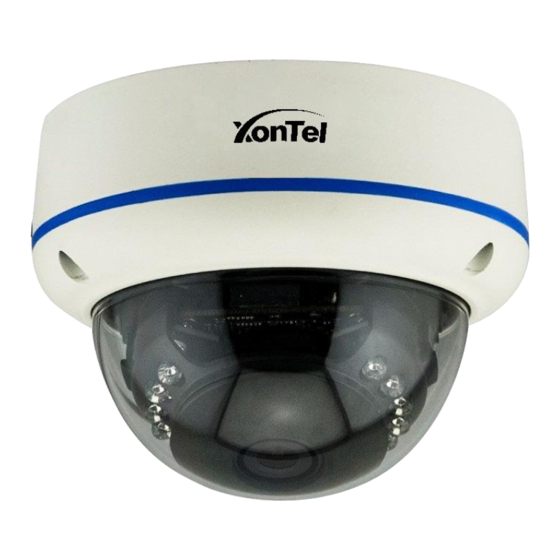
- Page 1 XT-M5CAM 5MP IP Dome Camera (Built-in PoE) User Manual...
-
Page 2: Table Of Contents
Contents 1.Login interface ………………………………………………………………………………………………………………………… Real-time Preview ……………………………………………………………………………………………………………………….. 4 2.1 Full screen preview ……………………………………………………………………………………………………………………. 4 2.2 PTZ control …………………………………………………………………………………………………………………………………. 4 2.2 Stream type selection ………………………………………………………………………………………………………………… 5 2.3 Display intelligent detection ………………………………………………………………………………………………………. 5 Playback …………………………………………………………………………………………………………………………………………… 6 Parameter configuration ……………………………………………………………………………………………………………...…… 7 4.1 Device Information ..…......................... 7 4.2 Time Settings ………………………………………………………………………………………………………………………………. -
Page 3: Login Interface
1.Login interface Enter the IP address of the camera in Google or Firefox (the default IP address is 192.168.1.188) to enter the login interface, as shown below: Username:admin Password:admin Language Arabic and English can be selected: Forgot password: click this button to reset the password according to the wizard; Select the sun icon to use the white page, and select the moon icon to use the black page;... -
Page 4: Real-Time Preview
Real-time Preview After successful login, the interface is as follows: Note: The device needs to be inserted with a TF card as a full function display interface, otherwise, the device is a simple display interface. 2.1 Full screen preview Click the full screen icon to preview the full screen, and press ESC to exit the full screen 2.2 PTZ control... -
Page 5: Stream Type Selection
【Preset point setting】First, turn the camera to the desired position through the direction button controlled by the PTZ, then select a preset number in the "preset point" drop-down list, and finally click the setting button. 【Preset point call】Select a preset number to be called from the "preset point" drop- down list, and then click the call button. -
Page 6: Playback
Playback Click "Video Playback" to enter the playback interface, select the time to call the video, click seach button the video will be automatically retrieved; play:Start current playback; stop:Stop current playback; Slow:Slow down playback speed (1/2, 1/4, 1/8, 1/16 times respectively); Fast:Speed up playback (2, 4, 8, 16 times respectively);... -
Page 7: Parameter Configuration
Parameter configuration Note: The device needs to be inserted with a SD card as a full function display interface, otherwise, the device is a simple display interface. 4.1 Device Information Equipment Name: the name of the equipment can be set. Equipment Type: displays the equipment type. -
Page 8: Time Settings
Serial Number: displays the product serial number. Master version: displays the software program version date. Hardware Version: Displays the version number of the hardware motherboard. System: PAL and NTSC image system can be switched. 4.2 Time Settings Manual timing: set IPC time manually. synchronization with PC: synchronize the current PC time. -
Page 9: Voice Output Settings
4.3 Voice output settings Voice alarm output: you can set the playing times of 8 voice alarms and click to listen. Arming Schedule: The Arming Schedule of voice broadcast can be set. -
Page 10: Alarm Lamp Output
4.4 Alarm lamp output You can set the defense time of alarm lamp output, and click the [Save] button after setting to take effect. 4.5 Display Settings OSD font: the OSD font size of the interface can be adjusted. Time OSD: Time OSD format and position can be adjusted. Title OSD: adjust the content, format and location of the title OSD. -
Page 11: Encoding Settings
4.6 Encoding settings Stream compression type: the main stream and sub stream coding types can be selected. Code stream type: including composite stream and video stream; Resolution: The front-end IPC supports several resolutions, and the corresponding ones will be displayed here. Video frame rate: different values can be selected from the drop-down list. -
Page 12: Image Parameters
4.7 Image Parameters Day night switch: divided into external trigger, automatic, color, black and white. The day and night switching mode of non-infrared network model is automatic by default, and the day and night mode of infrared network model is external trigger by default. The user selects the day and night switching mode according to the network machine model and the actual use scenario;... -
Page 13: Motion Detection
4.8 Motion Detection Parameter setting: you can set whether to enable the detection function, set the detection sensitivity, and set the detection area. Deployment Time: you can set the deployment time from Monday to Sunday. Linkage setting: you can set the linkage to upload email, video, FTP, alarm light, alarm output, capture, and voice broadcast. -
Page 14: Video Tampering
4.9 Video Tampering Parameter configuration: you can set whether to enable the detection function, set the detection sensitivity, and set the detection area. Deployment Time: you can set the deployment time from Monday to Sunday. Linkage setting: you can set the linkage to upload email, video, FTP, alarm light, alarm output, capture, and voice broadcast. -
Page 15: Human Detection
Enable: privacy masking can be enabled or disabled. Setting area: In the preview interface of Setting Area, press and hold the left mouse button and drag to select the area to be masked. Clear: click "Clear" to clear the area specified by IPC. 4.11 Human Detection Parameter setting: you can set whether to enable the human shape detection function;... -
Page 16: Video Plan
4.12 Video Plan Parameter configuration: video recording mode, pre-recording time and video recording delay can be set. Deployment Time: you can set the deployment time from Monday to Sunday. 4.13 Network Settings Basic setting: static IP or DHCP mode can be set; HTTP/HTTPS:You can set HTTP or HTTPS access on or off and port number;... -
Page 17: Rtmp Settings
4.14 RTMP Settings Basic settings: set whether RTMP is enabled or not and the port number; RTMP Push: set whether to display the set rules and detection results in the preview interface. No Disturb Time: set the no push time period in weeks. No Disturbance Setting: set the no push client. -
Page 18: Multicast Config
maximum heartbeat timeout, signaling transmission mode, and stream transmission mode. SIP server 1: Set the SIP 1 server number, IP, domain, port, and registration password. SIP server 2: Set the SIP 2 server number, IP, domain, port, and registration password. Multicast settings: set multicast ports and multicast addresses. -
Page 19: Email Settings
4.17 Email Settings Sending Email: fill in the email address of the sending box. Password: fill in the email password of the outbox. confirm Password: Confirm the email password. SMTP Server: Set the SMTP server address of the outgoing mailbox. SMTP Port: Set the SMTP server port of the outgoing mailbox. -
Page 20: Alarm Input
4.19 Alarm Input Parameter configuration: select whether to open alarm input, alarm input terminal, name and trigger level. Deployment Time: You can set the deployment time period from Monday to Sunday; Linkage setting: you can set the linkage to upload email, video, FTP, alarm light, alarm output, capture, and voice broadcast. -
Page 21: User Settings
4.21 User Settings Modify: login password can be changed for administrator account; Ordinary users can change the user type, set two types: ordinary users and operators, and set different permission assignments in Permission. Delete: delete the new user. Permission: you can assign permissions to ordinary users. Add new users: users can be added as required. -
Page 22: Storage Management
4.22 Storage Management The current recording status can be displayed, the used capacity, remaining capacity and total capacity of SD card can be formatted. 4.23 System Update Select the correct upgrade package file and click Upgrade to upgrade the camera. -
Page 23: Device Maintenance
4.24 Device Maintenance Configuration: current configuration can be exported and user configuration can be imported. Restore default: simple restore or full restore is available. Automatic maintenance: automatic maintenance time can be set; Restart: restart the camera immediately. 4.25 Developer You can access The IP camera through telnet after enabling this setting... -
Page 24: File Management
5.FILE Management Select the time and click the search button to retrieve the SD card linkage snapshot. 6.Logout Click the blue letter "a" in the upper right corner to log out, as shown in the figure...
Need help?
Do you have a question about the XT-M5CAM and is the answer not in the manual?
Questions and answers