Table of Contents
Advertisement
Quick Links
USER MANUAL
25L LOW ENERGY COMPRESSOR
DEHUMIDIFIER WITH DIGITAL HUMIDISTAT
AND ADVANCED LAUNDRY MODE
LD25PROLEW
Thank you for choosing electriQ.
Please read this user manual before using this innovative dehumidifier and keep it safe for future reference
Visit our page www.electriQ.co.uk for our entire range of Intelligent Electricals
Advertisement
Table of Contents

Related Manuals for ElectrIQ LD25PROLEW


Summary of Contents for ElectrIQ LD25PROLEW
- Page 1 DEHUMIDIFIER WITH DIGITAL HUMIDISTAT AND ADVANCED LAUNDRY MODE LD25PROLEW Thank you for choosing electriQ. Please read this user manual before using this innovative dehumidifier and keep it safe for future reference Visit our page www.electriQ.co.uk for our entire range of Intelligent Electricals...
-
Page 3: Table Of Contents
CONTENTS SAFETY INSTRUCTIONS VISUAL SAFETY GUIDE APPLIANCE DIAGRAM FEATURES INSTALLATION CONTROL PANEL OTHER FEATURES AND INDICATORS POSITIONING THE DEHUMIDIFIER WATER DRAINAGE Wi-Fi CONNECTION CARE AND MAINTENANCE TROUBLESHOOTING FAULT CODES TECHNICAL DATA SUPPORT... -
Page 4: Safety Instructions
SAFETY INSTRUCTIONS Carefully read the instructions before Never operate this appliance if the • • operating the unit. power cord or plug is damaged. This appliance is for indoor use only Ensure the power cord is not stretched • • and is only intended for use in a or exposed to sharp objects/edges. - Page 5 R290 has a low GWP (Global Warming where the air composition is flammable. • Potential) of 3. Ensure that the louvre is open before • The LD25PROLEW contains about 85g operating the unit. • Due to continual product development of R290 refrigerant gas. •...
-
Page 6: Visual Safety Guide
VISUAL SAFETY GUIDE WHERE OR WHEN NOT TO USE YOUR DEHUMIDIFIER... -
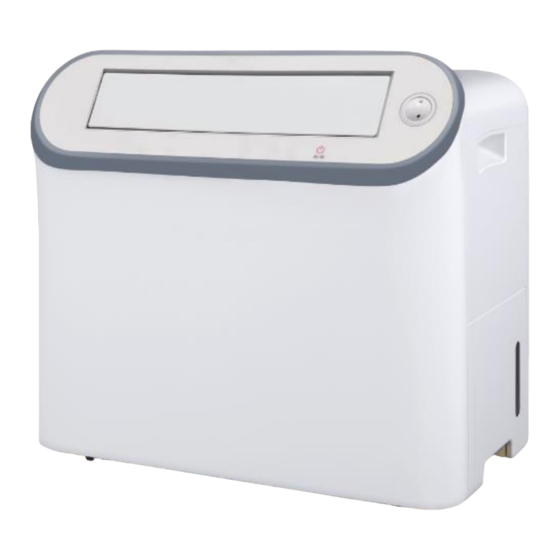
Page 7: Appliance Diagram
APPLIANCE DIAGRAM FEATURES Your dehumidifier belongs to the electriQ dehumidifier range featuring power saving logic. Innovative laundry mode with PTC heater and infrared sensor, ensuring the warm dry air is targeted at the dampest areas. Dries laundry more efficiently than a tumble dryer. - Page 8 Use in an enclosed area for maximum efficiency. Close all doors, windows to create an effective operating environment. Do not use outdoors. Your electriQ dehumidifier will begin to protect your space from the harmful effects of excessive moisture as soon as it is turned on. Excess moisture is dispersed throughout your home. For this reason, the dehumidifier should be positioned in a central and clear location so that it can draw this moist air towards it from all over the home.
-
Page 9: Control Panel
CONTROL PANEL Press to run the CLEAN mode, which will run the fan to dry out the CLEAN internals of the unit after use, preventing the build up of mould during BUTTON periods of non-operation. While the appliance is operating, repeatedly press to set the duration TIMER of the shutdown timer. - Page 10 DISPLAY Wi-Fi Dehumidify Defrost Laundry Auto OPERATING MODES Water Tank Full MODE SYMBOLS SHOWN Dehumidify & Humidity / Timer Turbo Display Laundry & Horizontal Vertical Child lock Timer Swing Swing HUMIDITY / Shows the current relative humidity of the room. When the HUMIDITY TIMER button is pressed will show the desired humidity set, and when the DISPLAY...
- Page 11 FUNCTIONS POWER When first plugged in, press the POWER button ,to turn on the unit,the air deflector will then open. The unit will now start operating. LAUNDRY Press the LAUNDRY button to start the laundry mode, the laundry mode and Auto icons will illuminate on the display.
- Page 12 HUMIDITY Repeatedly press the HUMIDITY button to adjust the desired humidity in dehumidify mode. The desired humidity can be set between 40% and 70% in 5% increments. The appliance will start dehumidifying when the desired humidity is 5% lower than the current humidity, and will continue to run until the humidity of the room is 1% under the desired level.
-
Page 13: Other Features And Indicators
OTHER FEATURES AND INDICATORS TANK FULL INDICATOR When the water tank is full, removed or incorrectly inserted the unit will stop dehumidifying, the water tank full light will illuminate and the unit will beep. Empty the tank and reinsert it correctly to resume operation. AUTO DEFROST The appliance has a defrost mode, which monitors the temperature of the evaporator (cold coils). -
Page 14: Water Drainage
WATER DRAINAGE When the water tank is full, the unit will stop automatically. When this happens the TANK FULL indicator will illuminate on the control panel. NOTE: Only empty the water tank when it is full or before moving or storing the unit. There are two ways to dispense collected water. - Page 15 SETTING UP THE WIFI APP BEFORE YOU START • Ensure your router provides a standard 2.4GHz connection. • If your router is dual-band ensure that both networks have different network names (SSID). The provider of your router / Internet service provider will be able to provide advice specific to your router.
- Page 16 REGISTER THE APP 1. Press on the register button Read the Privacy policy 3. Enter your email address or at the bottom of the screen. and press the Agree phone number and press Button. continue to register. 4. A verification code will be 5.
- Page 17 SETTING UP YOUR HOME WITHIN THE APP TUYA is designed so it can work with a large number of compatible smart devices within your home. It can also be set up to work with multiple devices within different houses. As such, during the setup process the app requires that different areas are created and named to allow easy management of all your devices.
- Page 18 CONNECTING USING QUICK CONNECTION Before initiating the connection, make sure the unit is in standby mode, with the Wi-Fi symbol flashing twice per second. If not, follow the instructions for changing the connection mode. Ensure your phone is connected to the Wi-Fi network. (We advise turning mobile data off during setup) 1.
- Page 19 CONNECTING USING AP MODE (ALTERNATIVE METHOD) Before initiating the connection, make sure the unit is in standby mode, with the WiFi light flashing once per second. If not, follow the instructions for changing the connection type. Ensure your phone is connected to the WiFi network. (We advise turning mobile data off during setup) 1.
- Page 20 CONTROLLING YOUR DEVICE THROUGH THE APP THE HOME SCREEN Add a device Chose the device to control LD25proLEW Access the user profile Smart Scenes / Automation...
- Page 21 DEVICE SCREEN The device screen is the main control screen for the dehumidifier, providing access to the controls to amend the functions of the dehumidifier Profile: Use to change the name of the dehumidifier and amend user settings. Back: Returns to the Home Screen Mode: Displays the Indoor Temperature:...
- Page 22 SMART SCENES Smart Scenes is a powerful tool providing the option to customise the operation of the dehumidifier based both on conditions within the room and outside influences. This gives the user the option of specifying much more intelligent actions. These are split into two categories Scene and Automation.
- Page 23 AUTOMATION Automation allows an automatic action to be set up for the device. This can be triggered by the Time, indoor temperature, humidity of the room, weather conditions, and a range of other influences. 1. Press on the Smart Scene 2.
- Page 24 DEVICE DETAILS SCREEN The device details screen gives you the option to edit the details for the device, and use some of its additional features. The device details screen can be accessed from the device screen by pressing on the symbol in the top right-hand corner. CHANGING THE NAME OF YOUR DEVICE The top option within this allows you to change the name of the device to something relevant to the use of the product, such as...
-
Page 25: Care And Maintenance
CARE AND MAINTENANCE Always shut off the unit and unplug from the mains before cleaning or performing any maintenance. When it is not in use for long periods it is advisable to run the CLEAN mode before draining the tank and unplugging the appliance. Do not use chemical solvents (such as benzene, alcohol or gasoline) as they may cause irreversible damage to the unit. -
Page 26: Troubleshooting
Any other malfunctions will need to be reported to electriQ service centre. Do not attempt unauthorised repairs as these may invalidate the warranty. Recycling facilities are now available for all customers at which you can deposit your old electrical products. -
Page 27: Fault Codes
FAULT CODES CODE REASON RESOLUTION Evaporator temperature sensor Check wiring of temperature sensor / fault replace sensor Ambient temperature / humidity Check wiring of temperature and sensor fault humidity sensors / replace Infrared sensor fault Check wiring of sensor / replace Defrost sensor fault Check wiring of sensor / replace Fan Motor fault... -
Page 28: Technical Data
526 x 287 x 454 Dimensions mm (WxDxH) 15.8 Weight kgs electriQ UK SUPPORT www.electriQ.co.uk/support Please, for your own convenience, make these simple checks before calling the service line. Has the unit been standing upright for at least 2 hours?
Need help?
Do you have a question about the LD25PROLEW and is the answer not in the manual?
Questions and answers