Table of Contents
Advertisement
Quick Links
Advertisement
Table of Contents

Subscribe to Our Youtube Channel
Related Manuals for Ozone RAPIDO 3X


Summary of Contents for Ozone RAPIDO 3X
-
Page 2: Table Of Contents
CONTENTS Thank You Warning Your Rapido 3X Limitations Preparation Basic Flight Techniques Advanced Flying Techniques Incidents Care and Maintenance Ozone Quality Line diagram Materials Technical Specifications EN v1.0 September 2023... -
Page 3: Thank You
THANK YOU Thank you for choosing Ozone. As a team of free flying enthusiasts, competitors and adventurers, Ozone’s mission is to build paragliding equipment of the highest quality. We are constantly working together to develop cutting edge designs with class leading performance and maximum security. Wings are rigorously tested and developed by our team of experienced, discerning, world-class pilots to ensure they meet your expectations and demands. -
Page 4: Warning
Flying an Ozone paraglider is undertaken with the full knowledge that paragliding involves such risks. • As the owner of an Ozone paraglider you take exclusive responsibility for all risks associated with its use. Inappropriate use and or abuse of your equipment will increase these risks. -
Page 5: Your Rapido 3X
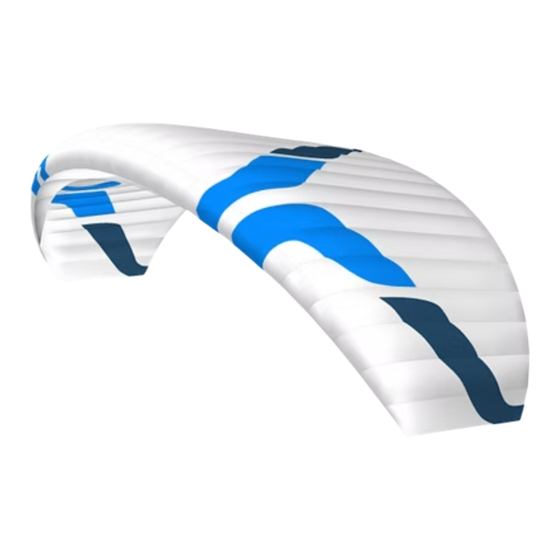
YOUR RAPIDO 3X The Rapido 3X is an uncompromising speedwing created for intermediate-to-advanced level pilots seeking high performance and low pack-weight. Evolved from the Rapido 3 with increased roll sensitivity, reduced weight and an innovative new riser design to deliver improved speed, agility and power without compromising stability and comfort. - Page 6 Never fly with your Risers trimmers released in The Rapido 3X has been designed with 3 risers group per side equipped with trimmers. The turbulent conditions. A riser is covered with coloured webbing to allow for easy identification. The trimmers should only be used in calm conditions when you want more speed and a higher sink rate.
-
Page 7: Limitations
LIMITATIONS Pilot Suitability The Rapido 3X has been designed as a solo mini wing for advanced level speed riding pilots, it is not suitable for training, beginners or tandem flights. Choosing Your Wing Size A range of sizes from 5.9m to 11m are available. The most suitable size for you depends on your experience and how you intend to use it. - Page 8 (e.g early morning dew) should be avoided at all costs. Towing Do not tow launch your Rapido 3X. Modifications Your wing has been carefully designed and trimmed to give the optimum balance of performance, handling and safety.
-
Page 9: Preparation
PREPARATION Harness It is important to set up your harness correctly before flying the wing. Make sure to spend time adjusting your harness’s different settings until you are completely comfortable. Wing To prepare the wing, lay it out on the top surface and perform a thorough daily check. You should inspect the top and bottom surfaces for any rips and tears or any other obvious signs of damage. -
Page 10: Basic Flight Techniques
BASIC FLIGHT TECHNIQUES Launching Your Rapido 3X will launch with either the forward or reverse technique. The wing should be laid out in a pronounced arc, with the centre of the wing higher than the tips. Forward Launch Nil to Light winds... - Page 11 To familiarize yourself with the Rapido 3X your first turns should be gradual and progressive. The turn behaviour of To make efficient and coordinated turns with the Rapido 3X first look in the direction you the wing is direct and want to go, then lean into it.
- Page 12 Landing The Rapido 3X shows no unusual landing characteristics but as a reminder, here are some tips: • Always set up for your landing early, give yourself plenty of options and a safe margin for error. • Once below 30 metres avoid turning tightly as the glider will have to dive to accelerate back to normal flight. If you are at low altitude, or if you hit sink, this could mean you hit the ground harder than necessary.
-
Page 13: Advanced Flying Techniques
ADVANCED FLIGHT TECHNIQUES Trimmers The trimmers are designed to adjust the speed and sink rate of the wing, they should not IMPORTANT be used to fly in stronger winds than it is safe to do so with the trimmers closed. Make sure Releasing the you are an experienced mini wing pilot before attempting to fully open the trimmers, and trimmers decreases... -
Page 14: Incidents
Make sure the glider is not in parachutal stall before making any further inputs. If your Rapido 3X collapses in accelerated flight, return the trimmers to the slow position and manage the collapse using the same methods described above. - Page 15 Cravats If the tip of your wing gets stuck in the lines, this is called a ‘cravat’. This can make your glider go into a spiral, which is difficult to control. The first solution to get out of this situation is to stabilise the glider into normal flight, i.e get control of your direction and use strong deep pumps of the brake on the cravated side.
-
Page 16: Care And Maintenance
CARE AND MAINTENANCE Caring Tips Careless ground handling damages many paragliders. Here are some things to avoid in order to prolong the life of your aircraft: • DO NOT drag your wing along the ground to another take-off position - this damages the sailcloth. - Page 17 Ozone recommends to use the concertina packing method exactly as shown so that all of the cells rest alongside each other and the plastic reinforcements are not unnecessarily bent. Using an Ozone Saucisse or Saucisse light pack will help preserve the life of the wing and aid with the speed and ease of packing.
- Page 18 Step 4. Group together the middle/trailing edge of the wing by sorting the folds near the B, C and D tabs. If using a Saucisse pack go to Step 8. Step 5. Once the LE and rear of the wing have been sorted, turn the whole wing on its side. Step 6. Fold the wing with 3 or 4 folds whilst being careful to not crush the LE. Step 7. Now place the folded wing into the stuff sack.
- Page 19 Step 8. If using the Saucisse Pack, carefully zip it up without trapping any material. Step 9. Turn the Saucisse on its side and make the first fold just after the LE reinforcements. Do not fold the plastic reinforcements, use 3 or 4 folds around the LE. IMPORTANT: Do NOT lay the wing flat on the ground before packing the glider, this will cause abrasion damage to the top surface as you pull the glider towards the middle. ALWAYS pack from a mushroom or lift the wing off the ground when gathering the wing and grouping the leading edge.
- Page 20 After a day of speedriding, it is important to allow the wing to dry in a warm, dry space, Never pack away or before folding or packing for longer-term storage. Avoid storing the Rapido 3X overnight in store your glider wet.
- Page 21 When cutting out the patches allow ample overlap of the tear and make sure both sides are different sizes. Make sure to round off each corner of the patches. You can find more information about repairing your wing on the Ozone website, including step by step instructions with pictures.
- Page 22 The dimensions of the lines tend to move during the first part of their life, it is therefore recommended to have a performance trim check within the first 50hrs of use. To ensure the correct trim, the lines should be measured and adjusted to the published values as necessary.
-
Page 23: Ozone Quality
OZONE QUALITY GUARANTEE At Ozone we take the quality of our products very seriously, all our gliders are made to the highest standards in our own manufacturing facility. Every glider manufactured goes through a stringent series of quality control procedures and all the components used to build your glider are traceable. -
Page 24: Line Diagram
Rapido X Rigging diagram LINE DIAGRAM Individual and linked line lengths can be found online. A Riser B Riser B2 B3 B4 B5 B6 B9 B10 Brake handle C Riser... -
Page 25: Materials
MATERIALS All Ozone gliders are made from the highest quality materials available. Cloth Upper Surface Dominico N20D / Porcher 7000 Lower Surface Porcher 7000 Internal Ribs Porcher 40 hard Leading Edge Reinforcement Plastic pipe Line Set Brake Lines Riser Lines... -
Page 26: Technical Specifications
TECHNICAL SPECIFICATIONS No. of Cells Projected Area (m Flat Area (m 10.9 Projected Span (m) 3.97 4.14 4.59 4.87 5.39 Flat Span (m) 4.75 4.96 5.84 6.46 Projected Aspect Ratio Flat Aspect Ratio Root Chord (m) 1.51 1.57 1.75 1.85 2.05 Glider weight (kg) 1.31... - Page 27 INSPIRED DRIVEN BY NATURE, BY THE ELEMENTS Ozone Gliders Ltd 16 Barnes Green Livingston Scotland UNITED KINGDOM...
Need help?
Do you have a question about the RAPIDO 3X and is the answer not in the manual?
Questions and answers