Table of Contents
Advertisement
Quick Links
Advertisement
Table of Contents

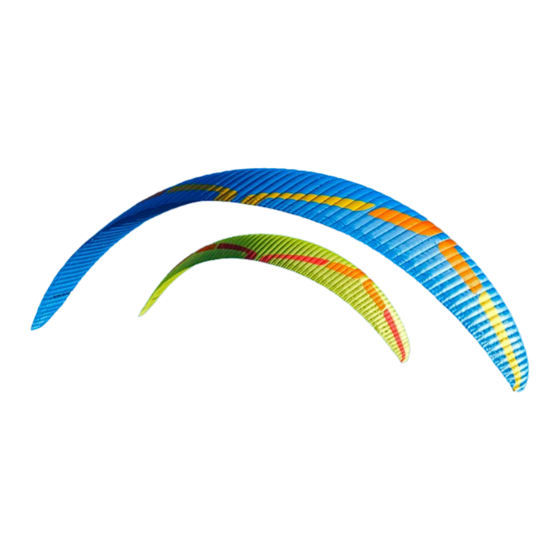
Related Manuals for Ozone ZENO 2


Summary of Contents for Ozone ZENO 2
-
Page 2: Table Of Contents
CONTENTS Thank You Warning Your Zeno 2 Preparation Limitations Basic Flight Techniques Rapid descent Techniques Incidents Care and Maintenance Ozone Quality Technical Specifications Drawings/Riser Lengths Rigging Diagram Materials EN v1.0 April 2022... -
Page 3: Thank You
THANK YOU Thank you for choosing Ozone. As a team of free flying enthusiasts, competitors and adventurers, Ozone’s mission is to build paragliding equipment of the highest quality. We are constantly working together to develop cutting edge designs with class leading performance and maximum security. Wings are rigorously tested and developed by our team of experienced, discerning, world-class pilots to ensure they meet your expectations and demands. -
Page 4: Warning
Flying an Ozone paraglider is undertaken with the full knowledge that paragliding involves such risks. • As the owner of an Ozone paraglider you take exclusive responsibility for all risks associated with its use. Inappropriate use and or abuse of your equipment will increase these risks. -
Page 5: Your Zeno 2
YOUR ZENO 2 The Zeno 2 builds on the success of the original, retaining the same cell count and aspect ratio to maintain the balance of comfort/performance/ease of use, whilst squeezing more performance, speed, and precision out of the concept. - Page 6 Risers The Zeno 2 has been designed with 2 risers per side. The A risers have a smaller Dyneema riser holding the outermost AR3 line. As the wing ages, it is not unusual for the AR3 risers to reduce in length.
- Page 7 It is NOT suitable for beginner or intermediate pilots, aerobatic manoeuvres, training or tandem flights. To be flown safely, the Zeno 2 requires a high level of piloting skills, pilots are expected to have the necessary active flying skills and quick reaction times to keep a high aspect ratio wing open in turbulent air.
- Page 8 Towing The Zeno 2 may be tow-launched. It is the pilot’s responsibility to use suitable harness attachments and release mechanisms and to ensure that they are correctly trained on the equipment and system employed. All tow pilots should be qualified to tow, use a qualified tow operator with proper, certified equipment, and make sure all towing regulations are observed.
-
Page 9: Preparation
PREPARATION Accelerator System Attach the speed system lines to the accelerator system on the risers with the Brummel IMPORTANT hooks. Alternatively they can be bypassed with the speed system attached directly to the riser Using the accelerator accelerator lines using a Larks foot. decreases the angle There must be enough slack in the speed system to ensure the A risers are not inadvertently of attack and makes... - Page 10 Wing To prepare the wing, lay it out on the top surface and perform a thorough daily check. You should inspect the top and bottom surfaces for any rips and tears or any other obvious signs of damage. Lay out the lines one side at a time, hold up the risers and starting with the brake lines, pull all lines clear.
-
Page 11: Basic Flight Techniques
Speed to Fly Never apply the brakes The Zeno 2 achieves its best glide in still air at trim speed. To maximise glide ratio when whilst using the speed gliding downwind or when the air is not excessively sinking fly at trim speed or slightly slower system - it makes the by applying gentle pressure on the B risers. - Page 12 At full speed the Zeno 2 is very fast, we recommend to only fly at full speed when absolutely necessary, such as when on final glide during a competition or when flying towards a strong thermal. 3/4 speed should suffice in most normal XC conditions.
- Page 13 When the conditions are turbulent, be more active and anticipate the movements of your wing, always be aware of your altitude and do not over-react. We strongly advise you to keep hold of your brakes at all times and to not fly in turbulent conditions.
- Page 14 B risers. Landing The Zeno 2 shows no unusual landing characteristics but as a reminder, here are some tips: • Always set up for your landing early, give yourself plenty of options and a safe margin for error.
- Page 15 • If the glider does begin to climb, ease off the brakes (10-20cm) - do not put your hands up all the way - then flare again, but more gently this time. Keep the brakes at mid speed, stand up, be ready to run and make sure you brake fully as you arrive on the ground. •...
-
Page 16: Rapid Descent Techniques
B-Line Stall Traditional B-line stalls are not possible with the Zeno 2. Prolonged deep input on the B risers will result in a full stall. Do not do it. - Page 17 It is possible for the Always be prepared Zeno 2 to remain neutral in a spiral dive, always be prepared to pilot the wing out of a spiral to pilot the wing out dive.
-
Page 18: Incidents
Make sure the glider is not in parachutal stall before making any further inputs. If your Zeno 2 collapses in accelerated flight, immediately release the accelerator and manage the collapse using the methods described above. Cravats Cravats are when the wing tips become trapped within the lines and can result in the wing entering a spiral dive if not addressed correctly. - Page 19 spinning. Correctly done, this action will clear the cravat quickly, it is the most efficient and effective method. You can also try collapsing the wing tip by pulling on the AR3 line, this can help free small stubborn wing tip cravats. Whichever method you use, be careful with any brake inputs to not stall the opposite side.
-
Page 20: Care And Maintenance
The folding pillow can be deflated and carried in your harness. Using the Ozone Concetino will help preserve the life of the wing and aid with the speed and ease of packing. - Page 21 Step 3. Group together the middle and the trailing edge (TE) of the wing by sorting the concertina folds near the B and C tabs. Step 4. Once the LE and TE of the wing have been sorted, turn the whole wing on its side. If using the Concertino pack go to Step 7.
- Page 22 Step 5. Place the Folding Pillow below the LE - at the point of the first fold. The pillow reduces the angle of the fold and helps preserve the plastics. Next fold the TE over the LE being careful to not fold with tight angles.
- Page 23 Step 7. If using a Concertino, with the wing laid on its side carefully close the zip without trapping any material. Step 8. Lay the Folding Pillow in place and make the fold of the LE around it. Use 3 folds.
- Page 24 IMPORTANT: Do NOT lay the wing flat on the ground before packing the glider, this will cause abrasion damage to the top surface as you pull the glider towards the middle. ALWAYS pack from a mushroom or lift the wing off the ground when gathering the wing and grouping the leading edge.
- Page 25 Caring Tips Careless handling damages many paragliders. Here are some things to avoid in order to prolong the life of your aircraft: • DO NOT drag your wing along the ground or any hard surface as this is guaranteed to damage to the sailcloth.
- Page 26 Make sure to round off each corner of the patches. If you damage a line: Any line that is visually damaged MUST be replaced. Lines can be ordered from your local Ozone dealer, alternatively use a reputable paragliding service centre to make the replacement lines.
- Page 27 It is important that replacement lines are made from the correct materials and diameters. You should check lengths against their counterpart on the other side of the wing to make ensure symmetry. Once the line has been replaced, inflate and check the glider before flying. Maintenance Checks Your wing should be checked regularly to ensure proper airworthiness.
- Page 28 Finally, a flight test to confirm that the wing behaves normally should be carried out by a professional. Modifications Your Ozone Zeno 2 was designed and trimmed to give the optimum balance of performance, IMPORTANT handling and safety. Any modification means the glider loses its certification and will be more Do not modify your difficult to fly.
-
Page 29: Ozone Quality
Ozone and its distributors provide the highest quality after sales service, do not hesitate to contact your local Ozone dealer for the latest most up to date information on our products. If you have an issue please contact the Ozone dealer where you purchased the product from, we will do our best to get you back in the air as fast as possible. -
Page 30: Technical Specifications
TECHNICAL SPECIFICATIONS No. of Cells Projected Area (m 17.7 18.9 20.3 22.2 Flat Area (m 22.5 24.1 26.5 Projected Span (m) 10.4 10.9 Flat Span (m) 12.3 12.7 13.2 13.8 Projected Aspect Ratio 5.33 5.33 5.33 5.33 Flat Aspect Ratio Root Chord (m) 2.19 2.26... -
Page 31: Drawings/Riser Lengths
TECHNICAL DRAWINGS Upper Surface Leading Lower Surface Edge Cell Openings Trailing B Riser Riser Non Accelerated Edge Handle Riser Riser 530mm 522mm 515mm Pulley Brake Handle Accelerated Pulleys axis - axis Brake Upper 370mm Lines Lines 443mm Ball Bearing Middle 515mm Pulleys Lines... -
Page 32: Rigging Diagram
Zeno Rigging Diagram LINE DIAGRAM Individual and linked line lengths can be found online. AR3 Riser A Riser Collapse lines Riser ZRL1 AML1 AML2 BMU8 BMU7 BMU3 BMU6 BMU2 BMU5 BMU4 BMU1 KMU6 KMU5 KMU4 KMU3 KMU2 KMU1 KML3 KML2 KML1 BRU3 KRU1... -
Page 33: Materials
MATERIALS All Ozone gliders are made from the highest quality materials available. Cloth Upper Surface Dominico DOKDO 30D MF / Porcher 7000 E71 Lower Surface Porcher 7000 E71 Internal Ribs Porcher 9017 E29 / Porcher 7000 E91 Leading Edge Reinforcement...
Need help?
Do you have a question about the ZENO 2 and is the answer not in the manual?
Questions and answers