
Subscribe to Our Youtube Channel
Related Manuals for Weston PRO Series


Summary of Contents for Weston PRO Series
- Page 1 User Manual of Product 1: Weston Brands Vacuum Sealer Machine for Food Preservation & Sous Vide, Extra-Wide Bar, Sealing Bags up to 16", 935 Watts, Commercial Grade Pro 2300 Stainless Steel...
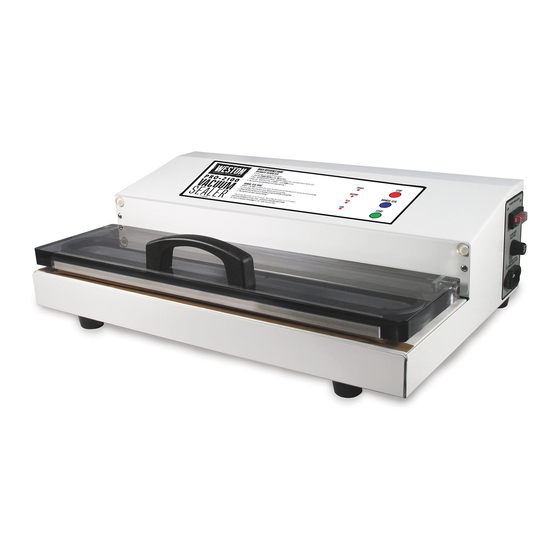
- Page 2 65-0201 PICTURED VACUUM SEALERS PRO 2100 65-0101 / PRO 2300 65-0201 DUE TO CONSTANT FACTORY IMPROVEMENTS, THE PRODUCT PICTURED MIGHT DIFFER SLIGHTLY FROM THE PRODUCT IN THIS BOX.
-
Page 3: Table Of Contents
PREPARACIÓN DE BOLSAS AL VACÍO DE UN ROLLO INSTRUCCIONES DE MANTENIMIENTO 27-28 REEMPLAZO DEL FUSIBLE PAUTAS SOBRE LA VIDA EN ALMACENAMIENTO SEGURIDAD DE LOS ALIMENTOS INFORMACIÓN DE GARANTÍA WESTON IMPORTANTES RÈGLES DE SÉCURITÉ DESCRIPTION DE LA PIÈCE 36-37 RUBAN PROTECTEUR INSTRUCTIONS DE NETTOYAGE GARNITURE DU CANAL D’ASPIRATION... -
Page 4: Important Safeguards
IMPORTANT SAFEGUARDS When using electrical appliances, basic safety precautions should always be followed to reduce the risk of fire, electric shock, and/or injury to persons, including the following: 1. Read all instructions. 9. TO PROTECT AGAINST RISK OF ELECTRICAL SHOCK: DO 2. - Page 5 QUICK REFERENCE GUIDE AUTOMATIC VACUUM SEAL STOP 1. PLUG power cord into 120-Volt outlet POWER 2. Turn the POWER SWITCH to the “ON” position 3. Place VACUUM BAG OPEN END into VACUUM CHAMBER (See Instruction Book for Details) R e c on n e c t with Re a l F ood 4.
-
Page 6: Component List
If any components of this unit are broken, the unit does not operate properly or you need a replacement instruction manual, visit us on the web at WestonSupply.com 1-800-814-4895 Or call Weston Brands, LLC Toll Free at Monday thru Friday 8:00am-5:00pm ET. Outside the U.S. call 001-216-901-6801... -
Page 7: Protective Tape
PROTECTIVE TAPE There are two (2) factory installed strips of Seal Bar Tape on the Vacuum Sealer. DO NOT REMOVE THE TAPE! FIGURE 1 SEAL BAR TAPE DO NOT REMOVE! OVAL VACUUM CHAMBER SEALS DO NOT REMOVE! The Seal Bar Heating Element and Vacuum Lid Seal are each covered with Seal Bar Tape to protect vacuum bags during sealing Figure 1. -
Page 8: Vacuum Chamber Seals
VACUUM CHAMBER SEALS There are two factory-installed Oval Vacuum Chamber Seals on the Vacuum Sealer. When the Vacuum Lid is closed and downward force applied, they form an airtight seal so the Vacuum Chamber can be evacuated. The Oval Vacuum Chamber Seals may wear over time and require replacement. See the “Service Instructions”... -
Page 9: Other Consumer Safety Information
Other Consumer Safety Information Electrical Shock Hazard: This appliance is provided with a w WARNING grounded (3-prong) plug to reduce the risk of electric shock. The plug fits only one way into a grounded outlet. Do not defeat the safety purpose of the plug by modifying the plug in any way or by using an adapter. -
Page 10: Power Supply
CONTROL BUTTONS STOP BUTTON Pressing the Stop Button stops to halt the vacuuming process Figure 3. MANUAL SEAL BUTTON Press the Manual Seal Button during the vacuuming process to initiate the seal (before the preset vacuum pressure is reached) Figure 3. START BUTTON Press the Start Button to initiate the vacuuming process (the Vacuum Sealer will automatically seal the bag when a preset vacuum pressure is reached) - Page 11 5. Fill a vacuum bag with the product you want to seal. Leave at least 2” (5 cm) of space between the open end of the bag and product Figure 4. 6. Load the open end of the bag into the Lower Vacuum Chamber. Center the bag in the Lower Vacuum Chamber.
-
Page 12: Preparing Vac Bags From A Roll
PREPARING VAC BAGS FROM A ROLL 1. Make sure the Vacuum Sealer is in the “OFF” position. Attach the Vacuum Sealer to the power supply. 2. Turn the Vacuum Sealer “ON”. 3. The “POWER” Light on the display, “POWER INDICATOR” Switch both will illuminate and the Internal Cooling Fan will run. -
Page 13: Replacing The Fuse
6. Set a new Oval Vacuum Chamber Seal on the groove in the Plastic Vacuum Chamber. Work the seal into the groove. 7. Position a new Oval Vacuum Chamber Seal near the groove in the Vacuum Lid. Work the seal into the groove. REPLACING THE SEAL BAR TAPE: *NOTE one extra piece of Seal Bar Tape is included with the original unit as a spare. -
Page 14: Storage Lifespan Guidelines
STORAGE LIFESPAN GUIDELINES . IMPORTANT NOTE: Vacuum packaging is NOT a substitute for refrigeration. Vacuum packed perishable foods still require refrigeration. . NEVER thaw frozen foods at room temperature. Thaw frozen foods in a refrigerator or microwave oven. . In general, the colder the temperature at which foods are stored, the longer the shelf life. -
Page 15: Food Safety
FOOD SAFETY There are basic rules to follow when handling food. They are COOK, SEPARATE, CLEAN, and CHILL. COOK It’s crucial to cook food to a safe internal temperature to destroy bacteria that is present. The safety of hamburgers and other foods made with ground meat has been receiving a lot of attention lately, and with good reason. -
Page 17: Warranty
A copy of the original receipt, must be received by Weston Brands, LLC within 30 days from purchase date for the warranty to apply. Failure to send the original receipt, will void the warranty. - Page 18 65-0201 SE MUESTRA SELLADORA AL VACIO PRO 2100 65-0101 / PRO 2300 65-0201 DEBIDO A CONSTANTES MEJORAS EN LA FÁBRICA, EL PRODUCTO QUE SE MUESTRA PUEDE SER LIGERAMENTE DIFERENTE DEL PRODUCTO EN ESTA CAJA.
-
Page 19: Reglas Importantes De Seguridad
SALVAGUARDIAS IMPORTANTES Cuando utilice artefactos eléctricos, siempre deben seguirse precauciones de seguridad básicas a fin de reducir el riesgo de incendio, descarga eléctrica, y/o lesiones a personas, incluyendo las siguientes: 1. Lea todas las instrucciones. Hacerlo puede causar lesiones graves. 2. - Page 21 QUICK REFERENCE GUIDE AUTOMATIC VACUUM SEAL STOP 1. PLUG power cord into 120-Volt outlet POWER 2. Turn the POWER SWITCH to the “ON” position 3. Place VACUUM BAG OPEN END into VACUUM CHAMBER (See Instruction Book for Details) R e c on n e c t with Re a l F ood 4.
-
Page 22: Lista De Componentes
Web en WestonSupply.com 1-800-814-4895 O llame a Weston Brands, LLC larga distancia sin costo De lunes a viernes, de 8:00 am a 5:00 pm tiempo del ET. Fuera de Estados Unidos llame al 001-216-901-6801... -
Page 23: Cinta Protectora
CINTA PROTECTORA Existen dos (2) tiras de cinta de la barra de sellado instaladas de fábrica en la selladora al vacío. ¡NO EXTRAIGA LA CINTA! FIGURA 1 CINTA DE LA BARRA DE SELLADO ¡NO LA EXTRAIGA! SELLOS OVALADOS DE LA CÁMARA DE VACÍO ¡NO LA EXTRAIGA! El elemento calentador de la barra de sellado y el sello de la tapa de vacío se encuentran cubiertos con una cinta de barra de sellado... -
Page 24: Sellos De La Cámara De Vacío
SELLOS DE LA CÁMARA DE VACÍO Existen dos sellos ovalados de la cámara de vacío instalados de fábrica en la selladora al vacío. Cuando la tapa de vacío se encuentra cerrada y se empuja hacia abajo, forma un sellado hermético para que la selladora al vacío se pueda extraer. -
Page 25: Otra Información De Seguridad Para El Cliente
Otra Información de Seguridad para el Cliente Peligro de Descarga Eléctrica: Este aparato es pro- w ADVERTENCIA visto con un enchufe con conexión a tierra (3 clavijas) para reducir el riesgo de una descarga eléctrica. El enchufe calza únicamente en una dirección dentro de un tomacorriente con conexión a tierra. -
Page 26: Fuente De Alimentación
BOTONES DEL CONTROL BOTÓN “STOP” (detener) Presione el botón “Stop” (detener) para detener el proceso de vacío. FIGURA 3. BOTÓN “MANUAL SEAL” (sellado manual) Presione el botón “Manual Seal” (sellado manual) durante el proceso de vacío para iniciar el sellado (antes de que la presión de vacío predeterminada se alcance) FIGURA 3. BOTÓN “START”... - Page 27 5. Llene la bolsa al vacío con el producto que desee sellar. Deje al menos 2 pulgadas (5 cm) de espacio entre el extremo abierto de la bolsa y el producto. FIGURA 4 6. Cargue el extremo abierto de la bolsa en la cámara de vacío inferior. Centre la bolsa en la cámara de vacío inferior.
-
Page 28: Preparación De Bolsas Al Vacío De Un Rollo
PREPARACIÓN DE BOLSAS AL VACÍO DE UN ROLLO 1. Asegúrese de que la selladora al vacío se encuentre en la posición “OFF” (apagado). Sujete la selladora al vacío a la fuente de alimentación. 2. Coloque la selladora al vacío en posición “ON” (encendido). 3. -
Page 29: Reemplazo Del Fusible
6. Coloque un nuevo sello ovalado de nueva tira ancha de la cinta de la barra la cámara de vacío en la ranura de la de sellado para el elemento calentador cámara de vacío de plástico. Introduzca de la barra de sellado. Tenga cuidado el sello en la ranura. -
Page 30: Pautas Sobre La Vida En Almacenamiento
PAUTAS SOBRE LA VIDA EN ALMACENAMIENTO .NOTA IMPORTANTE: El envasado al vacío NO sustituye la refrigeración. Los alimentos perecederos envasados al vacío requieren refrigeración. . NUNCA descongele los alimentos congelados a temperatura ambiente. Descongele los alimentos congelados en el refrigerador o en el microondas. . -
Page 31: Seguridad De Los Alimentos
SEGURIDAD DE LOS ALIMENTOS Hay que seguir ciertas reglas básicas al manejar alimentos. Las reglas son COCINAR, SEPARAR, LIMPIAR y ENFRIAR. COCINAR Es muy importante cocinar los alimentos a una temperatura interna que destruya cualquier bacteria que esté presente. Últimamente se ha puesto mucha atención en la higiene de las hamburguesas y otros alimentos elaborados con carne molida y con razón. -
Page 33: Información De Garantía Weston
La con una copia del recibo original debe ser recibida por Weston Brands, LLC dentro de 30 días desde la fecha de compra para hacer efectiva la garantía. Si no se envía la junto con una copia del recibo original, anulará la garantía. - Page 34 65-0201 MONTRÉ SCELLEUSE SOUS VIDE PRO 2100 65-0101 / PRO 2300 65-0201 PARCE QUE NOS PRODUITS BÉNÈFICIENT DE PERFECTIONNEMENTS CONSTANTS APPORTÉS EN USINE, LES ILLUSTRATIONS PRÉSENTES PEUVENT ÊTRE LÉGÈREMENT DIFFÉRENTES DU PRODUIT REÇU.
-
Page 35: Importantes Règles De Sécurité
PRÉCAUTIONS IMPORTANTES Pour utiliser un appareil électroménager, vous devez toujours prendre des mesures élémentaires de sécurité pour réduire le risque d’incendie, d’électrocution et/ou de blessure corporelle, en particulier les mesures suivantes : 1. Lire toutes les instructions. 8. NE PAS désosser cet appareil : cela ANNULERAIT LA GARANTIE 2. - Page 37 QUICK REFERENCE GUIDE AUTOMATIC VACUUM SEAL STOP 1. PLUG power cord into 120-Volt outlet POWER 2. Turn the POWER SWITCH to the “ON” position 3. Place VACUUM BAG OPEN END into VACUUM CHAMBER (See Instruction Book for Details) R e c on n e c t with Re a l F ood 4.
-
Page 38: Description De La Pièce
N’hésitez pas à visiter notre site Web WestonSupply.com/support si un composant est cassé, l’outil fonctionne mal, ou pour commander un nouveau mode d’emploi. WestonSupply.com 1-800-814-4895 Veuillez appeler Weston Brands, LLC au numéro sans frais : Du lundi au vendredi: de 8h00 à 17h00 ET. En dehors des États-Unis, veuillez appeler le 001-216-901-6801... -
Page 39: Ruban Protecteur
RUBAN PROTECTEUR La scelleuse sous vide est protégée par deux (2) bandes de ruban, posées en usine. NE PAS ENLEVER CES BANDES ! FIGURE 1 BANDE DE RUBAN NE PAS ENLEVER ! GARNITURES OVALES DU CANAL D’ASPIRATIONDO NE PAS ENLEVER ! L’élément chauffant de la bande de scellement et le joint du couvercle sont recouverts d’un ruban bandes de ruban qui protège les sacs sous vide pendant le scellage (cf. -
Page 40: Garniture Du Canal D'aspiration
GARNITURE DU CANAL D’ASPIRATION Deux garnitures ovales, superposées en usine, cerclent le canal d’aspiration. Lorsque l’on ferme le couvercle et exerce une pression, les deux garnitures forment un joint qui rend le canal d’aspiration hermétique. Ces garnitures s’useront au fil du temps et devront être remplacées. Consulter la section Instructions d’entretien pour savoir comment remplacer, s’il y a lieu, les garnitures ovales du canal d’aspiration. -
Page 41: Autres Renseignements De Sécurité Au Consommateur
AUTRES RENSEIGNEMENTS DE SÉCURITÉ AU CONSOMMATEUR Risque de choc électrique: Cet appareil est fourni avec w ADVERTENCIA une fiche à prise de terre (3 broches) pour réduire le risque de choc élec- trique. La fiche ne tient que dans un sens dans une prise mise à la terre. Ne pas transformer le dispositif de sécurité... -
Page 42: Touches De Commande
TOUCHES DE COMMANDE TOUCHE STOP (ARRÊT) Appuyer sur la touche Stop pour arrêter l’aspiration. FIGURE 3 TOUCHE MANUAL SEAL (SCELLAGE MANUEL) Appuyer sur la touche Manual Seal pendant l’aspiration pour exécuter le scellage (avant que la pression à vide préréglée soit atteinte). FIGURE 3 TOUCHE START (DÉMARRAGE) Appuyer sur la touche Start pour démarrer l’aspiration (le scellage du sac sera alors automatique lorsque la pression à... - Page 43 4. Ouvrir le couvercle. 5. Remplir un sac avec le produit souhaité à emballer sous vide. Laisser un espace d’au moins 5 cm (2 po) entre l’extrémité ouverte du sac et le produit. FIGURE 4 6. Placer l’extrémité ouverte du sac à l’intérieur du canal d’aspiration. Centrer le sac sur le canal d’aspiration.
-
Page 44: Fabrication D'un Sac Sur Mesure Avec Un Rouleau
FABRICATION D’UN SAC SUR MESURE AVEC UN ROULEAU 1. S’assurer que la scelleuse sous vide est éteinte (interrupteur sur OFF [Arrêt]). Brancher la scelleuse sur la prise murale. 2. Allumer la scelleuse (interrupteur sur ON [Marche]). 3. Le voyant POWER sur le tableau et l’interrupteur d’alimentation s’allument ; le ventilateur interne commence à... -
Page 45: Remplacement Du Fusible
7. Poser une garniture neuve dans la gorge du couvercle d’aspiration. Étendre et mettre en place la garniture. REMPLACEMENT DU BANDES DE RUBAN: *REMARQUE : un bandes de ruban supplémentaire est fourni avec l’appareil comme pièce de rechange. 1. Éteindre la scelleuse sous vide, puis la débrancher. 2. -
Page 46: Guide De Conservation Des Aliments Emballés
GUIDE DE CONSERVATION DES ALIMENTS EMBALLÉS . REMARQUE IMPORTANTE : L’emballage sous vide ne remplace PAS la réfrigération. Les denrées périssables emballées sous vide doivent quand même être réfrigérées. . NE JAMAIS décongeler des aliments à la température ambiante. Décongeler les aliments au réfrigérateur ou au micro-ondes. -
Page 47: Sécurité Alimentaire
SÉCURITÉ ALIMENTAIRE Il y a des règles fondamentales à suivre lors de la manipulation d’aliments. Elles sont CUIRE, SÉPARER, NETTOYER, et REFROIDIR RAPIDEMENT. CUIRE Il est crucial de cuire les aliments à une température interne sûre pour détruire les bactéries qui sont présentes. -
Page 48: Information Sur La Garantie
Le produit ne doit pas avoir été antérieurement modifié, réparé, ou entretenu par quelqu’un autre que Weston Brands, LLC. Le cas échéant, le numéro de série ne doit pas être modifié ou enlevé. Le produit ne doit pas avoir été soumis à un accident en transit ou pendant qu’il est en la possession du client, mal utilisé, mal traité, ou utilisé... - Page 49 840296100 10/2017...
Need help?
Do you have a question about the PRO Series and is the answer not in the manual?
Questions and answers