
Related Manuals for Weston PRO-1100


Summary of Contents for Weston PRO-1100
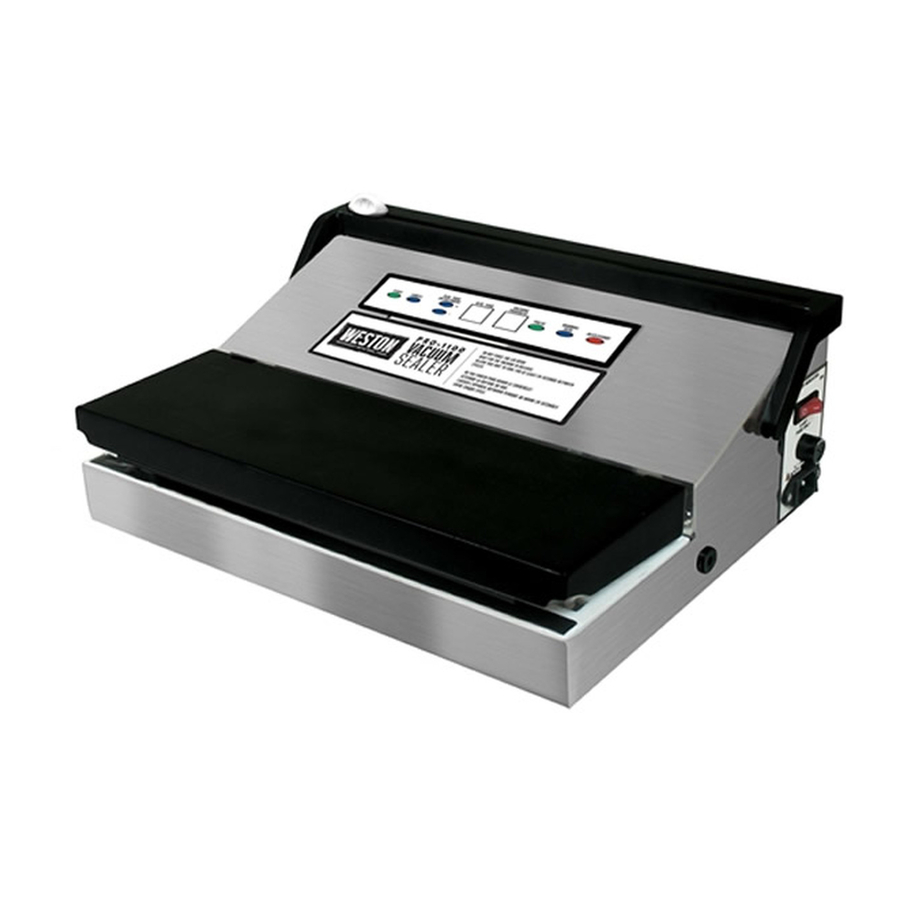
- Page 1 VACUUM SEALER 65-0601-W DUE TO CONSTANT FACTORY IMPROVEMENTS, THE PRODUCT PICTURED MIGHT DIFFER SLIGHTLY FROM THE PRODUCT IN THIS BOX. 020915...
-
Page 2: Table Of Contents
GENERAL S A F E T Y RU L E S COMPON E NT LI S T PROT EC T I VE T A PE COOLI NG F AN VACUUM C H AM BER S EA L S LI MI T S WI T C H T H ERMAL O V E RL O AD PRO T E C T O R ASSEMBL Y GROUN DI NG... -
Page 3: General Safety Rules
GENERAL SAFETY RULES READ AND FULLY UNDERSTAND ALL INSTRUCTIONS AND WARNINGS PRIOR TO USING THIS UNIT. YOUR SAFETY IS MOST IMPORTANT! FAILURE TO COMPLY WITH PROCEDURES AND SAFE GUARDS MAY RESULT IN SERIOUS INJURY OR PROPERTY DAMAGE. REMEMBER: YOUR PERSONAL SAFETY IS YOUR RESPONSIBILITY! 1. - Page 4 Lower Housing Upper Housing Power Vacuum Lid Panel Vacuum Chamber...
-
Page 5: Component List
If any components of this unit are broken, the unit does not operate properly or you need a replacement instruction manual, visit us on the web at WestonProducts.com 1-800-814-4895 Or call Weston Products LLC Toll Free at Monday thru Friday 8:00am-5:00pm ET. Outside the U.S. call 001-440-638-3131... -
Page 6: Protective Tape
BEFORE YOU START BAG SEALING Before using the Vacuum Sealer, familiarize yourself with the bag sealing functions. A vacuum bag is sealed when the Seal Bar Heating Element is activated and heats the bag to its melting point, which then permanently welds the bag layers together, sealing the bag shut. -
Page 7: Vacuum Chamber Seals
VACUUM CHAMBER SEALS There are two factory-installed Oval Vacuum Chamber Seals on the Vacuum Sealer. When the Vacuum Lid is closed and downward force applied, they form an airtight seal so the Vacuum Chamber can be evacuated. The Oval Vacuum Chamber Seals may wear over time and require replacement. -
Page 8: Grounding
GROUNDING INSTRUCTIONS FIGURE 3 GROUNDING This appliance must be grounded while in use to protect the operator from electrical shock. The appliance is equipped with a 3-conductor cord and a 3-prong grounding type plug to fit the proper grounding-type receptacle. The appliance has a plug that looks like Figure Grounding Prong... -
Page 9: Control Panel
CONTROL PANEL · Start Button: The Start Button starts the 2-Piston Vacuum Pump, which engages the air evacuation process. · Cancel Button: This button is used to stop the vacuum cycle at any time. · Seal Time + and - Buttons: The Seal Time Button adjusts the number of seconds that the Sealing Bar will apply heat to create the bag’s seal. -
Page 10: Using The Roll Holder & Cutter
USING THE ROLL HOLDER & CUTTER 1. To create bags using the roll holder, remove the roll holder rod from the cilps at the back of the vacuum sealer (FIGURE 6). 2. Slide the rod through the center opening of the roll (will hold bags up to 11”... -
Page 11: Initial Testing Of The Bag Seal
INITIAL TESTING OF THE BAG SEAL 1. ALWAYS allow the sealing bar to cool for approximately 20 seconds between bags. Leave the Vacuum Lid OPEN between uses, this allows the Heating Element to cool more quickly between bags. 2. Place one end of the bag onto the Sealing Bar, leaving about 2” (5 cm) of the empty part of the bag beyond the inside edge of the Sealing Bar. -
Page 12: Automatic Mode Operation
AUTOMATIC MODE OPERATION BEFORE ATTEMPTING VACUUM FIGURE 9 PACKAGING BE SURE THAT THE Vacuum Port VACUUM SEALER IS SET UP IN ACCORDANCE WITH ALL OF THE SAFETY PRECAUTIONS LISTED IN THIS BOOKLET. 1. Place the items to be vacuum sealed into a vacuum bag. Allow at least 2”... -
Page 13: Manual Mode Operation
MANUAL MODE OPERATION BEFORE ATTEMPTING VACUUM FIGURE 10 PACKAGING, BE SURE THAT THE VACUUM SEALER IS SET UP IN Vacuum Port ACCORDANCE WITH ALL OF THE SAFETY PRECAUTIONS LISTED IN THIS BOOKLET. 1. Place the items to be vacuum sealed into a vacuum bag. -
Page 14: Maintenance Kit Instructions
MAINTENANCE KIT INSTRUCTIONS Some parts of the Vacuum Sealer may need replacing after repeated use. The Vacuum Sealer Maintenance Kit will be necessary for the Vacuum Sealer to properly function. REPLACING THE OVAL VACUUM CHAMBER SEALS: 1. Turn “OFF” the Vacuum Sealer and remove the Power Cord from the electrical outlet. -
Page 15: Troubleshooting
TROUBLESHOOTING Q: NOTHING HAPPENS WHEN THE POWER BUTTON IS PRESSED! 1. Make sure that the Power Cord is not FIGURE 11 damaged in any way. 2. Be sure that the female end of the Power Cord is plugged completely into the Power Supply Port of the Vacuum Sealer, and that the male end of the Power Cord is firmly plugged into the wall outlet (Figure 11). - Page 16 Q: THE SEALING BAR MELTS THROUGH THE BAG. 1. The Vacuum Sealer is only intended to be used with vacuum sealing bags. For best results, Weston Vacuum Bags should be used. DO NOT USE HOUSEHOLD BAGS with the Vacuum Sealer.
-
Page 17: Replacing The Fuse
REPLACING THE FUSE FIGURE 13 If the Vacuum Sealer does not operate when it is plugged in and turned on, try any or all of the following: 1. Make sure the Fuse is not blown. The Fuse is located on the right side of the unit directly above the Power Cord Port. -
Page 18: Storage Lifespan Guidelines
STORAGE LIFESPAN GUIDELINES . IMPORTANT NOTE: Vacuum packaging is NOT a substitute for refrigeration. Vacuum packed perishable foods still require refrigeration. . NEVER thaw frozen foods at room temperature. Thaw frozen foods in a refrigerator or microwave oven. . In general, the colder the temperature at which foods are stored, the longer the shelf life. -
Page 19: Vacuum Packaging Guidelines
VACUUM PACKAGING GUIDELINES Powdery Items: When vacuum sealing powdery items, like flour, it is best to keep them in their original packaging before putting them into the vacuum bags. Sharp or Pointed Items: When vacuum sealing sharp or pointy items, it is best to cushion the edges so they do not puncture the bag during the vacuum process. -
Page 20: Food Safety
FOOD SAFETY There are basic rules to follow when handling food. They are COOK, SEPARATE, CLEAN, and CHILL. COOK It’s crucial to cook food to a safe internal temperature to destroy bacteria that is present. The safety of hamburgers and other foods made with ground meat has been receiving a lot of attention lately, and with good reason. -
Page 22: Warranty Information
The Warranty Card, along with a copy of the original receipt, must be received by Weston Brands LLC within 30 days from purchase date for the warranty to apply. Failure to send the completely filled out Warranty Card, along with a copy of the original receipt, will void the warranty. - Page 23 SELLADOR A VACÍO 65-0601-W DEBIDO A CONSTANTES MEJORAS EN LA FÁBRICA, EL PRODUCTO QUE SE MUESTRA PUEDE SER LIGERAMENTE DIFERENTE DEL PRODUCTO EN ESTA CAJA. 020915...
-
Page 24: Normas Generales De Seguridad
NORMAS GENERALES DE SEGURIDAD LEA Y COMPRENDA TODAS LAS INSTRUCCIONES Y ADVERTENCIAS ANTES DE USAR ESTA UNIDAD. ¡SU SEGURIDAD ES PRIMORDIAL! NO CUMPLIR CON LOS PROCEDIMIENTOS Y MEDIDAS DE SEGURIDAD PUEDE OCASIONAR LESIONES GRAVES O DAÑOS MATERIALES. RECUERDE: ¡USTED TIENE LA RESPONSABILIDAD SOBRE SU SEGURIDAD PERSONAL! VACÍO ESTÉ... - Page 26 Cubierta inferior Cubierta superior Tapa Panel de de vacío alimentación Cámara de vacío...
-
Page 27: Lista De Componentes
Web en WestonProducts.com 1-800-814-4895 O llame a Weston Brands LLC larga distancia sin costo De lunes a viernes, de 8:00 am a 5:00 pm tiempo del ET. Fuera de Estados Unidos llame al 001-440-638-3131... -
Page 28: Cinta Protectora
ANTES DE COMENZAR A SELLAR LA BOLSA Ante de utilizar la Selladora al vacío, familiarícese con las funciones de sellado de bolsa. Una bolsa de vacío se sella cuando el Calentador de la barra de sellado se activa y calienta la bolsa hasta su punto de fusión, que une permanentemente las capas de la bolsa, y sella la bolsa para cerrarla. -
Page 29: Sellos De La Cámara De Vacío
SELLOS DE LA CÁMARA DE VACÍO La selladora al vacío tiene dos sellos ovalados en la cámara instalados de fábrica. Cuando se cierra la tapa de vacío, ésta forma un cierro hermético para que pueda evacuarse la cámara. Los sellos ovalados de la cámara pueden desgastarse con el tiempo y necesitan ser reemplazados. -
Page 30: Instrucciones Para Hacer Tierra
INSTRUCCIONES PARA HACER TIERRA FIGURA 3 ATERRIZADO Este aparato debe estar aterrizado para proteger al operario de choques eléctricos. El aparato está equipado con un cable de 3 conductores y una clavija de tierra de tres patas que entra en un tomacorriente aterrizado apropiado. El aparato tiene una clavija que se ve como la Pata de figura 3. -
Page 31: Panel De Control
PANEL DE CONTROL . Botón Start (Arranque): El botón Start (Arranque) enciende la bomba de vacío de 2 pistones que activa el proceso de evacuación de aire. . Botón Cancel (Cancelar): Este botón se utiliza para detener el ciclo de vacío en cualquier momento. -
Page 32: Utilización Del Portarollos Y El Cortador
UTILIZACIÓN DEL PORTAROLLOS Y EL CORTADOR 1. Para crear bolsas con el portarrollos, extraiga la vara del portarrollos de los sujetadores en la parte trasera de la selladora al vacío (FIGURA 6). 2. Deslice la vara por la abertura central del rollo (sostiene bolsas de 11” de ancho). -
Page 33: Prueba Inicial De Sellado De Bolsas
PRUEBA INICIAL DE SELLADO DE BOLSAS 1. SIEMPRE permita que se enfríe la barra selladora unos 20 segundos entre una bolsa y otra. Deje ABIERTA la tapa de vacío entre cada uso; este permite que el elemento térmico se enfríe más rápidamente entre una bolsa y otra. -
Page 34: Operación En Modo Automático
OPERACIÓN EN MODO AUTOMÁTICO ANTES DE PROBAR EL ENVASADO Puerto de FIGURA 9 AL VACÍO, ASEGÚRESE DE QUE LA vacío SELLADORA AL VACÍO CUMPLA CON TODAS LAS PRECAUCIONES DE SEGURIDAD QUE SE ENUMERAN EN ESTE FOLLETO. 1. Coloque los elementos que se sellarán al vacío dentro de la bolsa de vacío. -
Page 35: Funcionamiento En Modo Manual
FUNCIONAMIENTO EN MODO MANUAL ANTES DE PROBAR EL ENVASADO Puerto de AL VACÍO, ASEGÚRESE DE QUE LA vacío SELLADORA AL VACÍO CUMPLA FIGURA 10 CON TODAS LAS PRECAUCIONES DE SEGURIDAD QUE SE ENUMERAN EN ESTE FOLLETO. 1. Coloque los elementos que se sellarán al vacío dentro de la bolsa de vacío. -
Page 36: Instruciones Del Kit De Mantenimiento
INSTRUCIONES DEL KIT DE MANTENIMIENTO Algunas piezas de la selladora al vacío quizás deban sustituirse luego de ser utilizadas repetidamente. El kit de mantenimiento de la selladora al vacío será necesario para que la selladora al vacío funcione correctamente. 1. Coloque la selladora al vacío en posición “OFF” (Apagado) y extraiga el cable de alimentación del tomacorriente. -
Page 37: Solución De Problemas
SOLUCIÓN DE PROBLEMAS PREGUNTA: NO PASA NADA CUANDO PRESIONO EL BOTÓN POWER (ENCENDIDO). FIGURA 11 1. Asegúrese de que el cable de alimentación no esté para nada dañado. 2. Asegúrese de que el extremo hembra del cable de alimentación esté conectado completamente en el puerto de la fuente de alimentación de la selladora al vacío, y que el extremo macho del cable de alimentación esté... - Page 38 La selladora al vacío está diseñada para usarse con bolsas para envasado al vacío. Para obtener mejores resultados use bolsas al vacío de Weston®. NO USE BOLSAS CASERAS con la selladora al vacío. El sello de la bolsa puede estar incompleto. Si el sello tiene una fisura o si entre las capas de la bolsa quedaron atrapados líquidos o polvos, las capas podrían no...
-
Page 39: Sustitución Del Fusible
WARNING! Before cleaning, assembling or disassembling the Vacuum Sealer, make sure the Vacuum Sealer is OFF and the PLUG IS REMOVED FROM THE OUTLET/POWER SOURCE! SUSTITUCIÓN DEL FUSIBLE Si la selladora al vacío no funciona cuando se la enchufa FIGURA 13 y enciende, intente con alguna de las siguientes opciones o con todas: 1. -
Page 40: Pautas Sobre La Vida En Almacenamiento
PAUTAS SOBRE LA VIDA EN ALMACENAMIENTO .NOTA IMPORTANTE: El envasado al vacío NO sustituye la refrigeración. Los alimentos perecederos envasados al vacío requieren refrigeración. . NUNCA descongele los alimentos congelados a temperatura ambiente. Descongele los alimentos congelados en el refrigerador o en el microondas. . -
Page 41: Lineamientos Para Empacar Al Vacío
LINEAMIENTOS PARA EMPACAR AL VACÍO Artículos con polvo: Cuando envase artículos con polvo al vacío, cómo harina, es mejor conservarlos en su empaque original antes de ponerlos en bolsas de vacío. Artículos filosos o puntiagudos: Cuando se sellen artículos filosos o puntiagudos, es mejor cubrir sus bordes para que no perforen la bolsa durante el proceso de vacío. -
Page 42: Seguridad De Los Alimentos
SEGURIDAD DE LOS ALIMENTOS Hay que seguir ciertas reglas básicas al manejar alimentos. Las reglas son COCINAR, SEPARAR, LIMPIAR y ENFRIAR. COCINAR Es muy importante cocinar los alimentos a una temperatura interna que destruya cualquier bacteria que esté presente. Últimamente se ha puesto mucha atención en la higiene de las hamburguesas y otros alimentos elaborados con carne molida y con razón. -
Page 44: I Nformac Ió N D E Ga Rant Í A
La Tarjeta de Garantía, junto con una copia del recibo original debe ser recibida por Weston Brands, LLC dentro de 30 días desde la fecha de compra para hacer efectiva la garantía. Si no se envía la Tarjeta de Garantía completamente llena, junto con una copia del recibo original, anulará... - Page 45 SOUS VIDE 65-0601-W PARCE QUE NOS PRODUITS BÉNÈFICIENT DE PERFECTIONNEMENTS CONSTANTS APPORTÉS EN USINE, LES ILLUSTRATIONS PRÉSENTES PEUVENT ÊTRE LÉGÈREMENT DIFFÉRENTES DU PRODUIT REÇU. 020915...
-
Page 46: I Mport A N T E D Règl E S D E Sécu R Ité
IMPORTANTES RÈGLES DE SÉCURITÉ LIRE ET COMPRENDRE COMPLÈTEMENT TOUTES LES DIRECTIVES ET AVERTISSEMENTS AVANT D’UTILISER CE PRODUIT. LE PLUS IMPORTANT EST VOTRE SÉCURITÉ! LE DÉFAUT D’OBSERVER LES PROCÉDURES ET MISES EN GARDE PEUT ENTRAINER DES BLESSURES GRAVES OU DES DOMMAGES MATÉRIELS. N’OUBLIEZ PAS : VOTRE SÉCURITÉ... - Page 48 Boîtier inférieur Boîtier supérieur Couvercle à Panneau d’ vide alimentation Chambre sous vide...
-
Page 49: Description De La Pièce
N’hésitez pas à visiter notre site Web WestonProduct.com/support si un composant est cassé, l’outil fonctionne mal, ou pour commander un nouveau mode d’emploi. WestonProducts.com 1-800-814-4895 Veuillez appeler Weston Brands, LLC au numéro sans frais : Du lundi au vendredi: de 8h00 à 17h00 ET. En dehors des États-Unis, veuillez appeler le 001-440-638-3131... -
Page 50: Ruban Protecteur
Cet appareil est livré pré-réglé de l’usine pour engager l’élément chauffant de la barre scellante pendant 3 secondes. Cette durée est appropriée au scellement de sacs sous vide Weston®. Des sacs d’autres marques peuvent nécessiter légèrement plus ou légèrement moins de temps. -
Page 51: Joints De La Chambre Sous Vide
JOINTS DE LA CHAMBRE SOUS VIDE Deux joints de la chambre de forme ovale sont installés à l’usine sur la scelleuse sous vide (Figure 2). Lorsque le couvercle à vide est fermé, une fermeture hermétique est créée pour l’évacuation de l’air de la chambre sous vide. Les joints de la chambre de forme ovale peuvent s’user au fil du temps et exiger le remplacement. -
Page 52: I Nst Ruc T Io N S D E M Is E A L A T Er Re
INSTRUCTIONS DE MISE À LA TERRE MISE À LA TERRE Conducteur de mise à Cet appareil doit être mis à la terre lorsqu’il est utilisé FIGURE A la terre du afin de protéger son utilisateur contre les décharges circuit électriques. Cet appareil est équipé d’un cordon d’alimentation polarisé... -
Page 53: Panneau De Commande
PANNEAU DE COMMANDE • Bouton Start (démarrage) : le bouton Start (démarrage) démarre la pompe d’aspiration à 2 pistons, qui commence le processus d’évacuation de l’air. • Bouton Cancel (annuler) : ce bouton est utilisé pour interrompre le cycle de vide à... -
Page 54: Utilisation Du Porte-Rouleau Et Du Coupe-Sac
UTILISATION DU PORTE-ROULEAU ET DU COUPE-SAC Pour créer un sac à l’aide du porte-rouleau, enlever les agrafes qui retiennent la tige du porte-rouleau à l’arrière de l’appareil d’emballage sous vide (FIGURE 6). Faire glisser la tige par l’ouverture centrale du rouleau (pour les sacs jusqu’à 11 po de largeur). -
Page 55: T Est I N T Ia L D U S C E L L E M Ent D 'U N S
TEST INITIAL DU SCELLEMENT D’UN SAC 1. TOUJOURS laisser la barre scellante refroidir pendant environ 20 secondes entre les sacs. Laisser le couvercle à vide OUVERT entre les emplois pour permettre à l’élément chauffant de se refroidir plus rapidement entre les sacs. 2. -
Page 56: Fonctionnement En Mode Automatique
FONCTIONNEMENT EN MODE AUTOMATIQUE AVANT D’EFFECTUER UN Port de l’orifice FIGURE 9 EMBALLAGE SOUS VIDE, du vide S’ASSURER QUE L’APPAREIL D’EMBALLAGE SOUS VIDE EST INSTALLÉ CONFORMÉMENT À TOUTES LES PRÉCAUTIONS DE SÉCURITÉ FIGURANT DANS LE PRÉSENT LIVRET. 1. Poser les articles à sceller sous vide dans un sac d’emballage sous vide. -
Page 57: Fonctionnement En Mode Manuel
FONCTIONNEMENT EN MODE MANUEL AVANT D’EFFECTUER UN EMBALLAGE SOUS VIDE, S’ASSURER QUE L’APPAREIL FIGURE 10 Port de l’orifice D’EMBALLAGE SOUS VIDE EST INSTALLÉ du vide CONFORMÉMENT À TOUTES LES PRÉCAUTIONS DE SÉCURITÉ FIGURANT DANS LE PRÉSENT LIVRET. 1. Poser les articles à sceller sous vide dans un sac d’emballage sous vide. -
Page 58: Directives Pour La Trousse D'entretien
DIRECTIVES POUR LA TROUSSE D’ENTRETIEN Certaines pièces de l’appareil d’emballage sous vide doivent être remplacées après un usage répété. La trousse d’entretien de l’appareil d’emballage sous vide sera nécessaire pour le bon fonctionnement de l’appareil d’emballage sous vide. 1. Éteindre l’appareil d’emballage sous vide, puis retirer le cordon d’alimentation de la prise secteur. -
Page 59: Dépanna
DÉPANNAGE Q: Rien ne se produit lorsque le bouton Power (d’alimentation) est enfoncé! 1 S’assurer que le cordon d’alimentation n’est FIGURE 11 pas endommagé de quelque façon que ce soit. 2. S’assurer que l’extrémité femelle du cordon d’alimentation est enfoncée dans le port d’alimentation de l’appareil d’emballage sous vide et que l’extrémité... - Page 60 La scelleuse sous vide doit uniquement être utilisée avec des sacs de scellement sous vide. Pour les meilleurs résultats, les sacs sous vide Weston® doivent être utilisés. NE PAS UTILISER DE SAC DE MÉNAGE avec la scelleuse sous vide. Vérifier l’état de la bande du ruban de la barre scellante. Remplacer, le cas échéant.
-
Page 61: Rempla Ce M Ent S U F U S I Bl
REMPLACEMENT DU FUSIBLE FIGURE 13 Si l’appareil d’emballage sous vide ne fonctionne pas lorsqu’il est branché et sous tension, essayer l’une ou toutes les directives suivantes : 1. S’assurer que le fusible n’est pas grillé. Le fusible est situé sur le côté droit de l’appareil, directement au- dessus du port du cordon d’alimentation. -
Page 62: Gui D E De C O Ns E R V At I O N D E S A L Im Ent S E Mba L Lés 6
GUIDE DE CONSERVATION DES ALIMENTS EMBALLÉS . REMARQUE IMPORTANTE : L’emballage sous vide ne remplace PAS la réfrigération. Les denrées périssables emballées sous vide doivent quand même être réfrigérées. . NE JAMAIS décongeler des aliments à la température ambiante. Décongeler les aliments au réfrigérateur ou au micro-ondes. -
Page 63: Guide D'emballage Sous Vide
GUIDE D’EMBALLAGE SOUS VIDE Article en poudre: Pour emballer les articles en poudre, tels la farine, il est préférable de les laisser dans leur emballage d’origine avant de les mettre dans le sac sous vide. La poudre fine risque en effet d’être aspirée dans la pompe à vide à... -
Page 64: Sécuri Té Al Im Ent Ai
SÉCURITÉ ALIMENTAIRE Il y a des règles fondamentales à suivre lors de la manipulation d’aliments. Elles sont CUIRE, SÉPARER, NETTOYER, et REFROIDIR RAPIDEMENT. CUIRE Il est crucial de cuire les aliments à une température interne sûre pour détruire les bactéries qui sont présentes. -
Page 67: I Nformat I O N S U R L A Ga Ra Nt I
Garantie complètement remplie avec une copie du reçu original annulera la garantie. Le produit doit être livré à ou expédié franco de port à Weston Brands LLC pour les services de garantie, soit dans son emballage d’origine ou un emballage similaire offrant un degré de protection équivalent. Les dommages causés par l’expédition ne sont pas la responsabilité... - Page 68 Numéro de téléphone à l’extérieur des É.-U. : 001-440-638-3131 Weston Brands LLC, 20365 Progress Drive, Strongsville, Ohio 44149 WestonProducts.com Veuillez communiquer avec le service clientèle des produits Weston AVANT de retourner cet appareil au détaillant. CONSERVER CES DIRECTIVES! Veuillez les consulter fréquemment et les utiliser pour la formation.
Need help?
Do you have a question about the PRO-1100 and is the answer not in the manual?
Questions and answers
My pro 1100 only reads E when time to seal bags