
Subscribe to Our Youtube Channel
Related Manuals for BIOS Diagnostics BD410


Summary of Contents for BIOS Diagnostics BD410
- Page 1 BLOOD PRESSURE MONITOR Automatic AFIB Instruction Manual Model: BD410 Go to biosmedical.com for a FREE Log Book! Advancing Home Monitoring Since 1973 07.25.23 biosmedical.com...
- Page 2 Excellence from Angelique Berg, CEO of Hypertension Canada Trusted by Canadians for 3 Generations At BIOS Diagnostics™, we are proud of our legacy in blood pressure monitoring in Canada. From the early 1930’s to 1987 we manufactured “Tycos” brand professional blood pressure equipment for doctors and hospitals in Canada.
-
Page 3: Table Of Contents
1.6B Key Advantages 1.6C Medical Benefits 1.6D Measurement Sequence 1.7 Important Facts about Atrial Fibrillation (AFIB) 2. Getting Started 2.1 About the BD410 2.2 About the LCD Screen 2.3 Inserting the Batteries 2.4 Using the AC Adapter 3. Using the Device 3.1 Setting the Time and Date... - Page 4 3.9 Viewing Previous Measurement Values 3.10 Clearing Measurement Values 3.11 Determining Your “Real” Average Blood Pressure at Home 4. Error Messages/Malfunctions 5. Care and Maintenance 6. Lifetime Limited Warranty 7. Technical Specifications...
-
Page 5: Introduction
Indications for Use: This blood pressure monitor (BD410) is intended to measure the systolic and diastolic pressure of an adult individual by using a non-invasive oscillometric technology. This device is designed to be portable, and used in both home and professional environments for every day blood pressure monitoring. -
Page 6: Important Information
1.2 Important Information Refer to the following sections to learn about important safety instructions and how to take care of the BIOS Diagnostics™ Blood Pressure Monitor – Automatic AFIB. 1.2A Safety Information • Self-measurement means control, not diagnosis or treatment. Your values must always be discussed with your doctor or a physician who is familiar with your family history. -
Page 7: B Care Of The Device
• If you have been diagnosed with a severe arrhythmia or irregular heartbeat, vascular constriction, liver disorders, or diabetes, have a cardiac pacemaker, or are pregnant, measurements made with this instrument should only be evaluated after a consultation with your doctor. •... -
Page 8: D Calibration
The patients back, elbow and forearm should be supported, and the middle of the cuff should be at the level of the right atrium. There should be no talking or moving during the measurement and if comparing to an aneroid gauge or mercury column, observers should avoid parallax and be careful not to round measurements. -
Page 9: Normal Blood Pressure Values
1.4 Normal Blood Pressure Values When rested, and measuring your blood pressure at home, measurements with diastolic pressure readings above 85 mmHg or systolic readings over 135 mmHg are considered high. If you obtain consistent readings in this range, consult your doctor immediately. High blood pressure values over time can damage blood vessels, vital organs such as the kidney, and your heart. -
Page 10: About Afib Detection Mode (Averaging Mode)
mmHg Time b) Why is the doctor’s reading different from the reading taken at home? Your blood pressure can vary due to the environment (temperature, nervous condition). When measuring blood pressure at the doctor’s office, it is possible for blood pressure to increase due to anxiety and tension, this is known as “White Coat Hypertension”. -
Page 11: B Key Advantages
1.6B Key Advantages The technology provides reduction in: • Device scattering • Insufficient rest prior to measurement • Movement effects (i.e. coughing, talking, movement) • Cuff positioning influences 1.6C Medical Benefits • Improved accuracy 1.6D Measurement Sequence • Single results are not displayed •... -
Page 12: Getting Started
AFIB is the first step in proactive stroke prevention. 2. Getting Started 2.1 About the BD410 a) This section describes the various components of the Blood Pressure Monitor. b) Upper arm cuffs: •... -
Page 13: About The Lcd Screen
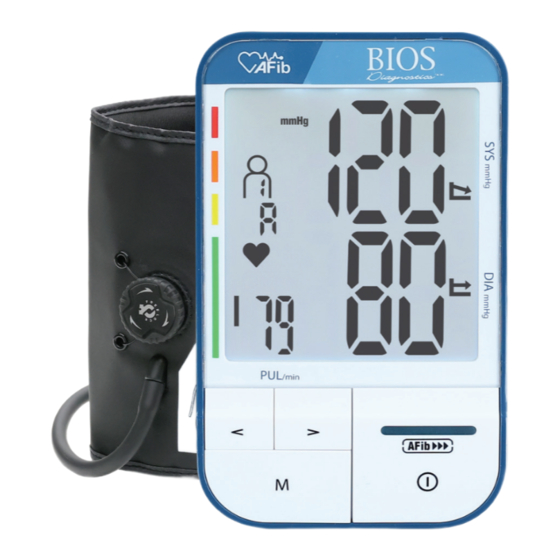
• BD41SC Soft Cuff (Standard Wide Range) (Accessory Item Sold Separately) Type BD41SC wide range cuff is for an arm circumference of 22-44 cm (9” - 17”) 2.2 About the LCD Screen The LCD screen displays the systolic and diastolic blood pressure measurements along with your heart rate. It also displays previously recorded measurements and the date and time, when the appropriate button is pressed. -
Page 14: Using The Ac Adapter
NOTE: When adapter is removed from the device, the date/time will need to be reset. 3. Using the Device This section describes how to get the maximum benefit from your BD410 blood pressure monitor. Follow the instructions carefully to get an accurate measurement of your blood pressure and pulse rate. -
Page 15: Selecting The User
3.2 Selecting the User 1. Start by pressing the [ ] to turn the device on. 2. Using the [<]/[>] buttons, select user 1, 2, 3, or 4. Confirm this selection by pressing the [ ] button. 3.3 Measurement Mode Selection (Single or AFIB) NOTE: The device is automatically set to Single measurement mode. - Page 16 Enter AFIB Detection mode. [ ] icon blinks. 30 second timer starts First measurement starts. Measurement #1 is in progess. to count down. 30 second timer starts to [ ] icon blinks. [ ] icon blinks. Measurement #3 is count down. Measurement #2 is in progress.
-
Page 17: Obtaining Accurate Measurements
3.4 Obtaining Accurate Measurements Your blood pressure can vary based on numerous factors, physiological conditions, and your surroundings. Follow these guidelines to obtain accurate and error-free measurements of your blood pressure and pulse rate. 3.4A Tips on Taking Accurate Measurements In the morning before breakfast, 2 hours after dinner, before taking Empty bladder (if necessary). -
Page 18: C Fitting The Easy-Fit Cuff
3.4C Fitting the Easy Fit Cuff a) The Easy-Fit Cuff comes ready to use! In preparation for fitting the cuff to your arm size, you will want to start by loosening it. Holding the cuff so that the tubing is facing away from you, grab the adjustable dial and pull up until you hear a ‘click’. -
Page 19: Measuring Your Blood Pressure
h) More than 6 consecutive measurements will cause blood accumulation in the lower arm which will affect the measuring results. To improve reading accuracy, raise the arm being measured, squeeze and relax your hand several times, then take another measurement. Another option is to take the cuff off and wait at least 5 minutes before repeating measurement. -
Page 20: Appearance Of The Atrial Fibrillation (Afib) Indicator (Only In Afib Detection Mode)
3.7 Appearance of the Atrial Fibrillation (AFIB) Indicator (only in AFIB Detection mode) This symbol [ ] indicates that atrial fibrillation was detected during the measurement. If AFIB is present during blood pressure measurement, the AFIB Indicator is displayed. The AFIB symbol [ ] will blink after the measurement is complete (if detected). -
Page 21: Viewing Previous Measurement Values
3.9 Viewing Previous Measurement Values The blood pressure monitor automatically stores your measurements. It can store up to 240 measurements per user. When more than 240 measurements in a user’s profile are present, the oldest readings are deleted to make space for the new ones. a) To view the previously stored values, in standby mode press the [M] button to enter the memory mode. -
Page 22: Clearing Measurement Values
3.10 Clearing Measurement Values a) Press the [M] button to enter into the user memory information. b) With a reading showing, press and hold down the [<] and [>] buttons simultaneously for approximately 7 seconds until [CL] and [00] are displayed on the screen c) All measurement data for the selected user has now been erased. - Page 23 Take: 2 measurements, 1 minute apart • Empty bladder (If necessary) • In the morning before breakfast, before taking medication • Sit with back supported and measurement arm resting on a table. Sit with feet flat on the floor. Take: 2 measurements, 1 minute apart •...
-
Page 24: Error Messages/Malfunctions
4. Error Messages / Malfunctions Error Possible Cause Remedy Ensure that the cuff is being worn Pulse is unable to be detected due to incorrect correctly, and that you have your arm at cuff positioning. the heart level. Avoid unnecessary movement Unnatural pressure impulses caused by arm or talking. -
Page 25: Care And Maintenance
6. Lifetime Limited Warranty This BIOS Diagnostics™ Blood Pressure Monitor has a lifetime limited warranty to be free of manufacturing defects for the life of the original owner. This warranty does not include the inflation system including the cuff and inflation bladder. -
Page 26: Technical Specifications
If you have questions regarding the operation of your monitor call the BIOS Medical Hotline: 1-866-536-2289. Should correction be necessary, return the unit with all component pieces. Enclose proof of purchase and $5.00 for return shipping and insurance. Ship the unit prepaid and insured (at owners option) to: Thermor Ltd. - Page 27 Reference to standards: EN ISO 13485:2016 EN ISO 81060-1:2012; ISO 81060-2:2013 EN 1060-3:1997+A2:2009 ISO 10993-5:2009; ISO 10993-10:2010 IEC 62304:2006+A1:2015 IEC 62366-1:2015 IEC 80601-2-30:2009+A1:2013 ISO 14971:2007 IEC 60601-1-2:2014; IEC 60601-1-11:2015; IEC 60601- 1:2005+A1:2012; IEC 60601-1-6:2010+A1:2013 Read the instruction manual carefully before using this device, especially the safety instructions, and keep the instruction manual for future use.
Need help?
Do you have a question about the BD410 and is the answer not in the manual?
Questions and answers
how do I get my bd410 to the test 3 times each time for an average.