Table of Contents
Advertisement
Quick Links
Advertisement
Table of Contents

Related Manuals for Makita VC006GML21


Summary of Contents for Makita VC006GML21
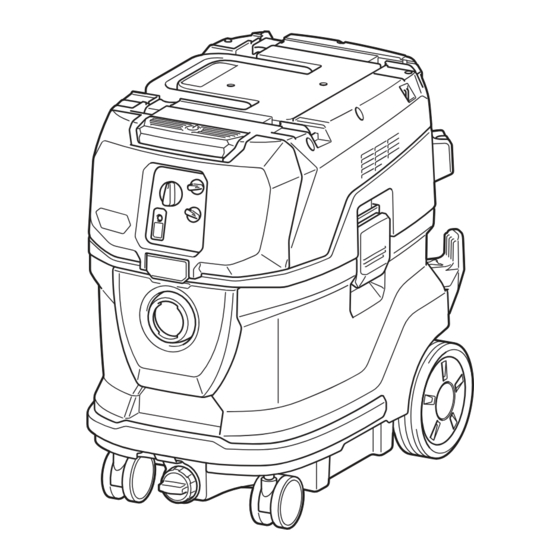
- Page 1 INSTRUCTION MANUAL Cordless Vacuum Cleaner VC006GM Read before use.
-
Page 2: Specifications
WARNING • This machine is not intended for use by persons including children with reduced physical, sensory or mental capabilities, or lack of experience and knowledge. • Children should be supervised to ensure that they do not play with the cleaner. •... -
Page 3: Safety Warnings
Only for EU countries NOTE: The declared vibration total value(s) has been Ni-MH Li-ion Due to the presence of hazardous com- measured in accordance with a standard test method ponents in the equipment, waste electrical and may be used for comparing one tool with another. and electronic equipment, accumulators NOTE: The declared vibration total value(s) may also and batteries may have a negative impact... - Page 4 24. The machine should be technically inspected NEVER USE THE CLEANER IN THE VICINITY OF GASOLINE, GAS, PAINT, ADHESIVES OR by the manufacturer, or an instructed person, OTHER HIGHLY EXPLOSIVE SUBSTANCES. at least annually, consisting of, for example, inspection of filters for damage, air tightness The switch emits sparks when turned ON and OFF.
- Page 5 Makita warranty for the Makita tool and charger. Do not expose battery cartridge to water or rain.
-
Page 6: Functional Description
Never open the lid of the slot by yourself once supplied case or a static-free container. installing the wireless unit. 27. Do not insert any devices other than Makita Do not disassemble or tamper with the wire- wireless unit into the slot on the tool. - Page 7 Align the tongue on the battery cartridge with the groove Indicator lamps Remaining in the housing and slip it into place. Insert it all the way capacity until it locks in place with a little click. Then lock the battery cover. Lighted Blinking 75% to 100%...
- Page 8 Let the appliance and battery(ies) cool down. Charge the battery If no improvement can be found by restoring protection system, then contact your local Makita Service Center. Battery not Switch action inserted Turning cleaner on Turn the stand-by switch in the "I" (ON) or "AUTO" (ON) NOTE: Battery indicator works while two batteries are position to have the cleaner ready in stand-by mode.
- Page 9 Warning beep Water drain When the tank is full with liquid, switch off the cleaner There are two types of beeping sound. One is short beeps, and the other is continuous beeps. and open the water drain cap to empty the tank. • When the air flow speed falls under 20 m/s, the cleaner emits short warning beeps for safety rea- sons.
- Page 10 If it is difficult to carry the appliance by yourself, carry it Locking and unlocking casters by two people as shown in the figure. Front casters can be locked with stoppers to help the cleaner stand still. Lower the stopper lever by hand to lock the caster, and raise it up to release. Fig.12 Fig.10 ► 1 . Caster 2. Stopper lever 3. Unlocked position 4.
- Page 11 Installing and disposing filter bag Installing polyethylene bag Optional accessory WARNING: Always use a P2-respirator. Lay a polyethylene bag over the tank, and slip one side Before using a filter bag, make WARNING: of the top edge of the bag at its open end in between sure that the filter unit is used together.
- Page 12 Remove the polyethylene bag out of the tank, Insert the hose end to the dust intake (hose inlet) of the closing the opening of the bag by hand. cleaner, then turn it clockwise until it locks in place. Fig.17 Fig.19 ► 1 .
-
Page 13: Operation
Mount the MAKPAC cases on top of the cleaner Attachments without lock function and fix it with latches. Optional accessory Insert an attachment into the suction inlet of the cleaner by pushing and hand screwing it in place. Hand twist and pull the attachment apart from the suc- tion inlet after use. - Page 14 ► 1 . Lid 2. Screw object with a sharp edge. Insert the wireless unit to the slot. NOTE: Wireless activation needs Makita tools When inserting the wireless unit, align the projections equipped with the wireless unit. with the recessed portions on the slot.
- Page 15 Tool registration for the cleaner wireless activation lamps will light up in green for 2 seconds and start blinking in blue. NOTE: A Makita tool supporting the wireless activa- NOTE: The wireless activation lamps finish blinking tion function is required for the tool registration. in green after 20 seconds elapsed. Press the wireless...
- Page 16 Push the wireless activation button on the tool Set the stand-by switch on the cleaner to "AUTO". briefly. The wireless activation lamp will blink in blue. Fig.33 ► 1 . Stand-by switch Fig.32 ► 1 . Wireless activation button 2. Wireless activation lamp Press the wireless activation button on the cleaner for 6 seconds.
- Page 17 Install the wireless unit to the cleaner. Erasing all tool registrations Install the batteries to the cleaner. You can erase all tool registrations from the cleaner as follows. Set the stand-by switch to "AUTO". Hold down the wireless activation button for about 6 seconds until the wireless activation lamp blinks in red (about twice per one second).
- Page 18 Troubleshooting for wireless activation function Before asking for repairs, conduct your own inspection first. If you find a problem that is not explained in the manual, do not attempt to dismantle the tool. Instead, ask Makita Authorized Service Centers, always using Makita replace- ment parts for repairs. State of abnormality Probable cause (malfunction) Remedy The wireless activation lamp does The wireless unit is not installed into the Install the wireless unit correctly.
-
Page 19: Maintenance
Discoloration, deformation or cracks may result. To maintain product SAFETY and RELIABILITY, Fig.37 repairs, any other maintenance or adjustment should ► 1 . Latch 2. Filter unit be performed by Makita Authorized or Factory Service Centers, always using Makita replacement parts. 19 ENGLISH... - Page 20 Removing powder filter and prefilter Cleaning of powder filter, prefilter and damper Picking up the knob and remove filters from the top plate. Clean out the filters and damper from time to time. Clogged filters and damper may result in poor suction performance. Regularly clean out the accumulated dust of filters and damper. Occasionally wash the powder filter, prefilter and damper in water, rinse and dry thoroughly in the shade before use. Never wash them in a washing machine. Fig.38 ► 1 . Top plate 2. Filters 3. Knob To prevent dusts from floating in the air, removing filters Fig.41 in the polyethylene bag is preferable.
- Page 21 Assembling the filters Installing water filter When you get the filters separately, assemble them as Optional accessory shown in the figure. NOTICE: For picking up wet dust, make sure that the water level sensors activate properly. Do not use prefilter and damper when NOTICE: using water filter. To pick up water or wet dust only, the water filter is more suitable than the powder filter and prefilter. When installing the water filter, fit the water filter to the top plate same as powder filter and prefilter. Fig.43 ► 1 . Powder filter 2. Damper 3. Prefilter Installing the filter unit Fig.45 NOTE: It is recommended that using water filter After installing the filters to the top plate, hook the holes...
-
Page 22: Optional Accessories
These accessories or attachments Pipes (with an optional stopper installed) can be placed into are recommended for use with your Makita tool the pipe holder when not using the cleaner for a short time. specified in this manual. The use of any other accessories or attachments might present a risk of injury to persons. Only use accessory or attachment... - Page 24 Jan-Baptist Vinkstraat 2, Makita Europe N.V. 3070 Kortenberg, Belgium 3-11-8, Sumiyoshi-cho, Makita Corporation Anjo, Aichi 446-8502 Japan 885990-222 www.makita.com 20220825...
Need help?
Do you have a question about the VC006GML21 and is the answer not in the manual?
Questions and answers