Advertisement
- 1 Panel & Display Description
- 2 Setup
- 3 Connections
- 4 Power / Master Volume
- 5 Playing Demo Song
- 6 Playing Tones
- 7 Piano Mode
- 8 Auto Accompaniment
- 9 Tempo
- 10 Metronome
- 11 Arpeggiator
- 12 Mixer
- 13 Quick Memory
- 14 One Touch Setting
- 15 Chord Dictionary
- 16 Playing Songs
- 17 Recording and Playing Back
- 18 Function Menu
- 19 MIDI
- 20 Troubleshooting
- 21 Specifications
- 22 Documents / Resources
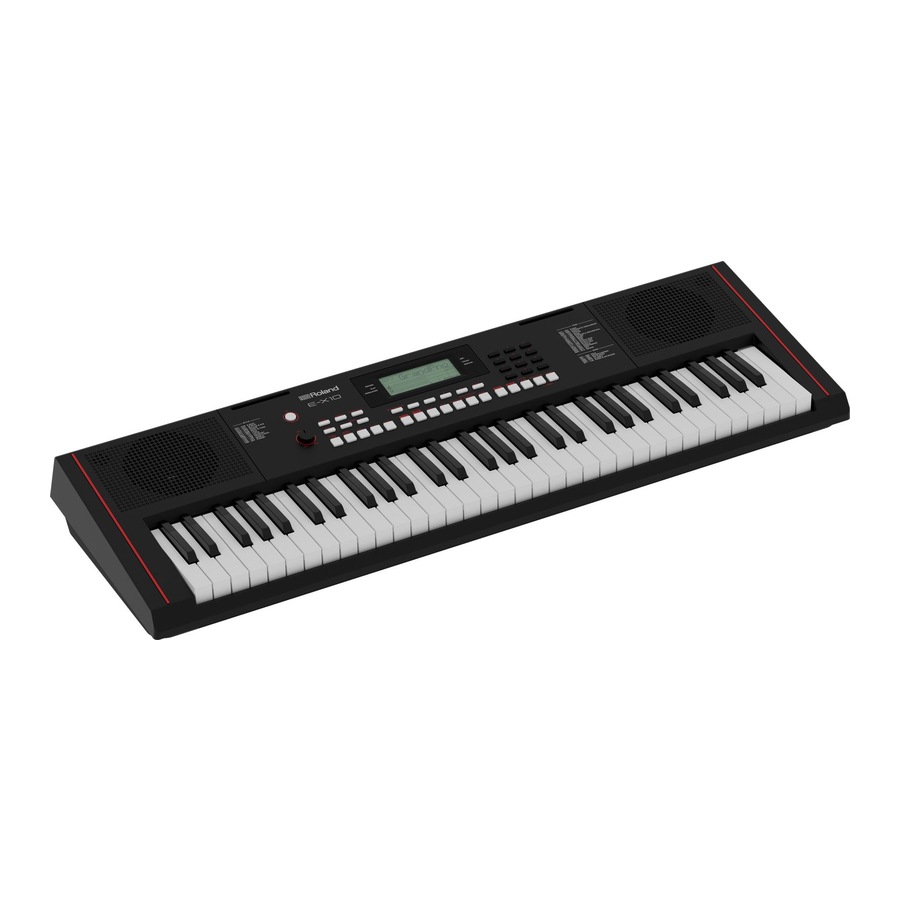
Panel & Display Description
Front Panel

- [POWER] switch
Switches the power on or off. - [VOLUME] knob
Adjusts the master volume. - [CHORD] button
Lets you access the Chord mode. - [LESSON] button
Lets you access the Lesson mode. - [CHORD DICT.] button
Turns the chord dictionary on or off. - [SYNC] button
Turns the sync function on or off. - TEMPO[-]/[+] buttons
Adjusts the current tempo. - [START/STOP] button
Starts or stops playing the style. - [INTRO/ENDING] button
Plays the intro or ending. - [FADE] button
Turns fade-in or fade-out on or off. - [FILL A] button
Plays fill A. - [FILL B] button
Plays fill B. - [QUICK MEMORY] button
Registers the panel settings.
14~17. [1]~[4] buttons
Recalls a registered panel setting.
- [O.T.S.] button
Turns one touch setting function on or off. - [STYLE] button
Lets you access the Style mode. - [TONE] button
Lets you access the Tone mode.
[ARP. (![]() )]
)]
Press and hold to turn arpeggiator on or off. - [DUAL] button
Turns the dual function on or off. - [SPLIT] button
Turns the split function on or off. - [TRANSPOSE] button
Adjusts the transpose setting. - [SUSTAIN] button
Turns the sustain function on or off.
[MODULATION (![]() )]
)]
Press and hold to turn modulation on or off. - [MIXER] button
Lets you access the Mixer menu. - [MENU] button
Lets you access the Function menu. - [SONG] button
Lets you access the Song mode. - [
![]() ] button
] button
Song mode: plays/pauses the song.
Other mode: plays/pauses the recorded song.
[REC (![]() )]
)]
Press and hold to enter the Record mode. - [METRONOME] button
Turns the metronome on or off. - [PIANO] button
Lets you access the Piano mode. - [<]/[>] and Numeric buttons:
Select the number or set parameter values.
 )]
)] ] button
Rear Panel

- USB COMPUTER jack
For connecting to a computer. - PEDAL jack
For connecting a pedal switch. - PHONES/OUTPUT jack
For connecting external audio equipment. - AUX IN jack
For connecting external audio source, such as an MP3. - MIC INPUT jack
For connecting a microphone. - DC IN jack
For connecting the DC 12V power adaptor.
LCD

- RECORD / PLAY / MODULATION
- NUMBER
- TONE / STYLE / DEMO / SONG
- CHARACTERS
- ARP. / TOUCH / SUSTAIN
- RECORD
- TREBLE CLEF
- BASS CLEF
- MEASURE
- BEAT
- TEMPO
- CHORD
- MEMORY / O.T.S.
- A.B.C. / WHOLE / FADE / A/B
- NOTE INDICATION
- LESSON
- DUAL / SPLIT / DSP
Setup
This section contains information about setting up your instrument and preparing to play. Please go through this section carefully before turning the power on.
Power Supply
You can power the instrument by using the included power adaptor or by using batteries.
Turn down the volume of the instrument and the connected audio equipment before you switch the instrument on.

Using Power Adaptor
- If the included power adaptor is interchangeable plug type, choose the included adaptor plug that fits the type of AC outlet used in your region. Follow the image to put the adaptor plug into the grooves of the power adaptor unit and rotate the adaptor plug clockwise to lock. If the included power adaptor is not interchangeable plug type, skip this process.
![]()
- Connect the adaptor to the DC 12V jack of this instrument.

- Plug the adaptor into an AC outlet.
- Press the [POWER] switch, the LCD screen turns on, indicating the instrument is powered on.
![]()
- If you are ready to turn off the instrument, press and hold the [POWER] switch again.


Notes:
- The power to the instrument will be turned off automatically after a pre~determined amount of time has passed since it was last used for playing music, or its buttons or controls were operated (Auto Off function). If you do not want the power to be turned off automatically, disengage the Auto Off function.
- The recorded song and the registered memory will be lost when the power turns off.
- To restore power, turn the power on again.
- For your safety, please unplug the instrument when it is not in use or during a thunderstorm.
Using Batteries
This instrument requires six AA size or equivalent alkaline batteries for power supply.
- Open the battery compartment cover located on the bottom of the instrument.
![]()
- Insert the batteries. Carefully follow the polarity markings on the cabinet.
- Replace the compartment cover. Make sure it locks firmly in place.

Notes:
- Do not mix used and new batteries.
- Always use same types of batteries.
- Remove the batteries from the instrument when it is not being used for an extended period of time.
- When turning the unit over, be careful so as to protect the buttons and knobs from damage. Also, handle the unit carefully; do not drop it.
Setting a Music Rest
A music rest is supplied with the instrument. You can easily attach it by inserting it into the slots at the rear of the panel.

Connections
Connecting a Computer
The instrument receives and transmits MIDI messages via the USB COMPUTER jack.
Use a USB cable to connect the instrument to a computer.

Notes:
- Do not set the USB MIDI device to be both input and output simultaneously when configuring the software on your computer. Otherwise, the sound will be overlapped when playing the keyboard.
- Using a USB2.0 interface is recommended when connecting the instrument to a computer.
Connecting a Pedal Switch
A pedal switch can be plugged into the PEDAL jack, and you can use it to turn the sustain on or off.
When you step on the pedal, all notes you play on the keyboard will have a longer sustain.

Note:
Please connect the plug of the pedal to the PEDAL jack before turning the power on. The polarity of different pedals may vary. If the connected pedal switch works in reversed behavior, please plug the pedal to the PEDAL jack before turning the power on.
Connecting a Pair of Headphones
A standard pair of stereo headphones can be connected to the PHONES/OUTPUT jack for private practice or late~night playing. The internal stereo speaker system is automatically shut off when a pair of headphones is plugged into this jack.

Note:
To avoid the risk of hearing loss, do not listen with headphones at high volume level for a long period of time.
Connecting an Audio Equipment
The PHONES/OUTPUT jacks deliver the output of the instrument to external audio equipment, such as a keyboard amplifier, a stereo sound system, a mixing console, or a tape recorder. Use an audio cable to connect the OUTPUT of the instrument to the AUX IN of the external audio equipment.

Note:
To avoid damaging the speakers, please set the volume level to minimum before connecting to power and other devices.
Connecting an Audio Player
The AUX IN jack receives audio signals from an external audio source such as a Smart Device, MP3 or CD player.
Use an audio cable to connect the AUX IN of the instrument to the OUTPUT of an audio player. The instrument's speakers will play the music transmitted from the external player, and you can play along.

Connecting a Microphone
Before connecting or disconnecting a microphone, set the master volume to minimum level.
Plug a microphone into the MIC INPUT jack, then adjust the master volume to an appropriate level.

Note:
Please unplug the microphone when it is not used.
Power / Master Volume
Turning the Power On / Off
- Make sure the instrument is properly connected to power supply.
- Press the [POWER] switch, the LCD screen turns on, indicating the instrument is powered on.
![]()
- If you are ready to turn off the instrument, press and hold the [POWER] switch again.

Note:
If the LCD isn't lit after you turn on the power, please check the power connection.
Adjusting the Master Volume

Rotate the [VOLUME] knob clockwise to increase the master volume or counter-clockwise to decrease it.
Adjust to set the desired volume level.
Note:
If the instrument keeps silent, check if the volume has been set to minimum or if headphones are plugged into the PHONES/OUTPUT jack.
Playing Demo Song
- Press the [METRONOME] + [PIANO] buttons simultaneously to loop playing all demo songs. The LCD displays the current demo number and name.

- Use the numeric buttons or [<]/[>] buttons to select a demo song.
- Press the [METRONOME] + [PIANO] buttons again to stop playing and exit demo song.
Or you can press the [START/STOP] button to stop playing and exit demo song.

Note:
While demo song is playing, all buttons and keys are unavailable except [<]/[>], Numeric buttons, [START/STOP], TEMPO[-]/[+], [VOLUME], [METRONOME] + [PIANO], and the [POWER] switch.
Playing Tones
The instrument features a variety of built-in tones. Please refer to the "Tone List".
Selecting a Tone
- Press the [TONE] button to enter Tone mode.
The "TONE R1" icon on LCD lights up. The LCD displays the current tone name and number.

- Use the numeric buttons or [<]/[>] buttons to select a tone.
- Play the keyboard to use the tone for performance.

Note:
When Dual and Split functions are in use, you can press the [TONE] button repeatedly to switch between the tone layers.
Playing Two Tones Simultaneously
The dual function can layer two different tones together, creating a much richer sound.
- Press the [DUAL] button to turn on the dual function.
The "TONE R2" and "DUAL" icons on LCD light up. The LCD displays the current name and number for R2.

- Use the numeric buttons or [<]/[>] buttons to select a tone for R2.
- Play the keyboard. You will hear two different tones layered together.
It seems like two different instruments playing at the same time. - Press the [DUAL] button again to turn off the dual function.

Playing Different Tones with Both Hands
This function splits the keyboard into the left and the right hand areas, each with a different tone. The left hand tone is the split tone. The default split point is F#3 (19). You can set the split point to any key as required. Please refer to Split Point in the "Function Menu".
- Press the [SPLIT] button to turn on the split function.
The "TONE L" and "SPLIT" icons on LCD light up. The LCD displays the current split tone name and number.

- Use the numeric buttons or [<]/[>] buttons to select a split tone.
- Play the keyboard with both hands. You will hear two different tones.
- Press the [SPLIT] button again to turn off the split function.

Notes:
- When the keyboard is split, only the right hand area will use the dual tones.
- You can set the volume level for each tone layer in the mixer menu. Please refer to "Mixer".
Touch Response
The touch response feature lets you dynamically and expressively controls the level of the sound with your playing strength- just like playing on an acoustic instrument.
You can set the touch response in the "Function Menu".

Modulation

Press and hold the [SUSTAIN] button to turn modulation effect on or off. When modulation is turned on, the "MODULATION" icon lights up. It will add vibrato effect to the notes you play.
Sustain

Press the [SUSTAIN] button to turn sustain effect on or off. When sustain is turned on, the "SUSTAIN" icon lights up. All the notes you play will have a longer sustain.
Note:
When using a pedal switch for sustain, it will have a stronger sustain effect than by using the [SUSTAIN] button.
DSP
The DSP simulates sounds in real environment. With the DSP effect, you can add ambiance and depth to your performance in a variety of ways. DSP is turned on by default. You can turn it on or off in the "Function Menu".

Transpose
This function will shift the pitch of the entire keyboard in semitone steps.
- Press the [TRANSPOSE] button. The LCD temporarily displays the transpose menu.

- Use the [<]/[>] buttons to change the transpose value. Press the [<] and [>] buttons simultaneously to restore the default setting.
- You can also press and hold the [TRANSPOSE] button, then press a specific key to fast set the transpose value.

| Key | Transpose value |
| C | 0 |
| C# | +1 |
| D | +2 |
| D# | +3 |
| E | +4 |
| F | +5 |
| F# | -6 |
| G | -5 |
| G# | -4 |
| A | -3 |
| A# | -2 |
| B | -1 |
Piano Mode

Press the [PIANO] button to enter or exit Piano mode.
In Piano mode, all parameters will be optimized for concert piano performance. You can play the accompaniment as in the other modes, but it plays only the rhythm part.
Note:
In Piano mode, Chord mode will be off automatically.
Auto Accompaniment
The auto accompaniment feature puts a full backing band at your fingertips. To use it, all you have to do is to play the chords with your left hand in the selected accompaniment style, and then the accompaniment will automatically play along, instantly following the chords you play. With auto accompaniment, even a solo performer can enjoy playing with the backing of an entire band or orchestra. This instrument features a variety of styles.
Try selecting some of the different styles and enjoy the auto accompaniment feature. Please refer to the "Style List".
Selecting Chord Modes
When Chord mode is off, you can press the [START/STOP] button to start playing the rhythm tracks.
When Chord mode is on, you can press the [START/STOP] button to start the rhythm tracks, then play a chord in the chord section to start all tracks.
In Chord mode, you can play back chords in the A.B.C mode and the WHOLE mode.
- Press the [CHORD] button once to enter the " A.B.C." (Auto Bass Chord) mode.
The "A.B.C." icon on LCD lights up. The keyboard is split into two sections. Left hand section is the chord section. You can play single finger chords and multi-finger chords in the chord section.

- Press the [CHORD] button again to enter the "WHOLE" mode. The "WHOLE" icon on LCD lights up. You can play multi-finger chords over the entire keyboard.

- Press the [CHORD] button again to turn off chord mode. The "WHOLE" icon turns off.


Playing Auto Accompaniment
Rhythm Track
- Press the [STYLE] button to enter Style mode.
The "STYLE" icon on LCD lights up. The LCD displays the current style name and number.

- Use the numeric buttons or [<]/[>] buttons to select a style.
- Press the [START/STOP] button to start playing the rhythm tracks.
- Or you can press the [SYNC] button to turn on the Sync function. The beats on LCD blink. The Sync function puts the playback on standby. You can press any key on the keyboard to start the rhythm tracks.

Note:
You can play back the rhythm tracks while Chord mode is on or off.
All Tracks
- Press the [CHORD] button to enter Chord mode.
![]()
- Press the [SYNC] button to turn on the Sync function.
The beats on LCD blink. The Sync function puts the playback on standby. You can play a chord in the chord section to start playing all tracks.

- Or you can press the [START/STOP] button to start the rhythm tracks.
Then play a chord in the chord section to start all tracks.


Accompaniment Sections
There are various types of accompaniment sections. They are Intro, Main (A, B), Fill (A, B), and Ending.
- Press the [STYLE] button.
- Use the numeric buttons or [<]/[>] buttons to select a style.
- Press the [CHORD] button to enter A.B.C. mode. The "A.B.C." icon on LCD lights up.
- Press the [SYNC] button to enter Sync Start status.
- Press the [FILL A]/[FILL B] button to select Main A or Main B.
- Press the [INTRO/ENDING] button. The icon "A" or "B" on LCD will blink, indicating playback is on standby.
![]()

- Now if you play a chord in the left hand chord section, the auto accompaniment will start. When the Intro section is finished, it will automatically lead into the Main section.
- Press the [FILL A]/[FILL B] button. It will play fill A or fill B, then automatically lead to the corresponding Main section.
![]()
- Press the [INTRO/ENDING] button. The icon "A" or "B" on LCD will blink. It will play the Ending section. When the Ending is finished, the playback will stop.


Note:
If you press the [FILL A]/[FILL B] button before the Ending is finished, it will play the selected fill then lead to the corresponding Main
Fade In / Out
Fade In
When style stops, press the [FADE] button to turn on the Fade In function. The " ![]() FADE" icon on LCD light up.
FADE" icon on LCD light up.
Now if you start style playback, the " ![]() FADE" icon on LCD blinks and the volume will increase from low to high.
FADE" icon on LCD blinks and the volume will increase from low to high.

Fade Out
When style is playing, you can press the [FADE] button to turn on the Fade Out function. The "FADE ![]() " icon on LCD blinks.
" icon on LCD blinks.
The volume will decrease from high to low until the playback stops.

Note:
The default fade time is 10 seconds.
Accompaniment Volume
You can adjust the accompaniment volume to keep an appropriate balance between the accompaniment volume and the tone volume.
- Press the [MIXER] button to enter the mixer menu.
![]()
- Use the [<]/[>] buttons to select "Accomp".

- Press the [MIXER] button again to move the cursor to the volume level. The volume level will blink.
- Use the [<]/[>] buttons to to adjust the level. The range is OFF, 1~32.


Notes:
- In the mixer menu, repeatedly press the [<] and [>] buttons simultaneously to mute or unmute the accomp volume. When the accomp volume is muted, the LCD displays "OFF Accomp".
- The accomp volume is not adjustable when playing demo, song or recorded song.
Chord Fingering
How the chords are played or indicated with your left hand (in the auto accompaniment section of the keyboard) is referred to as "fingering." There are 2 types of fingerings as described below.
Chord Basics
A chord, in music, is any harmonic set of three or more notes that is heard as if sounding simultaneously. The most frequently encountered chords are triads. A triad is a set of three notes that can be stacked in thirds. When stacked in thirds, the triad's members, from lowest pitched tone to highest, are called: the Root, the Third, and the Fifth.

Triad Type
There are following basic triad types:

| Major Triad | A root with a major third added above and a perfect fifth will consist as a "Major Triad." |
| Minor Triad | A root with a minor third added above and a perfect fifth will consist as a "Minor Triad." |
| Augmented Triad | A root with a major third added above and an augmented fifth will consist as an "Augmented Triad." |
| Diminished Triad | A root with a minor third added above and a diminished fifth will consist as a "Diminished Triad." |
Chord Inversion
We define this chord its root is not in the bass (i.e. the root is not the lowest note) as an inversion chord. When the root is in the bass, we call the chord: root-position chord. If we put the Third and Fifth in the root position, then it forms "Inversion," we call this chord "Inversion Chord." See the following major triad and its inverted chord.

Chord Name
The chord name contains two parts content: Chord root and Chord type.

Single Finger
Single finger type not only can detect single finger but also can detect multi finger. And the single finger makes it easily to play chords through only one, two or three keys. Including major, minor, seventh, and minor seventh chord. Refer to relevant picture on the right for details.
 Mаjor Triad
Only press the root note on the keyboard.

Minor Triad
Press the root note and the nearest left black key simultaneously.

Seventh chord
Press the root note and the nearest left white key simultaneously.

Minor seventh chord
Press the root note and the nearest left white and black keys simultaneously.

Multi-finger
Multi-finger allows you to play chords in normal fingering. Try playing the 32 chord types in C scale as listed on the right.

Notes: enclosed in parentheses  are optional; the chords could be recognized without them.
Note:
In WHOLE mode, the entire keyboard will only recognize chords played in normal fingering.
Tempo
- Press the TEMPO[-]/[+] button to change the tempo. The tempo value on LCD blinks. The range is 5~280.
![]()
- Press and hold the TEMPO[-]/[+] button to fast change the tempo. Press the TEMPO [-] and [+] buttons simultaneously to restore the default tempo.

Notes:
- When style stops, if you change the style, the tempo will be reset to the default tempo of the current style.
- When style is playing, if "Tempo Remain" is turned on, when you change the style, the tempo will remain unchanged. If "Tempo Remain" is turned off, when you change the style, the tempo will be reset to the default tempo of the current style. You can turn the Tempo Remain on/off in the "Function Menu". Tempo Remain is turned off by default.
Metronome
The metronome provides a steady beat to help you practice at a preset tempo.
- Press [METRONOME] button to turn the metronome on or off.
![]()
- The default time signature is "4". You can change it in the function menu.
Press the [MENU] button to enter the function menu, then use the [<]/ [>] buttons to select "Beat". Then press the [MENU] button again to move the cursor to the beat value. Use the [<]/[>] buttons to change the beat.

Notes:
- The metronome will respond in the next beat if it is turned on when style is playing.
- If you turn on the metronome in Record mode, the metronome sound will not be recorded.
Arpeggiator
This function can automatically generate arpeggios. Simply play a chord with your left hand, the instrument will play a preset arpeggio pattern and produce beautiful melody.
Turn the Arpeggiator on or off
- Press and hold the [TONE] button to turn on this function. The "ARP." icon lights up.

- Press and hold the [TONE] button again to turn off this function. The "ARP." icon turns off.

Note:
Each tone has a preset arpeggio pattern. When you change the tone, arpeggio pattern and tempo will change.
Set the Split Point of Arpeggiator
When the arpeggiator is turned on, the keyboard will be split into two areas. Play chords in the left hand area, and melody in the right hand area. The default split point is the same as in the split function: F#3 (19).
Mixer
You can adjust the volume of different tracks in the mixer.
- Press the [MIXER] button to enter the mixer menu. The current mixer parameter on LCD blinks.

- Use [<]/[>] buttons to select a parameter.
- Press the [MIXER] button again to move the cursor to the volume level. The volume level will blink.
- Use [<]/[>] buttons to change the volume. You can press the [<] and [>] buttons simultaneously to restore the default volume.
- Press the [STYLE], [TONE] or [SONG] button to exit the mixer menu.

Detailed parameters and their volume range:
| Parameter | LCD Display | Range |
| Accomp volume | XXX Accomp | OFF, 1~32 |
| Rhythm track volume | XXX Rhythm | OFF, 1~32 |
| Bass track volume | XXX Bass | OFF, 1~32 |
| Chord 1 track volume | XXX Chord1 | OFF, 1~32 |
| Chord 2 track volume | XXX Chord2 | OFF, 1~32 |
| Chord 3 track volume | XXX Chord3 | OFF, 1~32 |
| Upper 1 track volume | XXX Upper1 | OFF, 1~32 |
| Upper 2 track volume | XXX Upper2 | OFF, 1~32 |
| Lower track volume | XXX Lower | OFF, 1~32 |
Notes:
- It will exit the mixer menu if there is no operation in 60 seconds.
- Repeatedly press the [<] and [>] buttons simultaneously to mute the selected track (LCD displays "OFF") or unmute it.
Quick Memory
This function allows you to save virtually all panel settings to a registration memory. You can instantly recall these settings by pressing a single button.
Note: The registered memory will be lost when the power turns off.
Registering the Panel Settings
- The memory function is turned on by default when the power is turned on.
- When this function is turned off, you can press the [QUICK MEMORY] button to turn this function on, the "MEMORY" icon on LCD lights up.
![]()

- Press and hold the [QUICK MEMORY] button, then press one of the memory buttons [1] ~ [4] to save the panel settings to that button.
Note: It will overwrite the previous data saved in that button.
![]()
- Parameters that can be saved to registration memory include:
Tone: main tone, dual tone, split tone, DSP effects, mixer settings.
Accompaniment: style, tempo, chord mode.
Function: touch response and some parameters in the function menu.


Recalling the Registered Settings
Press one of the memory buttons [1] ~ [4].
It will recall the settings saved in that button. This will reset related parameters on the control panel.
Notes:
- By default, the four memory slots are empty when the power is turned on. If you press a memory button, the LCD will display "Empty" to indicate there's no data.
- Registration memory cannot be recalled when the O.T.S. function is in use.
One Touch Setting
When one touch setting function is in use, you can instantly recall the related tone settings to match the current style with a single touch of a button.
- Press the [O.T.S.] button. The "O.T.S." icon on LCD lights up. If chord mode is turned off, the A.B.C. function will be turned on automatically.
If the WHOLE mode is turned on, it will stay in WHOLE mode when O.T.S. is engaged.

- Press one of the O.T.S. buttons [1]–[4]. It will recall the tone and effect settings that match the selected style. O.T.S. parameters include:
Main tone: volume, reverb level, octave.
Dual tone: volume, reverb level, octave.
Split tone: volume, reverb level, octave.
![]()
- Press the [O.T.S.] button again to turn off this function.
It will automatically switch to registration memory. The "MEMORY" icon on LCD lights up.


Note:
Registration memory is not available when O.T.S. is in use.
Chord Dictionary
If you know the name of a chord but don't know how to play it, you can use the chord dictionary function.
- Press the [CHORD DICT.] button to turn on this function. The LCD displays "DICT.".

- Use the key C4 and the keys above to assign the chord type. Use the key C6 and the keys above to assign the chord root.
When the chord type and chord root are assigned, the LCD will display the chord name and chord notes. - When you play the chord correctly in the chord section, it will produce an applause sound.
- Press the [CHORD DICT.] button again to exit this function.

Chord types and roots will be displayed in the Chord Reference mode as follows:

Playing Songs
The instrument has a variety of songs. Please refer to the "Song List". Each song can be practiced in Lesson mode.
Listening to Songs
- Press the [SONG] button to enter Song mode. Then press the [
![]() ] button to start playing the song.
] button to start playing the song.

- Use the numeric buttons or [<]/[>] buttons to select a song.
- When song is playing, press the [
![]() ] button to pause or continue the song playback.
] button to pause or continue the song playback. - Use the TEMPO[-]/[+] buttons to change the tempo of the current song.
- When song stops, press these buttons to exit Song mode: [STYLE], [TONE], [DUAL],[SPLIT], [MENU], [MIXER], [1]-[4].
 ] button to start playing the song.
Note:
When song is playing, the [MENU] and [MIXER] buttons are not available.
Lesson Mode
In Lesson mode, you can practice song in 3 lessons. They are Lesson 1, Lesson 2 and Lesson 3. Your practice will be evaluated when you finish a lesson.
- You can enter Lesson mode from Song mode. When song stops, press the [LESSON] button to enter Lesson mode or select a lesson.
![]()
- Press the [
![]() ] button to start the lesson. The LCD will display the notes to play.
] button to start the lesson. The LCD will display the notes to play.

- Press the [
![]() ] button again to stop the lesson.
] button again to stop the lesson.


Lesson 1:
You will learn to play at the correct timing. As long as you play a key at the right time, the correct note will sound.
Lesson 2:
You will learn to play the correct notes. If you play a wrong note, the lesson will stop and wait, until you correctly play the note displayed on LCD.
Lesson 3:
You will learn to play the correct notes at the correct timing.
Grading:
When you finish a lesson, it will evaluate your practice and tell you the grades.
Level 1: OK.
Level 2: Good.
Level 3: Very Good.
Level 4: Excellent.
After grading, the song will play back again, so you can practice again.
Recording and Playing Back
You can record your performance and then play it back.
- Press and hold the [
![]() ] button to enter Record mode. The "RECORD" icon blinks. The beats on LCD blink.
] button to enter Record mode. The "RECORD" icon blinks. The beats on LCD blink.

- Play the keyboard or press the [START/STOP] button to start recording.
If you want to record accompaniment, turn on the Chord mode, then play chords in the chord section. - During recording, press and hold the [
![]() ] button again to stop recording. The "RECORD" icon turns off.
] button again to stop recording. The "RECORD" icon turns off. - During recording, press the [
![]() ] button, it will stop recording and then play back the recording.
] button, it will stop recording and then play back the recording. - When in other modes (except Song mode), you can press the [
![]() ] button to play back the recording. The "PLAY" icon lights up.
] button to play back the recording. The "PLAY" icon lights up. - When the recording is playing, you can use the [
![]() ] button to pause or continue the playback.
] button to pause or continue the playback. - When the recording is playing, you can the [START/STOP] button to stop and exit playback. The "PLAY" icon turns off.

Note:
The recording data will be lost after power off.
Function Menu
- Press the [MENU] button to enter the function menu. The current parameter on LCD blinks.
![]()
- Use the [<]/[>] buttons to select a parameter.
- Press the [MENU] button again to move the cursor to select the value.
- Use the [<]/[>] buttons to change the value.
- Pressing the [<] and [>] buttons simultaneously to restore the default value of the current parameter.
- Press the [STYLE], [TONE] or [SONG] button to exit the function menu.

Detailed parameters and their ranges:
| Parameter | LCD Display | Range | Default |
| Tune | XXX Tune | -50 ~ 50 | 0 |
| Octave | XXX Octave | -2 ~ 2 | 0 |
| Split Point | XXX SplitPt | 1 ~ 61 | 19 |
| Beat Type | XXX Beat | 0, 2 ~ 9 | 4 |
| Touch Response | XXX Touch | OFF, 1~3 | 2 |
| Modulation | XXX Modul | On, OFF | OFF |
| DSP | XXX Dsp | On, OFF | On |
| Reverb Type | XXX RevType | 1 ~ 10 | 4 |
| Reverb Level | XXX Rev Lev | 0 ~ 32 | 13 |
| Chorus Type | XXX ChrType | 1 ~ 8 | 3 |
| Chorus Level | XXX Chr Lev | 0 ~ 32 | 0 |
| Tempo Remain | XXX TempRmn | On, OFF | OFF |
| Auto Off | XXX AutoOff | OFF, 30, 60 | 30 |
Note:
- It will exit the function menu if there is no operation in 60 seconds.
- The function menu edited parameters will be lost when the power turns off.
Tune
This function adjusts the pitch of the keyboard up or down in a 2-cent increment.
- In the function menu, press the [<]/[>] buttons to select the tune menu. The LCD displays "Tune".

- Press the [MENU] button to move the cursor to the value.
- Use the [<]/[>] buttons to change the value. Pressing the [<] and [>] buttons at the same time will restore the default value.

Note: This setting applies to both accompaniment and tone.
Octave
This function shifts the pitch of the keyboard up or down by one octave.
- In the function menu, press the [<]/[>] buttons to select the octave menu. The LCD displays "Octave".

- Press the [MENU] button to move the cursor to the value.
- Use the [<]/[>] buttons to change the value. Pressing the [<] and [>] buttons at the same time will restore the default value.

Split Point
This function sets the split point for the Split mode and the Chord mode.
- In the function menu, press the [<]/[>] buttons to select the split point menu. The LCD displays "SplitPt".

- Press the [MENU] button to move the cursor to the value.
- Use the [<]/[>] buttons to change the value. Pressing the [<] and [>] buttons at the same time will restore the default value.

Beat Type
This function sets the metronome beat type.
- In the function menu, press the [<]/[>] buttons to select the beat menu. The LCD displays "Beat".

- Press the [MENU] button to move the cursor to the value.
- Use the [<]/[>] buttons to change the value. Pressing the [<] and [>] buttons at the same time will restore the default value.

Touch Response
This function sets the velocity response of the keyboard.
- In the function menu, press the [<]/[>] buttons to select the touch response menu. The LCD displays "Touch".

- Press the [MENU] button to move the cursor to the value.
- Use the [<]/[>] buttons to change the value. Pressing the [<] and [>] buttons at the same time will restore the default value.

| No. | Touch Response |
| OFF | fixed |
| 1 | Heavy |
| 2 | Medium |
| 3 | Light |
Modulation
This function turns the modulation effect on or off.
- In the function menu, press the [<]/[>] buttons to select the modulation menu. The LCD displays "Modul".

- Press the [MENU] button to move the cursor to the setting.
- Use the [<]/[>] buttons to change the setting. Pressing the [<] and [>] buttons at the same time will restore the default setting.

Note: Modulation is not available for percussive tones.
DSP
This function turns the DSP effect on or off.
- In the function menu, press the [<]/[>] buttons to select the DSP menu. The LCD displays "Dsp".

- Press the [MENU] button to move the cursor to the setting.
- Use the [<]/[>] buttons to change the setting. Pressing the [<] and [>] buttons at the same time will restore the default setting.

Note: When DSP is off, following Reverb and Chorus effects turn off.
Reverb Type
This function selects the reverb type.
- In the function menu, press the [<]/[>] buttons to select the reverb type menu. The LCD displays "RevType".

- Press the [MENU] button to move the cursor to the value.
- Use the [<]/[>] buttons to change the value. Pressing the [<] and [>] buttons at the same time will restore the default value.

Reverb Level
This function adjusts the reverb level.
- In the function menu, press the [<]/[>] buttons to select the reverb level menu. The LCD displays "RevLev".

- Press the [MENU] button to move the cursor to the value.
- Use the [<]/[>] buttons to change the value. Pressing the [<] and [>] buttons at the same time will restore the default value.

Chorus Type
This function selects the chorus type.
- In the function menu, press the [<]/[>] buttons to select the chorus type menu. The LCD displays "ChrType".

- Press the [MENU] button to move the cursor to the value.
- Use the [<]/[>] buttons to change the value. Pressing the [<] and [>] buttons at the same time will restore the default value.

Chorus Level
This function adjusts the chorus level.
- In the function menu, press the [<]/[>] buttons to select the chorus level menu. The LCD displays "ChrLev".

- Press the [MENU] button to move the cursor to the value.
- Use the [<]/[>] buttons to change the value. Pressing the [<] and [>] buttons at the same time will restore the default value.

Tempo Remain
When this function is turned on, the tempo will remain unchanged when changing style during style playback.
- In the function menu, press the [<]/[>] buttons to select the tempo remain menu. The LCD displays "TempoRmn".

- Press the [MENU] button to move the cursor to the setting.
- Use the [<]/[>] buttons to change the setting. Pressing the [<] and [>] buttons at the same time will restore the default setting.

Auto Off
The instrument will automatically shut down after 30 minutes of inactivity.
Selecting "OFF" will disable this function.
- In the function menu, press the [<]/[>] buttons to select the auto off menu. The LCD displays "AutoOFF".

- Press the [MENU] button to move the cursor to the value.
- Use the [<]/[>] buttons to change the value. Pressing the [<] and [>] buttons at the same time will restore the default value.

MIDI
MIDI (short for Musical Instrument Digital Interface) allows a wide variety of electronic musical instruments, computers and other related devices to connect and communicate with one another. MIDI carries event messages that specify notation, pitch and velocity, control signals for parameters such as volume, vibrato, audio panning, and program change information to change the tone selections.
The instrument can output the real~time playback information via MIDI messages and control external MIDI devices. The instrument can also accept incoming MIDI messages and generate sound accordingly.
Note:
This instrument has a USB computer jack (p. 7), which can be connnected to a computer as a MIDI input or MIDI output. This can not be connected with another instrument, unless the instrument has a USB host terminal.
The main application of MIDI
- Used as a tone generator.
This instrument can receive MIDI data from computer, and execute MIDI controls to change channels, change tones, add effect and make sound and so on. Refer to MIDI Implementation Chart for more MIDI controls. - Used as a MIDI Keyboard
When you play the keyboard, change the tones or turn the DSP on/ off, the instrument will send MIDI data to the computer, which will be saved as records (It only records your keyboard performance when playing along with accompaniment.) You can edit the records on the computer, such as changing the channels or tones, adding DSP effects. Then play back the records with the instrument or other sound source (such as a sound card). You can play the keyboard along with the playback. Refer to MIDI Implementation Chart for more MIDI controls.
Connecting to a MIDI Software on Computer
To use the USB computer jack of the instrument, you may need to configure the software on computer. For example, setting Digital Audio Workstation (DAW) software under WINDOWS10 operating system:
- Use a standard USB cable to connect the instrument to computer. Make sure the instrument is turned on.

- Open Digital Audio Workstation (DAW) software on computer.
- The software will automatically recognize the E-X10 USB DEVICE either as the MIDI Input or as the MIDI Output. For more configuration information, please refer to the HELP of the software.
- You can follow the above operations when using other similar MIDI software.

Troubleshooting
| Problem | Possible Cause and Solution |
| The speakers produce a pop sound whenever the power is turned on or off. | This is normal and does not indicate a malfunction. |
| Speakers do not produce sound when the keyboard is played. |
|
| The speakers produce noise when a mobile phone is put near them. | Using a mobile phone in close proximity to the instrument may produce interference. To prevent this, turn off the mobile phone or use it farther away from the instrument. |
| The auto accompaniment does not play back even when sync start is engaged and a key is pressed. | You may be playing keys in the right hand range of the keyboard. To start the accompaniment with sync start, make sure to play keys in the left~hand range. |
| Certain notes seem to be in the wrong pitch. | Make sure that the tune value is set to 0 in the function menu. |
| When connecting to computer, the instrument cannot be recognized. | Check if the USB cable is firmly connected. Try connecting another USB port on the computer. This instrument is plug and play and should work without installing a driver. |
| The pedal does not respond. | Check if the pedal cable is firmly connected. |
| When using a pedal switch, it doesn't sustain the notes when the pedal is pressed, but it sustain the notes when the pedal is released. | The polarity of different pedals may vary. If the connected pedal switch works in reversed behavior, please plug the pedal to the PEDAL jack before turning the power on. |
| It shuts down after a period of time. | The Auto Off function will turn off the instrument after a preset period of time when the instrument is not in use. You can disable this function in the function menu. |
Specifications
| Keyboard | 61 keys with touch response | |
| Display | Multi-functional LCD | |
| Max polyphony | 64 | |
| Tone | 610 presets | |
| Style | 207 presets | |
| Demo song | 140 | |
| Song | 140 | |
| Layer | L, R1, R2 | |
| Split | Yes | |
| Style control | Start / Stop Sync Start Intro Main (A, B) Fill (A, B) Ending Chord mode Fade in / out Accomp volume | |
| Chord type | 32 | |
| Reverb | 10 types, 33 levels | |
| Chorus | 8 types, 33 levels | |
| Effects | DSP effects, Modulation | |
| Mixer | Yes | |
| Sequencer | 1 user song | |
| Quick Memory | 4 memories | |
| O.T.S. | Yes | |
| Pitch adjustment | Transpose, Octave, Tune | |
| Metronome | Yes | |
| Tempo | 5 ~ 280 | |
| Other control | Touch response, Arpeggiator | |
| Connector | USB | USB MIDI |
| Headphone | 1 standard stereo | |
| Output | Yes (Phones jack) | |
| Microphone | Yes | |
| Pedal | Sustain pedal | |
| Aux In | Yes | |
| Amplifier | 2 x 2.5 watt | |
| Speaker | 2 x 12 cm | |
| Power | DC 12V, 2000mA or 6 x AA Batteries | |
| Battery life for Continuous use | Alkaline batteries (AA, LR6): Approximately 3 hours * This figure will vary depending on the actual conditions of use. | |
| Dimension | 947x317x100 mm | |
| Weight | 3.9 kg | |
- All specifications are subject to change without notice.

Documents / ResourcesDownload manual
Here you can download full pdf version of manual, it may contain additional safety instructions, warranty information, FCC rules, etc.
Advertisement


Need help?
Do you have a question about the E-X10 and is the answer not in the manual?
Questions and answers