dosatron D3 User Manual
Hide thumbs
Also See for D3:
- Quick start-up (2 pages) ,
- Owner's manual (76 pages) ,
- Owner's manual (192 pages)
Table of Contents
Advertisement
Advertisement
Table of Contents

Related Manuals for dosatron D3


Summary of Contents for dosatron D3
- Page 1 User manual...
- Page 2 NOTES...
-
Page 3: Table Of Contents
Precautions ............15 Installing the DOSOTRON..........18 Changing the dosing scale ...........21 Connecting the suction hose .........23 Installation tips ............25 STARTING UP THE DOSATRON ........27 Using for the first time ..........27 Use ..............28 Adjusting the dosing rate (without pressure) .......29 Dosing principle............29 By-pass option ............30... - Page 4 APPENDICES ............45 Graphs ..............45...
-
Page 5: Introduction
Over time, this DOSATRON will prove itself to be a most faithful ally. A few regular maintenance operations will guarantee operation in which the word “breakdown” will no longer be heard. - Page 6 This document does not form a contractual engagement and is for information purposes only. DOSATRON INTERNATIONAL reserves the right to modify its devices at any time. CE Conformity Statement Document No. DOCE06050103 This Dosatron is in compliance with the European Directive 2006/42/CE.
-
Page 7: Dosatron Technology
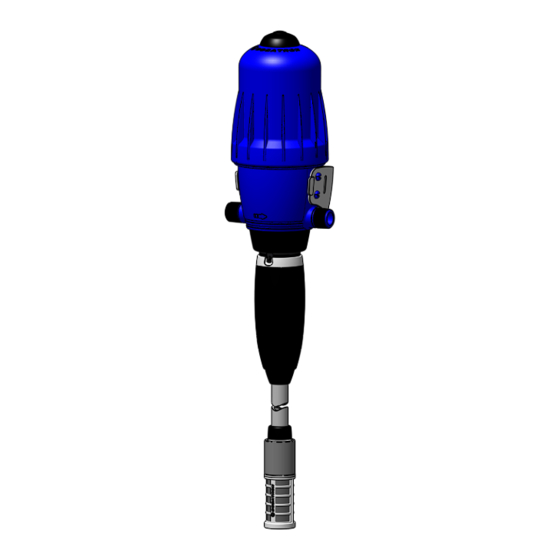
Technology Unique technology that incorporates all dosing functions. Installed on the water supply line, the DOSATRON uses water pressure as the only power source. When activated, it draws in the concentrate, doses it to the desired percentage, and mixes it with the motive water. The resulting solution is then propelled downstream. - Page 8 Description Item Clear water Concentrated additive to be dosed Solution water + % additive Motor piston Dosing piston Dosing adjustment(%) ratio...
- Page 9 fig 1...
- Page 10 Description Item MOTOR SECTION INJECTION ASSEMBLY Motor piston Bleed valve Top cover Mounting bracket Pump body Constant velocity washer Dosing piston Dosing pump body Injector sleeve Adjustment sleeve Dosing locking ring Retaining ring Suction valve Suction valve nut Hose nut (Ø16) Suction hose + strainer...
-
Page 11: Marking/Identification Specifications
Marking/Identification Specifications MARKINGS Your dosing pump has 3 main marking zones, allowing it to be identified in detail: • A 2-line engraving on the side of the top cover with the exact part number of the device on the first line and the serial number on the second line. fig 2 / 11... - Page 12 3 • A QR code - simply scan it with your smartphone and download the DOSATRON application. This gives you access to a wide range of resources and information about your dosing pump. fig 4 / 12...
-
Page 13: Codification Of The Part Number
CODIFICATION OF THE PART NUMBER REF..........Serial No........Example Dosatron Range Additive line IL: Industry Line Dosing IE: External injection option BP: Manual By-pass option V: Optional viscous kit Dosing Seal type VF: Acidic fluid AF: Alkaline fluid... -
Page 14: Specifications & Dimensions
Connection (NPT/BSP male gas fittings): ..Ø20 x 27mm [3/4”] Hydraulic motor capacity (every two clicks of the piston): approx.0.53L [0.14US Gallons] ATTENTION! The DOSATRON is not pre-set, please refer to the paragraph on Adjusting the dosing (without pressure), page 29 DIMENSIONS Diameter: cm [“]... -
Page 15: Installation
• If the system is located at a higher level than the DOSATRON itself, there is a possible risk of water and concentrate flowing back into the DOSATRON. - Page 16 Water with a high particle content If the water has a high abrasive particle content which could cause premature wear of the Dosatron, it is essential to install an upstream filter (e.g 60 microns - 300 mesh or finer). Water hammer / Overflow •...
- Page 17 Installation location • The DOSATRON and the dosing additive must be accessible at all times. Their installation must under no circumstances present a pollution or contamination risk. • It is recommended that all water pipes are marked showing that the water contains additives and with the wording: “CAUTION! Non-potable water”...
-
Page 18: Installing The Dosotron
INSTALLING THE DOSOTRON ATTENTION! THE INSTALLATION SHOULD BE CARRIED OUT WITHOUT TOOLS Remove the protective caps which block the openings in your DOSATRON, before connecting it to the water supply line. fig 5 / 18... - Page 19 • a suction hose with a strainer. The mounting bracket enables the DOSATRON to be mounted on a wall. Insert the DOSATRON into the mounting bracket, spreading the arms slightly so that the 4 lugs on the main body engage in the corresponding holes in the mounting bracket.
- Page 20 / 20...
-
Page 21: Changing The Dosing Scale
Ø 20 x 27 mm [3/4”]. Make sure that the water flows in the same direction as the arrows (water flow direction) on the device. Whenever possible, install the DOSATRON high enough to be able to read and adjust the dosing on the graduated scale in % or ratio. - Page 22 fig 9 fig 10 — Ensure that the centring pins are — Manually retighten the fixing nut aligned with the groove in the pump on the injection assembly. body. If necessary, to see the pins better, unscrew dosing adjustment sleeve to the middle of its travel.
-
Page 23: Connecting The Suction Hose
CONNECTING THE SUCTION HOSE The DOSATRON is supplied with a suction hose (to be adjusted as required) which allows it to be used with a large capacity container. This hose must be fitted with the strainer and ballast. NOTA: Maximum suction height: 4 m [13 ft]... - Page 24 D3IL10V fig 15 fig 14 fig 16 - Pass the suction hose through the - Push the hose all the way onto the clamp. suction valve fitting, position the clamp over the middle of the fitting and tighten it. - Assemble the strainer on the other end of the hose using the same method - Immerse the strainer into the...
-
Page 25: Installation Tips
INSTALLATION TIPS The DOSATRON must be assembled in by-pass as shown below. An in-line assembly is possible but not recommended because it does not enable the dosing pump to be easily isolated for maintenance (necessary to cut off the water supply). - Page 26 If you want to increase the flow rate, please choose a DOSATRON with a higher water flow capacity. ATTENTION! Leave the strainer approx. 10 cm [4”] from the bottom of the solution tank to avoid drawing in unsolvable particles that may damage the dosing pump body.
-
Page 27: Starting Up The Dosatron
Slowly open the fast priming valve located downstream of the DOSATRON. • Let the DOSATRON run until the additive to be dosed rises in the injection assembly (you will be able to see it through the transparent tube), then close the fast priming valve. -
Page 28: Use
To accelerate the priming, set the dosing level to maximum. Once the DOSATRON is primed, drop the pressure to zero and adjust to the required dosing value (please refer to the paragraph on... -
Page 29: Adjusting The Dosing Rate (Without Pressure)
ADJUSTING THE DOSING RATE (WITHOUT PRESSURE) ATTENTION! No tools should be used. The dosing adjustment must be carried out with no pressure in the system • Turn off the water supply and allow the pressure to drop to zero. • Unscrew the dosing locking nut. -
Page 30: By-Pass Option
BY-PASS OPTION The upper part of the DOSATRON can be equipped with a by-pass function (optional): • By-pass set to ON, the DOSATRON operates and the additive is drawn up. • By-pass set to OFF, the DOSATRON stops and does not draw up the additive. -
Page 31: Maintenance
(shown below) with a silicone-based lubricant. 2.Before restarting the DOSATRON at the start of the period of use, remove the motor piston and soak it in lukewarm water (<40 °C) for a few hours. This will remove any deposits that may have dried in the motor piston. -
Page 32: Draining The Dosatron
DRAINING THE DOSATRON In order to perform thorough maintenance on the DOSATRON, or to protect it from frost, it may be necessary to drain it. • Turn off the water supply and allow the pressure to drop to zero. •... -
Page 33: Removing The Suction Hose
WARNING: Before performing any work on the DOSATRON, you must read to the Precautions section, page NOTA: Before dismantling, and to avoid any contact with the injected additives, turn on the DOSATRON and allow it to draw in clear water in order to rinse the injection assembly. D3IL10 •... - Page 34 D3IL10V • Unscrew the hose clamp. • Remove the hose from the suction valve fitting by pulling it downwards. • Reassemble in the reverse order. If necessary, please refer to Connecting the suction hose, page fig 30 fig 31 / 34...
-
Page 35: Removing/Refitting The Injection Assembly
Precautions section, page NOTA: Before dismantling, and to avoid any contact with the injected additives, turn on the DOSATRON and allow it to draw in clear water in order to rinse the injection assembly. • Turn off the water supply and allow the pressure to drop to zero. -
Page 36: Replacing The Injection Seals
REPLACING THE INJECTION SEALS Frequency: at least once a year. Contact DOSATRON, or a dealer to select the appropriate seal kit for your dosing pump. Dismantle the injection assembly in accordance with the instructions in the Removing/Refitting the injection assembly section, page ATTENTION! Do not use metal tools or utensils. - Page 37 Replace the dosing piston seal: • Replace the dosing pump body O-ring following the method described above. • Clean the seal seating without any tools. • Reassemble by hand. It is extremely important that the seal is not twisted once it is in place, as this would compromise the seal. fig 36 fig 37 fig 35...
-
Page 38: Removing/Refitting The Dosing Piston
Precautions section, page NOTA: Before dismantling, and to avoid any contact with the injected additives, turn on the DOSATRON and allow it to draw in clear water in order to rinse the injection assembly. • Turn off the water supply and allow the pressure to drop to zero. -
Page 39: Cleaning And Refitting The Suction Valve
Precautions section, page NOTA: Before dismantling, and to avoid any contact with the injected additives, turn on the DOSATRON and allow it to draw in clear water in order to rinse the injection assembly. • Turn off the water supply and allow the pressure to drop to zero. -
Page 40: Replacing The Motor Piston (Without Pressure)
Precautions section, page NOTA: Before dismantling, and to avoid any contact with the injected additives, turn on the DOSATRON and allow it to draw in clear water in order to rinse the injection assembly. • Turn off the water supply and allow the pressure to drop to zero. -
Page 41: Troubleshooting
Restart the motor piston seized. by hand. Presence of air in the Bleed the air out of the DOSATRON. system. Your DOSATRON does 1.Reduce flow rate and not start, or it stops restart. working. Overflow. 2.Check that the motor valve seals are fitted. - Page 42 SYMPTOM CAUSE SOLUTION Dosing 1.Check the that the injection assembly nuts Air tightness problem. are correctly tightened 2.Check the condition of the suction hose. Suction valve seal worn Clean or replace it. Under dosing or dirty. Overflow (cavitation) Reduce the flow. Worn plunger seal replace it Scratched dosing pump...
-
Page 43: Warranty
Warranty DOSATRON INTERNATIONAL S.A.S. agrees to replace any part recognised as defective when new for a period of twelve months from the date of purchase by the initial purchaser. To obtain the replacement under the warranty, the device or spare part must be returned with proof of initial purchase to the manufacturer or authorized distributor. - Page 44 KNOW YOUR FLOW A SIMPLE METHOD THE DOSATRON IS COMPOSED OF: As it moves back and forth, the motor piston clicks: A volumetric piston hydraulic motor driving: a dosing piston 2 clicks = 1 motor Once in the up Once in the...
- Page 45 Appendices GRAPHS / 45...
- Page 46 Pressure losses - D3 - 10% fig 40 / 46...
- Page 47 Viscosity - D3 - 10% fig 41 / 47...
- Page 48 Rue Pascal - B.P. 6 - 33370 TRESSES (BORDEAUX) - FRANCE Phone: 33 (0)5 57 97 11 11 Fax. 33 (0)5 57 97 11 29 / 33 (0)5 57 97 10 85 info@dosatron.com - www.dosatron.com © DOSATRON INTERNATIONAL S.A.S. 2023...
Need help?
Do you have a question about the D3 and is the answer not in the manual?
Questions and answers