Table of Contents
Advertisement
Quick Links
R
Assembly Instructions
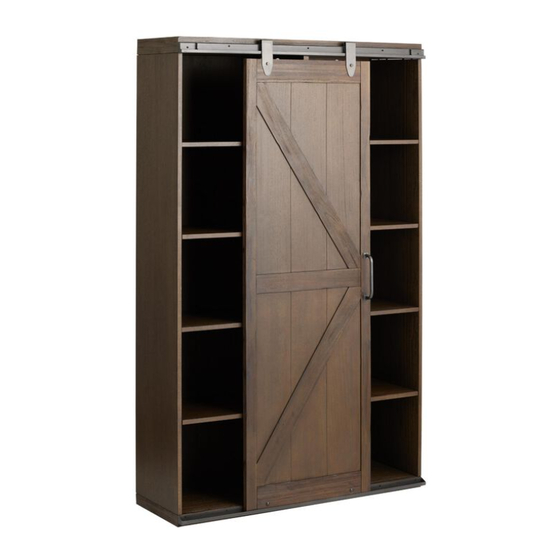
Farmhouse Bookcase 48" Wide
SKU - 618185
THANK YOU FOR YOUR PURCHASE. IF YOU HAVE ANY QUESTIONS
PERTAINING TO THE ASSEMBLY OF THIS FURNITURE PIECE, PLEASE CONTACT
THE NEAREST WORLD MARKET STORE
IF YOU ARE NOT NEAR A STORE PLEASE CALL OUR CUSTOMER SERVICE CALL
CENTER TOLL FREE AT 877-967-5362 FOR ASSISTANCE.
All products sold at World Market are not for commercial use and are intended for residential use only.
Page 1
2022.08.08
Advertisement
Table of Contents

Subscribe to Our Youtube Channel
Summary of Contents for World Market 618185
- Page 1 IF YOU ARE NOT NEAR A STORE PLEASE CALL OUR CUSTOMER SERVICE CALL CENTER TOLL FREE AT 877-967-5362 FOR ASSISTANCE. All products sold at World Market are not for commercial use and are intended for residential use only. Page 1...
-
Page 2: Component List
Component List Q.TY LABEL PICTURE DESCRIPTION Top Frame Bottom Frame Left Side Frame Right Side Frame Middle Divider Door Door Support Back Panel Page 2... -
Page 3: Hardware List
Component List Q.TY LABEL PICTURE DESCRIPTION Fixed Shelf Removable Shelf Handle Hardware List Q.TY LABEL PICTURE DESCRIPTION Cam lock Ø15 mm Cam Screw Connecting Screw M7 x 70 mm Bolt Ø8 x 30 mm Decorative Door Bolt M8 x 25 mm Nut Ø8 x 13 mm Lock Washer Ø8 x Ø13 x T2 mm Flat Washer Ø8 x Ø19 x T2 mm... -
Page 4: Assembly Preparation
Do not assemble on flooring or carpet. Assemble on a clean non-marring surface (packing foam). Save all packaging until finished. In case of missing parts, please contact your nearest World Market store or call our customer service call center at call 1-877-967-5362. Page 4... -
Page 5: Assembly Steps
Assembly Steps Step 1 (T-4) Phillips Screwdriver (H-2) Cam Screw x 16 TOP OF PANELS BOTTOM OF PANELS TOP OF PANEL BOTTOM OF Make sure Cam Screws are PANEL tightened fully as shown Install Cam Screws (H-2) into the pre-drilled holes on Left Side Frame (C-1), Right Side Frame (C-2) and Middle Divider (D) as shown. - Page 6 Step 2 NOTE: Two people are recommended for this assembly step. (T-1) Allen key (H-1) Cam Lock x 8 Front Follow Arrow direction NOTE: Cam Lock holes on Fixed Shelves (H) should all face toward the BOTTOM of the assembly. There is a smaller distance between the Top edges of Left/ Right Side Frames (C-1, C-2) and Fixed Shelves (H) than between the BOTTOM edges of Left/ Right Side Frames (C-1, C-2), and Fixed Shelves(H).
- Page 7 Step 3 (T-1) Allen key (H-1) Cam Lock x 4 Follow Arrow direction Front Install Cam Locks (H-1) into the corresponding holes on Fixed Shelf (H) that were installed on Left Side Frame (C-1) as shown. Ensure arrows on Cam Locks (H-1) point toward the Cam Screws (H-2). Insert Cam Screws (H-2) that have previously been installed in Middle Divider (D) into receiving holes in Fixed Shelves (H).
- Page 8 Step 5 NOTE: Please reference the "TOP" directional arrow in the illustration below to help with this assemply step. (T-1) Allen key (H-3) Connecting Screw x 6 Front Install and secure Left Side Frame (C-1) and Right Side Frame (C-2) to Bottom Frame (B) using Connecting Screws (H-3).
- Page 9 Step 7 NOTE: Two people are recommended for this assembly step. (H-10) Pan Head Screw x 45 (H-11) Flat Washer x 7 (T-4) Phillips Screwdriver Front H-10 H-10 H-11 Using a second person to assist you, carefully turn the assembled unit upside down as shown. Position and secure Back Panels (G) to the back of assembled unit with Pan Head Screws (H-10) by using the Phillips Screwdriver (T-4).
- Page 10 Step 9 (H-8) Flat Washer x 2 (H-6) Nut x 2 (T-2) Socket Wrench x 1 (H-7) Lock Washer x 2 Front Position and secure Handles (K) to Door (E) with Nuts (H-6), Lock Washers (H-7), Flat Washers (H-8), stacking the hardware in the order as shown.
- Page 11 Step 11 Option 1 Option 2 Front Front Hang the Doors ( E) to assembled unit. Step 12 - Leveling Procedure Cabinet Wall Cabinet Wall Cabinet Wall Adjust leveler to make Cabinet parallel to the Wall. The Farmhouse Bookcase 48" Wide is assembled and ready for use. Page 11...
-
Page 12: Care And Maintenance
Do not write on furniture without a padded barrier to protect the surface. Do not place furniture outside. For indoor use only. All products sold at World Market are not for commercial use and are intended for residential use only. - Page 13 Anti-Tip Measures Warning - Children may be injured by tipping of furniture and the use of the Anti-Tip Kit is highly recommended. This Anti-Tip Kit is only a deterrent It is not a substitute for proper adult supervision. Manufacturer and retailer assumes no liability for improper installation or excess loads placed on screws, brackets, or straps.
- Page 14 Customer Service Call Center, Toll Free at 877-967-5362. For valid warranty claims, World Market will repair or replace the product, or offer a full or partial credit, in the sole discretion of World Market. This LIMITED ONE-YEAR WARRANTY gives you specific legal rights and you may also have other rights which vary from state to state.


Need help?
Do you have a question about the 618185 and is the answer not in the manual?
Questions and answers